12
USING THE APPLIANCE
FOR THE FIRST TIME
• Coffee has been used to factory test the ap-
pliance and it is therefore completely normal
for there to be traces of coffee in the mill.
• Customise water hardness as soon as pos-
sible following the instructions in the "Setting
water hardness" section.
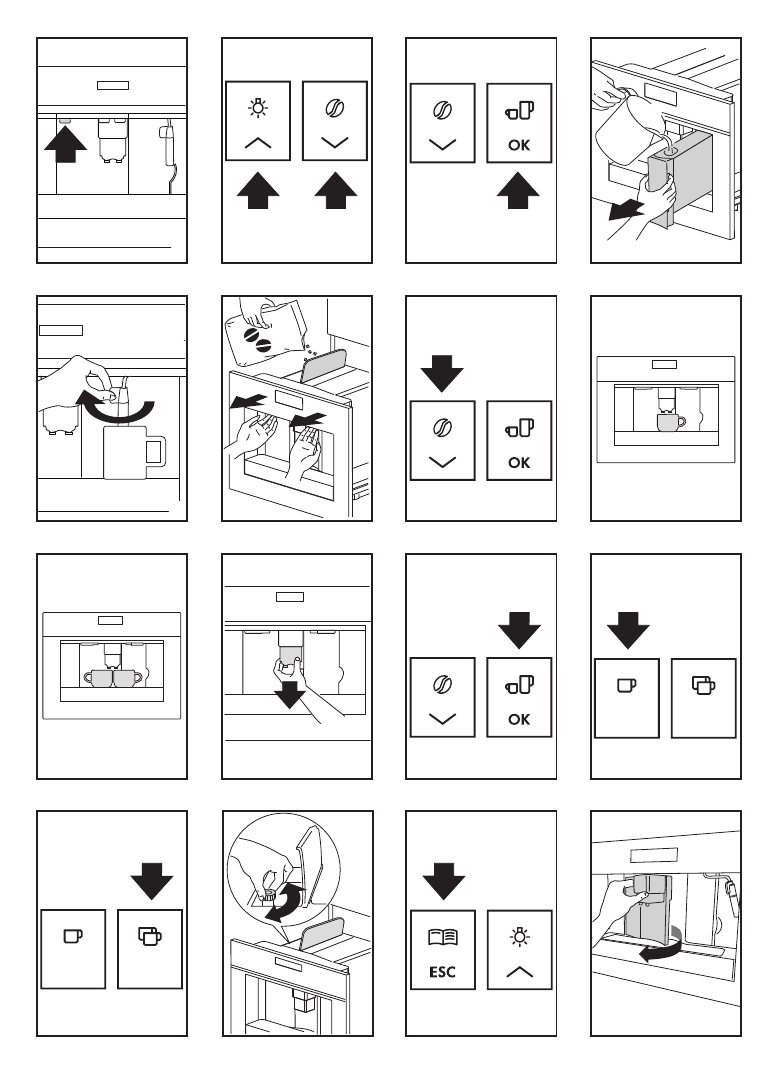
1. Connect the appliance to the mains supply.
Set the required language.
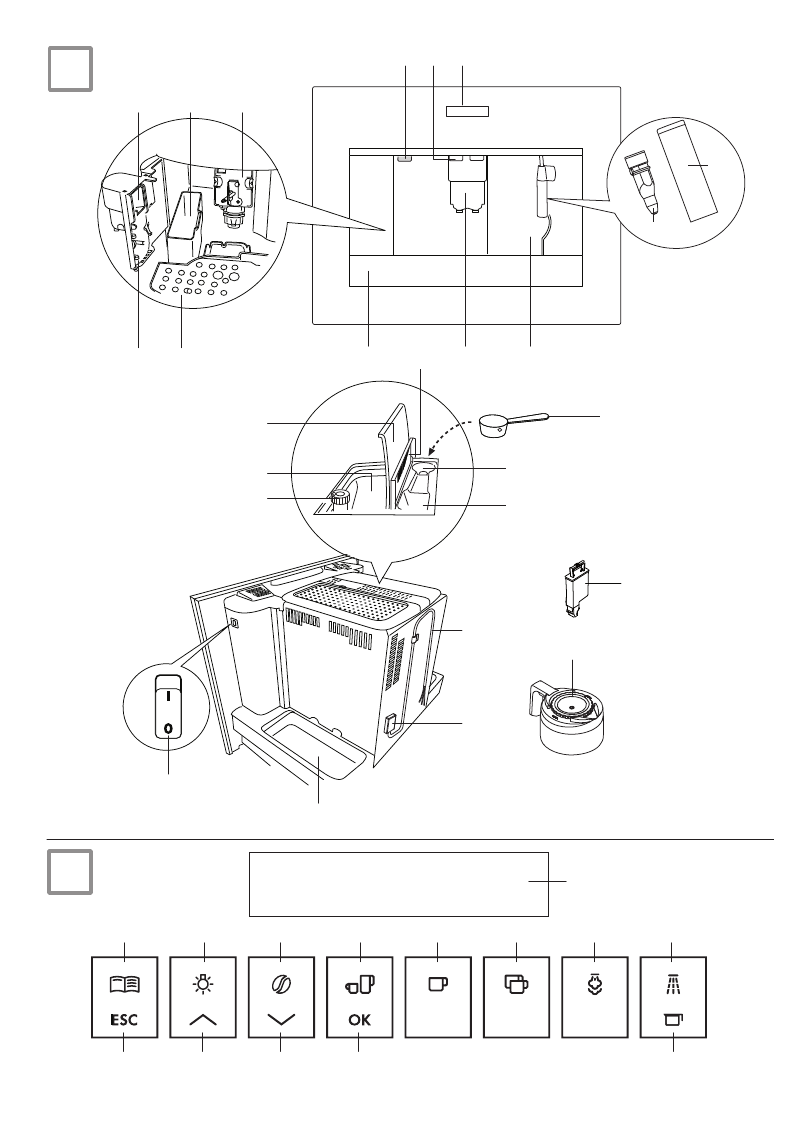
2. To set the language, use the icons (B7
and B8) to choose the required language (fig.
2). When the message "PRESS OK TO
CHOOSE ENGLISH" is displayed, press the
OK icon (B9) (fig. 3) for 3 seconds until "EN-
GLISH INSTALLED" is displayed. If you set
the wrong language, follow the instructions
in the "Setting the language" section. If your
language is not available, select one from
those displayed. The instructions refer to the
English version. Then follow the instructions
displayed:
3. After 5 seconds, the appliance displays "FILL
TANK". Extract the water tank (fig. 4), rinse
and fill with fresh water without exceeding
the MAX line. Replace and push as far as it
will go. A water softener filter can be instal-
led in the tank (fig. 29).
4. Place a cup under the cappuccino maker (fig.
5). The appliance displays: "HOT WATER
PRESS OK". Press the OK icon (B9) (fig. 3)
and after a few seconds a little water comes
out of the cappuccino maker.
5. The machine now displays "TURNING OFF...
PLEASE WAIT" and goes off.
6. Extract the appliance by pulling it out using
the handles (fig. 6). Open the lid and fill the
container with coffee beans, then close the
lid and push the appliance in.
The coffee maker is now ready for normal use.
Important!
Never introduce pre-ground
coffee, freeze dried coffee, caramelised beans or
anything else which could damage the appliance.
N.B.!
When using the appliance for the
first time, you need to make 4-5 cups of coffee
and 4-5 cappuccinos before the appliance gives
satisfactory results.
N.B.!
Each time you turn the coffee maker
on by the ON/OFF switch (A23), it performs a
SELF-DIAGNOSIS cycle and then goes off. To
turn it on again, press the ON/OFF button (A7)
(fig. 1)
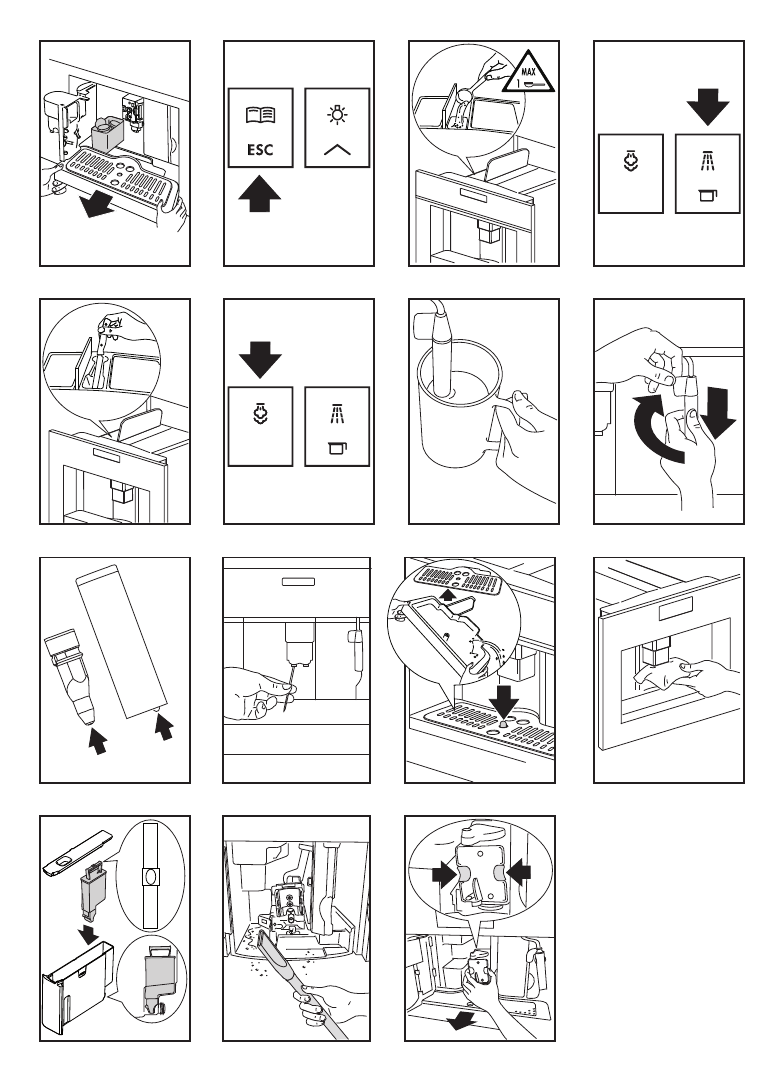
Installing the filter
Some models are fitted with a water softener fil-
ter to improve the quality of the water used and
extend the working life of the appliance.
To install, proceed as follows:
1. Remove the filter from the packaging;
2. Slide the date indicator pointer (see fig. 29)
until the months of use are displayed.
N.B.!
The filter lasts about two months if
the appliance is used normally. If the coffee
maker is left unused with the filter installed,
it will last a maximum of three weeks.
3. Fill the tank with a little water up to the level
shown in the figure:
4. Insert the filter in the water tank and press it
until it touches the bottom of the tank (see
fig. 29);
5. Fill the water tank and insert in the coffee
maker;
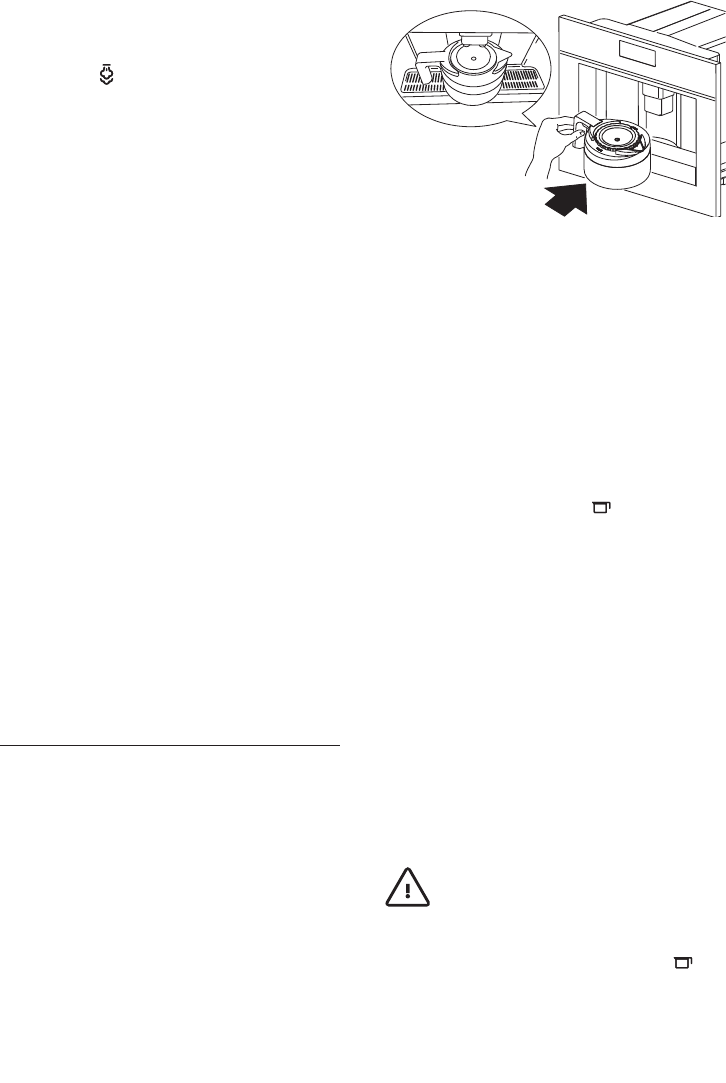
6. Place a container underneath the cappuccino
maker (min. capacity: 100 ml).
7. Press the icon (B2) to enter the menu;
8. Press the icons (B7) and (B8) until
"INSTALL FILTER" is displayed;
9. Press the OK icon (B9);
10. The message "INSTALL FILTER PLEASE
CONFIRM" is displayed.
11. Press the OK ICON (B9) to confirm the se-
lection (or ESC (B6) to cancel). "HOT WATER
PRESS OK" is displayed.