GB 12 GB 13
assembly (continued)
building in the extractor hood
1. Remove the edge-extractor panel:
- Flip the edge-extractor panel downwards.
- Release the latch cables by turning the bayonet catch
180 degrees.
- Disconnect the connectors from the electricity cables.
- Remove the edge-extractor panel from the extractor
hood.
2. Put the plug of the extractor hood in the socket.
3. Connect the 7-pole connector to the 7-pole connector of
the external motor (WU1511PX).
4. Position the extractor hood in the hole and slide the 4
sliding pieces outwards from inside the hood. The
extractor hood should remain hanging.
5. Secure the extractor hood to the joists using the screws
provided and the holes intended for this purpose.
6. Refit the edge-extractor panel. Do not forget to
reconnect the connectors of the electricity cables.
GB 12
assembly (continued)
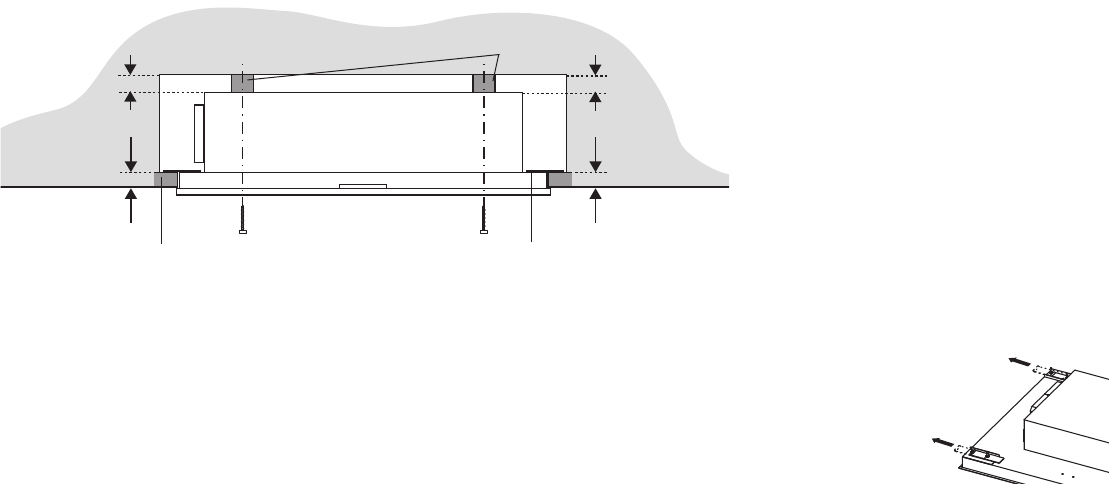
preparing the hole
1. Determine the position of the hole in the ceiling or in the
chimney with respect to the cooking plate.
2. The extractor hood is fit with a temporary suspension
system with sliding pieces to make mounting easier. To
use this system, the hole should be fit with a suspension
edge for temporary hanging (height: maximum 40 mm;
see diagram).
Note: the mounting must be sturdy enough to bear the
weight of the extractor hood at 4 points.
3. The ceiling/chimney must have a joisted layer with a
minimum thickness of 36 mm to which the extractor hood
can be attached using the 4 screws (see picture).
Account for the position of the fastening holes (see hole
pattern on page 11).
For upward extraction, the joists should preferably run
parallel with the short sides. When using the optional flat
duct system, the joists must run parallel with the direction of
extraction.