17
Cleaning the door panels
To facilitate cleaning, you can remove the inner door panels
from the appliance doors.
: Risk of injury!
The components inside the appliance door may have sharp
edges. Take care not to cut yourself. Wear protective gloves.
: Risk of injury!
The appliance must not be used again until the door panels
and appliance door have been correctly fitted.
Remove the door panels from the
ó main oven and from
the
ò top oven
Note: Before removing, make a note of which way round the
door panel is fitted, so that it is not refitted the wrong way
round.
1. Unhook the appliance door and lay it on a soft, clean surface
with the front side facing downwards (see section:Removing
and fitting the oven door).
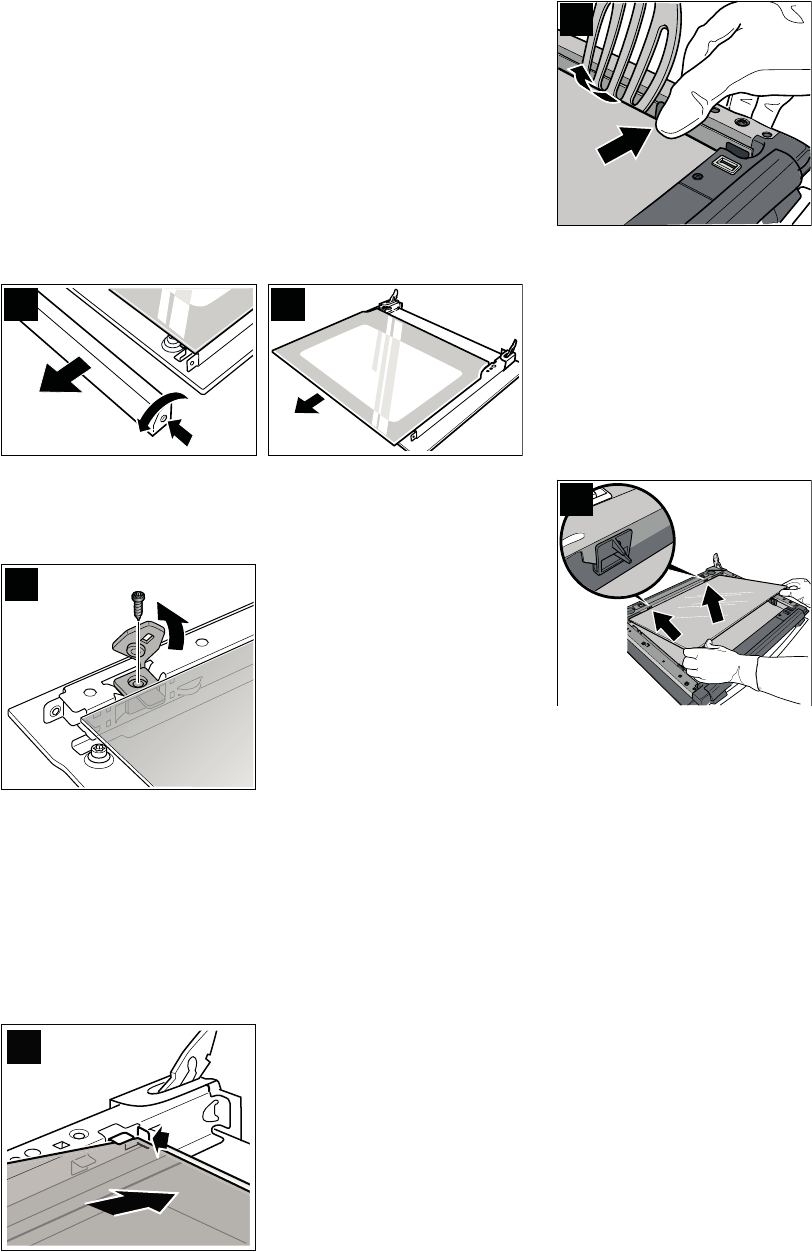
2. Unscrew the cover at the top left and right of the appliance
door and detach it (Fig. A).
3. Lift the door panel and remove it (Fig. B).
Clean the intermediate panel on the
ó main oven
1. Unscrew the retainers on the left and right (Fig. C).
2. Unfold the retainers on the left and right.
3. Gently lift the intermediate panel and pull it out forwards.
4. Clean the door panel and intermediate panel with glass
cleaner and a soft cloth.
Caution!
Do not use any sharp or abrasive medium or a glass scraper.
The glass could be damaged.
Refitting the intermediate panel:
1. Slide in the intermediate panel as far as it will go (Fig. D).
2. Close the retainers on the left and right and screw them tight.
Refitting the door panel:
1. Slide in the door panel all the way.
2. Put the cover back in place and screw it in.
3. Refit the appliance door.
Clean the intermediate panel on the
ò top oven
1. Press the retainer on the intermediate panel on one side and
unlatch it, using a spatula for instance (Fig. C).
2. Unlatch the other side in the same way and remove the
intermediate panel.
3. Clean the door panel and intermediate panel with glass
cleaner and a soft cloth.
Caution!
Do not use any sharp or abrasive medium or a glass scraper.
The glass could be damaged.
Refitting the intermediate panel:
1. Place the intermediate panel in the supports on the left and
right (Fig. D).
2. Push the intermediate panel downwards in the retainers.
Refitting the door panel:
1. Slide in the door panel all the way.
2. Put the cover back in place and screw it in.
3. Refit the appliance door.