8
Unsuitable ovenware
Metal ovenware is unsuitable. Metal does not allow microwaves
to pass through. Food in covered metal containers will remain
cold.
Caution!
Creation of sparks: metal – e.g. a spoon in a glass – must be
kept at least 2 cm from the oven walls and the inside of the
door. Sparks could destroy the glass on the inside of the door.
Ovenware test
Do not switch on the microwave unless there is food inside. The
following ovenware test is the only exception to this rule.
Perform the following test if you are unsure whether your
ovenware is suitable for use in the microwave:
1. Heat the empty ovenware at maximum power for ½ to
1 minute.
2. Check the temperature occasionally during that time.
The ovenware should still be cold or warm to the touch.
The ovenware is unsuitable if it becomes hot or sparks are
generated.
Microwave power settings
Use the button to set the desired microwave power.
Note: You can set the 800 W microwave power setting for
30 minutes, 600 W for 1 hour, the other power settings for
1 hour and 39 minutes respectively.
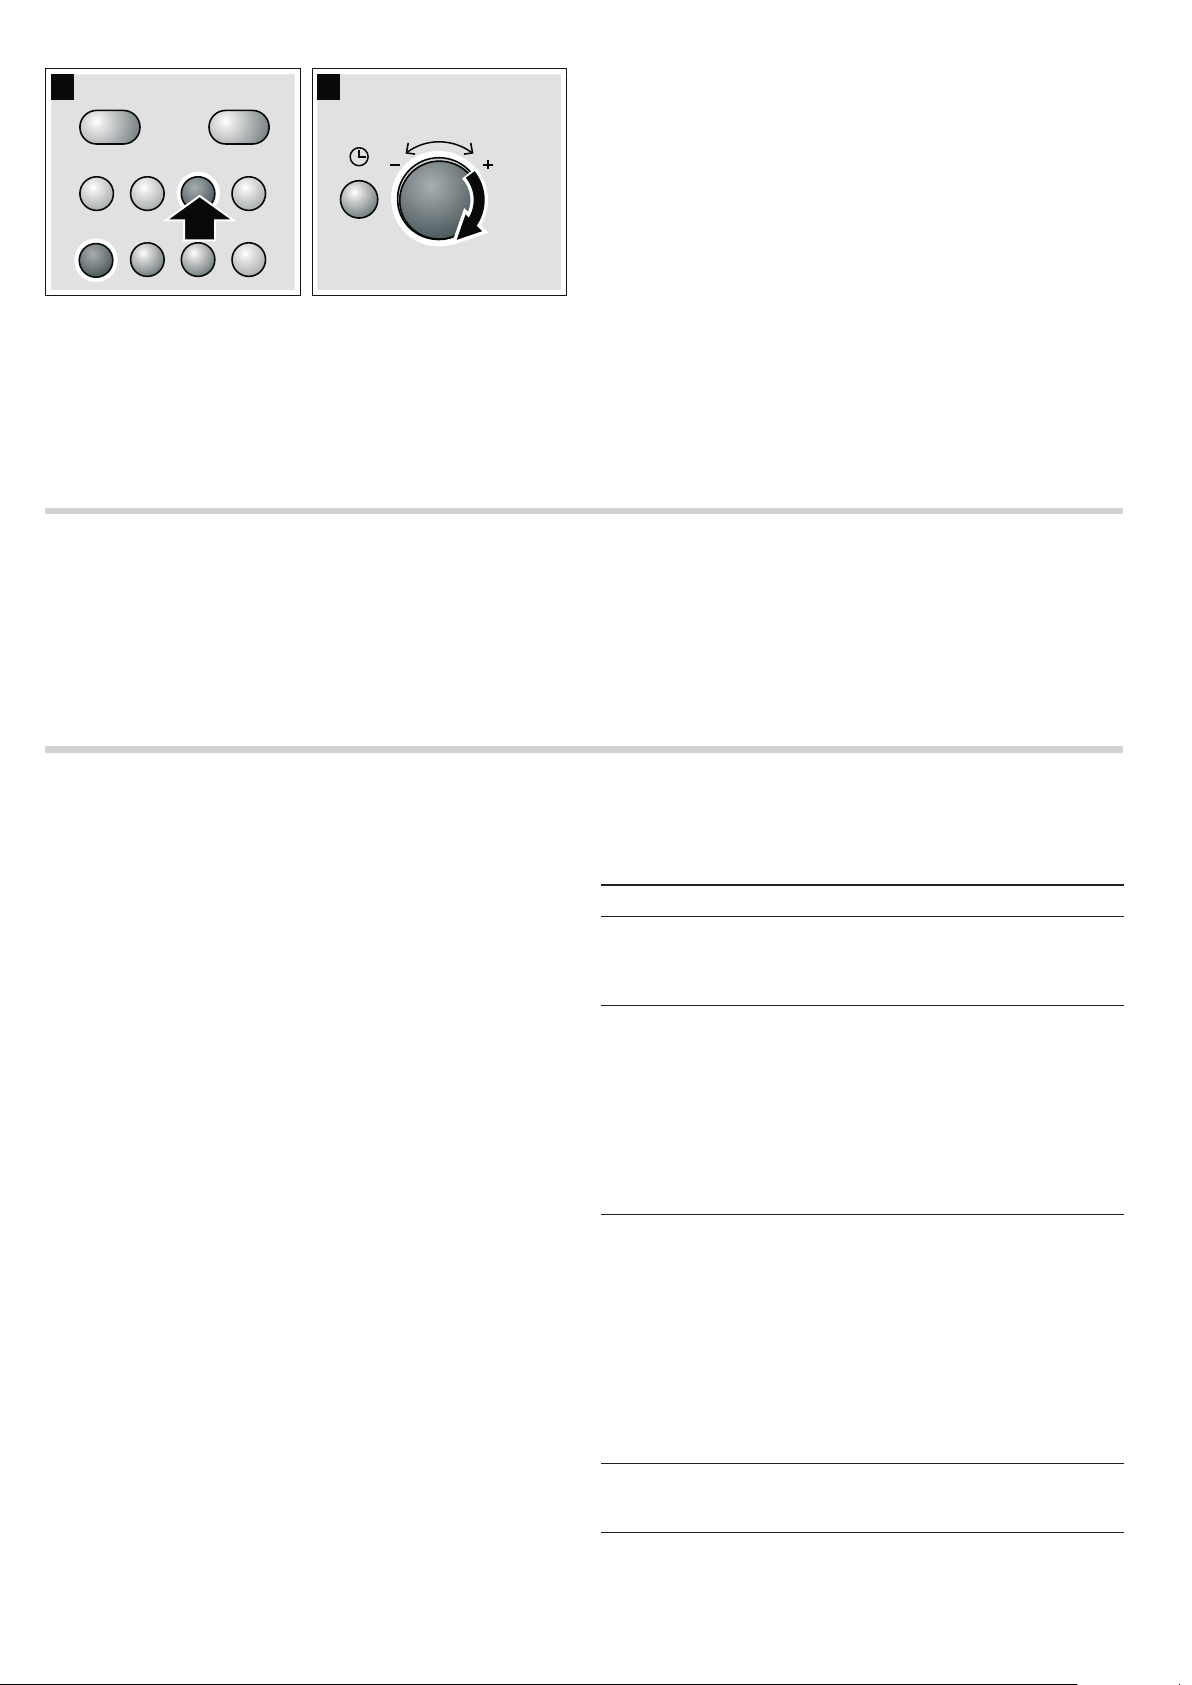
Setting the microwave
Example: microwave power setting of 600 watts
1. Press the required microwave power setting.
The selected microwave power setting lights up in the
display, and "1:00 min" appears.
2. Set a cooking time using the rotary selector.
3. Press the Start button.
The cooking time counts down in the display.
The cooking time has elapsed
A signal sounds. Open the appliance door or press Stop. The
clock reappears.
Changing the cooking time
This can be done at any time. Change the cooking time using
the rotary selector.
Pausing
Press the Stop button once, or open the appliance door. Press
the START button after closing the door.
Cancelling operation
Press the Stop button twice, or open the door and press the
Stop button once.
Note: You can also adjust the cooking time first and then the
microwave power setting.
Cooling fan
The appliance is equipped with a cooling fan. The fan may run
on even if the oven has been switched off.
Notes
■The cooking compartment remains cold during microwave
operation. The cooling fan will still switch on. The fan may run
on even when microwave operation has ended.
■Condensation may appear on the door window, interior walls
and floor. This is normal and does not adversely affect
microwave operation. Wipe away the condensation after
cooking.
Memory
You can save the settings for a dish in the memory and call it
up again at any time.
The memory is useful for if you frequently prepare a specific
dish.
Notes
■You cannot save several microwave power settings one after
the other.
■You cannot save automatic programmes.
■You can save the memory settings and start the appliance
immediately. When finishing, instead of pressing i , press
Start.
■Saving a new setting in the memory: press the i button.
The old settings appear. Save the new programme as
described in steps 1-4.
Saving memory settings
Example: 360 W, 25 minutes
1. Press the i button.
"M" appears in the display.
2. Press the required microwave power setting.
"M", the selected power setting and "1:00 min" appear in the
display.
3. Set the cooking time using the rotary selector.
90 W For defrosting delicate foods
180 W For defrosting and continued cooking
360 W For cooking meat and heating delicate foods
600 W For heating and cooking food
800 W For heating liquids
6WRS
6WDUW
PLQ
NJ
J
L
9
4. Confirm by pressing the i button.
The clock reappears. The setting is saved.
Starting the memory
It is very easy to start the saved programme. Place your meal
into the appliance. Close the appliance door.
1. Press the i button.
The saved settings are displayed.
2. Press the Start button.
The cooking time counts down in the display.
The cooking time has elapsed
A signal sounds. Open the appliance door or press Stop. The
clock reappears.
Pausing
Press the Stop button once, or open the appliance door. Press
the START button after closing the door.
Cancelling the setting
Press the Stop button twice, or open the appliance door and
press the Stop button once.
Changing the signal duration
You will hear a signal when the appliance is switched off. You
can change the duration of the acoustic signal.
Press the Start button for approx. 6 seconds.
The new signal duration is adopted.
The clock reappears.
The following are possible:
Short signal duration - 3 tones
Long signal duration - 30 tones.
Care and cleaning
With careful care and cleaning your microwave oven will retain
its looks and remain good order. We will explain here how you
should care for and clean your appliance correctly.
: Risk of short circuit!
Never use high-pressure cleaners or steam cleaners to clean
the oven.
: Risk of burns!
Never clean the appliance immediately after switching off. Let
the appliance cool down.
: Risk of electric shock!
Do not immerse the appliance in water or clean under a jet of
water.
Surfaces are different, and damage caused by using the wrong
cleaning agent can be avoided by observing the information in
the table below.
Do not use
■sharp or abrasive cleaning agents.
The surface could be damaged. If such a substance comes
into contact with the front of the appliance, wash it off
immediately with water.
■metal or glass scrapers to clean the glass in the appliance
door.
■metal or glass scrapers for cleaning the seal.
■hard scouring pads or cleaning sponges.
Wash new sponge cloths thoroughly before use.
■cleaning agents with high concentrations of alcohol.
Cleaning agents
Caution!
Before cleaning, unplug the appliance from the mains or switch
off the circuit breaker in the fuse box. Clean the outside of the
appliance and the cooking compartment with a damp cloth and
mild detergent. Dry with a clean cloth.
6WRS
6WDUW
PLQ
NJ
J
L
Area Cleaning agents
Appliance front Hot soapy water:
Clean with a dish cloth and dry with a soft
cloth. Do not use glass cleaners or metal or
glass scrapers for cleaning.
Appliance front
with stainless
steel
Hot soapy water:
Clean with a dish cloth and dry with a soft
cloth. Remove flecks of limescale, grease,
starch and albumin (e.g. egg white) immedi-
ately. Corrosion can form under such resi-
dues. Special stainless steel cleaning
agents can be obtained from the after-sales
service or from specialist shops. Do not use
glass cleaners or metal or glass scrapers
for cleaning.
Cooking com-
partment made
of stainless steel
Hot soapy water or a vinegar solution:
Clean with a dish cloth and dry with a soft
cloth.
If the oven is very dirty: use oven cleaner,
but only when cooking compartment is cold.
It is best to use a stainless-steel sponge. Do
not use oven spray or other aggressive
oven cleaners or abrasive materials. Scour-
ing pads, rough sponges and pan cleaners
are also unsuitable. These items scratch the
surface. Allow the interior surfaces to dry
thoroughly.
Recess in cook-
ing compartment
Damp cloth:
Ensure that no water seeps through the
turntable drive into the appliance interior.
Turntable and
turntable ring
Hot soapy water:
When putting the turntable back in place,
make sure it slots in correctly.