What you will need.....
2 x Size D batteries (not included)
Fitting instructions.
Model No 1217.
1 x set of screws and rawl plugs. (included)
Bell push, Twin bell wire and fixing clips. (included)
Inside the unit.....
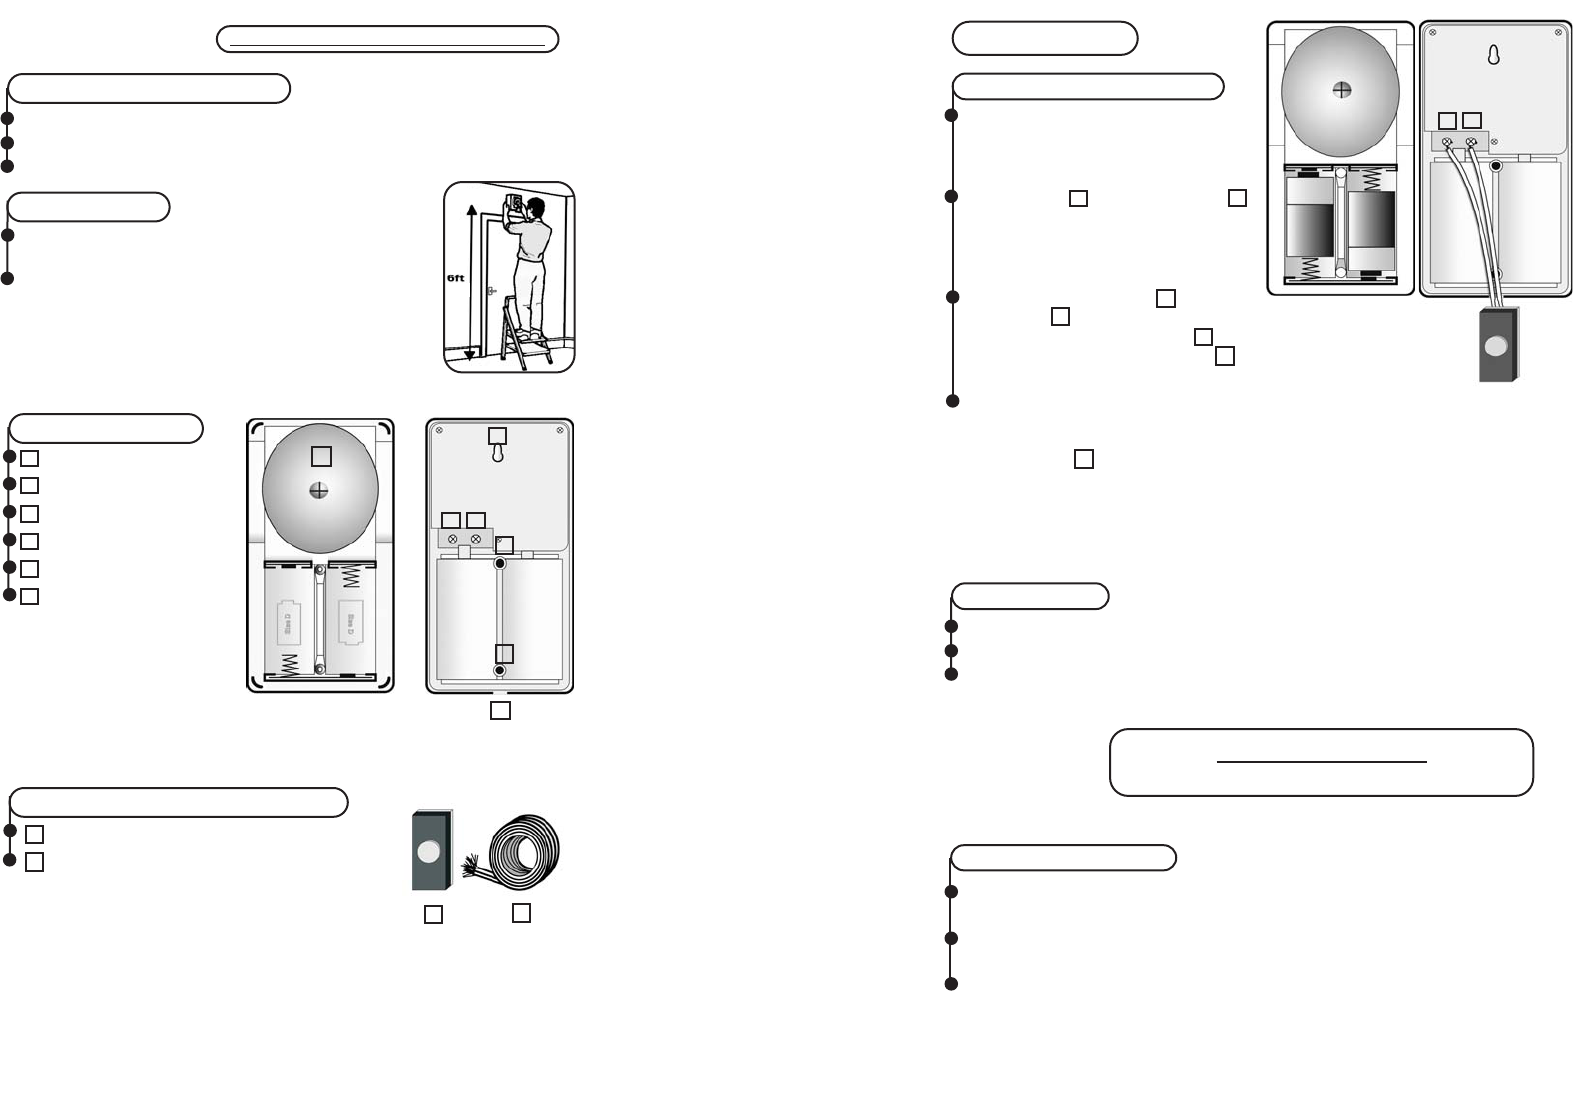
Battery operation only.....
Insert 2 x size ‘D’ batteries (not
included). Please ensure they are
inserted in the correct position.
(shown fig.2)
Approximately 12 months battery life
Do not use with an illuminated bell push when using batteries.
Twin bell wire , from the bell push
should be wired to terminals 3 & 4.
(shown fig.3)For good terminal
connection bend the wire to follow the
clockwise turn of the screw.
Extra info.....
INSTALLATION
Location.....
Avoid positioning your chime in a moist atmosphere
or above a direct heat source, such as a radiator.
WARNING !!!!!
DO NOT USE A TRANSFORMER WITH THIS PRODUCT
Ideally you should situate in a central location of the
house, such as the hallway. High up on the wall.
Trouble Shooting......
Be careful not to pinch the bell wire under a fixing clip or damage
the insulation in such a way as to cause a short circuit.
For battery operation: Ensure the size D batteries are secured
the correct way round.
PLEASE RETAIN INSTRUCTIONS
Do not turn the terminal screw too tightly as this may break the wire.
LOCATION.
22
MM
UK Helpine - 0121 544 9499
UK Website - www.chbyron.com
A weak sound could be caused by a low battery, or the bell
cover secured too tightly.
33
44
22
55
55
11
11
22
33
44
55
66
Adjustable bell cover
Keyhole hanging slot
Terminal connection
Terminal connection
Wall mounting fixing holes
fig.2
+
+
fig.3
66
Cut out for bell wire
SIZE D
SIZE D
33
44
Channel the twin bell wire through
the cut-out and fix to the wall using
either the keyhole hanging slot , or
wall the wall mounting fixing holes .
(shown fig.1)
66
22
55
fig.1
To adjust the sound of the ring,
Slightly loosen the screw which
holds the bell in place. Slowly turn
the bell dome, until you have
your desired sound. Now tighten the
screw to secure the black bell in
place. Please note that tightening
the screw too tight will change your
sound.
FRONT
BACK
FRONT
BACK
11
Bell push and Twin bell wire......
77
88
Bell push
Twin bell wire
77
88
77
88
88