Operation Guide 4709 4713
1
MO0907 -EB
Getting Acquainted
Congratulations upon your selection of this CASIO watch. To get the most out of your
purchase, be sure to read this manual carefully.
Expose the watch to bright light to charge its battery before using it.
You can use this watch even as its battery is being charged by exposure to bright light.
• Be sure to read “Power Supply” of this manual for important information you
need to know when exposing the watch to bright light.
Keep the watch exposed to bright light
The electr
stored by a built-in batter
it is not exposed to light causes the batter
Make sure the watch is exposed to light as much as possible.
•
When you are not w
position the f
• Y
as much as possible
the face is only partially covered.
l
l
l
l
l
l
l
l
l
l
l
Bright Light
Solar cell
• The watch contin
watch in the dark can cause the battery to run down, which will result in some watch
functions to be disabled.
settings after recharging.
exposed to light as m
All
functions
enabled
LEVEL 1
LEVEL 2
LEVEL 3
LEVEL 4
Charge
Rechargeable battery
Bright Light
Electrical
energy
Solar cell
(Converts light to
electrical power
LEVEL 1
LEVEL 2
LEVEL 3
LEVEL 4
Some or all
functions
disabled
Dis-
charge
Battery charges in the light. Battery discharges in the dark.
• The actual le
• Be sure to read “P” for important information you need to kno
when exposing the watch to bright light.
If the display of the watch is b
If the display of the w
has turned off the display to conserve power
• See “P” for more information.
Note that CASIO COMPUTER CO., L
damage or loss suffered by y
product or its malfunction.
About This
• The oper
are identical.
Module 4713.
• Most of the displa
the digital display
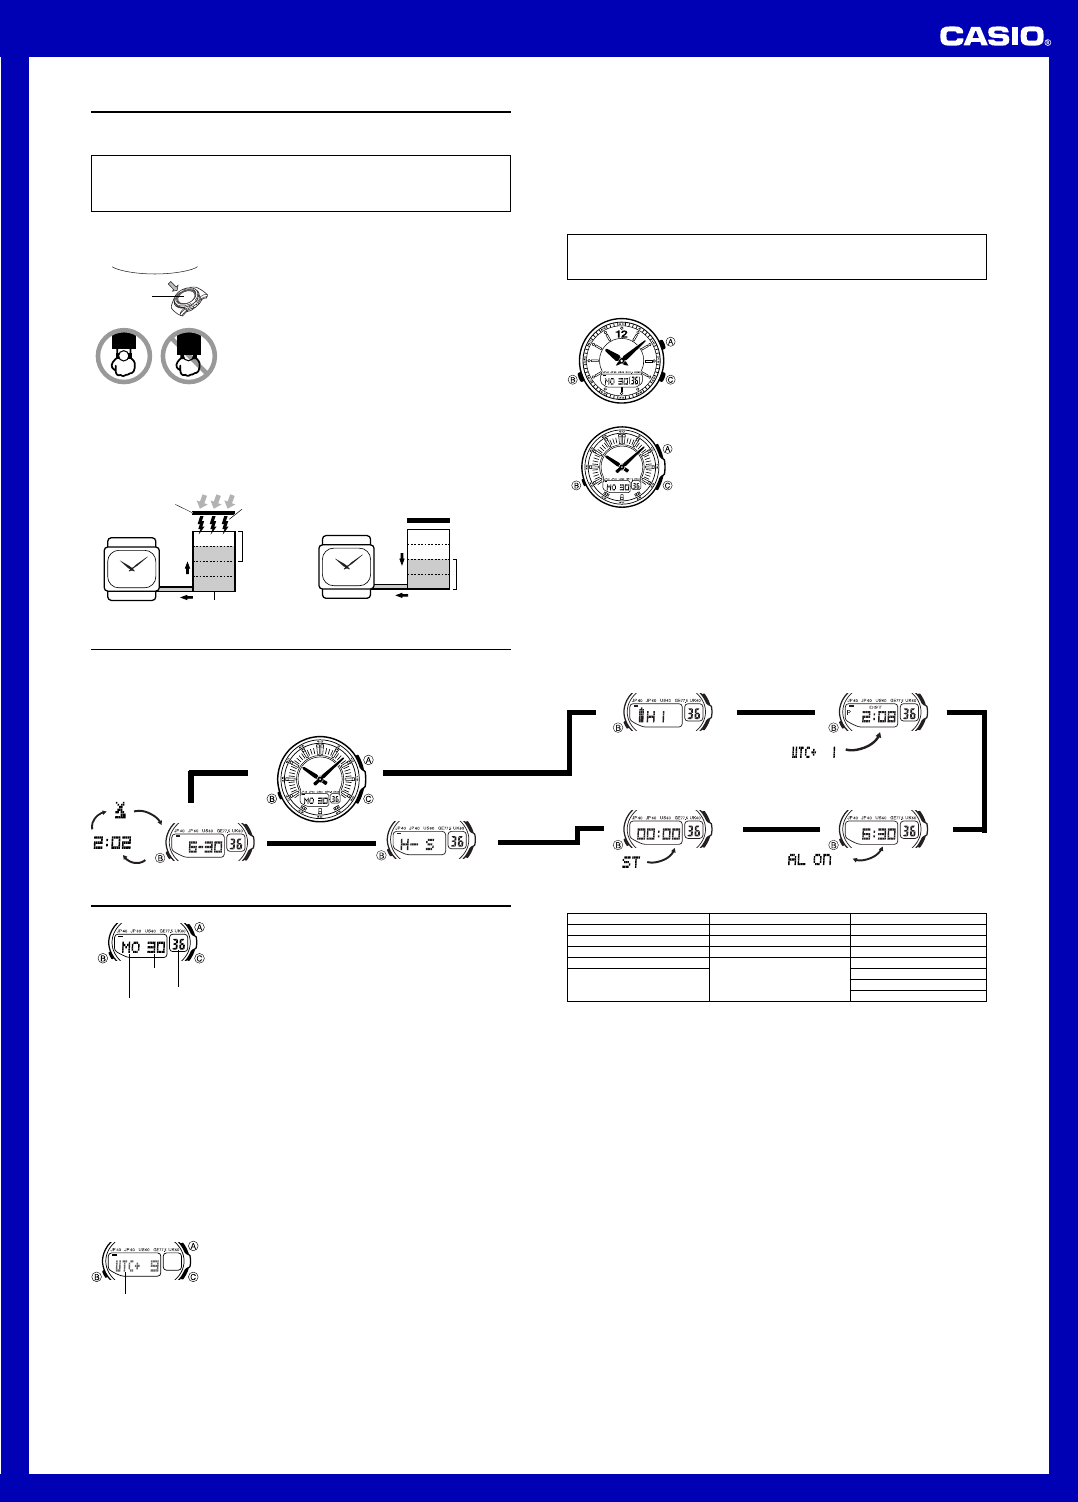
• Button operations are indicated using the letters sho
in the illustration.
• Each section of this manual pro
information you need to perf
mode.
found in the
Module 4709
Module 4713
▲
Dual Time
Alarm ModeStopwatch Mode
General Guide
• Press B to change from mode to mode
• In anA to illuminate
the display
• When setting the time, y
the week indicator (English or Japanese).
Press B .
Battery Level Indicator
▲
▲
▲
Hand Setting Mode
▲
Last signal screen
Timekeeping Mode
▲
▲
Radio-controlled Atomic
This watch receives a time calibr
its time setting accordingly
• Supported time calibration signals:
(Mainflingen), England (Anthorn), United States (Fort
Collins), Japan.
Current Time
This watch adjusts its time setting automatically in
accordance with a time calibration signal.
perform a manual procedure to set the time and date,
when necessary
• The first thing you should do after purchasing this w
is to specify your Home
zone where you normally will use the watch.
information, see “T
Day of week
Seconds
Date
• When using the watch outside the areas co
will hav
for more inf
• The U
America.
Canada, the continental United States, and Me
• The analog time of this w
the analog time setting is automatically adjusted whenev
setting.
T
1.A the UTC
diff
setting screen.
• Though illumination will also turn on when you press
A, keep the button held do
value flashes
2.C to select the time zone you w
your Home
• Time calibration signal reception is supported when
any one of the time zones sho
selected as your
Time zone
I
I
I
I
I
I
I
I
I
I
I
I
I
I
I
I
I
I
I
I
I
U.S.
UTC differential value
UTC –10
UTC –9
UTC –8
UTC –7
UTC –6
UTC –5
Japan Signal
UTC differential value
UTC +8
UTC +9
German/U.K.
UTC differential value
UTC +0
UTC +1
UTC +2
3.A to exit the setting screen.
Important!
• Normally
Time Zone.
operation (in the middle of the night).
can set the time manually
• The watch will receiv
transmitter (in the middle of the night) and update its settings accordingly
information about the relationship between time zones and transmitters
Time Zones and
• Under f
zones :
these time zones, see
• Y
off” for more inf
• See the maps under
reception ranges of the watch.
• If you are in an area that does not use Da
the DST setting.
Time Calibration Signal Reception
There are two different methods y
auto receive and manual receiv
• A
With auto receive, the watch receiv
six times a day
operations are not perf
• Manual Receive
Manual receive lets y
button.