38
Switch off the extractor hood and isola-
te by pulling out the mains plug or swit-
ching off the disconnector on the instal-
lation side.
q
At the same time as you renew the
grease filter (see Filters and
maintenance), clean off any grease from
all accessible parts of the housing.
This significantly reduces the fire hazard
and ensures that the extractor hood
performs as effectively as possible.
q Clean the extractor hood with a hot
detergent solution or a mild window
cleaning agent.
q
If the hood is extremely dirty (older
stains), use a liquid window cleaner.
q Do not scratch off dried-on dirt, but
wipe off with a damp cloth.
q Do not use scouring agents.
Warning: Clean the control buttons with a
mild detergent solution and a soft, damp
cloth only.
Painted, aluminium and plastic surfaces:
q Do not use scouring agents or abrasive
sponges.
q Do not use dry cloths.
q Do not use corrosive, acidic or alkaline
cleaning agents.
q
Note: Do not use alcohol (spirit) on
plastic parts, otherwise the surface may
become matt in appearance.
q
Caution! Ensure that the kitchen is ade-
quately ventilated. Avoid naked flames.
Cleaning and care
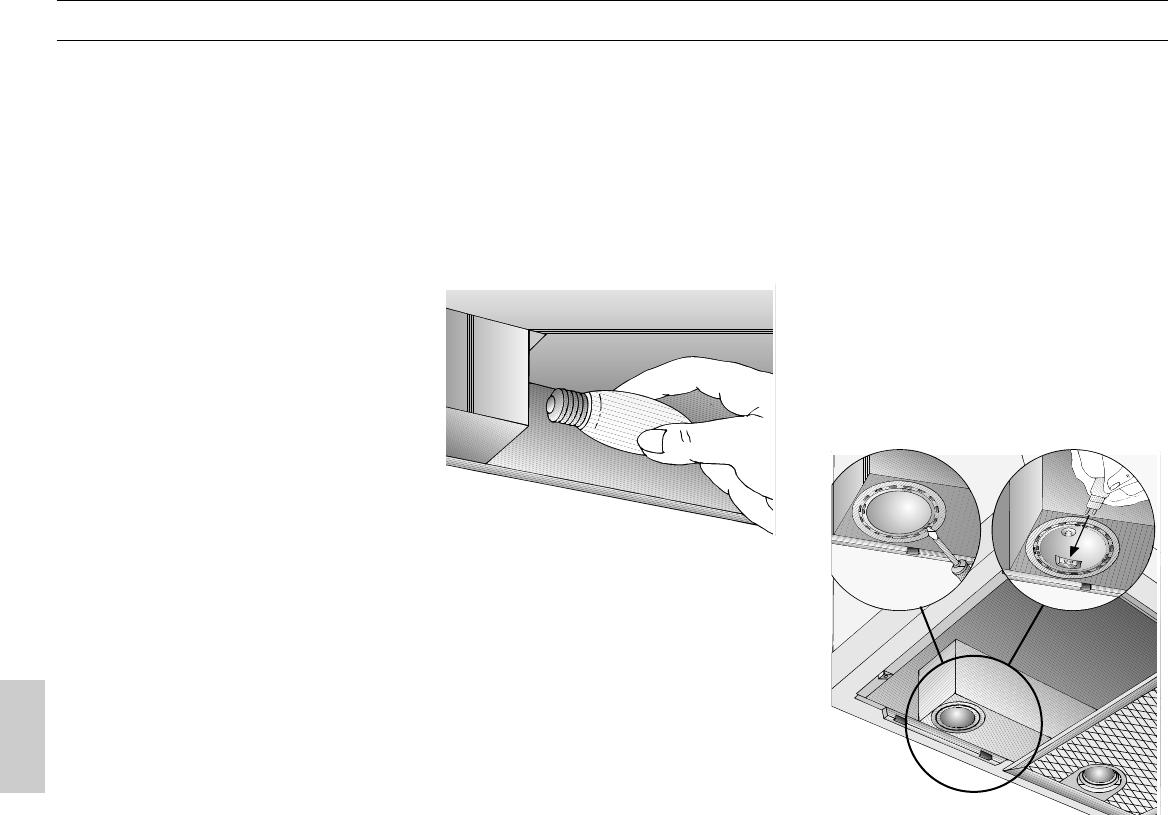
Changing the bulbs
1. Switch off the extractor hood and isolate
by pulling out the mains plug or swit-
ching off the disconnector on the instal-
lation side.
2. Remove the filter frame.
q See grease filter.
3. Replace the bulb (standard filament
bulb, max 40 W, E14 bulb holder).
4. Attach the filter frame.
q See grease filter.
Halogen bulbs:
1. Switch off the extractor hood and isolate
by pulling out the mains plug or swit-
ching off the disconnector on the instal-
lation side.
ṇ When switched on, the halogen
bulbs become very hot. Even for some
time after the bulbs have been switched
off there is still a risk of burns.
2. Remove the bulb ring with a screwdriver
or similar tool.
3. Replace the halogen light bulb
(conventional halogen bulb, 12 Volt,
max. 20 Watt, G4 cap).
Caution: Refer to for plug-in
lampholder.
Take hold of the bulb with a clean cloth.
4. Re-insert the bulb ring.
5. Plug the appliance into the mains or
switch it on at the fuse box.
Note: If the light does not function, check
that the bulbs have been inserted correctly.