(Main unit) (Remote control unit)
8
Press the ENTER button to finish surround parameter
mode.
(Remote control unit)
2 Dialogue Normalization
The dialogue normalization function is activated automatically when playing Dolby Digital program sources.
Dialogue normalization is a basic function of Dolby Digital which automatically normalizes the dialog level
(standard level) of the signals which are recorded at different levels for different program sources, such as DVD,
DTV and other future formats that will use Dolby Digital.
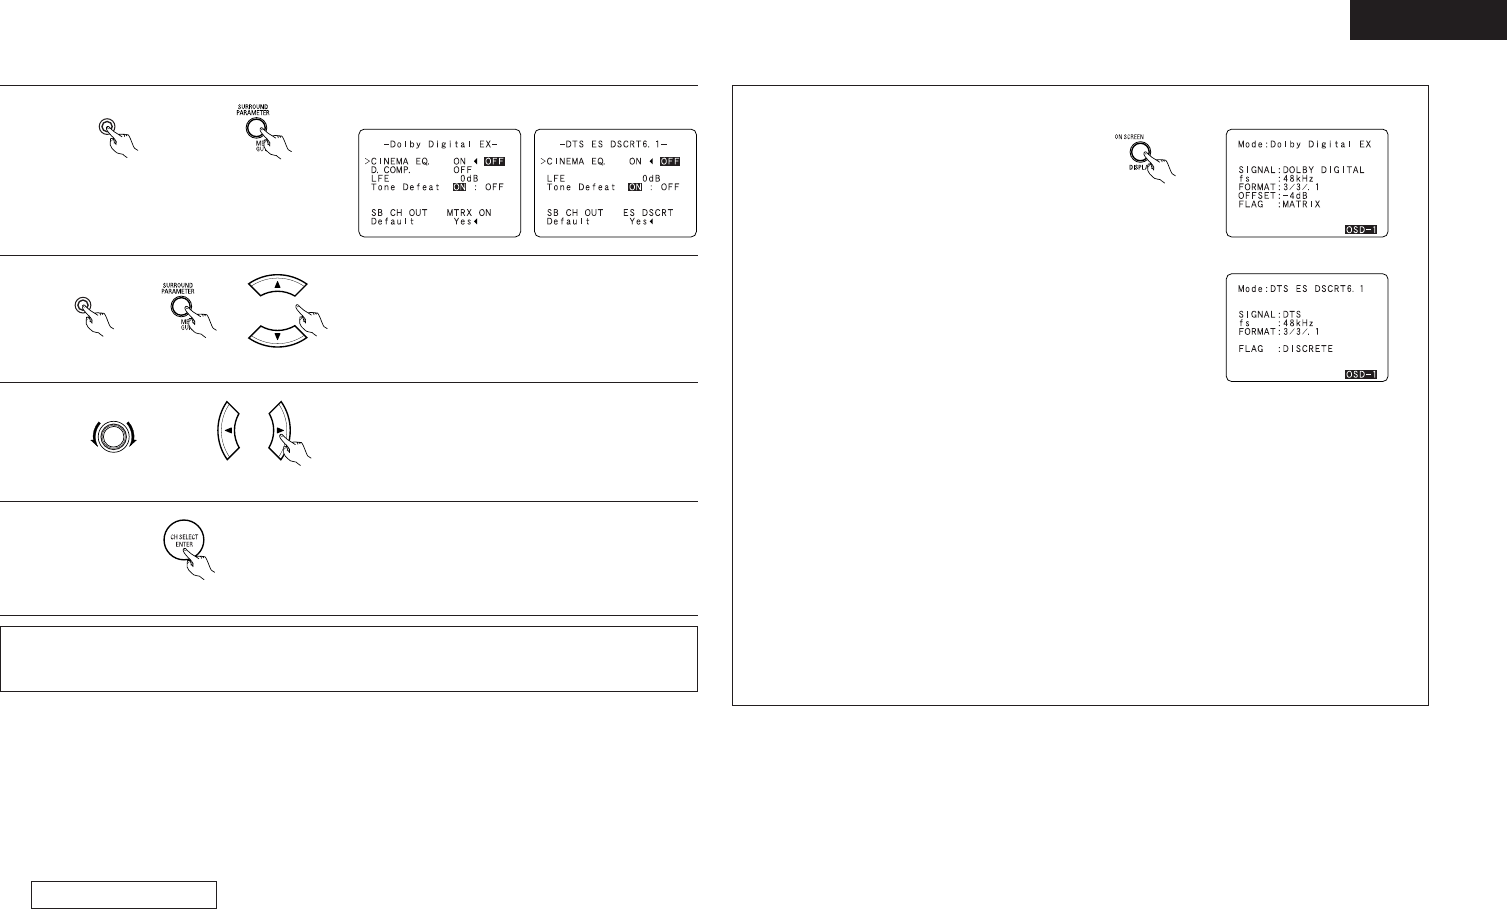
These contents can be verified with the ON SCREEN/DISPLAY button.
The number indicates the normalization level when the currently playing
program is normalized to the standard level.
Display
Checking the input signal
The input signal can be checked by pressing
the remote control unit’s ON SCREEN/
DISPLAY button.
SIGNAL: Displays the type of signal
(DTS, DOLBY DIGITAL, PCM,
etc.).
fs: Displays the input signal’s sampling frequency.
FORMAT: Displays the input signal’s number of channels.
“Number of front channels/Number of surround
channels/LFE on/off”
“SURROUND” is displayed for 2-channel signal sources
recorded in Dolby Surround.
OFFSET: Displays the dialog normalization offset value.
FLAG: Displays the special identification signal recorded in the
input signal.
“MATRIX” is displayed when matrix processing is
conducted on the surround back channel, “DISCRETE” is
displayed when discrete processing is conducted.
Not displayed when no identification signal is recorded.
In addition, screen information is displayed in the following
order when the ON SCREEN button is pressed repeatedly:
OSD-1 Input signal
OSD-2 Input/output
OSD-3 Auto surround mode
OSD-4~10 Tuner preset stations
NOTE:
OSD-3: This is displayed when the auto surround mode is set to “ON” and the input mode is
set to “Auto”.
It is not displayed when the input mode is set to “Analog” or “EXT. IN”.
(Remote control unit)
NOTE:
• When making parameter settings, the display will return to the regular condition several seconds after the
last button was pressed and the setting will be completed.