780087
15
Zoom out
Zoom in
Vorherige Seite
1/68
Nächste Seite
I General User Manual 15
The minimum insertion depth is marked on the seat-
post. If this is not the case, the minimum insertion
depth must be 7.5 cm. In ames with long seat tubes
that project beyond the top tube, the minimum inser-
tion depth is 10 cm.
Observe stop
mark.
9.2.4 Adjusting the saddle angle
Your bike saddle should be as close as possible to
horizontal.
You can make use of longer bike rides to nd out
what your most comfortable seat position is. If you
want to tilt the saddle, try tilting it very slightly
forwards. If you tilt the saddle back, this can quick-
ly lead to pain or physical injury.
Adjust the saddle angle as follows:
Turn the clamping screw anticlockwise to loosen it.
Tilt the bike saddle to the required angle.
Turn the clamping screw clockwise to tighten it.
(For tightening torques see
Chapter 30 "Technical
data").
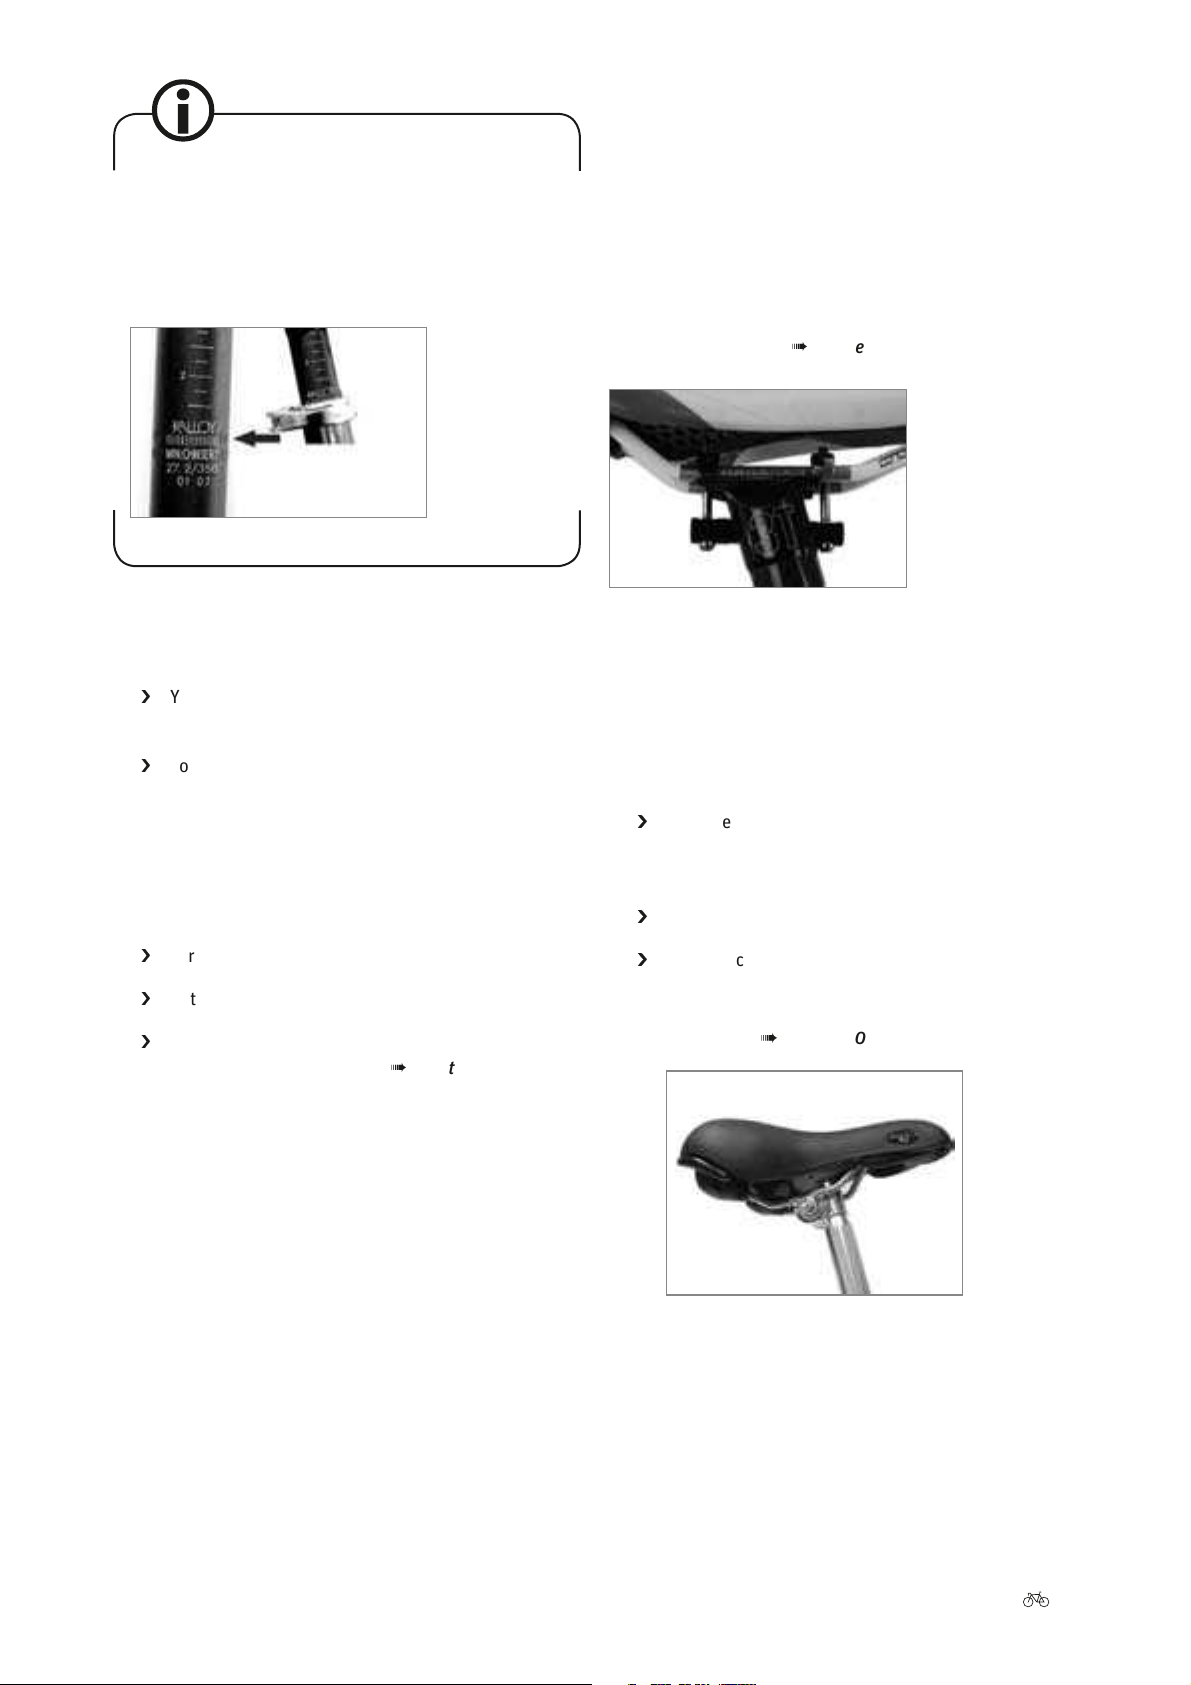
9.2.4.1 With a two-bolt seatpost
Some seatposts have two screws for adjusting the sad-
dle angle, one in ont of and one behind the seat tube.
If you want to tilt the saddle forwards, loosen the rear
screw with an Allen key and tighten the ont screw by the
same number of revolutions. To tilt the saddle backwards,
loosen the ont screw and tighten the other to the same
degree. Then retighten both screws observing the correct
tightening torque (see
Chapter 30 "Technical data").
Two-bolt seatpost
9.2.4.2 With a seatpost saddle clamp
If the saddle is attached to the seatpost by a clamp, the
clamping nut will be at the side. Adjust the saddle angle
as follows:
Turn the clamping nut anticlockwise to loosen it.
You may need to counter the nut on the other side
using another wrench.
Tilt the bike saddle to the required angle.
Turn the clamping nut clockwise to tighten it. You
may need to counter the nut on the other side us-
ing another wrench. Use the correct tightening
torque (see
Chapter 30 "Technical data").
Seatpost saddle clamp
15

Brauchen Sie Hilfe? Stellen Sie Ihre Frage.

Forenregeln

Missbrauch melden von Frage und/oder Antwort

Libble nimmt den Missbrauch seiner Dienste sehr ernst. Wir setzen uns dafür ein, derartige Missbrauchsfälle gemäß den Gesetzen Ihres Heimatlandes zu behandeln. Wenn Sie eine Meldung übermitteln, überprüfen wir Ihre Informationen und ergreifen entsprechende Maßnahmen. Wir melden uns nur dann wieder bei Ihnen, wenn wir weitere Einzelheiten wissen müssen oder weitere Informationen für Sie haben.

Art des Missbrauchs:

Zum Beispiel antisemitische Inhalte, rassistische Inhalte oder Material, das zu einer Gewalttat führen könnte.

Beispielsweise eine Kreditkartennummer, persönliche Identifikationsnummer oder unveröffentlichte Privatadresse. Beachten Sie, dass E-Mail-Adressen und der vollständige Name nicht als private Informationen angesehen werden.

Forenregeln

Um zu sinnvolle Fragen zu kommen halten Sie sich bitte an folgende Spielregeln:

Neu registrieren

Registrieren auf E - Mails für Derby Cycle 2012 General wenn:


Sie erhalten eine E-Mail, um sich für eine oder beide Optionen anzumelden.


Andere Handbücher von Derby Cycle 2012 General

Derby Cycle 2012 General Bedienungsanleitung - Deutsch - 68 seiten

Derby Cycle 2012 General Bedienungsanleitung - Holländisch - 68 seiten

Derby Cycle 2012 General Bedienungsanleitung - Französisch - 68 seiten

Derby Cycle 2012 General Bedienungsanleitung - Italienisch - 68 seiten

Derby Cycle 2012 General Bedienungsanleitung - Spanisch - 68 seiten


Das Handbuch wird per E-Mail gesendet. Überprüfen Sie ihre E-Mail.

Wenn Sie innerhalb von 15 Minuten keine E-Mail mit dem Handbuch erhalten haben, kann es sein, dass Sie eine falsche E-Mail-Adresse eingegeben haben oder dass Ihr ISP eine maximale Größe eingestellt hat, um E-Mails zu erhalten, die kleiner als die Größe des Handbuchs sind.

Ihre Frage wurde zu diesem Forum hinzugefügt

Möchten Sie eine E-Mail erhalten, wenn neue Antworten und Fragen veröffentlicht werden? Geben Sie bitte Ihre Email-Adresse ein.


Info