User Manual
18
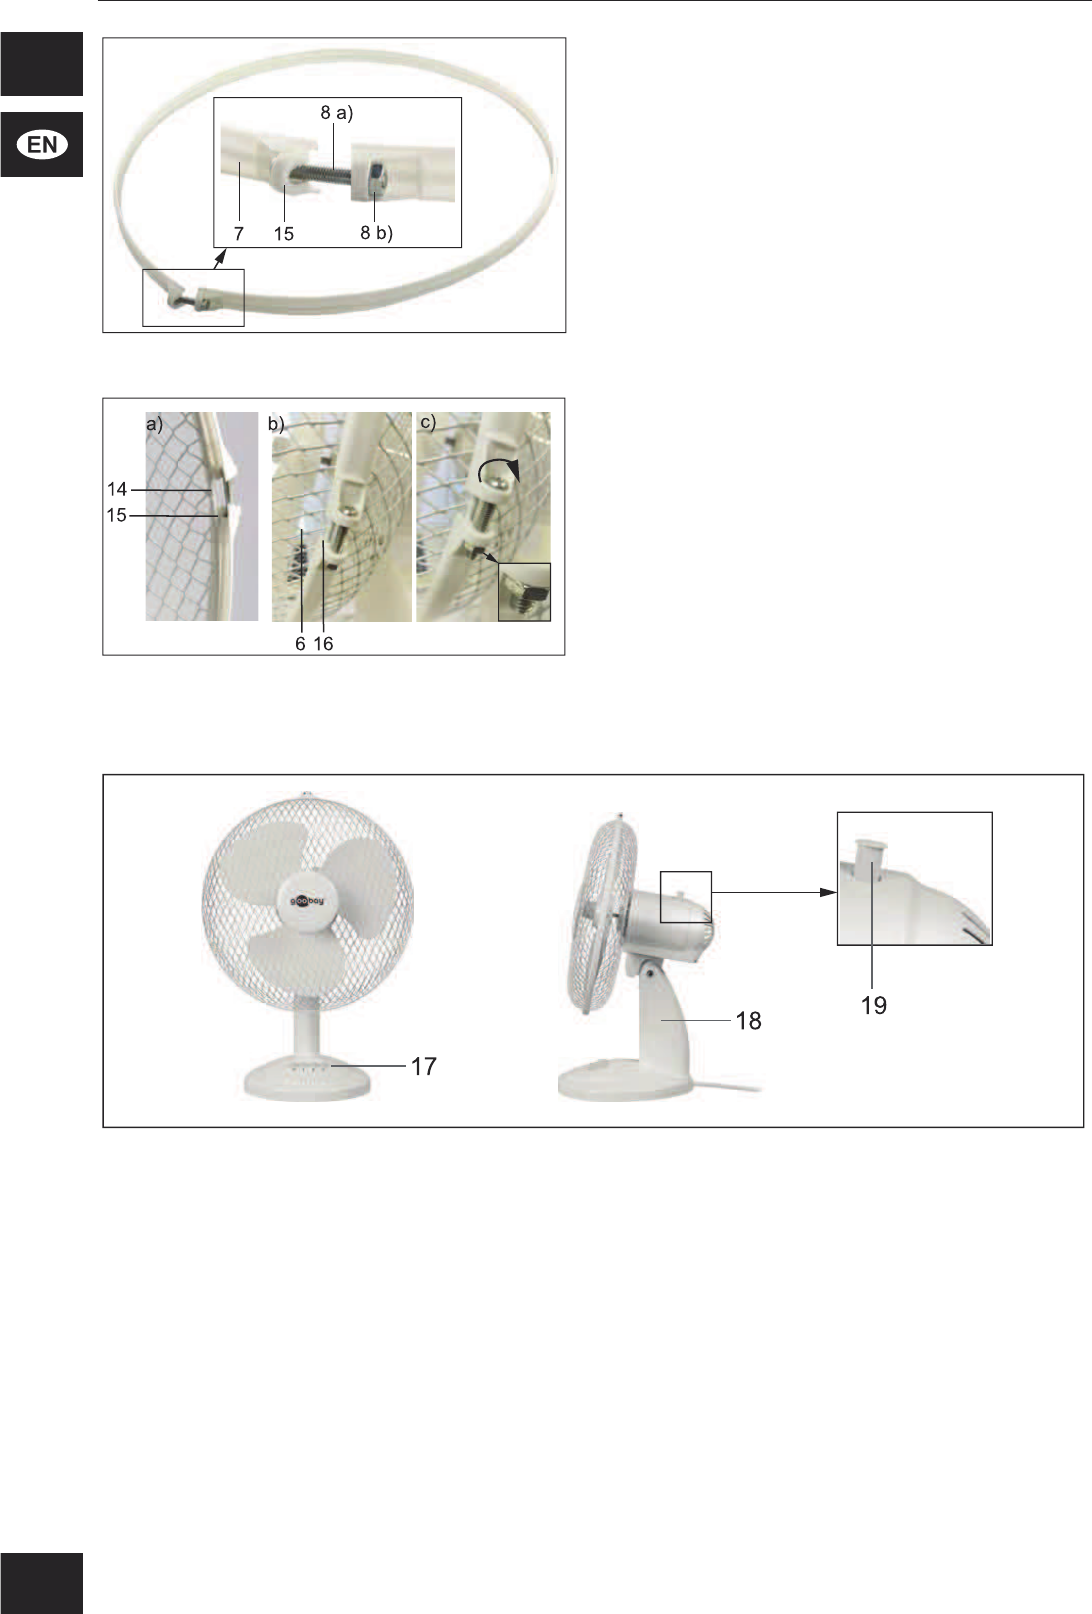
*UDVSWKHHQGVRIWKH¿[LQJVWULS
together.
10. Insert the Phillips-head screw with
lens head (8 a) through the two
H\HOHWVDQG¿[WKHPZLWKWKHVFUHZ
nut (8b).
The Phillips head screw should only be
VFUHZHGLQPLQLPDOO\DQGEHÀXVKZLWK
the nut.
Fig. 16: 0RXQWLQJ¿[LQJVWULS
11. Pull the resulted ring onto the edge of
the rear protective grille (14).
The edge of the protective grille must lie in
WKHUHDUJURRYHRIWKH¿[LQJWDSH
Fig. 17 a).
12. Insert the front guard grille (6) into the
IURQWJURRYHRIWKH¿[LQJVWULS
Fig. 17 b).
13. Tighten the Phillips screw further
Fig. 17: Mounting of front protective grille clockwise using a Phillipps
screwdriver. Fig. 17 c).
Fig. 18: Ready mounted table fan
17 Pushbuttons for setting the blower intensity 18 Plinth
19 Pin for rotation adjustment
End of mounting.