Placement of the set
Caution should be exercised if the set is placed on
furniture as surfaces are often coated with lacquers
and plastic finishes containing additives which
attack the material of which the feet of the set are
made, leaving stains which can only be removed
with difficulty or not at all.
Care and maintenance
• Only a soft cloth which picks up dust should be
used to clean the cabinet. Do not use
aggressive polishes or cleaning agents.
• If your set develops a fault, contact your dealer.
•
Do not expose the unit to moisture (e.g. dripping
or splashing) or to temperatures exceeding
70˚C
Cassette deck maintenance
To ensure a good recording and playback quality,
clean the indicated parts ABCD after every 50
hours of operation or, on average, once a month.
•
Open the cassette compartment with STOP/EJECT
9//.
• Use a cotton bud slightly moistened with alcohol
or a special head cleaning fluid.
• Press PLAY A and
clean the rubber
pressure rollers D.
• Then press PAUSE
; and clean the
capstans C and
the heads A and
B.
• After cleaning, press STOP/EJECT 9//.
• Cleaning of the heads A and B can also be
done by playing a cleaning cassette through
once.
Top and front panel
VOLUME – to adjust the volume level
UBS –(Ultra Bass System) – to boost
the bass response
FM STEREO 6
– lights up when receiving on FM
stereo stations
p – stereo headphone socket
ANTENNA – for FM reception
MODE:
– TAPE: to switch to Tape mode and
power off
– RADIO: to switch to Radio mode
– The set is switched off if the MODE selector
is in position TAPE and no buttons are
pressed.
BAND – to select between FM and AM
(MW) (and LW for RR 316 L)
MIC – built-in microphone
TUNING – to tune to radio stations
Stereo headphone socket p
• You can connect stereo headphones
having a 3.5 mm plug to the socket p.
– Inserting the plug will disconnect the
speakers.
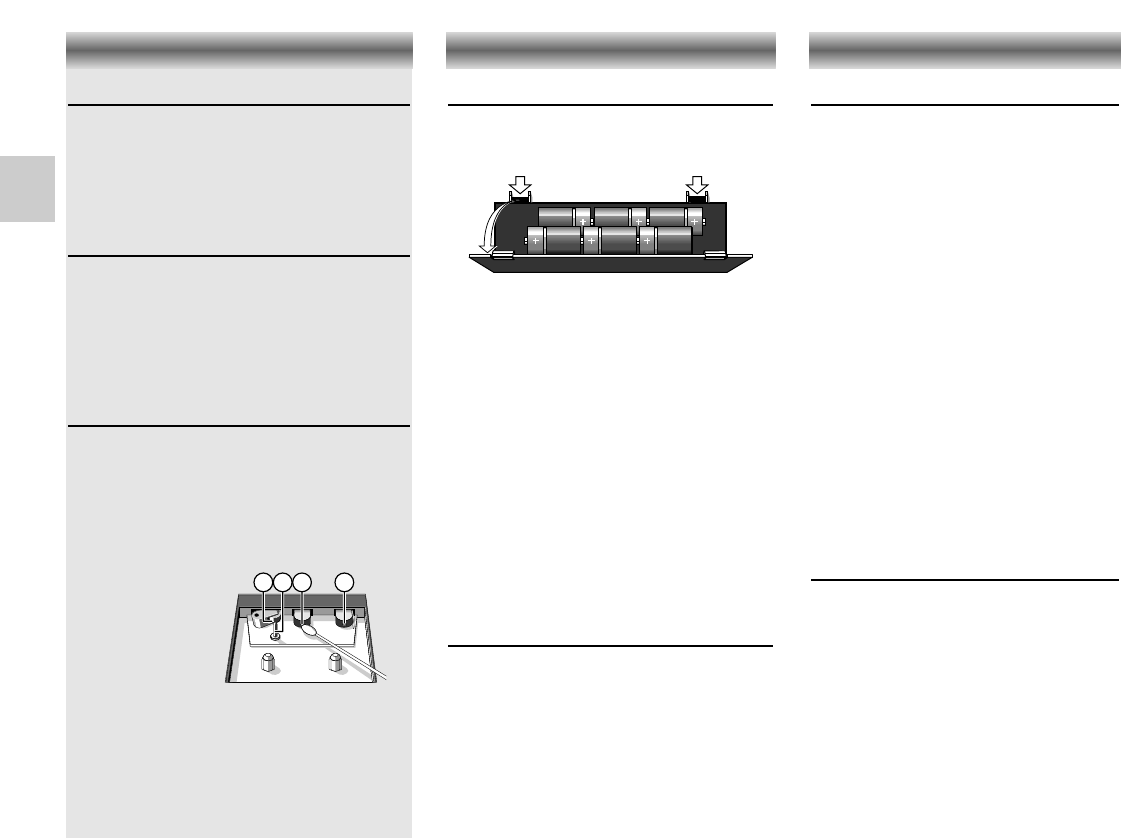
Power supply
Battery supply
• Open the battery compartment and insert as
shown 6 batteries, type R20, UM1 or D-cells.
• Remove the batteries if exhausted or if they
will not be used again for a long period.
– The battery supply is switched off when the
set is connected to the mains. To change over
to battery supply, pull out the plug from the
MAINS V~ socket.
Mains supply
• Check if the mains voltage as shown on the
type plate (on the rear of the set) corresponds
to your local mains voltage. If it does not,
consult your dealer or service organisation.
• Connect the mains lead to the MAINS V~
socket and the wall socket. The mains supply
is switched on.
•
To disconnect the set from the mains completely,
pull the mains plug from the wall socket.
Note on Environmental Protection
• Do not throw exhausted batteries in the
household refuse.
• Hand over the old batteries to your dealer or
public collecting points when buying new ones.
Important note for users in the U.K.
When fitting a mains plug, follow the instructions
on page 2.