PROPER USAGE
Your treadmill is capable of reaching high speeds. Always start off using a slower speed and adjust the speed in
small increments to reach a higher speed level. Never leave the treadmill unattended while it is running. When
not in use, remove the safety key, turn the on/off switch to off and unplug the power cord. Make sure to follow the
MAINTENANCE schedule located on page 33 in this manual. Never step onto the treadmill when it is moving more
than 0.5 mph. Keep your body and head facing forward. Do not attempt to turn around or look backwards while
the treadmill is running. Stop your workout immediately if you feel pain, faint, dizzy or are short of breath.
Do not operate the treadmill if the power cord or plug is damaged.
If the treadmill appears to not be working properly, do not use the treadmill.
FOLDING
Firmly grasp the back end of the treadmill. Carefully lift the end of the treadmill
deck into the upright position until the foot lock latch engages and securely
locks the deck into position. Make sure the deck is securely latched before letting
go. To unfold, firmly grasp the back end of the treadmill. Gently press down
on the foot lock latch with your foot until the lock latch disengages. Carefully
lower the deck to the ground.
MOVING
Your treadmill has 4 transport wheels built into the frame.
To move, make sure the treadmill is folded and securely
latched. To unlock wheels, push down on the top lever of all
4 wheel locks located on the corners of the base frame. Then
firmly grasp the handlebars, and slowly move the treadmill.
After moving to the desired location, push down on the
bottom lever of all 4 wheel locks.
NOTE: All 4 wheels MUST be locked before using the treadmill.
Our Treadmills are heavy, use care and additional help if necessary when moving.
Do not attempt to move or transport treadmill unless it is in the upright, folded
position with the lock latch secured. Failure to follow these instructions could
result in injury.
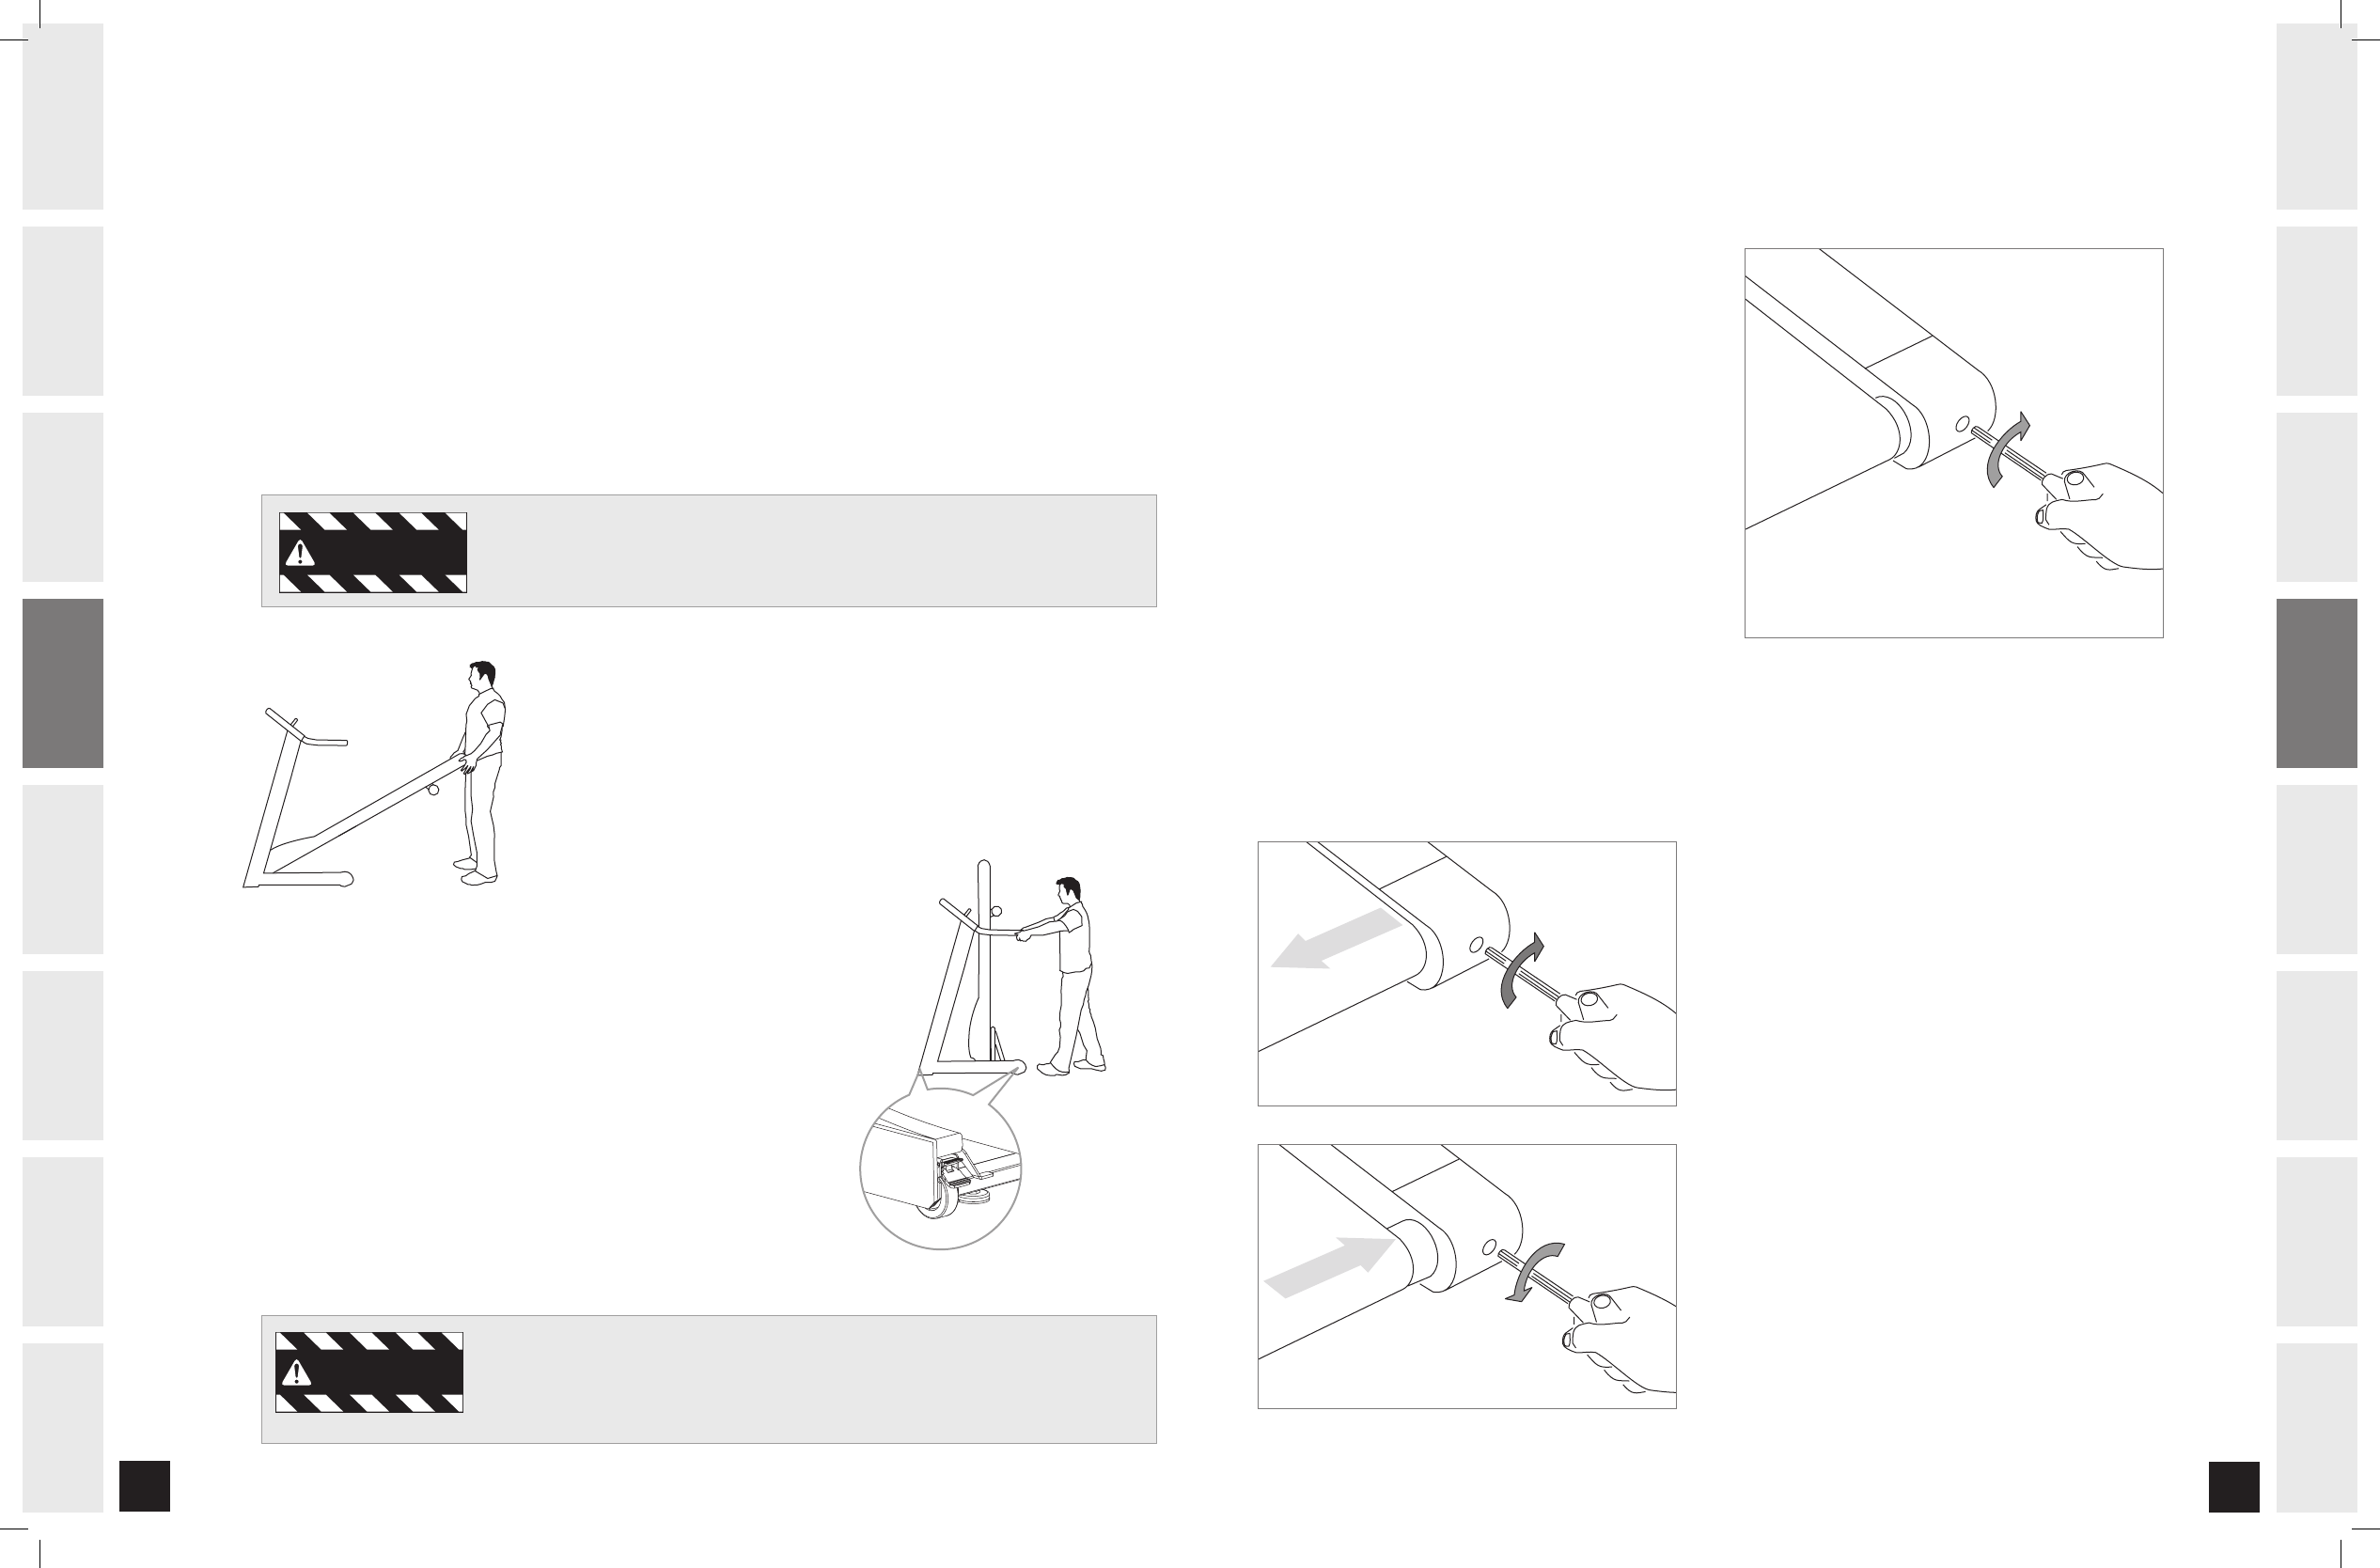
CENTERING THE RUNNING BELT
The running belt has been properly adjusted at the
factory before it was shipped. At times the belt can
move off-center during shipment. Before operating the
treadmill, make sure the belt is centered and remains
centered to maintain smooth operation.
CAUTION: Do not run belt faster than 1/2 mph while
centering. Keep fingers, hair and clothing away from
belt at all times.
If the running belt is too far to the right side:
With the treadmill running at 1/2 mph, turn the right
adjustment bolt clockwise 1/4
TURN at a time (using
the supplied Allen wrench). Check the belt alignment.
Allow belt to run a full cycle to gauge if more adjustment
is needed. Repeat if necessary, until the belt remains
centered during use.
If the running belt is too far to the left side:
With the treadmill running at 1/2 mph, turn the right
adjustment bolt counter-clockwise 1/4
TURN at a time
(using the supplied Allen wrench). Check the belt
alignment. Allow belt to run a full cycle to gauge if more
adjustment is needed. Repeat if necessary, until the
belt remains centered during use.
Belt is too far to the right side
Belt is too far to the left side
TENSIONING THE RUNNING BELT
The running belt has been properly adjusted at the
factory before it was shipped. At times the belt can
move off-center during shipment.
CAUTION: Running belt should NOT be moving during
tensioning. Over-tightening the running belt can
cause excessive wear on the treadmill as well as its
components. Never over-tighten the belt.
If you can feel a slipping sensation when running on the
treadmill, the running belt must be tightened. In most
cases, the belt has stretched from use, causing the belt
to slip. This is a normal and common adjustment. To
eliminate this slipping, turn the treadmill off and tension
BOTH THE REAR ROLLER BOLTS using the supplied Allen
wrench, turning them 1/4 TURN to the right as shown.
Turn the treadmill on and check for slipping. Repeat if
necessary, but NEVER TURN the roller bolts more than
1/4 turn at a time. Belt is properly tensioned when the
slipping sensation is gone.