726
PROBLEM: The walking belt is off-centre
SOLUTION: a. If the walking belt has shifted to the left, first re-
move the key and UNPLUG THE POWER CORD.
Using the allen wrench, turn the left rear roller adjust-
ment bolt clockwise, and the right bolt counterclock-
wise, 1/4 of a turn each. Be careful not to overtighten
the walking belt. Plug in the power cord, insert the key
and run the treadmill for a few minutes. Repeat until
the walking belt is centred.
b. If the walking belt has shifted to the right, first re-
move the key and UNPLUG THE POWER CORD.
Using the allen wrench, turn the left rear roller adjust-
ment bolt counterclockwise, and the right bolt clock-
wise, 1/4 of a turn each. Be careful not to overtighten
the walking belt. Plug in the power cord, insert the key
and run the treadmill for a few minutes. Repeat until
the walking belt is centred.
c. If the walking belt slips when walked on, first re-
move the key and UNPLUG THE POWER CORD.
Using the allen wrench, turn both rear roller adjust-
ment bolts clockwise 1/4 of a turn. When the walking
belt is correctly tightened, you should be able to lift
each side of the walking belt 7 to 10 cm (3 to 4 inches)
off the walking platform. Be careful to keep the walking
belt centred. Plug in the power cord, insert the key and
carefully walk on the treadmill for a few minutes.
Repeat until the walking belt is properly tightened.
PROBLEM: The Speed/Minutes-Mile display on the console does not function properly
SOLUTION: a. Remove the key from the console and unplug the power cord.
Remove the Screws (not shown) from the Motor Hood
(39). Carefully remove the Motor Hood.
Locate the Reed Switch (17) and the Magnet (12) on
the left side of the Pulley (11). Turn the Pulley until the
Magnet is aligned with the Reed Switch. Make sure
that the gap between the Magnet and the Reed
Switch is about 3 mm (1/8”). If necessary, loosen the
Reed Switch Screw (26) and move the Reed Switch
slightly. Retighten the Screw. Reattach the Motor Hood
(39) and run the treadmill for a few minutes to check
for a correct speed reading.
b
c
12
17
11
Top
View
39
a
OPERATION AND ADJUSTMENT
THE PERFORMANT LUBE
TM
WALKING BELT
Your treadmill features a walking belt coated with PERFORMANT LUBE
TM
, a high-performance lubricant. IMPOR-
TANT: Never apply silicone spray or other substances to the walking belt or the walking platform. Such
substances will deteriorate the walking belt and cause excessive wear.
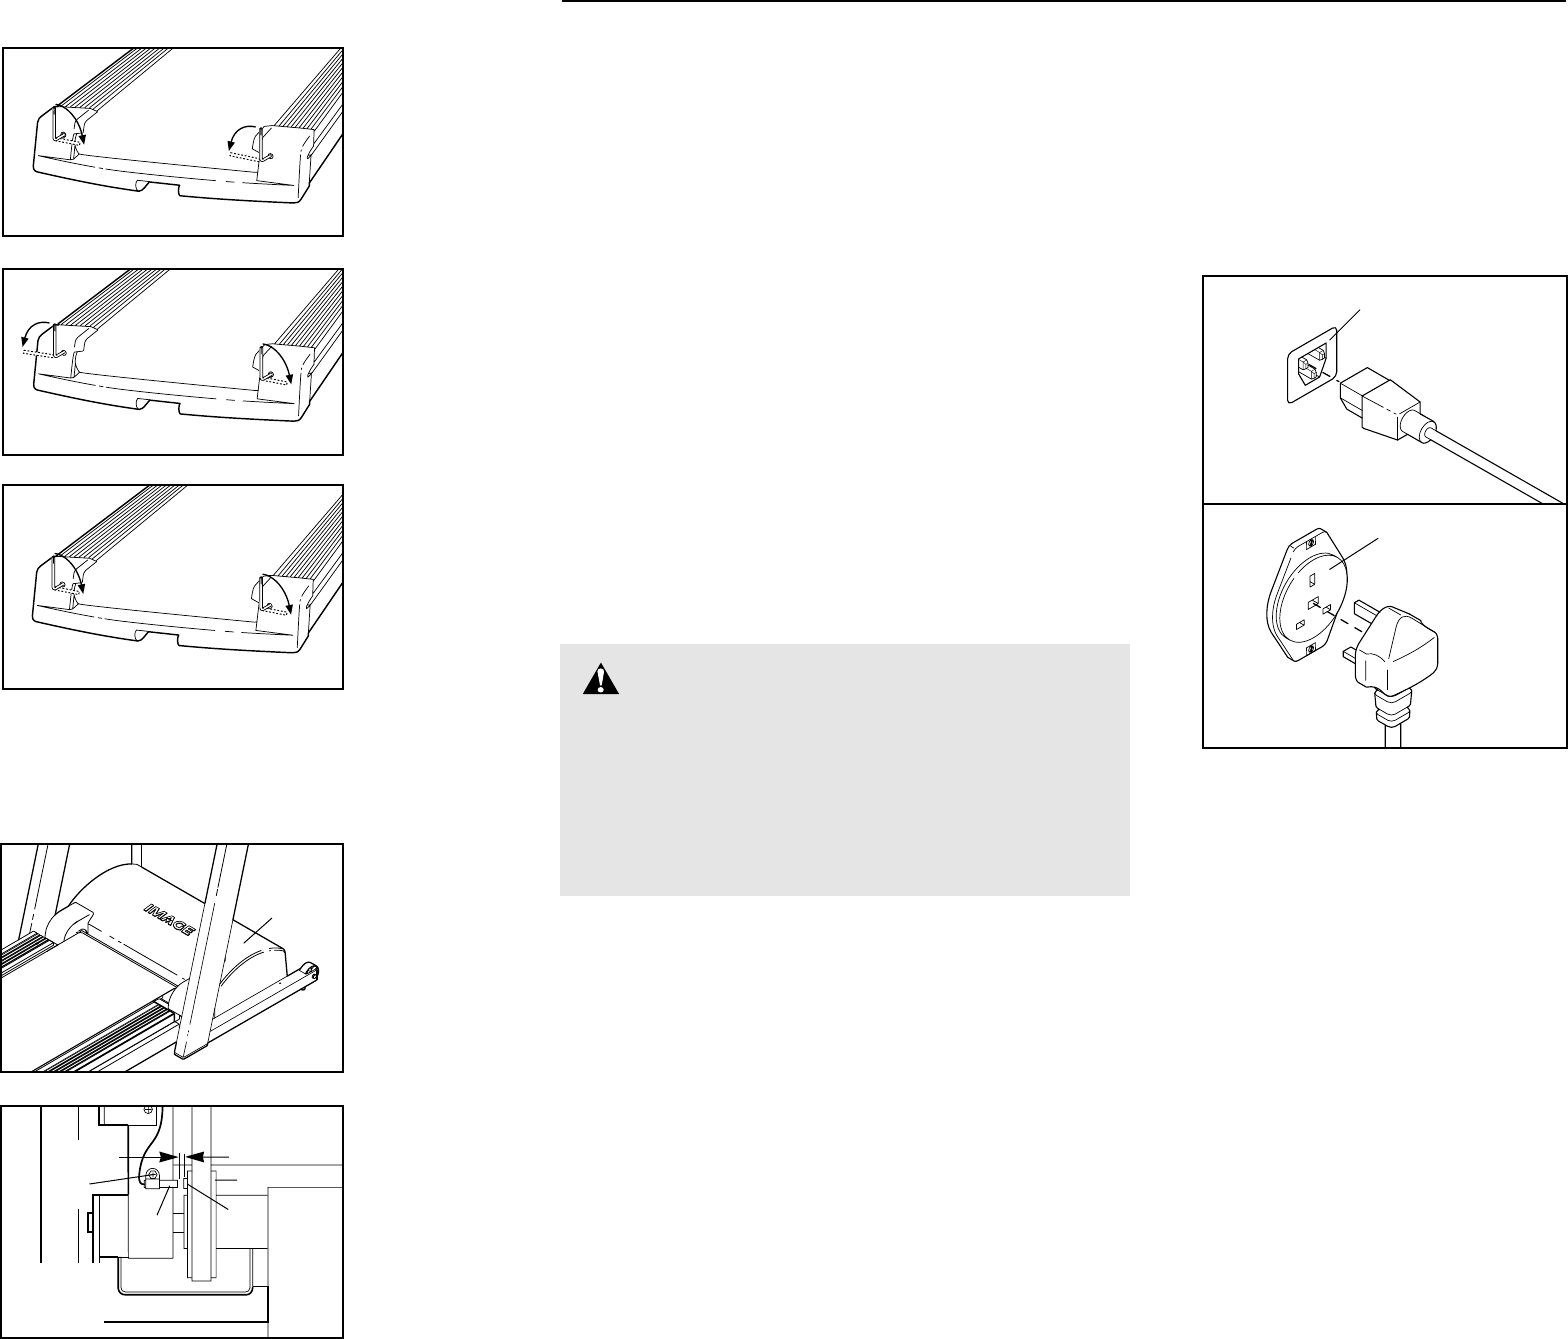
HOW TO PLUG IN THE POWER CORD
This product must be earthed. If it should malfunction or break
down, earthing provides a path of least resistance for electric
current to reduce the risk of electric shock. This product is equipped
with a cord having an equipment-earthing conductor and an earth-
ing plug.
Two power cords are included. Select the one that will fit your
outlet. Refer to drawing 1, and plug the indicated end of the
power cord into the socket on the treadmill. Refer to drawing 2.
Plug the power cord into an appropriate outlet that is properly
installed and earthed in accordance with all local codes and
ordinances. Note: In Italy, an adaptor (not included) must be
used between the power cord and the outlet. Important: The
treadmill is not compatible with GFCI-equipped outlets.
DANGER:Improper connection of the
equipment-earthing conductor can result in an in-
creased risk of electric shock. Check with a qualified
electrician or serviceman if you are in doubt as to
whether the product is properly earthed. Do not mod-
ify the plug provided with the product—if it will not fit
the outlet, have a proper outlet installed by a qualified
electrician.
1
2
Socket on treadmill
Outlet
3 mm
26