13
Functions and operation of the training computer
GB
OPERATING THE TREADMILL
- TURNING ON
Begin by turning on the training device. The On/Off switch for
the treadmill belt is located next to the mains cable on the front
side, below the motor cover.
- SAFETY KEY
Test the functionality of the safety key before commencing every
training session. Connect the safety key to the safety switch and
the cord to your clothing. If the safety key is not inserted in the
safety switch, all display segments will show dashed lines.
- GETTING ON AND OFF THE TREADMILL
Take the utmost care when getting on and getting off the tread-
mill. Use the handrails located on either side when getting on or
off. Do not stand on the treadmill when you are entering the set-
tings prior to use. Spread your legs, placing your feet on the side
platforms located on either side of the running surface. Only
when the treadmill has begun to move at a constant speed should
you place your feet on the running surface. For your own safety
you should only get on the treadmill when its speed does not
exceed 2 km/h.
Always have your body and head in a forward orientated direc-
tion during training. Never attempt to turn around on the tread-
mill when the treadmill belt is still moving. When you are finis-
hed with your training on the treadmill, bring it to a halt by pres-
sing the STOP button. Wait until the treadmill has come to a com-
plete stop before getting off the treadmill.
If you should wish to interrupt your training for a short period,
hold on tightly to the handrails and raise your feet from the tre-
admill and place them on the side platforms located next to the
running surface. The side platforms are a suitable spot for you to
rest before you recommence your training. Keep in mind at all
times that for your own safety that you should always begin at a
lower speed.
TRAINING PROGRAMS
PROGRAM SELECTION
After having turned on the treadmill and having inserted the safe-
ty key the user has the opportunity to choose between the indivi-
dual programs:
M: Manual Program
Incline programs P1 – P3
P1: Hilly terrain – Incline program
P2: Ascent – Incline program
P3: Protracted interval – Incline program
Speed programs P4 – P6
P4: Hilly terrain – Speed program
P5: Running with incline – Speed program
P6: Protracted interval – Speed program
U1: User program 1
HRC: Heart rate control program
M: MANUAL PROGRAM
The quickest way of getting the treadmill up and running is by
pressing the START button. By pressing the START button the tre-
admill will be started in the MANUAL program and the time will
be counted from 00:00.
During training you can adjust the speed and the incline level by
using the (+) and (-) buttons. To interrupt your training program
you can press the STOP button, and in order to reset your pro-
gram you need to press the STOP button for a longer period
(Reset function).
SETTING THE TIME IN THE MANUAL PROGRAM
Insert the safety key and press SPEED (+) or (-) until next to the
symbol Distance „M “is displayed on the display screen. Press the
MODE button and then the time begins to flash. Press SPEED (+)
or (-) in order to set the desired training time. Press START and the
time will be counted down from the time selected. Press the STOP
button to interrupt your training and press START to recommence
training. In order to reset your program, press the STOP button
for a longer period (Reset function)
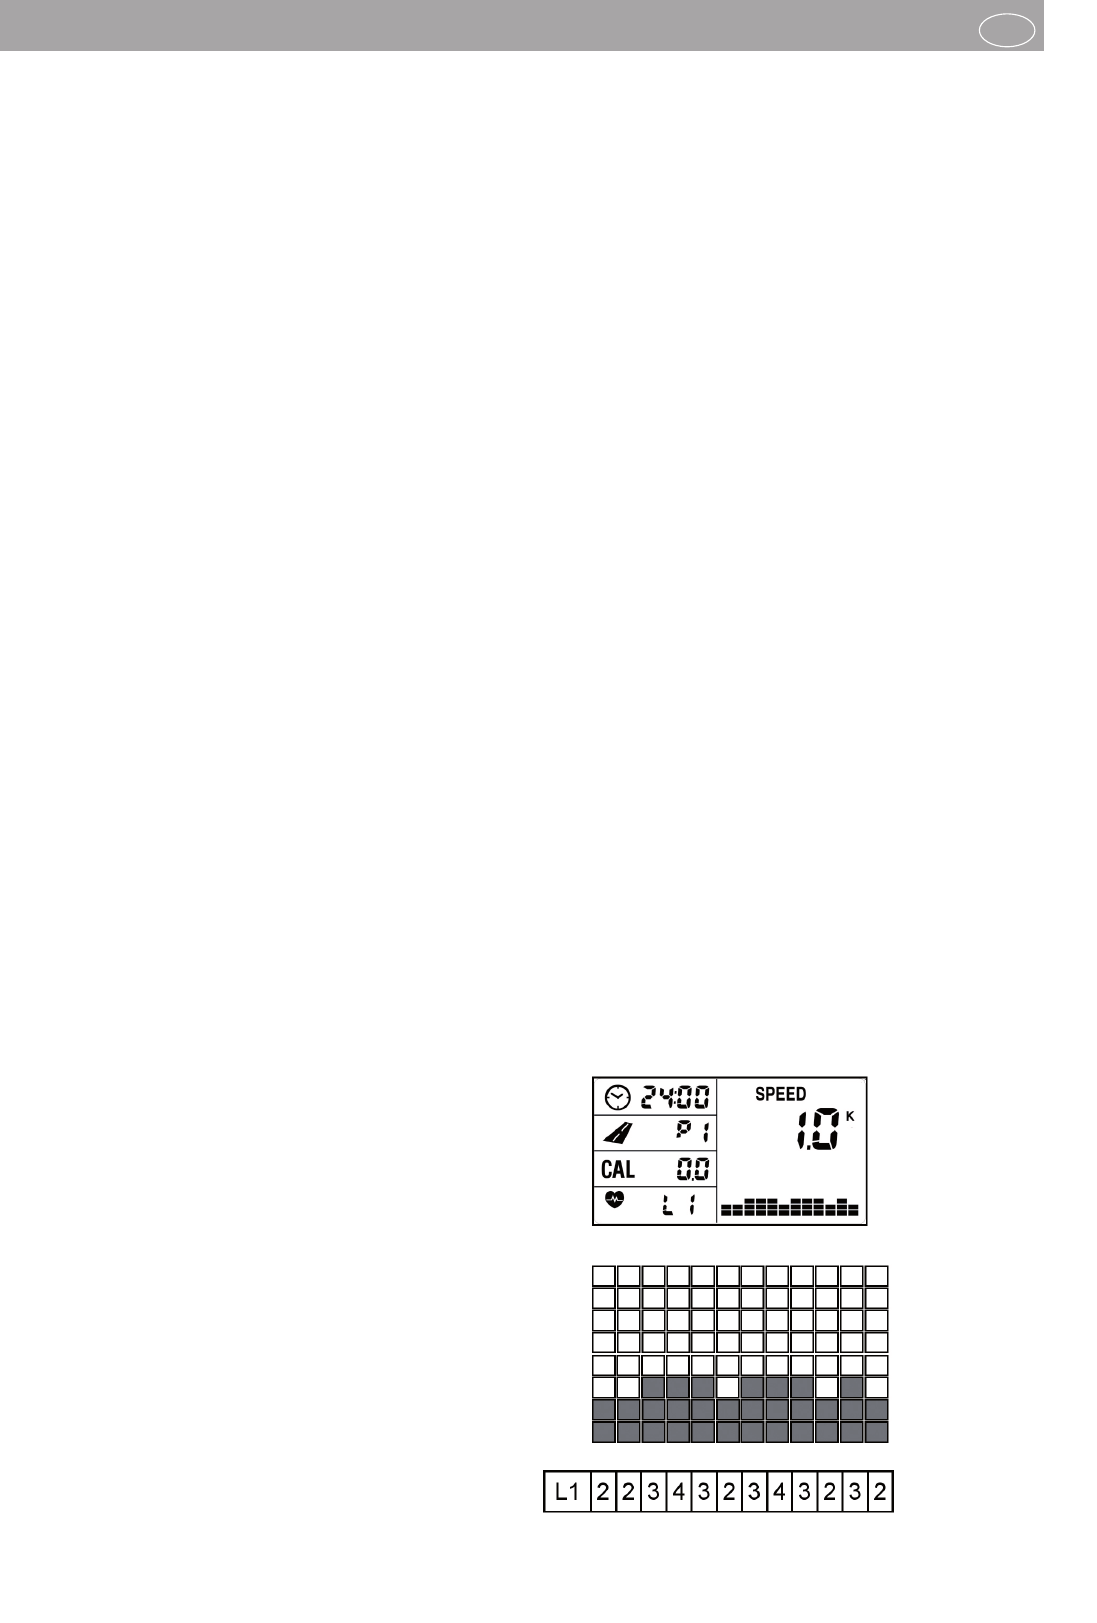
P1 to P6:
SELECTION OF AN INCLINE PROGRAMS OR A SPEED
PROGRAMS
1. Insert the safety key and press SPEED (+) or (-) until the des-
ired programs (P1 to P6) is displayed. The first 3 programs
are incline programs (INCLINE) and the next 3 are speed
programs (SPEED).
2. Press the Modus button and SPEED (+) or (-) in order to
select a level (intensity level) (L1 to L3).
3. Press the Modus button and SPEED (+) or (-) until you have
set the desired time.
4. Press the start button. The treadmill starts and the time counts
down from the selected time.
During training you can adjust the speed and the incline level by
pressing the (+) or (-) buttons.
Example: P1 INCLINE > Hilly terrain – Incline program
With the Modus button and subsequently with SPEED (+) or (-) you
can select the level (intensity level) (L1 to L3).