14
Heating and cooling are calculated based on:
- The selected power level (from “0” to “9”);
- The relay activation time after the cooking zone has been switched off.
The corresponding display shows “H” until the zone temperature drops below the critical level (< 60 °C)
according to the mathematical model.
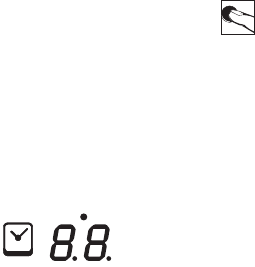
Timer function
The Timer function can be used as a cooking zone timer or independent alarm but never for
both functions. The two 7 segment displays of the respective cooking zones are used to
view the remaining time in minutes up until the timer alarm is activated.
Timer selection
- To program a timer, the touch control must be in the Standby or On mode.
- The timer button is pressed in order to select a timer function for the cooking zone.
- The programming of a timer using the Plus/Minus keys is signalled by led 8 for induction model 2 and led
6 for the wok induction model. The flashing timer LED signals that the 7 segment display value refers to
the timer and can be modified. When a timer continues to function in the OFF mode, the timer LED
remains on.
This indicates that the value on the display is related to the timer, but cannot be directly modified at that
particular moment; to do so, the control must be reactivated.
- The activation of the timer button depends on the conditions of the previously set function:
a) The cooking zone corresponding to the timer is on (cooking level > 0):
The timer is programmed in reference to the cooking zone;
the cooking zone automatically switches off when reset;
an independent timer cannot be selected.
The cooking level setting is accessed when the timer button is pressed again.
b) The cooking zone corresponding to the timer is off (cooking level = 0):
The timer is independently programmed and continues to function even in OFF.
The cooking zone cannot be activated until the timer is functioning.
Setting of the Timer value
- Following the selection of the time, the related LED flashes as described above. The countdown time of
the desired timer can be set by means of the +/- buttons.
- Starting with the plus button, the first value displayed is “01” and progressively increases from 1 to a
maximum value of “99” (upper limit).
- Starting with the minus button, the value displayed on the indication is “30” and diminishes to “01” (first
lower limit). When this value is reached, an acoustic signal is emitted. By pressing the minus button again,
the display “00” will not be modified (second lower limit).
- Setting can be performed by permanently pressing the plus or minus buttons or by intermittently pressing
them (selection: press button, release, press button, release, etc).
- If the button is permanently pressed, the regulation speed automatically accelerates, meaning that the time
between one step and the next is reduced, until the button is released.
- If the Plus or Minus buttons are not pressed within 10 sec. (parameter), after having selected the timer of
the current cooking zone (the display remains on “00”), the indication and allocation of the +/- buttons
automatically switch to the cooking zone.
- When a timer is used as an alarm, the indication and allocation of the buttons does not switch to the
cooking zone, being that this cannot be activated.
- The timer normally starts in countdown, if programmed with two values that are not 0. For example: the
timer starts when the Plus button is released after the timer value has been set at “01”.
- The timer settings have priority over the delimitation of the operating time if high cooking levels have
been set.
- If only one alarm has been programmed, the control remains at first in the standby mode (no other cooking
zone is on). If no other new values are introduced, the TC behaves as described above and switches to the
OFF mode.
Instructions for use