intégré de l'AX10A pour accorder votre guitare. Pour activer
l'accordeur, appuyez simultanément sur les commutateurs de
sélection de programme UP et DOWN.
CONSEILS
Vous pouvez activer l'accordeur en sélectionnant au choix
Bypass ou Mute.Si vous sélectionnez Mute, vous pourrez
accorder votre guitare en silence.
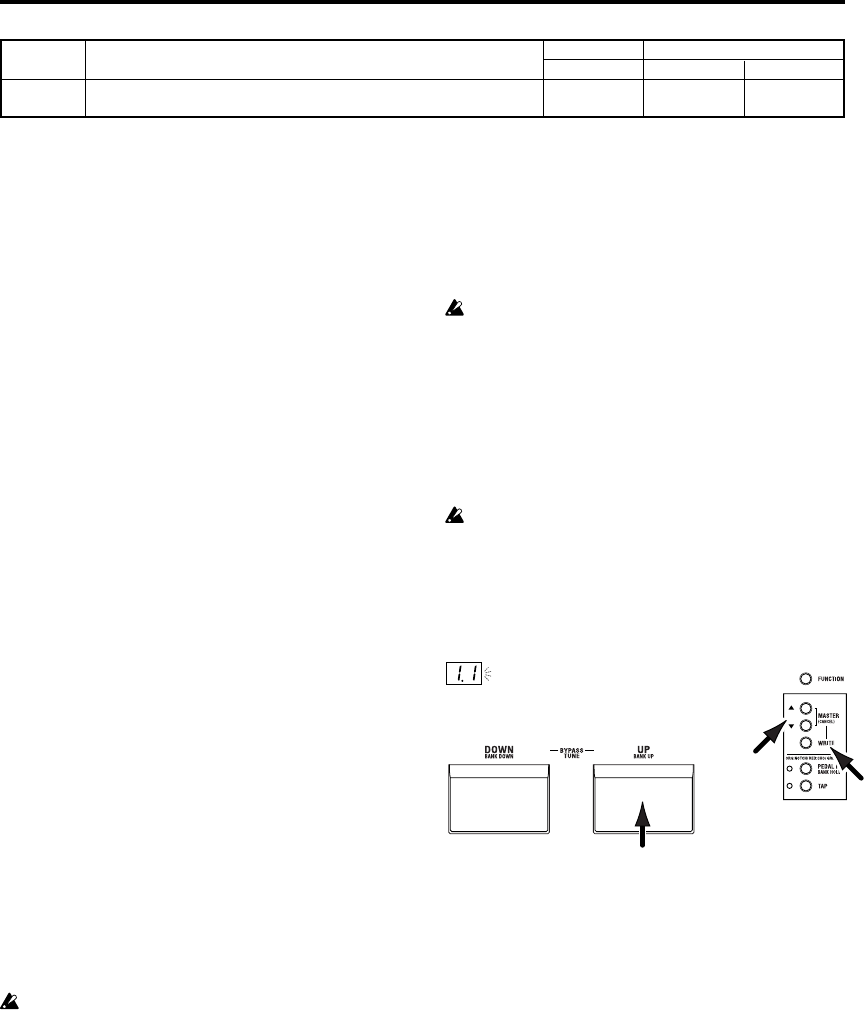
Procédure d'accord
1.
Pour activer l'accordeur, appuyez simultanément sur les
commutateurs de sélection de programme UP et DOWN afin
de contourner ou couper le son de l'AX10A. Pour la procédure
à suivre, reportez-vous à “Bypass et Mute” (ci-dessus).
2.
Jouez la corde que vous souhaitez accorder et le nom de
la note la plus proche sera affichée. Un point décimal “.” à
droite de la note représente un dièse (#).
Ne jouez pas simultanéement deux cordes ou plus quand
vous accordez.
3.
Accordez grossièrement la corde de telle façon que le
nom de la note correcte apparaisse sur l'afficheur.
4.
Accordez plus précisément la corde de telle façon que
seule la LED au centre de la section PRE FX (TUNER)
soit allumée.
Lorsque le nom de la note est A#
Trop bas
Trop hautAccord correct
5.
Lorsque vous avez fini d'accorder, appuyez sur le
commutateur de sélection de programme UP ou DOWN
pour revenir en mode de fonctionnement normal.
22
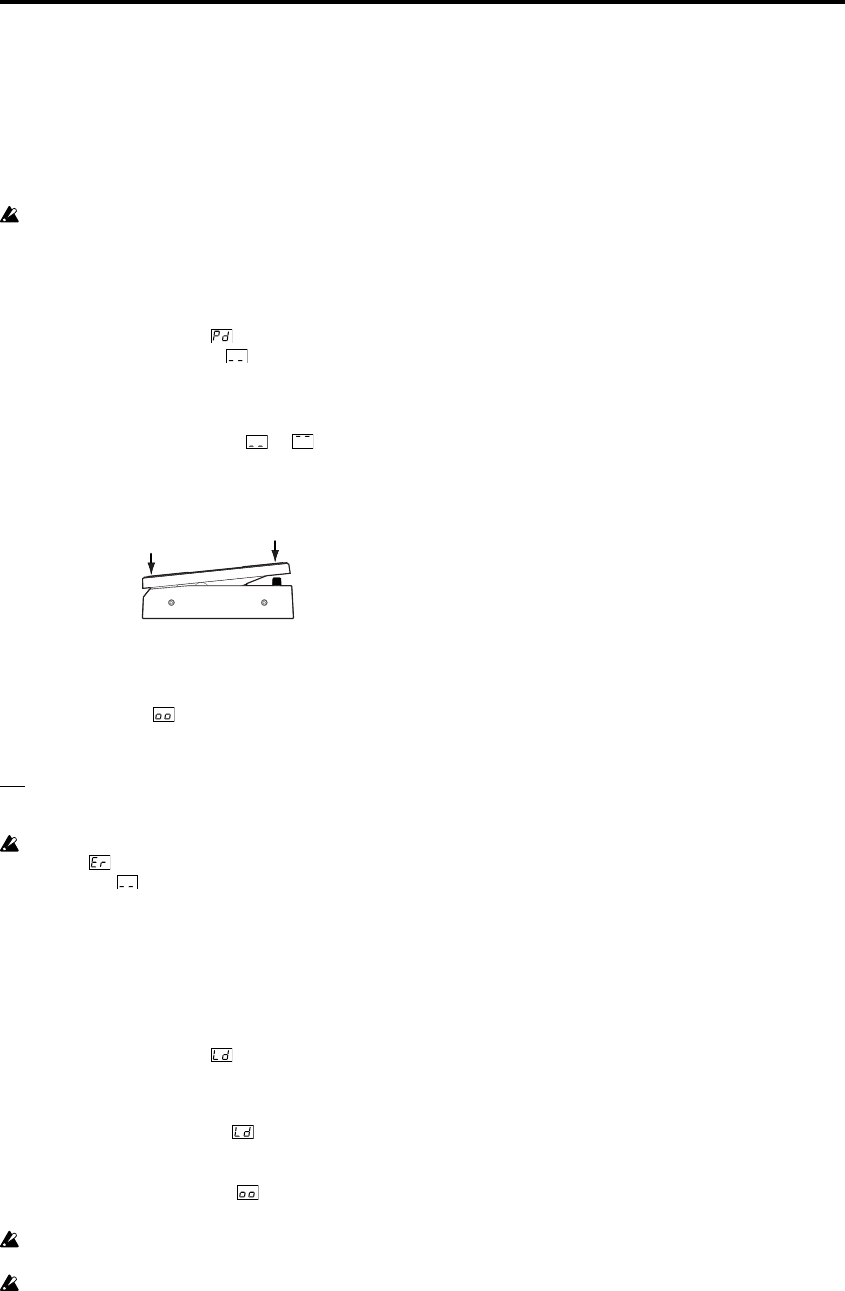
Calibrage de l'accordeur
Lorsque vous mettez l'appareil sous tension, A moyen est réglé
sur une fréquence de référence de 440 Hz. Si vous le souhaitez,
vous pouvez régler (calibrer) cette hauteur de référence.
1.
Avec l'accordeur activé, utilisez les touches VALUE
(CALIB) pour effectuer le calibrage.
La plage de réglage disponible s'étend de 438 à 445 Hz.
Lorsque vous changez la valeur de réglage, l'écran
affiche les deux chiffres inférieurs de la fréquence de
calibrage (e.g., “41” pour 441 Hz).
L'AX10A ne conserve pas la valeur de réglage quand il est mis hors tension.
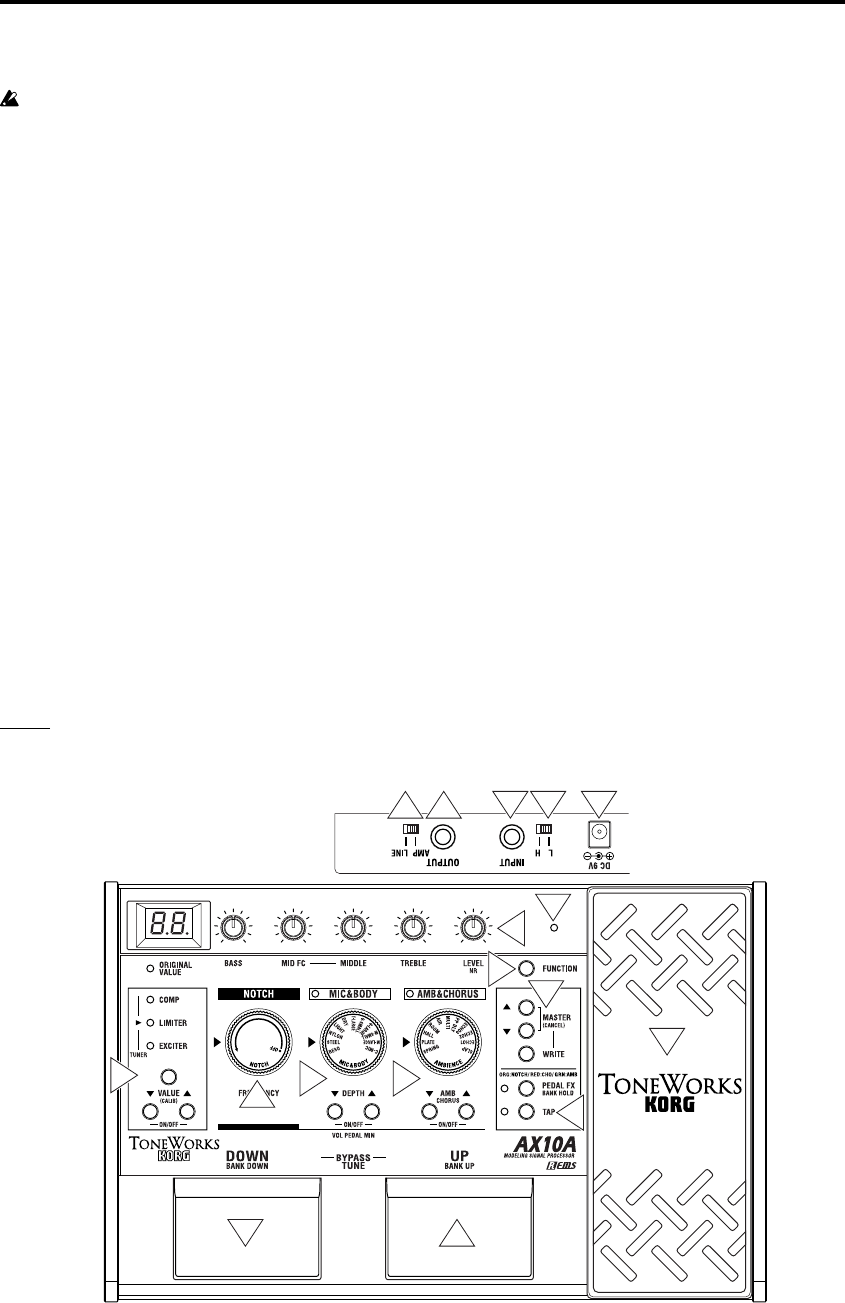
Utilisation de la pédale d'expression
Vous pouvez utiliser la pédale d'expression pour contrôler le
volume, le niveau de l'effet d'ambiance, la profondeur du
Chorus ou la fréquence du filtre à sillon.
L'effet contrôlé par la pédale peut être au choix un des onze
effets d'ambiance, CHORUS, NOTCH, ou bien le volume.
Utilisation de la pédale d'expression
1.
Sélectionnez un programme pour lequel la LED PEDAL (située
en haut et à gauche de la pédale d'expression) est allumée.
Si vous avez sélectionné un programme pour lequel la
LED PEDAL est allumée, vous pourrez utiliser la pédale
d'expression pour contrôler un effet de pédale.
Même avec un programme pour lequel la LED PEDAL
n'est pas allumée, vous pouvez enfoncer complètement la
pédale pour l'activer (la LED PEDAL s'allumera).
Si le volume ou NOTCH est sélectionné comme effet de
pédale, vous ne pourrez pas activer ou désactiver ce dernier
en appuyant sur la pédale.
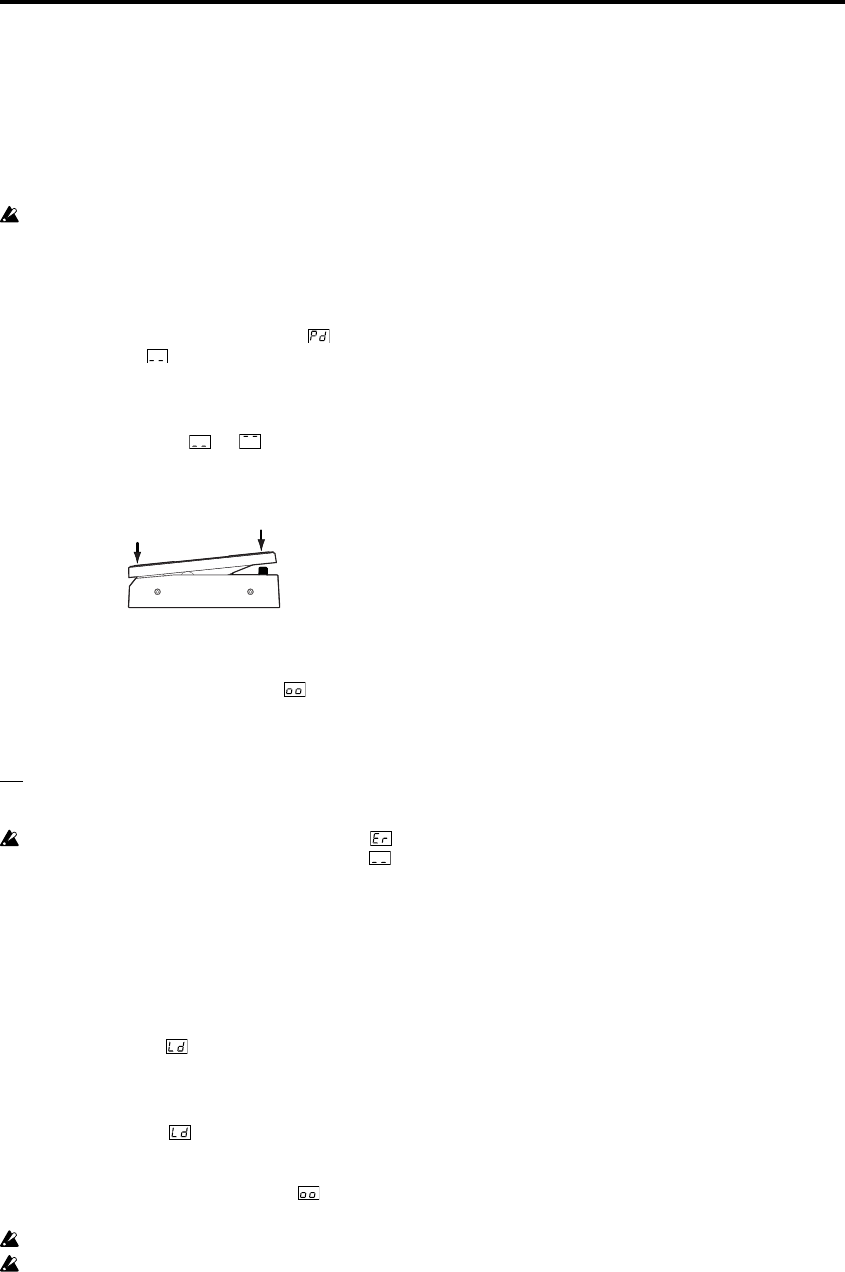
PEDAL LED
Si la LED PEDAL
n'est pas allumée,
enfoncez la
pédale.
2.
Utilisez la pédale d'expression en jouant. Le son de sortie
changera en même temps que vous déplacez la pédale vers
le haut ou vers le bas. Si vous avez assigné NOTCH à
PEDAL FX, vous pourrez éliminer l'effet Larsen en actionnant
la pédale quand l'effet se produira. Déplacez la pédale
jusqu'à ce que l'effet Larsen disparaisse. Si l'effet Larsen est
absent, nous vous conseillons de régler la pédale sur sa
position la plus basse pour désactiver cette fonction.
N'appliquez pas de force excessive sur la pédale d'expression.
Avant d'utiliser cette dernière, vous devriez déterminer la
quantité de force nécessaire pour allumer la LED PEDAL ou
contrôler l'effet, et appliquer seulement la force nécessaire.
CONSEILS
Vous pouvez appuyer sur la touche PEDAL FX pour commuter
l'effet ou le volume actuellement contrôlé par la pédale
d'expression. La fonction assignée à la pédale est indiquée par
la couleur de la LED située à gauche de la touche. (p.48). Vous
trouverez également à la page 48 des explications sur la façon
de sauvegarder un son créé en actionnant la pédale.
Création de sons
Création de sons sur l'AX10A
Vous pouvez choisir entre deux méthodes pour créer des
sons; vous pouvez éditer un programme préréglé ou utilisateur
existant ou créer un son à partir de zéro.
Si vous souhaitez commencer avec un programme existant,
sélectionnez le programme dont le son est le plus proche du
son souhaité et modifiez-le. Réglez les boutons de commande
de tonalité BASS, MID FC, MIDDLE et TREBLE et utilisez les
touches VALUE, DEPTH et TAP pour régler la profondeur de
chaque effet.
Si vous souhaitez créer un son à partir de zéro, vous pouvez
par exemple commencer en sélectionnant une des fonctions
MIC & BODY TYPE
. Si vous désactivez alors les effets PRE
FX et AMB & CHORUS, vous pourrez entendre plus claire-
ment les caractéristiques de chaque modèle de microphone
ou de guitare acoustique. Vous pouvez activer ou désactiver
l'effet correspondant en appuyant simultanément sur les
touches VALUE ou DEPTH
▲
et
▼
.
Lorsque vous avez choisi votre type de microphone ou de
guitare acoustique, réglez les boutons de commande de
tonalité BASS, MID FC, MIDDLE, TREBLE et LEVEL au
niveau souhaité.
Après avoir effectué les réglages de microphone et de guitare
acoustique, vous pourrez ajouter des effets.
AMB &
CHORUS
est situé après la section MIC & BODY. Appuyez
simultanément sur les touches DEPTH
▲
et
▼
pour activer
l'effet. Puis, tournez le commutateur de sélection AMB &
CHORUS pour choisir l'effet souhaité. Utilisez les touches
DEPTH pour régler la profondeur de l'effet. En ce qui
concerne l'effet Chorus, vous pouvez utiliser les touches
DEPTH en maintenant la touche FUNCTION enfoncée pour
régler sa profondeur. Vous pouvez également régler le temps
de Delay ou de Reverb de l'effet d'ambiance en appuyant sur
la touche TAP à l'intervalle de temps souhaité.
Vous pourrez ensuite régler PRE FX situé avant la section
MIC & BODY. Activez l'effet, puis appuyez sur la touche
PRE
FX
pour sélectionner un effet. Utilisez les touches PRE FX
VALUE pour régler la quantité d'effet. Il se peut que vous
souhaitiez temporairement désactiver AMB & CHORUS
pendant le réglage de PRE FX.
Finalement, utilisez la touche PEDAL FX pour spécifier le
paramètre contrôlé par la
pédale d'expression
.
Ce paramètre (effet ou volume) changera à chaque pression
sur la touche. Si vous entendez du bruit, vous pourrez régler la
réduction de bruit
(p.24). Tournez le bouton de commande
de tonalité NR (le bouton le plus à droite) tout en maintenant
la touche FUNCTION enfoncée pour régler la quantité de
réduction.
Enfin, lorsque vous aurez obtenu le son souhaité, vous
pourrez l'enregistrer dans la mémoire. Si vous passez à un
programme différent ou mettez l'appareil hors tension sans
avoir enregistré le programme, ce dernier sera perdu.
Certains réglages d'effet peuvent produire de la distorsion.
Baissez dans ce cas le volume avec le bouton VOLUME.
23
PRE FX
Utilisez la touche PRE FX pour sélectionner le type de pré-effet, et utilisez les touches VALUE pour régler la quantité d'effet.
TYPEDescriptionVALEUR
COMP
Compresseur rend ant le volume du picking plus consistant.Réglage de la sensibilité 0…30
LIMITER
Limiteur éliminant les niveaux excessifs.Montant de la limitation 0…30
EXCITER (*1)
Exciter qui ajoute du brillant dans la plage des hautes fréquences.Profondeur de l'effet 0…30
TONE (*1)
Il s'agit d'une commande de la tonalité sur trois plages de fréquences. Vous pouvez régler la réduction du bruit en tournant le bouton LEVEL (NR)
tout en maintenant la touche FUNCTION enfoncée.
BASS
Réglage des basses fréquences (00…30).
MID FC
Réglage de la fréquence de crête moyenne dans une plage de 170 Hz…3 kHz (1…10).
MIDDLE
Réglage des fréquences moyennes (00…30).
TREBLE
Réglage des hautes fréquences (00…30).
LEVEL
Réglage du volume (00…30).
NR
Quantité de réduction du bruit.
NOTCH
Vous pouvez éliminer l'effet Larsen en tournant ce sélecteur pour régler la fréquence du filtre à sillon. Tournez le bouton complètement à gauche
pour désactiver le filtre à sillon. Tournez-le complètement vers la droite pour augmenter la fréquence du filtre à sillon et identifier le point auquel
l'effet Larsen se produit. S'il n'y a pas d'effet Larsen, nous vous conseillons de laisser le filtre à sillon désactivé. Si vous avez assigné NOTCH à
PEDAL FX, vous pourrez utiliser la pédale d'expression pour régler la fréquence du filtre à sillon.
FREQUENCY
Fréquence du filtre à sillon. (bas-haut). Filtre à sillon désactivé dans la position la plus à gauche.
MIC & BODY (*1)
Utilisez le commutateur de sélection MIC & BODY pour sélectionner un type de microphone ou de guitare acoustique et les touches DEPTH pour
régler le paramètre DEPTH.
TYPEDescriptionPROFONDEUR
C-MIC
Microphone électrostatique.Distance du microphone 0 (loin)…30 (près)
M-LARGE
Grande guitare ancienne appropriée dans de nombreuses situations.
M-SMALL
Petite guitare ancienne idéale pour des arpèges délicats, etc.
G-LARGE
Grande guitare ancienne avec un son dur, idéale pour le strumming.
G-SMALL
Petite guitare avec une plage moyenne distincte, préférée par les musiciens de
country et de blues.
T-LARGE
Grande guitare au son sophistiqué, idéale pour la pop. Le son d'un des nouveaux
Profondeur de l'effet 0…30
fabricants américains.
DRY
Grande guitare avec un son sec distinct.
LIGHT
Guitare au son léger, idéale pour un orchestre ou un ensemble.
NYLON
Simule le son des cordes en nylon.
STEEL
Guitare présentant des sons hauts métalliques distincts, idéale pour le rock.
RESO
Guitare Resonator, idéale pour le jeu avec slide.
AMB & CHORUS
Utilisez le commutateur de sélection AMBIENCE pour sélectionner le type d'effet d'ambiance et utilisez les touches AMB pour régler le
paramètre AMB. En appuyant deux fois sur la touche TAP à l'intervalle de temps souhaité, vous pouvez régler le temps de Delay ou Reverb. Pour
régler la profondeur de l'effet Chorus, utilisez les touches AMB en maintenant la touche FUNCTION enfoncée. AMBIENCE et CHORUS peuvent
être utilisés simultanément. Si vous souhaitez désactiver AMBIENCE ou CHORUS individuellement, réglez le paramètre correspondant sur la
valeur “0”. Si vous avez assigné AMB ou CHO à PEDAL FX, la pédale d'expression contrôlera cet effet.
TYPEExplicationTAP
NormalPEDAL FX: AMB
AMBPEDALAMB
SLAP
Slap-Type Delay pour lequel le temps du delay est le quart de
l'intervalle configuré par vos pressions sur TAP.
ECHO1
Simulation d'un Tape Echo avec une tonalité chaude (faible Feedback).
ECHO2
Simulation d'un Tape Echo avec une tonalité chaude (Feedback moyen).
ECHO3
Simulation d'un écho de bande avec une tonalité chaude
(Feedback élevé).
PP DLY
Ping-Pong Delay avec sauts de gauche à droite et vice-versa.
MULTI
Multi-tap delay.
AIR
Reverb avec effet mystérieux.
ROOM
Reverb d'une pièce.
HALL
Reverb d'une salle de concert
(*3)
.
PLATE
Reverb plat
(*3)
.
SPRING
Spring Reverb
(*3)
.
Temps du delay:
jusqu'à 250 [ms]
Temps du delay:
jusqu'à 1,0 [s]
N/A
(*2)
Temps du Reverb:
jusqu'à 4,0 [s]
Temps du Reverb:
jusqu'à 8,0 [s]
Niveau de l'effet:
0–30
Contrôle la
profondeur de
l'effet
Spécifie la
profondeur de
l'effet à la
position de
pédale maximale
(*1)
Certains réglages risquent de produire de la distorsion. Réduisez dans ce cas la valeur du paramètre.
(*2)
La touche n'aura pas d'effet sur la valeur.
(*3)
Le temps de Reverb est réglé de façon à doubler l'intervalle de temps réglé au moyen de TAP.
24
Pédale d'expression
Sélection de l'effet qui sera contrôlé par la pédale
Appuyez sur la touche PEDAL FX pour sélectionner l'effet qui
sera contrôlé par la pédale. La LED située à gauche indique
l'effet (ou volume) qui sera contrôlé.
ORG: NOTCH (orange): Fréquence du filtre à sillon
RED : CHO (rouge): Effet Chorus
GRN: AMB (vert): Effet sélectionné avec AMBIENCE
OFF: VOLUME (éteint): Pédale de volume
Utilisation de la pédale pour activer/désactiver
l'effet
En enfonçant complètement la pédale, vous pouvez activer ou
désactiver l'effet assigné à PEDAL FX. Lorsque l'effet est
activé, la LED à gauche de la pédale s'allume. Si VOLUME ou
NOTCH est assigné à PEDAL FX, la LED ne pourra pas
s'éteindre.
Réglage de la valeur minimale de la pédale de
volume
Si VOLUME est assigné à PEDAL FX, vous pourrez maintenir
la touche FUNCTION enfoncée et utiliser les touches MIC &
BODY DEPTH pour spécifier le volume minimal qui sera
contrôlé par la pédale (VOL PEDAL MIN).
Sauvegarde du son d'une position de pédale
spécifique
Si AMB, CHO ou VOLUME est assigné à PEDAL FX, il vous
sera impossible de sauvegarder le son produit en actionnant
la pédale. L'effet produit dépendra toujours de la position
actuelle de la pédale. Néanmoins, si NOTCH est assigné à
PEDAL FX, vous pourrez sauvegarder la fréquence du filtre à
sillon spécifiée en actionnant la pédale.
NR (Réduction du bruit)
Vous pouvez régler la quantité de réduction du bruit en
tournant le bouton de commande de tonalité LEVEL (NR) tout
en maintenant la touche FUNCTION enfoncée.
Suivant l'appareil raccordé, une réduction de bruit trop
importante peut entraîner la perte de plusieurs notes. Dans ce
cas, baissez le niveau de réduction.
Enregistrement d'un
programme
Lorsque vous avez créé un son que vous souhaitez conserver,
vous pouvez l'enregistrer dans un des 40 programmes
utilisateur (0.1–9.4).
Si vous changez de programme ou mettez l'appareil hors
tension avant d'avoir enregistré votre programme édité, les
changements effectués seront perdus.
Le programme dans la mémoire de destination sera écrasé
par réécriture.
1.
Appuyez sur la touche WRITE. Le numéro de programme
clignotera sur l'écran et l'AX10A passera en mode “write-
ready”.
2.
Utilisez les commutateurs de sélection de programme
pour sélectionner la mémoire où vous souhaitez
enregistrer le programme.
Vous ne pouvez pas remplacer un programme préréglé (01–
94).
3.
Appuyez sur la touche WRITE pour enregistrer le
programme sous le numéro de programme sélectionné.
Si vous décidez de ne pas enregistrer le programme,
appuyez sur une des touches MASTER (CANCEL) au
choix pour quitter le mode write-ready (l'affichage
clignote). L'appareil reviendra en mode de fonctionnement
normal.
2
3
1, 3
TYPEDescriptionNormalPEDAL FX: CHO
CHORUSPEDALCHORUS
CHORUS
Chorus stéréo électroacoustique.
Profondeur de
l'effet: 0…30
Profondeur de
l'effet
Aucun effet
25
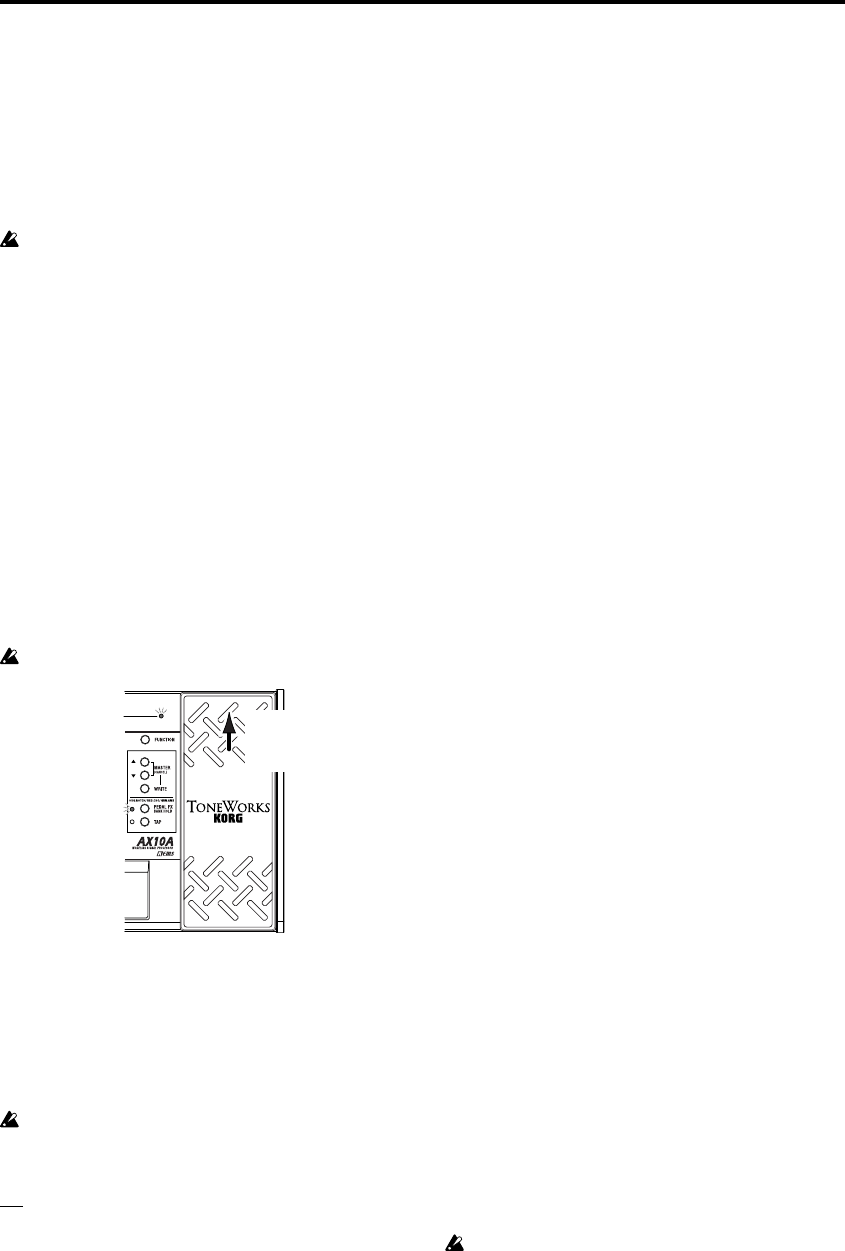
Autres fonctions
Calibrage de la pédale
d'expression
Si la pédale d'expression ne fonctionne pas correctement,
veuillez effectuer la procédure décrite ci-dessous.
Lorsque vous calibrez la pédale utilisez votre main car un
réglage précis ne sera pas possible si vous utilisez votre pied.
1.
Tout en maintenant simultanément enfoncées les touches
FUNCTION et PEDAL FX, mettez l'appareil sous tension.
L'écran affichera
pendant environ une seconde, puis
.
2.
Déplacez doucement la pédale vers l'arrière. Lorsqu'elle
s'arrête, retirez votre main de la pédale et appuyez sur la
touche PEDAL FX.
L'affichage passera de
à
Si vous appuyez sur la touche MASTER (CANCEL)
pendant l'opération de calibrage, le calibrage sera
interrompu et le numéro de programme apparaîtra.
2. Appuyez lentement
3. Appuyez lentement
3.
Déplacez lentement la pédale vers l'avant. Lorsqu'elle
s'arrête, retirez votre main de la pédale et appuyez sur la
touche PEDAL FX.
Lorsque le réglage est terminé, l'affichage
, clignote et
le numéro de programme apparaît. Vérifiez la pédale pour
vous assurer que les réglages sont corrects.
CONSEILS
Si vous assignez par exemple PEDAL FX à VOLUME et réglez
VOL PEDAL MIN sur “0”, il sera facile de vérifier le niveau MIN
après le retour complet de la pédale.
En cas d'échec de l'opération de calibrage, l'écran affichera
et l'affichage précédant la calibration sera visible (). Si
plusieurs essais répétés échouent, il est possible que cela soit
dû à un dysfonctionnement de l'AX10A. Contactez votre
revendeur.
Réinitialisation des programmes
aux réglages d'usine
1.
Tout en maintenant la touche WRITE enfoncée, mettez
l'appareil sous tension.
L'écran affichera
.
Si vous décidez de commencer normalement sans
charger les réglages d'usine, appuyez sur une des
touches MASTER (CANCEL) au choix.
2.
Pendant que l'écran affiche , appuyez sur la touche
WRITE. Les programmes d'usine seront chargés dans la
zone utilisateur (0.1–9.4). Lorsque le chargement est
terminé, l'affichage
clignote, puis le numéro de
programme apparaît.
Ne mettez jamais l'appareil hors tension pendant que cette
opération est en cours.
Veuillez noter que si vous chargez de nouveau les program-
mes préréglés, tous les programmes écrits précédemment
seront écrasées par réécriture.
Guide de dépannage
Si l'AX10A ne fonctionne pas de la façon souhaitée, veuillez
vérifier tout d'abord les points suivants. Si vous n'arrivez pas
malgré tout à résoudre le problème, contactez votre reven-
deur.
L'appareil ne se met pas sous tension.
❑
Y a-t-il des piles dans l'appareil ? Ou bien, l'adaptateur
secteur est-il branché sur une prise secteur ? (p.20)
❑
Un câble avec fiche mono est-il raccordé à la prise
Libble nimmt den Missbrauch seiner Dienste sehr ernst. Wir setzen uns dafür ein, derartige Missbrauchsfälle gemäß den Gesetzen Ihres Heimatlandes zu behandeln. Wenn Sie eine Meldung übermitteln, überprüfen wir Ihre Informationen und ergreifen entsprechende Maßnahmen. Wir melden uns nur dann wieder bei Ihnen, wenn wir weitere Einzelheiten wissen müssen oder weitere Informationen für Sie haben.
Art des Missbrauchs:
Forenregeln
Um zu sinnvolle Fragen zu kommen halten Sie sich bitte an folgende Spielregeln:
Lesen Sie zuerst die Anleitung;
Schauen Sie nach, ob die Frage bereits gestellt wurde;
Stellen Sie die Frage so deutlich wie nur einigermaßen möglich;
Erwähnen Sie was Sie bereits versucht haben um das Problem zu lösen;
Ist Ihr Problem von einem Besucher gelöst dann lassen Sie ihn / sie wissen in diesem Forum;
Falls Sie reagieren möchten, so verwenden Sie bitte das Antworten- Formular;
Da ihre Frage für alle Besucher sichtbar ist, sollten Sie lieber keine persönliche Daten erwähnen.
Neu registrieren
Registrieren auf E - Mails für Korg AX10A wenn:
neue Frage gestellt werden
neue Handbücher vorhanden sind
Sie erhalten eine E-Mail, um sich für eine oder beide Optionen anzumelden.
Das Handbuch wird per E-Mail gesendet. Überprüfen Sie ihre E-Mail.
Wenn Sie innerhalb von 15 Minuten keine E-Mail mit dem Handbuch erhalten haben, kann es sein, dass Sie eine falsche E-Mail-Adresse eingegeben haben oder dass Ihr ISP eine maximale Größe eingestellt hat, um E-Mails zu erhalten, die kleiner als die Größe des Handbuchs sind.
Ihre Frage wurde zu diesem Forum hinzugefügt
Möchten Sie eine E-Mail erhalten, wenn neue Antworten und Fragen veröffentlicht werden? Geben Sie bitte Ihre Email-Adresse ein.