14
ENGLISH
Euro scart connection
(Depending on model)
Transmits the video and audio signals from an external device to the
TV set. Connect the external device and the TV set with the euro scart
cable.
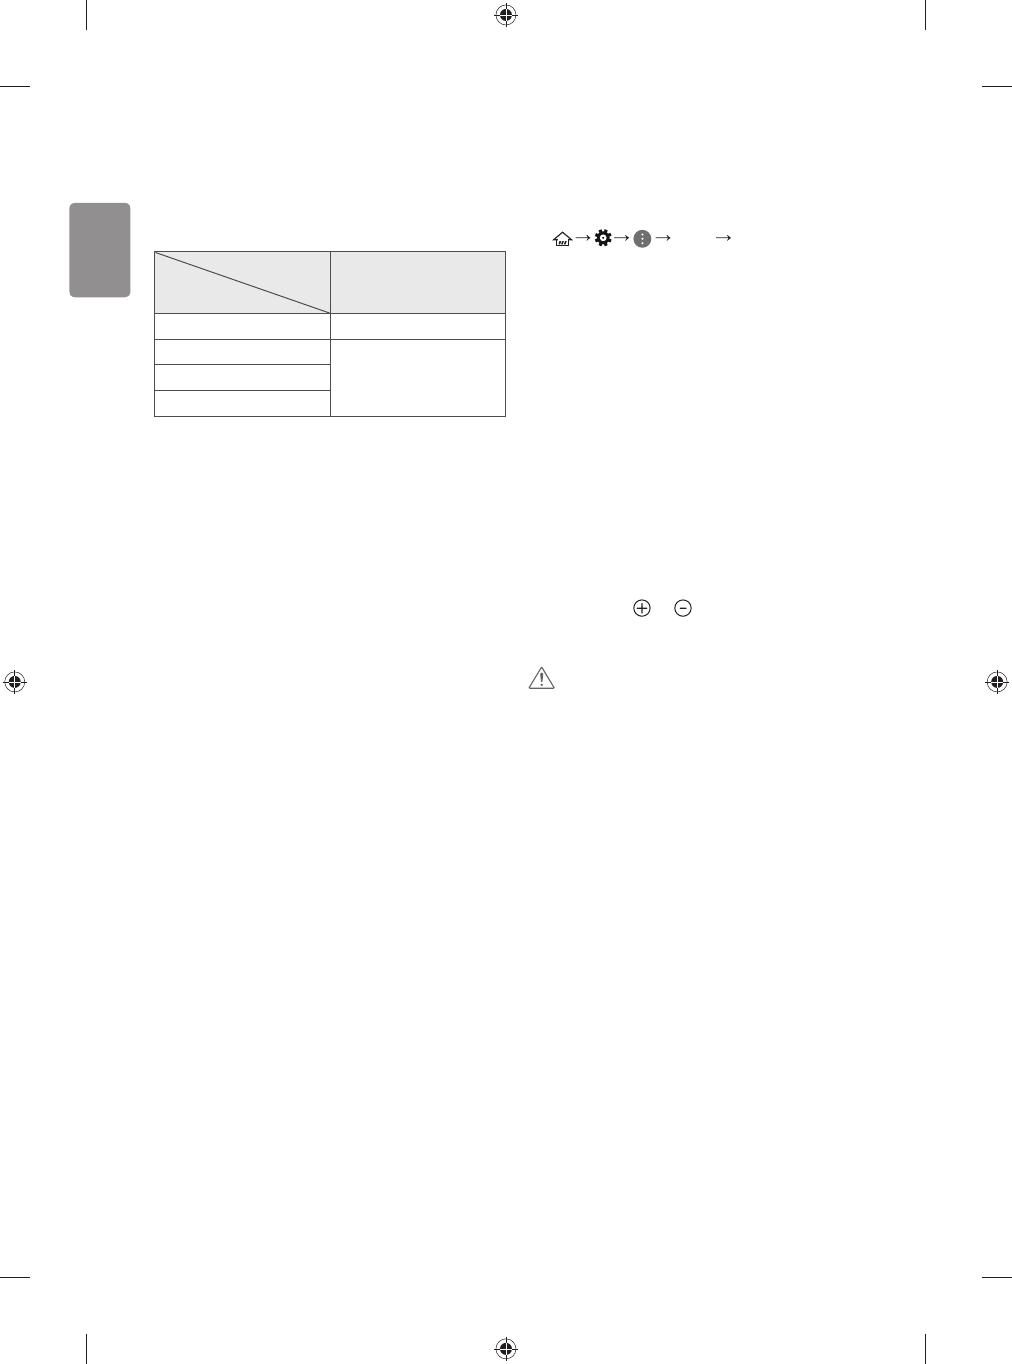
Output Type
Current
input mode
AV1
(TV Out
1
)
Digital TV Digital TV
Analogue TV, AV
Analogue TVComponent
HDMI
1 TV Out : Outputs Analogue TV or Digital TV signals.
t Any Euro scart cable used must be signal shielded.
t When watching digital TV in 3D imaging mode, only 2D out signals
can be output through the SCART cable. (Only 3D models)
t If you use the Time Machine function on digital TV, TV out signals
cannot be output through the SCART cable.
CI module connection
(Depending on model)
View the encrypted (pay) services in digital TV mode.
t Check if the CI module is inserted into the PCMCIA card slot in the
right direction. If the module is not inserted properly, this can
cause damage to the TV and the PCMCIA card slot.
t If the TV does not display any video and audio when CI+ CAM is
connected, please contact to the Terrestrial/Cable/Satellite Service
Operator.
USB connection
(Depending on model)
Some USB Hubs may not work. If a USB device connected using a USB
Hub is not detected, connect it to the USB port on the TV directly.
Other connections
Connect your TV to external devices. For the best picture and audio
quality, connect the external device and the TV with the HDMI cable.
Some separate cable is not provided.
t
! !
!
Picture HDMI ULTRA HD Deep
Colour
- On : Support 4K @ 50/60 Hz (4:4:4, 4:2:2, 4:2:0)
- Off : Support 4K @ 50/60 Hz (4:2:0)
If the device connected to Input Port also supports ULTRA HD Deep
Colour, your picture may be clearer. However, if the device doesn’t
support it, it may not work properly. In that case, connect the device
to a dierent HDMI port or change the TV’s HDMI ULTRA HD Deep
Colour setting to Off.
(This feature is available on certain models which are supported
ULTRA HD Deep Colour only.)
Remote control
The descriptions in this manual are based on the buttons on the remote
control. Please read this manual carefully and use the TV correctly.
To replace batteries, open the battery cover, replace batteries (1.5
V AAA) matching the
and ends to the label inside the
compartment, and close the battery cover. To remove the batteries,
perform the installation actions in reverse.
CAUTION
t Do not mix old and new batteries, as this may damage the remote
control.
t The remote control will not be included for all sales market.
Make sure to point the remote control toward the remote control sensor
on the TV.