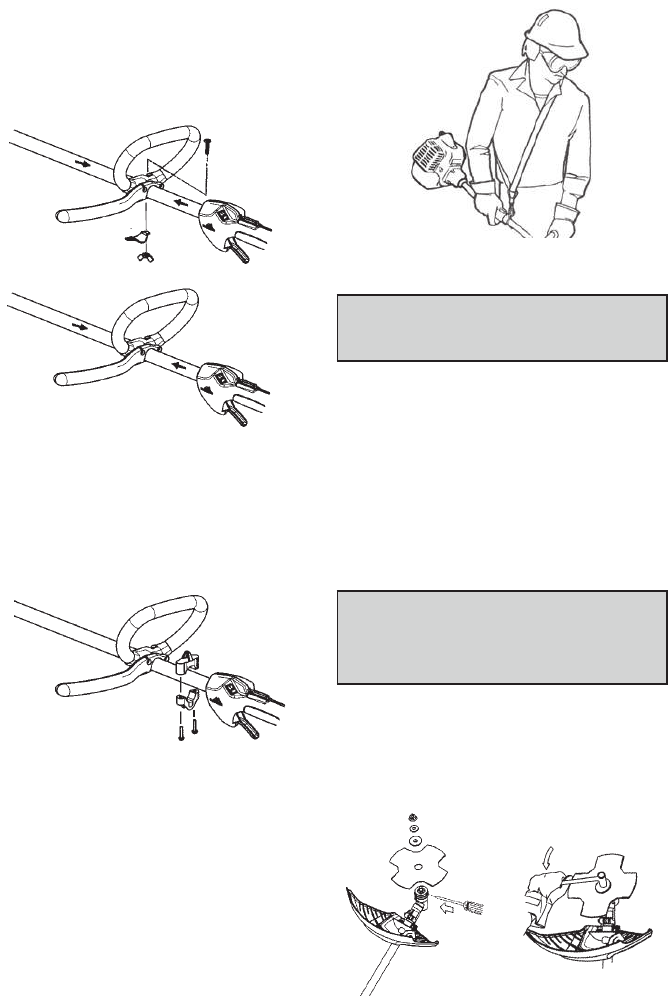
:KHQDGMXVWLQJWKH-EDUKDQGOHEHVXUHLWUHPDLQV
above the safety label and below the mark or arrow on
the shaft.
1. 3RVLWLRQWKH-EDUKDQGOHRQWKHVKDIW1RWHWKDW
the handle must be mounted between the two
arrows on the shaft.
2. Fit the screw, securing plate and wing nut as
shown.
3. 0DNHD¿QDODGMXVWPHQWRIWKH-EDUKDQGOHWRD
comfortable working position.
4. Tighten the wing nut.
ATTACHING THE HARNESS CLAMP
1. Place the upper harness clamp over the shaft and
position the lower harness clamp under the shaft.
Align the upper and lower clamp screw holes. The
clamp must be attached above the arrow on the
shaft.
2. Insert the two screws into the screw holes.
3. Secure the harness clamp by tightening the screws
with a hex wrench.
ATTACHING THE HARNESS
1. Insert your right arm and head through the harness
and allow it to rest on your left shoulder. Make sure
the harness hook is to the right side of your waist.
2. Adjust the harness, allowing the hook to be about
15 cm below the waist.
3. Fasten the harness to the harness clamp on the
shaft and lift the machine to the operating position.
4. 0DNHD¿QDODGMXVWPHQWVRWKDWWKHPDFKLQHLVLQ
a comfortable working position when it hangs from
the harness.
NOTE: It may be necessary to relocate the harness
clamp on the shaft for proper balancing of
machine.
5. Adjust the harness so that the cutting attachment
is parallel to the ground.
6. Let the cutting attachment rest lightly on the
ground. If you use a grass blade, it should balance
about 10 cm above the ground to prevent contact
with stones and the like. Adjust the position of the
harness clamp to balance the machine correctly.
CUTTING EQUIPMENT SELECTION
AND ATTACHMENT
a WARNING: Never use a cutting attachment
without an approved shield. Attaching an
incorrect or faulty shield can cause serious
personal injury.
CUTTING EQUIPMENT SELECTION
Use a grass blade to cut coarse grass.
Use a trimmer head to trim grass.
ATTACHING THE GRASS BLADE
1. Turn the bevel gear shaft until one of the holes in
the dust cup aligns with the corresponding hole in
the bevel gear.
2. Insert a small screwdriver in the hole to lock the
bevel gear shaft.
3. Place the blade and retaining washer onto the
shaft of the bevel gear.
a :$51,1*:KHQ¿WWLQJEODGHVLWLV
extremely important that the raised section
on the retaining washer engages correctly
in the centre hole of the blade. If the blade is
attached incorrectly, it can result in serious
and/or fatal personal injury.
4. Place the cupped washer onto the bevel gear
shaft with the cupped side of the washer toward
the blade.
5. Install the blade nut. Tighten the nut using a
wrench. Turn in the opposite direction to the
GLUHFWLRQRIURWDWLRQ7KHQXWKDVDOHIWKDQG
thread.