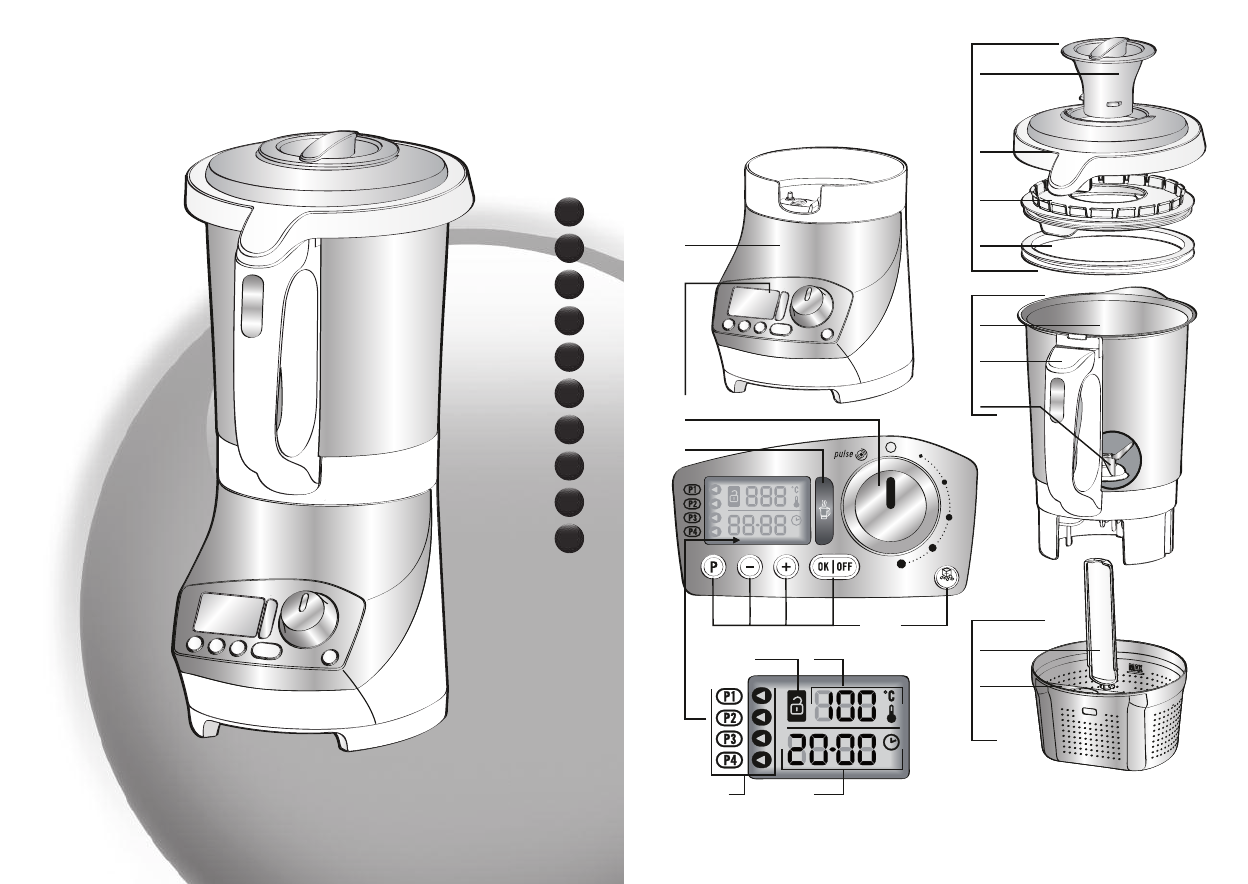
660946
1
Zoom out
Zoom in
Vorherige Seite
1/41
Nächste Seite
Réf. 0828789
FR p. 1 - 8
EN p. 9 - 16
IT p. 17 - 24
ES p. 25 - 32
PT p. 33 - 40
DE p. 41 - 48
NL p. 49 - 56
AR p. 57 - 64
FA p. 65 - 72
ice
max
0
E
A
e1
e2
e3
e4
D
d1
d2
d3
B
b2
b1
b3
c4
C
c1
F*
f1
f2
b4
c3 c2
FR
IT
ES
PT
DE
NL
EL
AR
FA
EN
8 9
6
7
!
!
M
I
N
!
!
M
A
X
1.a
1.b
2
3
4
5
"
c
l
i
c
k
"
2
1
12
2
1
10
13
*
1
A Bloc moteur
B Tableau de commande
b1 Touches de sélection
– P - Programmes automatiques
P1 : Soupe Veloutée / P2 : Soupe Moulinée /
Cuisson vapeur: P3 (selon modèle*)
Autoclean: P3 ou P4 (selon modèle*)
-/+ – Diminution/Augmentation de la
durée ou de la température de cuisson
– OK/OFF – Validation d’un choix de
programme, de la durée ou de la
température de cuisson /Arrêt de
l’appareil
b2 Témoin lumineux de chauffe (si >50°C à
l’intérieur du bol)
b3 Sélecteur de vitesses
b4 Touche Ice crush (piler des glaçons)
C Ecran d’affichage
c1 Affichage température réglée
de 60 à 100°C
c2 Affichage timer (temps réglable
de 0 à 59 min)
c3 Affichage programme (P1, P2, P3 et P4
selon modèle*)
c4 Affichage témoin de sécurité
D Ensemble Bol blender
d1 Bol inox (repère Max = 1.8 litre)
d2 Gâchette poignée
d3 Lames inox
E Ensemble couvercle
e1 Bouchon doseur
e2 Couvercle
e3 Porte-joint
e4 Joint d’étanchéité
F Panier de cuisson (selon modèle*)
f1 poignée
f2 panier
Données techniques de l’appareil :
Température maximum : 100°C
Puissance : 1100W
Temps de programmation maximum : 59 minutes.
Vis-à-vis de la sécurité de la
personne
Lisez attentivement le mode
d’emploi avant la première
utilisation de votre appareil
et conservez-le : une utilisation
non conforme au mode
d’emploi gagerait le fabricant
de toute responsabilité.
Ne pas laisser les enfants utiliser
l’appareil sans surveillance.
Cet appareil ne doit pas
être utilisé par les enfants.
En parcourant cette notice, vous découvrirez des conseils d’utilisation qui vous feront entrevoir le
potentiel de votre appareil : préparation de soupes veloutées ou moulinées, de soupes avec
morceaux, de sauces et de compotes, de smoothies, de cocktails et des recettes vapeur...
Conserver l’appareil et son câble
hors de portée des enfants.
Cet appareil n’est pas prévu
pour être utilisé par des
personnes (y compris les
enfants) dont les capacités phy -
siques, sensorielles ou mentales
sont réduites ou des personnes
dénuées d’expérience ou de
connaissance, sauf si elles ont pu
bénéficier, par l’inter médiaire
d’une personne responsable de
leur sécurité, d’une surveillance
ou d’instructions préalables
FR
DESCRIPTION DE L’APPAREIL
CONSIGNES DE SECURITE
2 3
l’utilisation de l’appareil en
toute sécurité et en compren -
nent bien les dangers potentiel.
Cet appareil peut être utili par
des enfants âgés d’au moins 8
ans , à condition qu’ils
bénéficient d’une surveillance
ou qu’ils aient reçu des
instructions quant à lutilisation
de l’appareil en toute sécurité et
qu’ils comprennent bien les
dangers encourus. Le nettoyage
et l’entretien par l’utilisateur ne
doivent pas être effectués par
des enfants sans surveillance, à
moins qu’ils ne soient âgés de
plus de 8 ans et qu’ils soient
sous la surveillance d’un adulte.
Votre appareil émet de
la vapeur qui peut
occasionner des brûlures.
Manipulez avec précau tion le
couvercle et le bouchon doseur
(utilisez si nécessaire un gant,
une manique, etc). Manipulez le
bouchon doseur par sa partie
centrale.
Être vigilant si un liquide
chaud est versé dans le
préparateur culinaire ou le
mélangeur dans la mesure où
il peut être éjecté de l'appareil
en raison d'une ébullition
soudaine.
Ne faites pas fonctionner
l’appareil si le bouchon doseur
n’est pas positionné dans
l’orifice du couvercle, si le
joint n’est pas positionné sur
le support-joint, si le porte-
joint n’est pas assemblé dans
le couvercle.
Attention aux risques de
blessure en cas de mauvaise
utilisation de l’appareil.
Les lames sont très
coupantes : manipulez-
les avec précaution pour
ne pas vous blesser lors
du vidage du bol et du
nettoyage.
Vis-à-vis du raccordement
électrique
L’appareil doit être branché sur
une prise de courant électrique
reliée à la terre.
L’appareil est conçu pour
fonctionner uniquement en
courant alternatif. Vérifiez que la
tension d’alimentation indiquée
sur la plaque signalétique de
l’appareil corresponde bien à
celle de votre installation
électrique.
Toujours déconnecter l'appareil
de l'alimentation, si on le laisse
sans surveillance et avant
montage, démontage et
nettoyage.
Toute erreur de branchement
annule la garantie.
concernant l’utilisation de
l’appareil.
Il convient de surveiller les
enfants pour s’assurer qu’ils ne
jouent pas avec l’appareil.
Maintenez votre appareil hors
de pore des enfants.
Lors de l’utilisation de l’appareil,
certaines pièces atteignent des
températures élevées (paroi inox
du bol, parties transparentes du
couvercle et du bouchon, pces
métalliques sous le bol, panier).
Elles peuvent occasionner des
brûlures. Manipulez l’appareil
par les pièces plastiques froides
(poignées, bloc moteur). Le
témoin lumineux de chauffe
rouge indique qu’il y a un risque
de blure.
N’utilisez pas votre appareil s’il
ne fonctionne pas correctement,
s’il a été endommagé ou si le
ble d’alimentation ou la prise
sont endommas. Afin d’éviter
tout danger, faites obligatoire -
ment remplacer le cordon par un
centre service agréé (voir liste
dans le livret service).
Votre machine a été conçue
pour un usage domestique
seulement. Le fabricant décline
toute responsabilité et se réserve
le droit de résilier la garantie en
cas d’utilisation commerciale ou
inadaptée, ou de non respect
des consignes.
Cet appareil n’est pas destiné à
être utilisé dans des applications
domestiques et analogues telles
que
- zone de travail de cuisine dans les
magasins, bureaux et autres
environnements de travail.
- des coins cuisines réservés au
personnel dans des magasins,
bureaux et autres environ -
nements professionnels.
- des fermes.
- l’utilisation par les clients des
tels, motels et autres environ -
nements à caractère sidentiel.
- des environnements du type
chambres d’hôtes.
Marchés européens
seulement :
Conserver l’appareil et son câble
hors de portée des enfants âgés
de moins de 8 ans.
Les enfants ne doivent pas
utiliser l’appareil comme un
jouet.
Cet appareil peut être utili par
des personnes dont les capacités
physiques, sensorielles ou
mentales sont réduites ou dont
l’expérience ou les connais -
sances ne sont pas suffisantes, à
condition qu’ils bénéficient
d’une surveillance ou quils aient
reçu des instructions quant à
54
l’ensemble sur le couvercle (Cf. Fig. 1.b).
• Pour réaliser des cuissons vapeur, positionnez le panier
avec les légumes coupés en morceaux et remplissez le
bol avec 0.5 litre d'eau froide sans dépasser le bas du
panier (cf. Fig. 10 et 11).
• Positionnez le couvercle (E) sur le bol (D) en alignant les
deux triangles (Cf. Fig. 2), verrouillez le couvercle sans
appuyer en le tournant dans le sens de la flèche (Cf. Fig.
3). Positionnez le bol blender (D) sur le bloc moteur (A)
jusqu’à entendre un « clic » (Cf. Fig. 4).
• L’appareil démarre uniquement si le bol et le
couvercle sont correctement positionnés et verrouillés
sur le bloc moteur.
En cas de mauvais positionnement ou de mauvais
verrouillage de l’un ou de l’autre (Cf. Fig. 5 et 6), le
logo se met à clignoter lorsque l’on active une
fonction.
Votre appareil possède 3 modes de fonctionnement :
• Mode programme automatique : température, durée de
cuisson et durée de mixage sont préprogrammées pour
réaliser des soupes ou des cuissons vapeur en
automatique.
Mode manuel : réglages personnalisés de la température,
de la durée de cuisson pour une utilisation selon votre
convenance.
• Mode blender : lection de la vitesse moteur sans
utiliser la fonction cuisson pour réaliser de savoureux
smoothies, cocktails.
Mise en place du bol et de l’ensemble couvercle
• Avant la première utilisation, nettoyez tous les
accessoires (D, E et F) à l’eau chaude savonneuse, mais
pas le bloc moteur (A).
• Assurez-vous que tout emballage soit retiré avant le
fonctionnement de l’appareil.
• Placez le joint sur le porte-joint (Cf. Fig. 1.a) et clipsez
MISE EN SERVICE
Ne tirez jamais sur le câble
d'alimentation pour brancher
l'appareil.
Ne mettez pas l'appareil, le
ble d'alimentation ou la prise
dans du liquide.
L'appareil ne doit pas être
immergé
Ne laissez pas le ble
d’alimentation à portée de
mains des enfants, être à
proximité ou en contact avec les
parties chaudes de l’appareil,
près d’une source de chaleur ou
sur un angle vif.
Vis-à-vis d’une mauvaise
utilisation
N’utilisez jamais le bol blender
sans ingrédient ou avec des
produits secs uniquement.
Versez toujours les ingrédients
solides en premier dans le bol
avant d’ajouter des ingrédients
liquides, sans passer le repère
1,8 L MAX gravé à l’intérieur du
bol. (Cf. Fig. 8)
.
Si le blender est
trop rempli, de l’eau bouillante
peut-être éjectée. Attention à
avoir un niveau de liquide
suffisant pour recouvrir le repère
mini (Cf. Fig. 7)
.
Certaines recettes peuvent
provoquer des débordements
intempestifs, en raison de
l’apparition de bulles, en
particulier lors de l’utilisation de
légumes congelés. Dans ce cas,
il vous appartient de réduire les
volumes en conséquence.
Ne placez jamais vos doigts ou
tout autre objet dans le bol
blender pendant le fonction -
nement de l’appareil.
N’utilisez pas le bol comme
récipient (congélation, stérilisa -
tion).
Placez l’appareil sur un plan de
travail stable, sistant à la
chaleur, propre et sec.
Ne placez pas l’appareil près
d’un mur ou d’un placard :
la vapeur produite pouvant
endommager les éments.
Ne laissez pas pendre vos
cheveux, un foulard, une
cravate,… au dessus du bol
pendant le fonctionnement de
l’appareil.
Ne passez jamais les accessoires
dans un four à micro-ondes.
N’utilisez pas l’appareil en plein
air.
Ne dépassez jamais la quanti
maximum indiquée dans la
notice.
Rangez l’appareil lorsqu’il est
refroidi.
SAV
Pour votre sécurité, n’utilisez pas
d’accessoires ou de pièces de
rechange, autres que ceux
fournis par les centres de service
aps-vente agés.
N’utilisez pas votre appareil s’il
ne fonctionne pas correctement,
s’il a été endommagé ou si le
ble d’alimentation ou la prise
sont endommas.
Afin d’éviter tout danger, faites
obligatoirement remplacer le
cordon par un centre service agréé
(voir liste dans le livret service).
Toute intervention autre que le
nettoyage et l’entretien usuel
par le client doit être effectuée
par un centre service agréé.
MODE MANUEL
Ajustez le temps de cuisson à l’aide des touches +
(augmenter) et (diminuer) en fonction des
ingrédients utilisés et du volume préparé (voir tableau
des temps de cuisson des soupes dans le livret recettes).
• Validez ensuite le temps lectionpar la touche
OK.
• L’information température clignote, vous avez la
possibilité de modifier cette information. Réglez la
température de cuisson à l’aide des touches +
(augmenter) et – (diminuer).
Validez ensuite la température sélectionnée par la
touche OK.
• Le témoin lumineux rouge s’allume pour vous
informer que la cuisson a démarré.
• A tout moment vous pouvez actionner le moteur
soit :
- en vitesse lente (position 1) pour mélanger des
aliments liquides (ex : réalisation de sauces).
- en vitesse rapide partir de la position 2) pour
mixer des aliments solides.
MODE BLENDER (sans cuisson)
Sélectionnez une vitesse en tournant le
sélecteur à droite. Le mixage démarre et
le temps s’affiche sur l’écran. En mode
blender, vous pouvez sélectionner jusqu’à 5 vitesses de
mixage différentes. La vitesse pulse se trouve à gauche
de la position 0.
• Tournez le sélecteur de vitesses sur la position 0 pour
arrêter l’appareil.
• Appuyez sur la gâchette (d2) puis soulevez le bol
blender (D). Si vous souhaitez programmer un temps
de fonctionnement avec arrêt automatique :
• Ajustez le temps de fonctionnement à l’aide des
touches + (augmenter) et – (diminuer).
• Sélectionnez une vitesse en tournant le sélecteur. Le
décompte temps s’affiche sur l’écran.
• Le moteur s’arrête automatiquement à la fin du
décompte temps.
Touche glace pilée : la touche « Ice » déclenche le
fonctionnement qui permet de réaliser de la glace
pilée. Vous pouvez arrêter l’appareil à votre
convenance en appuyant sur la touche « OFF ». Vous
pouvez piler 6 à 8 glaçons maximum.
7
ice
max
0
• L’appareil ne doit pas être immergé. Ne passez pas le
bloc moteur (A) sous l’eau chaude courante.
• Nettoyer immédiatement votre bol après utilisation.
• Remplissez le bol avec 1 litre d’eau chaude
additionné de 2, 3 gouttes de produit lessiviel.
Respectez les quantités d’eau et de liquide vaisselle
préconisés. Un surplus de liquide vaisselle
augmente fortement le moussage et par
conséquent favorise les débordements.
• Utilisez le programme automatique Autoclean : P3
ou P4 (selon modèle*) pour aliser un prélavage
du bol.
• Une fois le programme terminé, débranchez
l’appareil.
• Appuyez sur la gâchette (d2) puis soulevez le bol
blender (D).
• Placez le bol sur une surface plane.
• Déverrouillez le couvercle en le tournant d’un quart
de tour dans le sens des aiguilles d’une montre.
Retirez le couvercle avec précaution.
• Lorsque les pièces sont refroidies, déclipsez le porte-
joint du couvercle à l’aide des zones de préhension.
• Finissez le nettoyage du bol à l’aide d’une éponge.
• Rincez l’intérieur du bol sous l’eau courante ainsi que
son couvercle.
• En cas d’encrassement pronon de la partie
chauffante du bol, laissez tremper pendant plusieurs
heures avec de l’eau additionnée de liquide vaisselle
pour faciliter le nettoyage.
Prenez des précautions avec les lames
(d3) du bol blender lorsque vous les
nettoyez et lorsque vous videz le bol,
elles sont coupantes.
• Pour nettoyer le bloc moteur (A), utilisez un chiffon
humide. Séchez-le soigneusement.
• Les éléments amovibles (couvercle, porte joint, joint,
bouchon doseur, panier de cuisson) se nettoient à
l’aide d’une éponge et d’eau chaude savonneuse.
NETTOYAGE DE L’APPAREIL
6
UTILISATION DE L’APPAREIL
MODE PROGRAMME
Une fois l’eau et les ingrédients placés au fond du bol ou dans le panier vapeur, verrouillez le couvercle et positionnez le
b
ol sur le bloc moteur (voir mise en service).
Sélectionnez un des programmes automatiques proposés ci-dessous (touche P) et validez (touche OK).
Lorsque le programme est terminé, l’appareil émet 3 bips.
Déverrouillez le bol en appuyant sur la gâchette (d2) située à l’intérieur de la poignée (cf. Fig. 9) et servez de suite ou
laissez le bol en place en maintien au chaud (jusqu’à 40 minutes).
Découvrez les programmes automatiques proposés
Température (Max) Temps ajustable Mixage
P1 - Soupe Veloutée
(texture fine)
100°C
25 min.
(+ ou -10 min)
Vitesse maxi
1 min
P2 - Soupe Moulinée
(texture dense)
100°C
35 min.
(+ ou -10 min)
Vitesse mini
13s
P3 (uniquement pour le modèle
disposant du panier de cuisson ) –
Cuisson vapeur avec le panier de
cuisson et 50 cl d’eau (selon modèle*)
100°C
30 min.
(+ ou -20 min)
Non
P3 (ou P4 pour le modèle disposant
du panier de cuisson) - Auto clean :
programme automatique de
nettoyage
100°C
30 s
(ajustable
jusqu'à 1 min)
Vitesse maxi
CONSEILS PRATIQUES
• Attention à avoir un niveau de liquide suffisant pour
recouvrir le repère mini (Cf. Fig. 7). et à ne pas
dépasser le repère 1,8 L MAX gravé à l’intérieur du
bol (Cf. Fig. 8).
• Certaines recettes peuvent provoquer des
débordements intempestifs, en raison de
l’apparition de bulles, en particulier lors de
l’utilisation de légumes congelés. Dans ce cas, il vous
appartient de réduire les volumes en conséquence.
• L’information temps ou température clignote : vous
avez la possibilité de modifier cette information.
Ajustez si besoin le temps à l’aide des touches +
(augmenter) et (diminuer), en fonction des
ingrédients utilisés et du volume préparé (voir
tableau des temps de cuisson des soupes dans le
livret recettes).
• Le panier de cuisson (selon modèle*) vous permet
de réaliser des cuissons vapeur (en P3 avec 0.5 litre
d'eau), ou pour une préparation avec morceaux, de
cuire des ingrédients entiers tels que viandes,
poissons, légumes, en même temps que votre soupe,
(en P1 ou P2).
• A la fin des programmes, l’appareil passe automa -
tiquement en maintien au chaud pendant 40 minutes
pour conserver la pparation prête à être consome.
Pour stopper le maintien au chaud, il suffit d’appuyer
sur la touche OFF.
Si vous ouvrez le couvercle, appuyez sur la gâchette ou
retirez le bol, le maintien au chaud sera
automatiquement arrêté.
• Lorsque le programme est lancé, vous avez la
possibilité d’arrêter l’appareil à tout moment en
appuyant sur la touche P. Le programme est alors en
mode pause, vous avez la possibilité de le relancer en
appuyant de nouveau sur P ou sur la touche OK.
Si vous vous êtes trompé de programme et si vous
voulez annuler, appuyez pendant 2 secondes sur le
bouton OFF, cela permet de réinitialiser les temps et
les températures.
9
A Motor unit
B Control panel
b1 Selection buttons
– P - Automatic programs
P1 : Creamy soup/P2: Thick soup/
Steam cooking: P3 (depending on model*)
Autoclean: P3 or P4 (depending on model*)
-/+ – Decrease/Increase cooking time or
temperature
– OK/OFF – Validation of program choice,
cooking time or temperature/Stop appliance
b2 Heat indicator light (if >50°C inside
the jug)
b3 Speed selector button
b4 Ice crush button (for crushing ice-cubes)
C Display screen
c1 Temperature adjustment display from
60 to 100°C
c2 Timer display (time adjustable from
0 to 59 mins)
c3 Programme display (P1, P2, P3 and P4
depending on model*)
c4 Safety indicator display
D Blender jug unit
d1 Stainless steel jug (Max limit = 1.8 litre)
d2 Handle with trigger
d3 Stainless steel blades
E Lid unit
e1 Measuring cap
e2 Lid
e3 Carrier seal
e4 Waterproof seal
F Cooking basket (depending on model*)
f1 handle
f2 basket
Technical data on appliance:
Maximum temperature: 100°C
Power: 1100W
Maximum programming time: 59 minutes.
On personal safety
Read the instructions carefully
before using your appliance for
the first time and retain them for
future use: the manufacturer
cannot accept any liability for
non compliant appliance use.
Do not allow children to use the
appliance without supervision.
This appliance shall not be used
by children.
Keep the appliance and its cord
out of the reach of children.
By reading this guide, you will find some user instructions that will help you discover the full potential
of your appliance: make creamy or thick soups, chunky soups, sauces and fruit purées, smoothies,
cocktails and steam based recipes and much more.
This appliance is not intended to
be used by persons (including
children) with reduced physical,
sensory or mental capacities or
lack of experience and
knowledge, unless they are
supervised or have been given
instructions beforehand concer -
ning use of the appliance by a
person responsible for their
safety.
Children should be supervised to
ensure they do not play with the
appliance.
EN
APPLIANCE DESCRIPTION
SAFETY INSTRUCTIONS
8
SI VOTRE APPAREIL NE FONCTIONNE PAS, QUE FAIRE ?
P
R
O
B
LÈM
ES
CA
US
ES
S
O
L
UTI
O
NS
L’
appar
ei
l
ne
fo
nc
t
i
o
nne
pas
La
pri
s
e
n'
est
p
as
bran
c
h
ée
Branc
hez
l'
ap
par
ei
l
s
ur
une
pri
s
e.
Le
bo
l
o
u
le
c
o
uv
erc
le
n
e
so
nt
pas
c
o
rr
ec
t
em
ent
po
si
t
i
o
nnés
o
u
v
err
o
ui
llés
V
éri
fi
ez
que
le
bo
l
o
u
le
c
o
uv
erc
le
so
nt
bi
en
p
o
si
t
i
o
nnés
et
v
err
o
ui
llés
sui
vant
les
s
c
h
ém
as
d
e
la
n
o
t
i
c
e
V
i
brat
i
o
ns
ex
c
essi
v
es
L’
appar
ei
l
n
'
es
t
pas
po
sur
une
surfac
e
plane,
l’
appar
ei
l
n’
est
pas
s
t
able
P
lac
ez
l’
appar
ei
l
sur
une
surfac
e
plane
Vo
lum
e
d'
i
ng
r
édi
ent
s
t
r
o
p
i
m
po
rt
ant
R
édui
s
ez
la
quant
i
t
é
d
'
i
ngr
éd
i
ent
s
t
rai
t
és
Fui
t
e
par
le
c
o
uv
erc
le
Vo
lum
e
d'
i
ng
r
édi
ent
s
t
r
o
p
i
m
po
rt
ant
R
édui
s
ez
la
q
uant
i
t
é
d
'
i
n
g
r
édi
ent
s
t
rai
t
és
Le
c
o
uv
erc
le
n'
est
p
as
bi
en
p
o
si
t
i
o
nné
o
u
v
err
o
ui
llé
V
err
o
ui
llez
c
o
rr
ec
t
em
ent
le
c
o
uv
erc
le
sur
le
bo
l
Le
j
o
i
nt
d
ét
anc
héi
t
é
n’
est
p
as
p
r
ésent
P
o
si
t
i
o
nn
ez
le
j
o
i
nt
d’
ét
anc
h
éi
t
é
sur
le
p
o
rt
e-
j
o
i
nt
et
c
li
psez
l’
en
s
em
ble
s
ur
le
c
o
uv
erc
le
Le
j
o
i
nt
d
ét
anc
h
éi
t
é
est
c
o
up
é,
dét
éri
o
r
é
C
h
an
g
ez
le
j
o
i
nt
,
c
o
nt
ac
t
ez
un
c
ent
r
e
s
ervi
c
e
agr
éé
Les lames
ne t
our
nen
t
pas facilement
Morceaux
d'ali
ments
trop gros ou trop durs
Réduisez
la t
ai
lle
ou la q
uantité
d'ingrédients traités.
Ajou
tez
d
u
li
q
u
i
d
e
A
ffi
chage
«
s
écu »
Su
rch
arg
e
moteur pro
voqu
ée par une
quantité d’ingrédients trop
i
m
p
or
t
an
te
ou
d
es
m
or
ceau
x
t
rop
d
u
r
s
ou
t
rop
g
ros
.
Lai
ss
ez refroidir
le moteur
et réduisez la quantité d’ingrédients
dan
s
le
bol.
A
ffi
chage
«
s
écu »
+
tém
oi
n
lumineux rouge clignote
Bol
vide,
pres
que vi
de ou
préparation
pas assez liquide
Ajoutez
du li
qui
de jusq
u’au n
iv
eau
minimum du bol (Cf. Fig. 7)
.
A
ffi
chage
«
Err
»
+ témoin lumineux rouge clignote
La rés
is
t
ance chauff
ante
ne fonctionne pas
Cont
ac
tez un centre agréé
A
ffi
chage
«
ntc »
+ témoin lumineux rouge clignote
Le
c
apteur
de température
ne fonctionne plus
Contac
tez un centre agréé
Votre appareil ne fonctionne toujours pas ?
Adressez-vous à un centre service agréé (voir la liste dans le livret service).
• Elimination des matériaux d’emballage et de l’appareil
L'emballage comprend exclusivement des matériaux sans danger pour l'environnement, pouvant
être jetés conformément aux dispositions de recyclage en vigueur.
Pour la mise au rebut de l'appareil, se renseigner auprès du service approprié de votre commune.
• Produits électroniques ou produits électriques en fin de vie :
RECYCLAGE
Participons à la protection de l’environnement !
Votre appareil contient de nombreux matériaux valorisables ou recyclables.
Confiez celui-ci dans un point de collecte pour que son traitement soit effectué.
11
unless they are over 8 years of
age and are being supervised by
an adult.
Your appliance releases
steam which can cause
burns.
Handle the lid and measuring
cap with care (use an oven
glove or pot holder if
necessary). Hold the measu -
ring cap by the central section.
Be careful if hot liquid is
poured into the food processor
or blender as it can be ejected
out of the appliance due to a
sudden steaming.
Do not start up the appliance
if the measuring cap is not
placed in the hole in the lid, if
the seal is not positioned on
the support seal or if the carrier
seal is not fixed in the lid.
Be aware of the risk of injury in
the event of incorrect use of
the appliance.
The blades are very
sharp: handle them with
care so as not to injure
yourself whilst emptying the
jug or during cleaning.
On connection to power supply
The appliance must be plugged
into a socket with an earth
connection.
• The appliance is designed to
work with alternating current
only. Check that the voltage on
your appliance's data plate
corresponds to your domestic
power supply.
• Given the diverse standards in
effect, if the appliance is used in
a country other than that in
which it is purchased, have it
checked by an Approved Service
Centre.
• Always unplug the appliance
from the power supply if you
leave it unattended and before
assembling, dismantling and
cleaning it.
• Any error in connection will
invalidate the guarantee.
Never pull on the power cord
when unplugging the appliance.
• Do not immerse the appliance,
cord or plug in liquid.
• Do not immerse this appliance
in water or any other liquid.
• The power cord must be kept
out of the reach of children and
must not be placed near or
come into contact with the hot
parts of the appliance, sources
of heat or sharp edges.
On incorrect use
Never turn on the blender jug
without ingredients or with dry
products only.
10
Keep the appliance out of the
reach of children.
When using the appliance, some
parts reach high temperatures
(stainless steel side of jug,
transparent parts of the lid and
cap, metallic sections under the
jug, basket). They can cause
burns. Handle the appliance by
the cold plastic parts (handles,
motor unit). The red heat
indicator light comes on if there
is a risk of burning.
Do not use your appliance if it is
not working correctly, if it has
been damaged or if the power
cord or plug have been
damaged. To avoid any danger
have the cord replaced by an
approved service centre (see list
in the service booklet).
The appliance is designed for
domestic use only. The
manufacturer shall not accept
any liability and reserves the
right to cancel the warranty in
the event of commercial or
inappropriate use or failure to
follow the instructions.
This appliance is not intended to
be used in the following appli -
cations, and the guarantee will
not apply for:
- staff kitchen areas in shops,
offices and other working envi -
ron ments;
- farm houses;
- by clients in hotels, motels and
other residential type environ -
ments;
- bed and breakfast type environ -
ments.
European markets only:
Keep the appliance and its cord
out of reach of children under
8 years of age.
Children shall not play with the
appliance.
This appliance may be used by
persons with reduced physical,
sensory or mental capacities,
or by persons with little or no
knowledge of the appliance, as
long as they are under proper
supervision and have received
instructions as to the safe use of
the appliance, and as long as
they understand the implicit
risks.
This appliance may be used by
children as long as they are at
least 8 years old, they are
properly supervised and have
received instructions as to the
safe use of the appliance, and as
long as they understand the
implicit risks. Cleaning and
maintenance of the appliance
should not be carried out by
children without supervision,
13
• To steam cook, put the basket with the sliced
vegetables in position and fill up the jug with 0.5
litres of cold water without exceeding the bottom of
the basket (cf. Fig. 10 and 11).
• Position the lid (E) on the jug (D) lining up the two
triangles (Cf. Fig. 2), lock the lid without pressing by
turning it in the direction of the arrow (Cf. Fig. 3)
Position the blender jug (D) on the motor unit (A)
until you hear it click (Cf. Fig. 4)
The appliance only starts up once the jug and lid
are correctly in place and are locked onto the
motor unit.
In the event of incorrect positioning or locking of one
or the other (Cf. Fig. 5 and 6), the lock sign starts
to flash when you activate a function.
Your appliance has 3 operating modes:
• Automatic program mode: temperature, cooking and
mixing times are pre-programmed to make soups
and to carry out automatic steam cooking.
• Manual Mode: personalised adjustments in
temperature and cooking time for one use can be
made according to your preferences.
• Blender Mode: select the motor speed without using
the cooking function to make some tasty smoothies
or cocktails.
Positioning of the jug and the lid unit
• Before using for the first time, wash all the
accessories (D, E and F) in hot soapy water except
for the motor unit (A).
• Make sure that all packaging is removed before
operating the appliance.
• Put the seal on the carrier seal (Cf. Fig. 1.a) and clip
the unit onto the lid (Cf. Fig. 1.b).
BEFORE FIRST USE
12
Always add solid ingredients
before pouring in any liquid
ingredients, without exceeding
the limit marker of 1.8 L MAX
engraved inside the jug. (Cf. Fig.
8). If the blender is too full,
boiling water may spurt out.
Make sure there is enough liquid
to cover the mini limit marker
(Cf. Fig. 7).
Some recipes may cause
sudden overflowing, due to
the formation of bubbles,
particularly when using frozen
vegetables. In this case, it is up
to you to reduce the quantities
accordingly.
Do not place your fingers or any
other object in the jug while the
appliance is in operation.
Do not use the jug as a
container for freezing or
sterilisation purposes.
Place the appliance on a stable,
heat-resistant, clean, and dry
surface.
Do not place the appliance next
to a wall or a cupboard: the
steam may damage them.
Do not let your hair, a scarf or a
tie amongst other things hang
over the jug whilst the appliance
is in operation.
Do not put any of the
accessories in the microwave.
Do not use the appliance
outdoors.
Never exceed the maximum
quantity indicated in the
instructions.
Put the appliance away once it
has cooled down.
AFTER-SALES SERVICE
For your safety, do not use
accessories or spare parts other
than those provided by the
approved after-sales service
centres.
Do not use your appliance if it
does not operate correctly, if it
has been damaged or if the
power cord or plug is damaged.
To maintain safety, these parts
must be replaced by an
Approved Service Centre.
Contact the Customer Relations
Helpline - see contact list
Any intervention other than
normal cleaning and
maintenance by the customer
must be performed by an
Approved Service Centre."
You then have to validate the temperature chosen by
pressing the
OK button.
The red indicator light lights up to inform you that the
cooking has started.
At any point you can adjust the motor onto either:
- slow speed (position 1) to mix liquid ingredients (e.g.
to make sauces).
- quick speed (position 2 onwards) to mix solid
ingredients.
BLENDER MODE (without cooking)
• Select a speed by turning the speed
selector to the right. The mixing starts
and the time appears on the screen.
In blender mode, you can select up to 5 speeds with
different mixing types.
The pulse speed can be found to the left of
position 0.
• Turn the speed selector to position 0 to stop the
appliance.
• Press on the trigger (d2) then remove the blender jug
(D). If you wish to program an operation time which
stops automatically:
• Adjust the operation time with the aid of the +
(increase) and - (decrease) buttons.
• Select a speed by turning the speed selector. The
count time appears on the screen.
• The motor stops automatically at the end of the
count time.
Ice crushing button: The "Ice" button sets off the ice
crushing operation. You can stop the appliance as
required by pressing the "OFF" button. You can crush a
maximum of 6 to 8 ice cubes.
15
i
ce
max
0
• Do not immerse the appliance in water. Never put the
motor unit (A) under hot running water.
• Clean the jug immediately after use.
• Fill up the jug with 1 litre of hot water along with 2 or
3 drops of washing up liquid Only use the
recommended amount of water and washing up
liquid. An excess of washing up liquid creates more
foam and consequently can lead to overflowing.
• Use the automatic Autoclean programme: P3 or P4
(depending on model*) to carry out a prewash of the
bowl.
• Once the program has stopped, unplug the
appliance.
• Press on the trigger (d2) then remove the blender jug
(D).
• Place the jug on a flat surface.
• Unlock the lid by turning it a quarter turn clockwise.
Remove the lid with care.
• When the parts have cooled down, unclip the lid's
carrier seal with the aid of the gripping system.
• Finish cleaning the jug with the aid of a sponge.
• Rinse the inside of the jug and the lid under running
water.
• In the event of the heated part of the jug getting
extremely dirty, leave to soak for a few hours in a mix
of water and washing up liquid to help get it clean.
Take care when cleaning the blades
(d3) in the blender jug and when you
empty the bowl as they are sharp.
• Use a damp cloth to clean the motor unit (A). Dry it
carefully.
• The detachable parts (lid, carrier seal, seal, measuring
cap, cooking basket) can be cleaned with a sponge
and hot soapy water.
CLEANING THE APPLIANCE
14
USING THE APPLIANCE
PROGRAM MODE
Once the water and the ingredients are placed into the jug or into the steam basket, lock the lid and position the jug onto
t
he motor unit (see before first use).
Select one of the automatic programs suggested below (P button) and validate (OK button).
When the program is finished, the appliance gives out 3 beeps.
Unlock the jug by pressing the trigger (d2) located on the inside of the handle (cf. Fig. 9) and serve immediately or leave
the jug in place to keep warm (up to 40 minutes).
Introducing the suggested automatic programs
Temperature (Max) Adjustable times Mixing
P1 - Creamy soup
(thin texture)
100°C
25 min.
(+ or -10 min)
Max speed
1 min
P2 - Chunky Soup
(texture dense)
100°C
35 min.
(+ or -10 min)
Min speed
13 secs
P3 - (only for model with cooking
basket) – Steam cooking with
cooking basket and 50 cl water
(depending on model*)
100°C
30 min.
(+ or -20 min)
No
P3 - (or P4 for model with cooking
basket) - Autoclean: automatic
cleaning programme
100°C
30 s.
(adjustable
up to 1 min)
Max speed
PRACTICAL GUIDANCE
• Make sure you have enough liquid to cover the Min
limit marker (Cf. Fig. 7). and take care not to exceed
the 1.8 L MAX limit marker engraved inside the jug
(Cf. Fig. 8).
• Some recipes may cause sudden overflowing, due to
the formation of bubbles, particularly when using
frozen vegetables. In this case, it is up to you to
reduce the quantities accordingly.
• Time and temperature information is flashing: you
can modify this information. Adjust the time as
required with the aid of the + (increase) and -
(decrease) buttons, depending on the ingredients
used and the amount to be made (see table of the
cooking times for soups in the recipe booklet).
• With the cooking basket (depending on model*) you
can steam cook (use P3 with 0.5 litres of water), or
for chunky soup recipes and cooking whole
ingredients such as meat, fish, vegetables at the
same time as your soup (use P1 or P2).
• At the end of the programs, the appliance
automatically keeps the recipe warm for 40 minutes
so it remains ready to be consumed. To stop
warming, simply press the OFF button.
• If you open the lid, press the trigger or remove the
jug, the warming process will automatically stop.
• When the program has started, you can stop the
appliance at any time by pressing the P button. The
program is then in pause mode and you can restart
it by pressing the P button again or by pressing the
OK button.
• If you choose the wrong program by mistake and you
wish to cancel it, press the OFF button for 2 seconds
and that will allow you to restart the times and the
temperatures.
MANUAL MODE
Adjust the cooking time with the aid of the + (increase)
and - (decrease) buttons, depending on the ingredients
used and the amount to be made (see table of the
cooking times for soups in the recipe booklet).
You have to then validate the time chosen by pressing
the OK button.
The temperature information is flashing, you can
change this information. Adjust the cooking
temperature with the aid of the + (increase) and -
(decrease) buttons.
17
A Blocco motore
B Pannello di controllo
b1 Pulsanti di selezione
- P – Programmi automatici
P1: Vellutata / P2: Passata /
Cottura al vapore: P3 (secondo il modello*)
Autoclean: P3 o P4 (secondo il modello*)
- -/+ - Diminuzione/Aumento della
temperatura o del tempo di cottura
-OK/OFF – Conferma del programma, della
durata o della temperatura di
cottura/Spegnimento dell’apparecchio
b2 Spia di riscaldamento (se la temperatura
all’interno del recipiente è >50°C)
b3 Selettore di velocità
b4 Pulsante Ice (tritaghiaccio)
C Display
c1 Temperatura impostata (da 60 a 100°C)
c2 Timer (da 0 a 59 min)
c3 Indicazione programma (P1, P2, P3 e P4
secondo il modello*)
c4 Spia di sicurezza
D Unità recipiente frullatore
d1 Recipiente inox (tacca MAX = 1,8 L) d2
Grilletto impugnatura
d3 Lame inox
E Unità coperchio
e1 Tappo dosatore
e2 Coperchio
e3 Alloggio della guarnizione
e4 Guarnizione
F Cestello vapore (a seconda del modello)
f1 Impugnatura
f2 Cestello
Specifiche tecniche dell’apparecchio:
Temperatura max: 100°C
Potenza: 1100 W
Tempo di programmazione max: 59 minuti.
Sicurezza personale
Leggere attentamente le istruzioni
prima di usare l’apparecchio per la
prima volta e conservarle: un uso
non conforme alle istruzioni solleva
il fabbricante da qualsiasi
responsabilità.
Non lasciare che i bambini usino
l’apparecchio senza sorveglianza.
Questo apparecchio non deve
essere usato dai bambini.
Conservare l’apparecchio e il cavo di
alimentazione fuori dalla portata dei
bambini.
Leggendo queste istruzioni, scoprirete come usare il vostro apparecchio in tutto il suo potenziale: per
preparare vellutate, passate, minestre, salse, composte, frullati, cocktail, cotture al vapore...
Questo apparecchio non deve
essere usato da persone (compresi
i bambini) affette da disabilità
fisiche, sensoriali o mentali o prive
di esperienza o conoscenza, a
meno che non siano sorvegliate o
siano state istruite sull’uso
dell’apparecchio da una persona
responsabile della loro sicurezza.
Sorvegliare i bambini per accertarsi
che non giochino con
l'apparecchio.
Tenere l’apparecchio fuori dalla
portata dei bambini.
IT
DESCRIZIONE DELL’APPARECCHIO
NORME DI SICUREZZA
16
WHAT TO DO IF YOUR APPLIANCE DOES NOT WORK
P
R
O
B
LEM
S
CA
US
ES
S
O
L
UTI
O
NS
T
h
e
appli
anc
e
do
es
n
o
t
wo
rk.
I
t
i
s
n
o
t
plug
ged
i
n
.
P
lug
yo
ur
app
li
anc
e
i
nt
o
t
h
e
m
ai
ns
p
ower
s
upply
.
T
h
e
j
ug
and
t
h
e
li
d
ar
e
no
t
i
n
t
h
e
c
o
rr
ec
t
plac
e
o
r
ar
e
no
t
lo
c
ked
c
o
rr
ec
t
ly
.
C
h
ec
k
t
hat
t
he
j
ug
an
d
t
h
e
li
d
ar
e
c
o
rr
ec
t
ly
po
si
t
i
o
ned
and
lo
c
ked
fo
llow
i
n
g
t
he
di
ag
ram
s
i
n
t
h
e
i
n
s
t
ruc
t
i
o
n
s
Ex
c
essi
v
e
vi
brat
i
o
ns.
T
he
app
li
an
c
e
i
s
no
t
plac
ed
o
n
a
flat
s
urfac
e,
t
h
e
ap
p
li
anc
e
i
s
no
t
st
able
P
lac
e
t
h
e
appli
an
c
e
o
n
a
flat
s
t
able
surfac
e.
Vo
lum
e
o
f
i
ngr
edi
ent
s
i
s
t
o
o
hi
gh.
R
educ
e
t
h
e
quant
i
t
y
o
f
i
n
g
r
ed
i
ent
s
pr
o
c
essed.
Leak
t
h
r
o
ug
h
li
d.
Vo
lum
e
o
f
i
ngr
edi
ent
s
i
s
t
o
o
hi
gh.
R
educ
e
t
h
e
quant
i
t
y
o
f
i
n
g
r
edi
ent
s
pr
o
c
essed.
T
h
e
li
d
i
s
n
o
t
p
o
si
t
i
o
ned
o
r
lo
c
ked
c
o
rr
ec
t
ly
Lo
c
k
t
h
e
li
d
fi
rm
ly
o
nt
o
t
he
j
ug
T
h
e
wat
erpr
o
o
f
seal
i
s
no
t
pr
esent
P
o
si
t
i
o
n
t
h
e
wat
erpr
o
o
f
s
eal
o
n
t
he
c
arri
er
seal
and
c
li
p
t
he
uni
t
o
nt
o
t
he
li
d
T
he
wat
erpr
o
o
f
seal
h
as
been
c
ut
through or damaged
C
hang
e
t
h
e
seal
o
r
c
o
nt
ac
t
an
approved service centre
Th
e
blades do not
rot
ate easily
P
i
eces of
food
too bi
g
or too hard
Reduce the s
i
ze
or quantity of th
e
ingredients processed.
Ad
d
s
om
e
li
q
u
i
d
Disp
lays
"s
afety"
Motor o
verload caused
by
too large an
amount of ingredients or pieces of
f
ood
t
h
at
are
t
oo
h
ar
d
or
t
oo
larg
e
Let t
he m
otor cool d
own
and reduce
the amount of ingredients in the jug.
Disp
lays
"s
afety" + red ind
ic
ator
light is flashing
Empty jug
, nearly
em
pty
or
not enough liquid in recipe
Add liq
u
i
d
up to t
he jug's
minimum
level marker (Cf. Fig. 7)
Disp
lays
"Er
r"
+ red indicator light is flashing
Th
e
heating elem
en
t does
not work
Contac
t th
e Cus
tomer Relations
Helpline - see contact list
Disp
lays
« ntc »
+ red indicator light is flashing
Th
e
temp
erat
ure sensor
is
no longer
working
Cont
ac
t th
e Cus
tomer Relations
Helpline - see contact list
Your appliance still doesn't work?
Contact the Customer Relations Helpline - see contact list.
• Disposal of packaging materials and the appliance.
The packaging is made of exclusively environmentally safe materials that can be disposed of
according to current recycling regulations.
To dispose of your appliance, consult the appropriate department of your local authority.
• Expired electronic or electrical products:
RECYCLING
Think of the environment!
Your appliance contains valuable materials which can be recovered or recycled.
Please take it to a local waste collection point where it will be disposed
19
devono essere effettuate da
bambini, a meno che non
abbiano almeno 8 anni e siano
supervisionati da un adulto.
• L
’apparecchio emette
vapore che potrebbe
causare ustioni.
Manipolare il coperchio e il
tappo dosatore con cautela (se
necessario, usare un guanto da
forno, una presina, ecc.). Per
manipolare il tappo dosatore
usare la sua parte centrale.
Prestare particolare attenzione
quando nel recipiente è
presente un liquido caldo,
perché potrebbe schizzare
dall’apparecchio a causa di
un’ebollizione improvvisa.
Non usare l’apparecchio se il
tappo dosatore non è inserito
nell’apertura del coperchio, se
la guarnizione non è
posizionata sul suo supporto o
se l’alloggio della guarnizione
non è inserito nel coperchio.
L’eventuale uso scorretto
dell’apparecchio comporta il
rischio di lesioni.
Le lame sono molto
taglienti: maneggiarle
con attenzione per
evitare il rischio di lesioni
durante lo svuotamento del
recipiente e le operazioni di
pulizia.
Collegamento elettrico
L’apparecchio deve essere
collegato a una presa di
corrente con messa a terra.
• L’apparecchio è progettato per
essere alimentato
esclusivamente a corrente
alternata. Verificare che la
tensione riportata sulla
targhetta informativa
dell’apparecchio corrisponda a
quella dell’impianto elettrico
utilizzato.
• Scollegare l’apparecchio
dall’alimentazione quando lo si
lascia incustodito e prima delle
operazioni di montaggio,
smontaggio o pulizia.
• Eventuali errori di collegamento
annullano la garanzia.
• Non tirare mai il cavo per
scollegare l’apparecchio.
• Non immergere l’apparecchio,
il cavo di alimentazione o la
spina in acqua o altri liquidi.
• L'apparecchio non deve essere
immerso.
• Tenere il cavo di alimentazione
fuori dalla portata dei bambini
e lontano dalle parti calde
dell’apparecchio, fonti di calore
o spigoli.
18
Durante l’uso dell’apparecchio,
alcune parti diventano molto calde
(rivestimento inox del recipiente,
parti trasparenti del coperchio e
del tappo, parti metalliche sotto il
recipiente, cestello). Se toccate,
possono provocare ustioni.
Manipolare l’apparecchio usando
le parti fredde in plastica
(impugnature, blocco motore). La
spia rossa di riscaldamento indica
che sussiste il rischio di ustioni.
Non usare l’apparecchio se non
funziona correttamente, se è stato
danneggiato o se il cavo di
alimentazione o la spina sono
danneggiati. Per evitare pericoli,
fare sostituire il cavo da un centro
di assistenza autorizzato
(consultare l’elenco nel libretto di
servizio).
Questo apparecchio è destinato al
solo uso domestico. Il fabbricante
declina ogni responsabilità e si
riserva il diritto di annullare la
garanzia in caso di utilizzo
commerciale o scorretto o del
mancato rispetto delle istruzioni.
Questo apparecchio è destinato
all'ambito domestico e ad altri usi
analoghi, ad esempio:
- aree di ristoro in negozi, uffici e altri
ambienti professionali.
- cucine riservate al personale di
negozi, uffici o altri ambienti
professionali;
- case coloniche;
- stanze di alberghi, motel e altri
edifici residenziali;
- camere in affitto e altri ambienti
analoghi.
Per i soli mercati europei:
Conservare l’apparecchio e il
cavo di alimentazione fuori dalla
portata dei bambini di età
inferiore a 8 anni.
I bambini non devono usare
l’apparecchio come un
giocattolo.
Questo apparecchio può essere
usato da persone affette da
disabilità fisiche, sensoriali o
mentali o prive di esperienza o
conoscenza se correttamente
sorvegliate o se sono state
istruite sull’uso sicuro
dell’apparecchio e conoscono i
rischi correlati.
Questo apparecchio può essere
usato da bambini di età
superiore a 8 anni solo se
supervisionati o istruiti sulluso in
sicurezza dell’apparecchio e se
comprendono i rischi correlati. Le
operazioni di pulizia e
manutenzione ordinaria non
21
• Posizionare la guarnizione sul suo alloggio (Cf. Fig.
1.a) e inserire l’insieme nel coperchio (Cf. Fig. 1.b).
• Per cuocere al vapore, inserire il cestello con le
verdure tagliate a pezzetti e versare nel recipiente
0,5 litri d’acqua fredda, senza superare la parte
inferiore del cestello (cf. Fig. 10 et 11).
• Posizionare il coperchio (E) sul recipiente (D)
allineando i due triangoli (Cf. Fig. 2) e chiudere il
coperchio, senza premerlo, ruotandolo nel senso
della freccia (Cf. Fig. 3). Posizionare il recipiente
frullatore (D) sul blocco motore (A) fino a udire un
“clic” (Cf. Fig. 4).
L’apparecchio funziona esclusivamente se il
recipiente e il coperchio sono posizionati e bloccati
correttamente sul blocco motore.
In caso di posizionamento o blocco scorretto di uno
dei due elementi (Cf. Fig. 5 et 6), la spia
lampeggerà all’attivazione di una funzione.
L’ apparecchio è dotato di 3 modalità di
funzionamento:
• Modalità automatica: temperatura, tempo di cottura
e durata di miscelazione sono preimpostati per
preparare automaticamente zuppe o pietanze al
vapore.
• Modalità manuale: impostazione manuale di
temperatura e tempo di cottura per una
preparazione personalizzata.
• Modalità frullatore: selezione della velocità del
motore senza la funzione di cottura, per preparare
frullati e cocktail.
Montaggio del recipiente e dell’unità coperchio
• Prima del primo utilizzo, pulire tutti gli accessori (D,
E e F) in acqua calda saponata, ad eccezione del
blocco motore (A).
• Assicurarsi di rimuovere tutti i materiali di
imballaggio prima di usare l’apparecchio.
PREPARAZIONE
FUNZIONAMENTO DELL’APPARECCHIO
MODALITÀ AUTOMATICA
Dopo aver versato l’acqua e gli ingredienti sul fondo del recipiente o nel cestello vapore, chiudere il coperchio e
posizionare il recipiente sul blocco motore (vedi sezione “Preparazione”).
Selezionare uno dei programmi automatici riportati di seguito (tasto P) e confermare (pulsante OK).
Al termine del programma l’apparecchio emette 3 segnali sonori.
Sbloccare il recipiente premendo il grilletto (d2) situato all’interno dell’impugnatura (cf. Fig. 9) e servire subito; oppure,
lasciare il recipiente in posizione per mantenere la temperatura (fino a 40 minuti).
Elenco dei programmi automatici disponibili
Temperatura (Max) Durata Miscelazione
P1 – Zuppa vellutata
(consistenza diluita)
100°C
25 min
(+ o -10 min)
Velocità max
1 min
P2 – Zuppa passata
(consistenza densa)
100°C
35 min
(+ o -10 min)
Velocità min
13s
P3 – (solo per il modello dotato del
cestello di cottura) – Cottura al
vapore con il cestello di cottura e
50 cl d'acqua (secondo il
modello*)
100°C
30 min
(+ o -20 min)
No
P3 – (o P4 per il modello dotato di
cestello di cottura) – Autoclean:
programma di pulizia
automatico
100°C
30 sec
(regolabile fino
a 1 min)
Velocità max
20
Uso conforme
Non usare il recipiente frullatore
senza ingredienti o se riempito
unicamente con alimenti secchi.
Versare nel recipiente gli
ingredienti solidi sempre prima
di aggiungere gli ingredienti
liquidi, senza oltrepassare la
tacca MAX (1,8 L) riportata
all’interno del recipiente. (Cf.
Fig. 8). Se il frullatore è troppo
pieno, potrebbe fuoriuscire
acqua bollente. Verificare che il
livello di liquido sia sufficiente
per coprire la tacca minima (Cf.
Fig. 7).
Alcune ricette possono causare
traboccamenti improvvisi a
causa della formazione di bolle,
in particolare con l’uso di
verdure surgelate. In tal caso,
ridurre la quantità di
conseguenza.
Non inserire dita o altri oggetti
nel recipiente frullatore quando
l’apparecchio è in uso.
Non usare il recipiente come
contenitore per congelamento,
sterilizzazione, ecc.
Posizionare l’apparecchio su un
piano di lavoro stabile, resistente
al calore, pulito e asciutto.
Non posizionare l’apparecchio
in prossimità di pareti o mobili: il
vapore potrebbe danneggiarli.
Evitare che capelli, sciarpe,
cravatte, ecc. pendano sopra al
recipiente quando l’apparecchio
è in funzione.
Non usare gli accessori in un
forno a microonde.
Non usare l'apparecchio
all'aperto.
Non superare la quantità
massima indicata nelle
istruzioni.
Riporre l’apparecchio solo
quando si è raffreddato.
Riparazioni
Per ragioni di sicurezza, usare
esclusivamente accessori e parti
di ricambio forniti dai centri di
assistenza autorizzati.
Non usare l’apparecchio se non
funziona correttamente, se è
stato danneggiato o se il cavo di
alimentazione o la spina sono
danneggiati.
Per evitare pericoli, fare sostituire
il cavo da un centro di assistenza
autorizzato (consultare l’elenco
nel libretto di servizio).
Interventi diversi dalle
operazioni di pulizia e
manutenzione ordinaria da
parte del cliente devono essere
effettuati da un centro di
assistenza autorizzato.
23
• Non immergere l’apparecchio. Non passare il blocco
motore (A) sotto l’acqua corrente.
• Pulire il recipiente immediatamente dopo l’uso.
• Versare nel recipiente 1 litro di acqua calda e 2 o 3
gocce di detersivo per lavastoviglie.
Rispettare la quantità di acqua e detersivo
raccomandate. Una quantità eccessiva di detersivo
aumenta sensibilmente la formazione di schiuma e
di conseguenza comporta traboccamenti.
• Utilizzare il programma automatico Autoclean: P3 o
P4 (secondo il modello*) per effettuare un
prelavaggio del recipiente.
• Al termine del programma, scollegare l’apparecchio
dall’alimentazione.
• Premere il grilletto (d2), quindi sollevare il recipiente
frullatore (D).
• Posizionare il recipiente su una superficie piana.
• Aprire il coperchio ruotandolo di un quarto di giro in
senso orario. Rimuovere il coperchio con cautela.
• Quando i componenti si sono raffreddati, separare
l’alloggio della guarnizione dal coperchio usando le
linguette.
• Terminare la pulizia del recipiente usando una
spugna.
• Risciacquare l’interno del recipiente e il coperchio
sotto acqua corrente.
• In caso di sporco persistente sulla parte riscaldante
del recipiente, lasciarla a mollo diverse ore in una
miscela di acqua e detersivo per piatti.
Prendere delle precauzioni durante la
manipolazione delle lame (d3) del
recipiente frullatore durante la pulizia
e lo svuotamento del recipiente, perché
sono taglienti.
• Per pulire il blocco motore (A), usare un panno umido.
Asciugarlo scrupolosamente.
• Gli elementi removibili (coperchio, alloggio della
guarnizione, guarnizione, tappo dosatore, cestello
vapore) possono essere lavati con una spugna in
acqua calda saponata.
PULIZIA DELL’APPARECCHIO
22
SUGGERIMENTI PRATICI
• Il livello del liquido deve superare la tacca minima
(Cf. Fig. 7) ma non deve superare la tacca
MAX (1,8 L) riportata all’interno del recipiente
(Cf. Fig. 8).
• Alcune ricette possono causare traboccamenti
improvvisi a causa della formazione di bolle, in
particolare con l’uso di verdure surgelate. In tal caso,
ridurre la quantità di conseguenza.
• Quando il tempo di cottura o la temperatura
lampeggia, è possibile modificare l’impostazione
premendo i pulsanti + (aumento) e - (diminuzione), a
seconda degli ingredienti utilizzati e della quantità
preparata (vedi tabella dei tempi di cottura delle
zuppe nel libretto delle ricette).
• Il cestello vapore (a seconda del modello) permette
di cuocere al vapore (selezionando P3 e
aggiungendo 0,5 litri di acqua), o di cuocere
ingredienti come carne, pesce, verdure,
contemporaneamente alla zuppa (selezionando P1
o P2).
• Al termine dei programmi, l’apparecchio passa
automaticamente alla modalità di mantenimento
della temperatura e conserverà per 40 minuti la
preparazione. Per interrompere la modalità di
mantenimento della temperatura, premere il
pulsante OFF.
In caso di apertura del coperchio, pressione del
grilletto o rimozione del recipiente, la modali di
mantenimento al caldo si interrompe
automaticamente.
• Dopo aver avviato il programma, è possibile in
qualsiasi momento spegnere l’apparecchio
premendo il pulsante P. Il programma verrà
interrotto temporaneamente; per riprenderlo,
premere nuovamente il pulsante P o il pulsante OK.
Se si desidera annullare il programma, tenere premuto
per 2 secondi il pulsante OFF: saquindi possibile
impostare nuovamente il tempo di cottura e la
temperatura.
MODALITÀ MANUALE
• Impostare il tempo di cottura con i pulsanti +
(aumento) e - (diminuzione) a seconda degli
ingredienti utilizzati e della quantità preparata (vedi
tabella dei tempi di cottura delle zuppe nel libretto
delle ricette).
• Confermare il tempo di cottura impostato premendo
il pulsante OK.
• Quando la temperatura lampeggia, è possibile
modificare l’impostazione premendo i pulsanti +
(aumento) e - (diminuzione).
• Confermare la temperatura impostata premendo il
pulsante OK.
• La spia rossa di accenderà, a indicare che la cottura
è avviata.
• È possibile azionare il motore in qualsiasi momento:
- a velocità lenta (posizione 1) per mescolare alimenti
liquidi (ad esempio per la preparazione di salse);
- a velocità rapida (dalla posizione 2) per mescolare
alimenti solidi.
MODALITÀ FRULLATORE (senza cottura)
• Selezionare la velocità ruotando la
manopola verso destra. Il frullatore si
avvierà e sul display apparirà il tempo.
In modali frullatore è possibile scegliere tra 5 veloci
di miscelazione diverse. La velocità a impulsi è situata
a sinistra della posizione 0.
• Posizionare la manopola della velocità su 0 per
spegnere l’apparecchio.
• Premere il grilletto (d2), quindi sollevare il recipiente
frullatore (D). Se si desidera programmare un tempo
di funzionamento con spegnimento automatico:
• Impostare il tempo di funzionamento premendo i
pulsanti + (aumento) e - (diminuzione).
• Selezionare una velocità ruotando la manopola. Sul
display apparirà il conto alla rovescia.
• Il motore si spegnerà automaticamente al termine
del conto alla rovescia.
Pulsante tritaghiaccio: il pulsante Ice” permette di
ottenere del ghiaccio tritato. È possibile spegnere
l’apparecchio in qualsiasi momento premendo il
pulsante OFF. È possibile tritare da 6 a 8 cubetti di
ghiaccio.
ice
max
0
25
A Bloque motor
B Panel de mandos
b1 Teclas de selección
- P - Programas automáticos
P1: Crema de sopa / P2: Puré/
Cocción vapor: P3 (según modelo*)
Autolimpieza: P3 o P4 (según modelo*)
- -/+ - Disminución/Aumento de la duración o
de la temperatura de cocción
- OK/OFF –Validación de una selección de
programa, de la duración o de la
temperatura de cocción / Parada del aparato
b2 Testigo luminoso de calor (si >50°C en el
interior del bol)
b3 Selector de velocidades
b4 Tecla Ice crush (triturar los cubitos)
C Pantalla de indicadores
c1 Indicador de temperatura regulada de
60a 100°C
c2 Indicador de temporizador (tiempo
regulable de 0 a 59 min)
c3 Marcador de programas (P1, P2, P3 y P4
según modelo*)
c4 Indicador de testigo de seguridad
D Conjunto Bol mezclador
d1 Bol inox (referencia Max = 1.8 litros)
d2 Pestillo empuñadura
d3 Láminas inox
E Conjunto tapa
e1 Tapón dosificador
e2 Tapa
e3 Porta-juntas
e4 Junta de estanqueidad
F Cesta de cocción (según modelo*)
f1 empuñadura
f2 cesta
Datos técnicos del aparato:
Temperatura máxima: 100°C
Potencia: 1100W
Tiempo de programación máximo: 59 minutos.
Lea atentamente el modo de
empleo antes de la primera
utilización de su aparato y
consérvelo: un uso no conforme
con el modo de empleo liberaría al
fabricante de cualquier
responsabilidad.
No dejar a los niños utilizar el
aparato sin vigilancia.
Este aparato no debe ser utilizado
por los niños.
Conservar el aparato y su cable fuera
del alcance de los niños.
Este aparato no está previsto
Recorriendo este folleto, usted descubrirá consejos de utilización que le harán entrever el potencial
de su aparato: preparación de cremas de sopa o purés, de sopas con trozos, de salsas y de compotas,
de smoothies, de cócteles y de recetas de vapor…
para ser utilizado por personas
(comprendidas entre ellas los
niños) cuyas capacidades físicas,
sensoriales o mentales sean
reducidas o personas carentes de
experiencia o de conocimiento, salvo
si ellas han podido beneficiarse,
por medio de una persona
responsable de su seguridad, de una
vigilancia o de instrucciones previas
concernientes al uso del aparato.
Conviene vigilar a los niños para
asegurarse de que ellos no juegan
con el aparato.
ES
DESCRIPCIÓN DEL APARATO
CONSIGNAS DE SEGURIDAD
24
RISOLUZIONE DEI PROBLEMI
P
R
O
B
LEM
I
CA
US
E
S
O
L
UZ
I
O
NI
L'
appar
ec
c
h
i
o
no
n
f
unz
i
o
na
L’
appar
ec
c
h
i
o
n
o
n
è
c
o
llegat
o
all’
ali
m
ent
az
i
o
ne.
C
o
llegar
e
l’
appar
ec
c
hi
o
a
una
pr
es
a
di
c
o
rr
ent
e.
I
l
r
ec
i
p
i
ent
e
o
i
l
c
o
perc
hi
o
n
o
n
so
no
p
o
s
i
z
i
o
nat
i
o
blo
c
c
at
i
c
o
rr
et
t
am
ent
e.
Ve
rif
ica
re
che
il
re
cipie
n
t
e
o
il
cope
r
chio
sia
no
posiziona
t
i
e
b
l
occa
t
i
corre
t
-
ta
me
n
t
e
come
il
l
ust
r
a
t
o
ne
l
l
e
ist
ruzioni.
V
i
braz
i
o
ni
ec
c
es
s
i
v
e
L'
appar
ec
c
h
i
o
n
o
n
è
p
o
s
i
z
i
o
nat
o
su
una
superfi
c
i
e
pi
ana,
qui
ndi
l’
ap
p
ar
ec
c
h
i
o
n
o
n
è
s
t
abi
le.
P
o
s
i
z
i
o
nar
e
l’
app
ar
ec
c
h
i
o
su
un
a
superfi
c
i
e
pi
ana.
Quant
i
t
à
deg
li
i
ng
r
ed
i
ent
i
ec
c
es
s
i
va.
Ri
durr
e
la
q
uant
i
t
à
degli
i
ngr
edi
ent
i
.
P
erd
i
t
e
dal
c
o
perc
h
i
o
Quant
i
t
à
deg
li
i
n
g
r
ed
i
ent
i
ec
c
ess
i
va.
Ri
durr
e
la
q
uant
i
t
à
d
eg
li
i
ngr
edi
ent
i
.
I
l
c
o
p
erc
h
i
o
no
n
è
p
o
si
z
i
o
n
at
o
o
blo
c
c
at
o
c
o
rr
et
t
am
ent
e.
Blo
c
c
ar
e
c
o
rr
et
t
am
ent
e
i
l
c
o
perc
hi
o
sul
r
ec
i
pi
ent
e.
La
g
uarn
i
z
i
o
ne
è
as
sent
e.
P
o
si
z
i
o
n
ar
e
la
g
uarni
z
i
o
ne
sull’
allo
g
gi
o
della
g
uarni
z
i
o
ne
e
i
nseri
r
e
l’
i
nsi
em
e
n
el
c
o
p
erc
h
i
o
.
La g
uarn
izione è dannegg
iata o
usurata.
So
st
i
t
ui
r
e
la
g
uarni
z
i
o
ne:
c
o
nt
at
t
ar
e
un
centro d
i assistenza autorizzato.
R
i
d
u
r
re
la
d
i
m
en
s
ion
e o la q
uantità
Le
lame
ru
ot
ano con difficolt
à
Ali
menti troppo
du
ri o tagli
ati a pezzi
troppo grandi.
degli ingred
i
ent
i. Agg
iungere d
el
liquido.
L
as
ci
are
ch
e
i
l
m
otore s
i raffred
d
i e
Su
l d
i
s
play
appare “s
écu
Su
rr
i
s
caldamento
d
el m
otore causato
da un’eccessiva quantità di ingredienti
o
da
p
ezzi
t
rop
p
o
d
u
r
i
o
t
rop
p
o
g
r
an
d
i
.
r
id
ur
re
la quanti
tà d
i in
g
redienti n
el
recipiente.
Agg
i
u
n
g
ere
d
el
li
q
uid
o fin
o al liv
ello
Su
l d
i
s
play
appare “s
écu
” e la spia
rossa lampeggia
Reci
pien
te vuot
o,
quasi v
uoto o
preparazione non abbastanza liquida.
mi
ni
m
o del reci
pi
ente (Cf. Fig. 7).
Su
l d
i
s
play
appare “Err” e la
spia rossa
lampeggia
La res
is
ten
za ri
scaldan
te non f
u
nzi
on
a.
Contattare un centro d
i assis
tenza
autorizzato.
Su
l d
i
s
play
appare “ntc” e la s
pi
a rossa
lampeggia
Il
s
en
sore della
temperatura non
funziona.
Cont
att
are un
centro d
i as
s
istenza
autorizzato.
Se il problema sussiste, contattare un centro di assistenza autorizzato (consultare l’elenco nel libretto
di servizio).
• Smaltimento dei materiali di imballaggio e dell’apparecchio
L’imballaggio comprende esclusivamente materiali innocui per l’ambiente, che possono essere
smaltiti conformemente alle leggi vigenti sul riciclaggio.
Per smaltire l’apparecchio, contattare l’ufficio preposto presso il proprio comune.
• Rifiuti di apparecchiature elettriche ed elettroniche:
SMALTIMENTO
Contribuiamo alla protezione dell’ambiente!
Questo apparecchio contiene numerosi materiali riutilizzabili o riciclabili.
Portarlo presso un apposito punto di raccolta affinché sia smaltito correttamente.
27
aparato con total seguridad y
que ellos comprendan bien los
peligros corridos. La limpieza y el
mantenimiento por el usuario no
deben ser efectuados por niños
sin vigilancia, a menos que
tengan más de 8 años y que
estén bajo la vigilancia de un
adulto.
• Su aparato emite vapor
que puede ocasionar
quemaduras.
Manipule con precaución la
tapa y el tapón dosificador
(utilice si es necesario un
guante, una manopla, etc.).
Manipule el tapón dosificador
por su parte central.
• Esté atento si un quido
caliente se vierte en el
preparador culinario o el
mezclador en la medida en
que pueda ser expulsado del
aparato como consecuencia
de una ebullición repentina.
• No haga funcionar el
aparato si el tapón
dosificador no ha sido
colocado en el orificio de la
tapa, si la junta no está bien
posicionada o si el soporte
no se fija correctamente en
la tapa.
Atención a los riesgos
de quemadura en caso
de mala utilización del
aparato.
• Las láminas son muy
cortantes: manipúlelas con
precaución para no herirse
durante el vaciado del bol y
la limpieza.
Conexión con la fuente de
alimentación
El aparato debe ser enchufado
a una toma de corriente
eléctrica unida a la tierra.
• El aparato está concebido para
funcionar únicamente en
corriente alterna. Verifique que
la tensión de alimentación
indicada en la placa descriptiva
del aparato corresponde bien a
la de su instalación eléctrica.
• Desconectar siempre el aparato
de la alimentación si se deja sin
vigilancia y antes del montaje,
desmontaje y limpieza.
• Cualquier error de conexión
anula la garantía.
• No tire nunca del cable de
alimentación para desenchufar
el aparato.
• No meta el aparato, el cable de
alimentación o el enchufe
dentro de un líquido.
• El aparato no debe ser
sumergido.
• No deje el cable de
alimentación al alcance de la
26
Mantenga su aparato fuera del
alcance de los niños.
Durante el uso del aparato,
algunas piezas alcanzan
temperaturas elevadas (pared
inox del bol, partes transparentes
de la tapa y del tapón, piezas
metálicas bajo el bol, cesta).
Pueden ocasionar quemaduras.
Manipule el aparato por las piezas
plásticas frías (empuñaduras,
bloque motor). El testigo
luminoso de calor rojo indica que
hay un riesgo de quemadura.
No use su aparato si no funciona
correctamente, si ha sido dañado
o si el cable de alimentación o el
enchufe están dañados. Para evitar
todo peligro, haga cambiar
obligatoriamente el cable por un
servicio técnico autorizado (ver
lista en el librito servicio).
Su máquina ha sido concebida
para un uso doméstico solamente.
El fabricante declina toda
responsabilidad y se reserva el
derecho de anular la garantía en
caso de uso comercial o
inadecuado, o de no respeto de las
consignas.
Este aparato no ha sido destinado
a ser usado en aplicaciones
dosticas y análogas tales como
- zona de trabajo de cocina en las
tiendas, despachos y otros
entornos de trabajo
- rincones de cocina reservados al
personal en las tiendas, despachos
y otros entornos profesionales
- granjas
- la utilización por los clientes de
hoteles, moteles y otros entornos
de carácter residencial
- en alojamiento y desayuno y otros
entornos similares.
Sólo en mercados europeos:
Conservar el aparato y su cable
fuera del alcance de los niños de
edad menor de 8 os.
Los niños no deben de utilizar el
aparato como un juguete.
Este aparato puede ser utilizado
por personas cuyas capacidades
físicas, sensoriales o mentales
sean reducidas o cuya
experiencia o conocimientos no
sean suficientes, a condicn de
que se beneficien de una
vigilancia o de que hayan
recibido instrucciones en cuanto
a la utilización del aparato con
total seguridad y comprendan
bien los dos potenciales.
Este aparato puede ser utilizado
por niños de al menos 8 años, a
condición de que se beneficien
de una vigilancia o de que ellos
hayan recibido instrucciones en
cuanto a la utilización del
29
• Coloque la junta sobre el portajuntas (ver fig. 1.a) y
junte el conjunto en la tapa (ver fig. 1.b).
• Para realizar cocciones al vapor, coloque la cesta con
las legumbres cortadas en trozos y llene el bol con
0.5 litros de agua fría sin sobrepasar la parte inferior
de la cesta (ver fig. 10 et 11)
• Posicione la tapa (E) en el bol (D) alineando los dos
triángulos (ver fig. 2), cierre la tapa sin apoyar
girándola en el sentido de la flecha (ver fig. 3)
Posicione el bol mezclador (D) sobre el bloque motor
(A) hasta oír un “clic” (ver fig. 4)
El aparato arranca únicamente si el bol y la tapa
están correctamente posicionados y cerrados
sobre el bloque motor.
En caso de mal posicionamiento o de mal cierre de
uno u otro (ver fig. 5 y 6), el logo se pone a
parpadear cuando se le activa una función.
Su aparato posee 3 modos de funcionamiento:
• Modo programa automático: temperatura, duración
de cocción y duración de mezclado son
preprogramadas para realizar sopas o cocciones al
vapor de modo automático.
• Modo manual: reglajes personalizados de la
temperatura, de la duración de cocción para una
utilización según su conveniencia.
• Modo mezclador: selección de la velocidad motor sin
utilizar la función cocción para realizar sabrosos
smoothies, cócteles.
Puesta en marcha del bol y del conjunto de la tapa
• Antes del primer uso, limpie todos los accesorios (D,
E y F) con agua caliente jabonosa, pero no el bloque
motor (A).
• Asegúrese de que todo el embalaje sea retirado
antes del funcionamiento del aparato.
PUESTA EN MARCHA
Con el fin de evitar cualquier
peligro, haga obligatoriamente
cambiar el cable por un servicio
cnico autorizado (ver lista en el
librito servicios).
Cualquier intervencn diferente
a la limpieza y el mantenimiento
por el cliente debe ser efectuada
por un servicio técnico
autorizado.
28
mano de los niños, estar
próximo o en contacto con las
partes calientes del aparato,
cerca de una fuente de calor o
sobre un ángulo cortante.
Con respecto a una mala
utilización
No utilice nunca el bol
mezclador sin ingredientes o con
productos secos únicamente.
Vierta siempre los ingredientes
sólidos primero en el bol antes
de añadir ingredientes líquidos,
sin pasar la referencia 1,8 L MAX
grabado en el interior del bol.
(ver fig. 8). Si el mezclador está
demasiado lleno, el agua
hirviendo puede ser expulsada.
Atención a tener un nivel de
quido suficiente para recubrir la
referencia mínima (ver fig. 7).
Ciertas recetas pueden provocar
desbordamientos intempestivos,
en razón de la aparición de
burbujas, en particular durante
la utilización de legumbres
congeladas. En ese caso,
corresponde reducir los
volúmenes en consecuencia.
No coloque jamás sus dedos o
cualquier otro objeto en el bol
mezclador durante el
funcionamiento del aparato.
No utilice el bol como recipiente
(congelación, esterilizacn).
Coloque el aparato sobre un
plano de trabajo estable,
resistente al calor, limpio y seco.
No coloque el aparato cerca de
una pared o de una alacena: el
vapor producido puede dañar
los elementos.
No deje colgar sus cabellos, un
fular, una corbata,por encima
del bol durante el funciona -
miento del aparato.
No ponga nunca los accesorios
en un horno microondas.
No utilice el aparato al aire libre.
No sobrepase nunca la cantidad
xima indicada en el folleto.
Coloque el aparato cuando esté
frío.
SAV
Por su seguridad, no utilice más
que accesorios o piezas de
recambio nada más que las
provistas por los centros de
servicio técnico posventa
autorizados.
No use su aparato si no funciona
correctamente, si ha sido
dañado o si el cable de
alimentación o el enchufe están
dañados.
ingredientes utilizados y del volumen preparado (ver
tabla de los tiempos de cocción de las sopas en el
libro de recetas).
• Valide seguidamente el tiempo seleccionado con la
tecla OK.
• La información temperatura parpadea, usted tiene
la posibilidad de modificar esta información. Regule
la temperatura de cocción con la ayuda de las teclas
+ (aumentar) y - (disminuir).
• Valide a continuación la temperatura seleccionada
con la tecla OK.
• El testigo luminoso rojo se alumbra para informarle
de que la cocción ha empezado.
• En cualquier momento usted puede accionar el
motor bien:
- en velocidad lenta (posición 1) para mezclar
alimentos líquidos (ej.: realización de salsas).
- en velocidad rápida (a partir de la posición 2) para
mezclar alimentos sólidos.
MODO MEZCLADOR (sin cocción)
• Seleccione una velocidad girando el
selector a la derecha. La mezcla
comienza y el tiempo se anuncia en la pantalla. En
modo mezclador, usted puede seleccionar hasta 5
velocidades de mezcla diferentes.
La velocidad sacada se encuentra a la izquierda de
la posición 0.
• Gire el selector de velocidades a la posición 0 para
detener el aparato.
• Apriete en el pestillo (d2) luego levante el bol
mezclador (D). Si usted desea programar un tiempo
de funcionamiento con parada automática:
• Ajuste el tiempo de funcionamiento con la ayuda de
las teclas + (aumentar) y - (disminuir).
• Seleccione una velocidad girando el selector. El
descuento del tiempo se muestra sobre la pantalla.
• El motor se para automáticamente al final del
descuento de tiempo.
Tecla hielo triturado: la tecla « Ice » activa el
funcionamiento que permite realizar hielo triturado.
Usted puede detener el aparato a su conveniencia
pulsando sobre la tecla “ OFF”. Usted puede triturar de
6 a 8 cubitos de hielo máximo.
31
• El aparato no debe ser sumergido. No pase el bloque
motor (A) bajo el agua caliente corriente.
• Limpiar inmediatamente su bol después del uso.
• Llene el bol con 1 litro de agua caliente a la que se
han añadido 2, 3 gotas de lejía. Respete las
cantidades de agua y de líquido lavavajillas
recomendados. Un excedente de líquido lavavajillas
aumenta fuertemente el espumeado y en
consecuencia favorece los desbordamientos.
• Utilice el programa automático Autolimpieza: P3 o
P4 (según modelo*) para realizar un prelavado del
bol.
• Una vez el programa haya terminado, desenchufe el
aparato.
• Apriete sobre el pestillo (d2) luego levante el bol
mezclador (D).
• Coloque el bol sobre una superficie plana.
• Desbloquee la tapa girándola un cuarto de vuelta en
el sentido de las agujas de un reloj. Quite la tapa con
precaución.
• Cuando las piezas estén frías, separe el portajuntas
de la tapa con la ayuda de las zonas de prensión.
• Finalice la limpieza del bol con la ayuda de una
esponja.
• Aclare el interior del bol bajo el agua corriente así
como su tapa.
• En caso de tener mucha grasa la parte caliente del
bol, déjelo en remojo durante varias horas con agua
con líquido lavavajillas para facilitar la limpieza.
Tome precauciones con las minas
(d3) del bol mezclador cuando usted
las limpie y cuando usted vacíe el bol,
son cortantes.
• Para limpiar el bloque motor (A), utilice un trapo
húmedo. Séquelo cuidadosamente.
• Los elementos amovibles (tapa, portajuntas, junta,
tapón dosificador, cesta de cocción) se limpian con
ayuda de una esponja y de agua caliente jabonosa.
LIMPIEZA DEL APARATO
ice
max
0
30
CONSEJOS PRÁCTICOS
• Atención a tener un nivel de líquido suficiente para
cubrir la referencia mini (ver fig. 7). y a no pasar la
referencia 1,8 L MAX grabada en el interior del bol
(ver fig. 8).
• Algunas recetas pueden provocar desbordamientos
intempestivos, en razón de la aparición de burbujas,
en particular durante la utilización de legumbres
congeladas. En este caso, le corresponde reducir los
volúmenes en consecuencia.
• La información tiempo o temperatura parpadea:
usted tiene la posibilidad de modificar esta
información. Ajuste si es necesario el tiempo con la
ayuda de las teclas + (aumentar) y - (disminuir), en
función de los ingredientes utilizados y del volumen
preparado (ver tabla de tiempos de cocción de sopas
en el librito recetas).
• La cesta de cocción (según modelo*) le permite
realizar cocciones al vapor (en P3 con 0.5 litros de
agua), o para una preparación con trozos, cocer
ingredientes enteros tales como carnes, pescados,
legumbres, al mismo tiempo que su sopa, (en P1 o
P2).
• Al final de los programas, el aparato pasa
automáticamente a mantenimiento en calor durante
40 minutos para conservar la preparación preparada
para ser consumida. Para parar el mantenimiento en
calor, es suficiente apretar la tecla OFF.
• Si abre la tapa, se apoya sobre el pestillo o quita
el bol, el mantenimiento en calor será
automáticamente detenido.
• Cuando el programa está en marcha, usted tiene la
posibilidad de parar el aparato en cualquier
momento apretando sobre la tecla P. El programa
está entonces en modo pausa, usted tiene la
posibilidad de volver a ponerlo en marcha apretando
de nuevo sobre la tecla P o sobre la tecla OK.
• Si usted se ha equivocado de programa y si usted
quiere anularlo, apoye durante 2 segundos sobre la
tecla OFF, esto permite reiniciar los tiempos y las
temperaturas.
MODO MANUAL
• Ajuste el tiempo de cocción con la ayuda de las teclas
+ (aumentar) y - (disminuir) en función de los
UTILIZACIÓN DEL APARATO
MODO PROGRAMA
Una vez colocados el agua y los ingredientes en el fondo del bol o en la cesta vapor, cierre la tapa y coloque el bol sobre
e
l bloque motor (ver puesta en marcha).
Seleccione uno de los programas automáticos propuestos aquí debajo (tecla P) y valide (tecla OK).
Cuando el programa ha terminado, el aparato emite 3 bips.
Desbloquee el bol apoyándose sobre el pestillo (d2) situado en el interior de la empuñadura (ver fig. 9) y sirva
seguidamente o deje el bol laissez le bol en el sitio de mantenimiento caliente (hasta 40 minutos).
Descubra los programas automáticos propuestos
Temperatura (Max) Tiempo ajustable Mezcla
P1 – Crema de sopa
(textura fina)
100°C
25 min
(+ ou -10 min)
Velocidad maxi
1 min
P2 – Puré
(textura densa)
100°C
35 min
(+ ou -10 min)
Velocidad mini
13s
P3 – (únicamente para el modelo que
disponga de cesta de cocción) –
Cocción vapor con la cesta de
cocción y 50 cl de agua (según
modelo*)
100°C
30 min
(+ ou -20 min)
No
P3 – (o P4 para el modelo que
disponga de cesta de cocción) -
Autolimpieza: programa
automático de limpieza
100°C
30 s
(ajustable hasta
a 1 min)
Velocidad maxi
33
A Bloco do motor
B Painel de comando
b1 Botões de selecção
- P – Programas automáticos
P1 : Sopa aveludada / P2 : Sopa triturada /
Cozedura a vapor: P3 (consoante o modelo*)
Autoclean: P3 ou P4 (consoante o modelo*)
- -/+ - Diminuição/aumento da duração ou da
temperatura de cozedura
- OK/OFF -Validação da selecção do
programa, da duração ou da temperatura de
cozedura /Paragem do aparelho
b2 Indicador luminoso de aquecimento (se
>50°C no interior da cuba
b3 Selector de velocidades
b4 Botão Ice crush (picar gelo)
C Visor
c1 Indicação da temperatura regulável
entre 60 e 100°C
c2 Temporizador (tempo regulável
entre 0 e 59 min)
c3 Visualização do programa (P1, P2, P3 e P4
de consoante o modelo*)
c4 Indicador de segurança
D Conjunto do copo liquidificador
d1 Copo inox (marca MAX = 1,8 litros)
d2 Mola da pega d3 Lâminas
d3 em inox
E Conjunto da tampa
e1 Tampa doseadora
e2 Tampa
e3 Suporte da junta
e4 Junta vedante
F Cesto de cozedura (consoante o modelo*)
f1 pega
f2 cesto
Dados técnicos do aparelho:
Temperatura máxima: 100°C
Potência: 1.100 W
Tempo de programação máxima: 59 minutos
Sobre a segurança pessoal
Leia atentamente o manual de
instruções antes da primeira
utilizão do aparelho e guarde-o.
Uma utilização não conforme
isenta o fabricante de qualquer
responsabilidade.
o deixe as criaas utilizarem o
aparelho sem vigincia.
Este aparelho não deve ser
utilizado por criaas. Conservar o
aparelho fora do alcance das
criaas.
Ao ler este folheto, encontrará conselhos de utilização que o(a) farão antever o potencial do seu
aparelho: preparação de sopas aveludadas ou trituradas, sopas com pedaços, molhos e compotas,
batidos, cocktails e receitas no vapor…
Este aparelho não foi concebido
para ser utilizado por pessoas
(incluindo crianças) cujas
capacidades físicas, sensoriais ou
mentais se encontram reduzidas,
ou por pessoas com falta de
experiência ou conhecimento, a
não ser que tenham sido
devidamente acompanhadas e
instruídas sobre a correcta
utilização do aparelho, pela
pessoa responsável pela sua
segurança.
PT
DESCRIÇÃO DO APARELHO
INSTRUÇÕES DE SEGURANÇA
32
SI SU APARATO NO FUNCIONA, ¿QUÉ HACER?
P
R
O
B
LEM
A
S
CA
US
A
S
S
O
L
UCI
O
NES
E
l
aparat
o
no
f
unc
i
o
na
E
l
en
c
h
uf
e
no
est
á
c
o
nec
t
ad
o
C
o
nec
t
e
el
aparat
o
en
un
enc
h
uf
e.
E
l
bo
l
o
la
t
apa
no
est
án
c
o
rr
ec
t
am
ent
e
c
o
lo
c
ado
s
o
c
errado
s
V
eri
fi
q
ue
que
el
bo
l
o
la
t
apa
es
t
án
bi
en
c
o
lo
c
ado
s
y
c
errado
s
si
gui
endo
lo
s
esquem
as
del
fo
llet
o
V
i
brac
i
o
nes
ex
c
esi
vas
E
l
ap
arat
o
no
es
t
á
c
o
lo
c
ado
so
br
e
una
s
up
erfi
c
i
e
plana,
el
aparat
o
no
est
á
est
able
C
o
lo
q
ue
el
aparat
o
s
o
br
e
una
s
up
erfi
c
i
e
plana
Vo
lum
en
de
i
n
g
r
ed
i
ent
es
dem
asi
ado
i
m
po
rt
ant
e
R
eduz
c
a
la
c
ant
i
dad
de
i
n
gr
edi
ent
es
t
rat
ado
s
H
ui
da
po
r
la
t
ap
a
Vo
lum
en
de
i
ngr
edi
ent
es
d
em
asi
ado
i
m
po
rt
ant
e
R
eduz
c
a
la
c
ant
i
dad
de
i
ng
r
edi
ent
es
t
rat
ado
s
La
t
apa
no
es
t
á
bi
en
c
o
lo
c
ada
o
c
errada
C
i
err
e
c
o
rr
ec
t
am
ent
e
la
t
apa
en
el
bo
l
La
j
unt
a
de
est
an
quei
dad
n
o
est
á
p
r
esent
e
C
o
lo
q
ue
la
j
unt
a
de
es
t
an
quei
dad
s
o
br
e
el
p
o
rt
aj
unt
as
y
una
el
c
o
nj
unt
o
en
la
t
apa
La
j
unt
a
de
es
t
an
quei
dad
es
t
á
c
o
rt
ada,
deteriorada
Cam
bi
e
la
j
unt
a,
c
o
nt
ac
t
e
c
o
n
un
servicio técnico autorizado
Las
láminas
no gi
ran fácilm
en
te
Trozos d
e
ali
ment
os
dem
asi
ado gor
dos
o demasiado duros
Reduzca
el
t
amañ
o o la cantidad
de
ingredientes tratados. Añada líquido
Ind
i
cad
or
«
s
écu »
Sobrecarga
del
motor
pro
vocada por
una cantidad de ingredientes
d
em
as
i
ad
o
i
m
p
or
t
an
te
o
t
rozos
d
em
as
i
ad
o
d
u
ros
o
d
em
as
i
ad
o
g
or
d
os
Deje en
friar
el motor y reduzca la
cantidad de ingredientes en el bol
Ind
i
cad
or
«
sécu »
+ testigo luminoso rojo parapadea
Bol
vacío,
casi
vací
o o p
reparación s
i
n
suficiente líquido
Añada
líqu
i
d
o
hasta el n
iv
el mínimo
del bol (ver fig. 7)
.
Ind
i
cad
or
«
E
r
r »
+ testigo luminoso rojo parapadea
La res
is
ten
ci
a
que c
ali
en
t
a
no fun
ciona
Contac
te con un s
ervicio técnico
autorizado
Ind
i
cad
or
«
n
tc
»
+ testigo luminoso rojo parpadea
El
sen
sor
de temperatura no f
unciona
ya
Contac
te con un s
ervicio técnico
autorizado
¿Su aparato no funciona aún?
Diríjase a un servicio técnico autorizado (ver la lista en el librito servicios).
• Eliminación de los materiales de embalaje y del aparato
El embalaje comprende exclusivamente materiales sin peligro para el medioambiente, pudiendo ser
tirados conforme a las disposiciones de reciclado en vigor.
Para deshacerse del aparato, informarse en el servicio apropiado de su municipio.
• Produtos electrónicos ou eléctricos em fim de vida:
RECICLAJE
¡Participemos en la protección del medioambiente!
Su aparato contiene numerosos materiales de valor o reciclables.
Confíe éste a un punto de recogida selectiva para que su tratamiento sea llevado a
cabo.
35
compreendam os riscos
envolvidos.
Este aparelho pode ser utilizado
por crianças com mais de 8 anos
de idade, desde que sejam
supervisionadas ou que tenham
recebido instruções
relativamente à utilização
segura do aparelho e
compreendam os riscos
envolvidos. A limpeza e a
manutenção por parte do
utilizador não devem ser
realizadas por crianças sem
vigilância, excepto se estas
tiverem mais de 8 anos de idade
e forem supervisionadas por um
adulto.
• O aparelho liberta
vapor que pode
provocar queimaduras.
Manuseie a tampa e a
tampa doseadora com
precaução (se necessário,
utilize uma luva, uma pega,
etc.). Manuseie a tampa
doseadora pela parte
central.
• Tenha atenção se for
deitado um líquido quente
no copo liquidificador, dado
que este pode ser projectado
do aparelho devido a uma
ebulição repentina.
• Não coloque o aparelho em
funcionamento se a tampa
doseadora não estiver
posicionada no orifício da
tampa, se a junta não
estiver posicionada sobre o
suporte da junta ou se o
suporte da junta não estiver
montado na tampa.
• Atenção aos riscos de
ferimentos em caso de
utilização incorrecta do
aparelho.
• As lâminas são
extremamente afiadas:
manuseia-as com
precaução para não se ferir
durante o esvaziamento e
limpeza do copo.
Ligação eléctrica
O aparelho deve ser ligado a
uma tomada eléctrica com
ligação à terra.
• O aparelho foi concebido para
funcionar apenas em corrente
alterna. Verifique se a tensão de
alimentação do aparelho
indicada na placa sinalética é
compatível com a sua
instalação eléctrica.
• Desligar sempre o aparelho da
corrente se o deixar sem
vigilância e antes de proceder à
sua montagem, desmontagem
ou limpeza.
• Os erros de ligação anulam a
34
É conveniente vigiar as crianças
para garantir que as mesmas não
brincam com o aparelho.
Manter o aparelho fora do alcance
das criaas.
Durante a utilização do aparelho,
algumas peças atingem
temperaturas elevadas (parede
em inox do copo, peças
transparentes da tampa e da
tampa doseadora, peças metálicas
por baixo do copo, cesto). Podem
ocorrer queimaduras. Manuseie o
aparelho pelas peças plásticas frias
(pegas, bloco do motor). O
indicador luminoso de
aquecimento vermelho indica que
existe um risco de queimadura.
o utilize o aparelho se este não
funcionar correctamente, estiver
danificado ou se o cabo de
alimentação ou a ficha estiverem
danificados. Por forma a evitar
qualquer tipo de perigo, estes
deverão ser obrigatoriamente
substituídos por um Serviço de
Assistência Técnica autorizado
(consultar lista no folheto de
assistência técnica).
Este aparelho foi concebido
apenas para uma utilização
doméstica. O fabricante declina
qualquer responsabilidade e
reserva-se o direito de anular a
garantia em caso de utilização
comercial ou inadequada, ou de
desrespeito pelas instruções.
Este aparelho o se destina a ser
utilizado em aplicações
dosticas e análogas como
- cozinhas de lojas, escritórios e
outros ambientes de trabalho.
- em cozinhas pequenas reservadas
a funciorios de lojas, escririos e
outros ambientes profissionais.
- em quintas.
- utilização por clientes de hotéis,
motéis ou outros ambientes de
carácter residencial.
- em ambientes tipo quarto de
spedes.
Apenas mercados europeus:
Manter o aparelho e o cabo de
alimentação fora do alcance de
crianças com menos de
8 anos de idade.
Não permitir que as crianças
utilizem o aparelho como um
brinquedo.
Este aparelho pode ser utilizado
por pessoas cujas capa ci dades
físicas, sensoriais ou mentais
são reduzidas, ou por
pessoas sem experiência ou
conhecimentos, desde que
sejam supervisionadas ou que
tenham recebido instruções
relativamente à utilização
segura do aparelho e
37
• Coloque a junta sobre o suporte da junta (ver Fig.
1.a) e encaixe o conjunto na tampa (ver Fig. 1.b).
• Para cozer a vapor, posicione o cesto com os legumes
cortados aos pedaços e encha o copo liquidificador
com 0,5 l de água fria sem ultrapassar a parte
inferior do cesto (ver Fig. 10 e 11).
• Posicione a tampa (E) sobre o copo (D) alinhando os
dois triângulos (ver Fig. 2), enrosque a tampa sem
carregar, rodando-a no sentido da seta (ver Fig. 3)
Posicione o copo liquidificador (D) sobre o bloco do
motor (A) até ouvir um « clic » de encaixe (ver Fig. 4).
O aparelho começa a funcionar se o copo e a
tampa estiverem devidamente posicionadas e
enroscadas sobre o bloco do motor.
Em caso de posicionamento ou encaixe incorrecto de
uma ou de outra (ver Fig. 5 e 6), o logótipo
começa a piscar assim que se activa uma função.
O seu aparelho dispõe de 3 modos de
funcionamento:
• Modo de programação automática: a temperatura,
a duração da cozedura e da trituração são pré-
programadas para confeccionar sopas ou cozer a
vapor de forma automática.
• Modo manual: regulações personalizadas da
temperatura, da duração da cozedura para uma
utilização de acordo com a sua conveniência.
• Modo liquidificadora: selecção da velocidade do
motor sem utilizar a função de cozedura para
preparar saborosos batidos e cocktails.
Colocação do copo liquidificador e do conjunto da
tampa
• Antes da primeira utilização, limpe todos os
acessórios (D, E e F) com água e detergente, à
excepção do bloco do motor (A).
• Certifique-se de que retirou completamente todo o
material de embalagem antes de colocar o aparelho
em funcionamento.
FUNCIONAMENTO
Arrume o aparelho depois de ter
arrefecido.
SPV
Para sua segurança, não utilize
outros acessórios ou peças de
substituição para além dos
fornecidos pelos Serviços de
Assistência Técnicas autori -
zados.
Não utilize o aparelho se este
não funcionar correctamente,
estiver danificado ou se o cabo
de alimentação ou a ficha
estiverem danificados.
Por forma a evitar qualquer tipo
de perigo, estes deverão ser
obrigatoriamente substituídos
por um Serviço de Assistência
Técnica autorizado (consultar
lista no folheto de assistência
cnica).
Qualquer intervenção para além
da limpeza e manutenção
habituais realizadas pelo cliente
deve ser efectuada por um
Serviço de Assistência Técnica
autorizado.
36
garantia.
• Nunca desligue o aparelho
puxando pelo cabo de
alimentação.
• Não coloque o aparelho, o cabo
de alimentação nem a ficha
dentro de líquidos.
• Não deve imergir o aparelho
em líquidos.
• Não deixe o cabo de
alimentação ao alcance das
crianças, na proximidade ou em
contacto com as partes quentes
do aparelho, junto a uma fonte
de calor ou sobre uma aresta
afiada.
Utilização incorrecta
Nunca utilize a cuba o copo
liquidificador sem ingredientes
ou apenas com produtos secos.
Deite sempre os ingredientes
quidos em primeiro lugar na no
copo liquidificador antes de
adicionar os ingredientes
lidos, sem exceder a marca de
1,8 l MAX gravada no interior do
copo. (ver Fig. 8). Se a
liquidificadora o copo
liquidificador estiver demasiado
cheio, pode ser projectada água
a ferver. Tenha atenção para que
o nível de líquido seja suficiente
para cobrir a marca de mínimo
(ver Fig. 7).
Algumas receitas podem
provocar derrames inconve -
nientes, devido ao aparecimento
de bolhas, particularmente
quando se utiliza legumes
congelados. Neste caso, deverá
reduzir os volumes em
conformidade.
Nunca coloque os dedos ou
algum objecto no copo
liquidificador durante o
funcionamento do aparelho.
Não utilize o copo como
recipiente (para congelação,
esterilizão).
Coloque o aparelho em cima de
uma bancada de trabalho
estável, resistente ao calor, limpa
e seca.
o coloque o aparelho junto a
uma parede ou arrio: o vapor
produzido pode danificar os
materiais.
o deixe os cabelos, echarpes,
gravatas, etc., pendurados por
cima do copo liquidificador
durante o funcionamento do
aparelho.
Nunca coloque os acessórios
dentro de um forno micro-ondas.
Não utilize o aparelho ao ar livre.
Nunca exceda a quantidade
xima indicada no manual de
instrões.
tabela do tempo de cozedura das sopas no livro de
receitas).
• Valide o tempo seleccionado com o botão OK.
• A informação sobre a temperatura pisca e o
utilizador tem a possibilidade de modificar esta
informação. Regule a temperatura de cozedura com
os botões + (aumentar) e - (diminuir).
• Valide a temperatura seleccionada com o botão OK.
• O indicador luminoso vermelho acende para
informar que a cozedura teve início.
• Pode accionar o motor a qualquer momento:
- na velocidade lenta (posição 1) para misturar os
alimentos líquidos (ex: preparação de molhos).
- na velocidade rápida (a partir da posição 2) para
triturar alimentos sólidos.
MODO LIQUIDIFICADORA (sem cozedura)
• Seleccione uma velocidade rodando o
selector para a direita. A trituração é
iniciada e o tempo é indicado no ecrã.
No modo de liquidificadora, pode seleccionar a
5 velocidades de trituração diferentes.
A velocidade encontra-se à esquerda da posição 0.
• Rode o selector de velocidades para a posição 0 para
parar o aparelho.
• Carregue na mola (d2), depois retire a cuba
liquidificadora (D). Se pretender programar um
tempo de funcionamento com paragem automática:
• Regule o tempo de funcionamento com os botões +
(aumentar) e - (diminuir).
• Seleccione uma velocidade rodando o selector. A
contagem decrescente do tempo é indicada no ecrã.
• O motor pára automaticamente no final da
contagem decrescente.
Função Picar Gelo: o botão "Ice" activa a função que
permite picar gelo. Pode parar o aparelho consoante a
sua conveniência pressionando o botão "OFF". Pode
picar, no máximo, 6 a 8 cubos.
39
• Não deve imergir o aparelho em quidos. Não
coloque o bloco do motor (A) sob água quente
corrente.
• Limpe imediatamente a cuba após a utilização.
• Encha a cuba com 1 litro de água quente e 2 a 3
gotas de detergente. Respeite as quantidades
recomendadas de água e de detergente da loiça. O
excesso de detergente da loiça aumenta bastante a
formação de espuma e, consequentemente, favorece
a ocorrência de derrames.
• Utilize o programa automático Autoclean: P3 ou P4
(de acordo com o modelo*) para efectuar uma
pré-lavagem do copo.
• Quando o programa tiver terminado, desligue o
aparelho da corrente.
• Carregue na mola (d2) depois retire a cuba
liquidificadora (D).
• Coloque a cuba sobre uma superfície plana.
• Desencaixe a tampa rodando-a um quarto de volta
no sentido contrário aos ponteiros do relógio. Retire
a tampa com precaução.
• Quando as peças tiverem arrefecido, desencaixe o
suporte da junta da tampa carregando nas zonas de
preensão
• Finalize a limpeza da cuba utilizando uma esponja.
• Enxagúe o interior da cuba sob água corrente, bem
como a respectiva tampa.
• Quando a parte da cuba que aquece está muito suja,
deixe humedecer durante várias horas com água e
detergente da loiça para facilitar a limpeza.
Tenha cuidado com as lâminas (d3) da
cuba liquidificadora durante a sua
limpeza e quando esvazia a cuba, pois
são muito afiadas.
• Para limpar o bloco do motor (A) utilize um pano
húmido. Seque-o cuidadosamente.
• Os elementos amovíveis (tampa, suporte vedante,
vedante, tampa doseadora, cesto de cozedura)
podem ser limpos com a ajuda de uma esponja e de
água , água e detergente para a loiça.
LIMPEZA DO APARELHO
ice
max
0
38
CONSELHOS PRÁTICOS
• Tenha atenção para que o nível de líquido seja
suficiente para cobrir a marca de mínimo (ver Fig. 7)
e não ultrapassar a marca de 1,8 l MAX gravada no
interior da cuba (ver Fig. 8).
• Algumas receitas podem provocar derrames
inconvenientes, devido ao aparecimento de bolhas,
particularmente quando se utiliza legumes
congelados. Neste caso, deverá reduzir os volumes
em conformidade.
• A informação sobre o tempo ou a temperatura pisca
e o utilizador tem a possibilidade de modificar esta
informação. Se necessário, regule o tempo com os
botões + (aumentar) e - (diminuir), em função dos
ingredientes utilizados e do volume preparado (ver
tabela do tempo de cozedura das sopas no livro de
receitas).
• O cesto de cozedura (consoante o modelo) permite-
lhe cozer no vapor (no programa P3 com 0,5 litros de
água), ou para uma preparação com pedaços
sólidos, cozer ingredientes como carne, peixe,
legumes, ao mesmo tempo que a sopa (no programa
P1 ou P2).
• No final dos programas, o aparelho passa
automaticamente para o modo "manter quente"
durante 40 minutos para conservar a preparação
pronta a consumir. Para parar o modo "manter
quente", basta pressionar o botão OFF.
• Se abrir a tampa, carregar na mola ou retirar a cuba,
o modo "manter quente" pára automaticamente.
• Assim que o programa é iniciado, o utilizador tem a
possibilidade de parar o aparelho em qualquer
momento pressionando o botão P. O programa
passa para o modo de poupança de energia e o
utilizador tem a possibilidade de o reiniciar
pressionando de novo o botão P ou o botão OK.
• Se se enganou no programa e quiser cancelá-lo,
pressione o botão OFF durante 2 segundos. Esta
acção permite reiniciar a o temporizador e as
temperaturas.
MODO MANUAL
• Regule o tempo de cozedura com os botões +
(aumentar) e - (diminuir), em função dos
ingredientes utilizados e do volume preparado (ver
UTILIZAÇÃO DO APARELHO
MODO DE PROGRAMAÇÃO
Quando a água e os ingredientes estiverem no fundo da cuba ou no cesto de cozedura a vapor, enrosque a tampa e
p
osicione o copo sobre o bloco do motor (consultar Funcionamento)
Seleccione um dos programas automáticos propostos a seguir (botão P) e valide (botão OK).
Quando o programa chega ao fim, o aparelho emite 3 bips.
Desencaixe a cuba carregando na mola (d2) situada no interior da pega (ver Fig. 9) e sirva de imediato ou deixe a cuba
encaixada para manter a preparação quente (até 40 minutos).
Descubra os programas automáticos propostos
Temperatura (Máx.) Tempo ajustável Trituração
P1 – Sopa aveludada
(textura fina)
100°C
25 min
(+ ou -10 min)
Velocidade máx.
1 min
P2 – Sopa triturada
(textura densa
100°C
35 min
(+ ou -10 min)
Velocidade mín.
13s
P3 – (apenas para o modelo que
possui o cesto para cozinhar) –
Cozer a vapor com o cesto para
cozinhar e 50 cl de água (de
acordo com o modelo*)
100°C
30 min
(+ ou -20 min)
Não
P3 – (ou P4 para o modelo que
possui o cesto para cozinhar) -
Autoclean: programa automático
de limpeza
100°C
30 s
(ajustável até 1 min.)
Velocidade máx.
41
A Motorblock
B Bedienfeld
b1 Auswahltasten
P – Automatische Programme
P1: Cremesuppe / P2: Passierte Suppe /
Dampfgaren: P3 (abhängig vom Modell*)
Autoclean: P3 oder P4 (abhängig vom
Modell*)
-/+ Verringerung/Erhöhung der Gardauer und
Gartemperatur
OK/OFF – Bestätigung einer Programmwahl,
der Gardauer oder Gartemperatur /
Abschalten des Geräts
b2 Heiz-Kontrollleuchte (wenn >50° C im
Behälter)
b3 Geschwindigkeitsregler:
b4 Ice Crush-Taste (Eiswürfel zerkleinern)
C Display
c1 Temperaturanzeige (einstellbar von 60
bis 100°C)
c2 Timeranzeige (Zeit einstellbar von 0 bis
59 Min.)
c3 Programm-Anzeige (P1, P2, P3 und P4
abhängig vom Modell*)
c4 Anzeige Sicherheitsleuchte
D Mixereinheit
d1 Edelstahlschüssel (Max-Markierung = 1,8
Liter)
d2 Griffschalter
d3 Edelstahlklingen
E Deckeleinheit
e1 Dosierstopfen
e2 Deckel
e3 Dichtungsträger
e4 Dichtungsring
F Garkorb (je nach Modell*)
f1 Handgriff
f2 Korb
Technische Gerätedaten:
Maximaltemperatur: 100 °C
Leistung: 1100W
Maximal programmierbare Zeit: 59 Minuten.
Zur Personensicherheit
Lesen Sie die Bedienungsanleitung
vor der ersten Verwendung Ihres
Geräts aufmerksam, bewahren
Sie sie dann sorgfältig auf: Eine
nicht der Bedienungsanleitung
entsprechende Verwendung
befreit den Hersteller von jeder
Haftung.
Lassen Sie Kinder das Gerät nie
unbeaufsichtigt verwenden.
Dieses Gerät darf nicht von
Kindern verwendet werden.
Beim Lesen dieser Gebrauchsanweisung werden Sie Verwendungstipps finden, die Ihnen die
Möglichkeiten Ihres Geräts aufzeigen: Zubereitung von Cremesuppen oder passierten Suppen,
Suppen mit Stückchen, Soßen und Kompott, Smoothies, Cocktails und Dampfgargerichten…
Halten Sie das Gerät und sein
Stromkabel außerhalb der
Reichweite von Kindern.
Dieses Gerät ist nicht dafür
vorgesehen, von Personen (oder
Kindern) verwendet zu werden,
deren physische, sensorische
oder mentale Fähigkeiten
verringert sind, oder von
Personen, die unzureichende
Erfahrung oder Kenntnisse
besitzen, außer sie werden von
einer Person beaufsichtigt, die
für ihre Sicherheit verantwortlich
DE
GERÄTEBESCHREIBUNG
SICHERHEITSHINWEISE
40
O QUE FAZER SE O APARELHO NÃO FUNCIONAR?
P
R
O
B
LEM
A
S CA
US
A
S
S
O
L
UÇÕ
ES
O
apar
elho
não
f
unc
i
o
n
a
A
fi
c
h
a
não
est
á
li
gada.
Li
gue
o
apar
elh
o
a
um
a
t
o
m
ada.
A
c
uba
o
u
a
t
am
pa
não
est
ão
c
o
rr
ec
t
am
ent
e
po
si
c
i
o
nadas
o
u
enr
o
s
c
adas
.
V
eri
fi
que
se
a
c
uba
o
u
a
t
am
p
a
es
t
ão
bem
po
si
c
i
o
nadas
o
u
enr
o
sc
adas
s
eg
ui
n
d
o
as
fi
g
uras
d
o
fo
lh
et
o
.
V
i
braç
õ
es
ex
c
ess
i
vas
O
ap
ar
elho
não
fo
i
c
o
lo
c
ado
em
c
i
m
a
d
e
um
a
superfí
c
i
e
plana
e
não
est
á
es
t
áv
el
C
o
lo
que
o
apar
elh
o
s
o
br
e
um
a
superfí
c
i
e
plana.
Vo
lum
e
de
i
ng
r
edi
ent
es
ex
c
essi
v
o
.
R
eduza
a
quant
i
dad
e
de
i
n
g
r
ed
i
ent
es
a
pr
eparar.
Fuga
pela
t
am
pa
Vo
lum
e
de
i
n
g
r
edi
ent
es
ex
c
ess
i
v
o
.
R
eduza
a
q
uant
i
dade
de
i
n
g
r
edi
ent
es
a
pr
eparar.
A
t
am
pa
n
ão
est
á
bem
po
si
c
i
o
n
ada
o
u
en
r
o
sc
ada.
E
nr
o
sque
c
o
rr
ec
t
am
ent
e
a
t
am
pa
s
o
br
e
a
c
uba.
A
j
unt
a
v
edant
e
não
est
á
pr
esent
e.
P
o
si
c
i
o
ne
a
j
unt
a
v
edant
e
so
br
e
o
s
up
o
rt
e
da
j
unt
a
e
en
c
ai
xe
o
c
o
nj
unt
o
na
t
am
p
a.
A
j
unt
a
v
edant
e
es
t
á
c
o
rt
ada,
d
eteriorada.
Subs
t
i
t
ua
a
j
unt
a,
c
o
nt
ac
t
e
um
Servi
ç
o
d
e As
sistência Técnica autorizado.
As lâmin
as
n
ão rodam
faci
lm
en
te
Pedaços d
e ali
m
ent
os dem
asi
ado
grandes ou demasiado rijos.
Dim
i
nua o
t
aman
ho ou a quantidad
e
dos ingredientes a preparar.
Ad
i
ci
on
e
q
u
i
d
o.
Mensag
em
"S
écu" (Segurança)
Sobrecarga
do motor
pro
vocada por
uma quantidade excessiva de
i
n
g
red
i
en
tes
ou
p
or
p
edaços
d
em
as
i
ad
o
r
i
jos
ou
g
r
an
d
es
.
Dei
xe arrefecer o
motor e red
uza a
quantidade de ingredientes na cuba.
Mensag
em
"sécu" +
i
ndic
ador luminoso
a piscar na cor vermelha
Cuba vazi
a,
qu
as
e vazi
a ou preparação
com pouco líquido.
Adi
cione lí
qui
do
até ao n
ív
el mínimo
da cuba (ver Fig. 7)
.
Mensag
em
"Err
" (Erro)+
indicador
luminoso a piscar na cor vermelha
A
resistênci
a d
e aquecim
ento não
funciona.
Cont
ac
te um Serviço de As
s
is
tência
Técnica autorizado
Mensag
em
"ntc"+
i
n
dicador
lum
inoso a
piscar na cor vermelha
O
s
ensor de temperatura d
ei
xou
de
funcionar.
Cont
ac
te um Serviço de As
s
is
tência
Técnica autorizado
O seu aparelho continua a não funcionar?
Contacte um centro de assistência técnica autorizado (consultar lista no folheto).
• Eliminação dos materiais de embalagem e do aparelho
A embalagem é composta exclusivamente por materiais sem perigo para o ambiente, que podem ser
eliminados em conformidade com as disposições de reciclagem em vigor.
Para a eliminação do aparelho, informe-se junto do serviço adequado da sua freguesia.
• Produtos electrónicos ou eléctricos em fim de vida:
RECICLAGEM
Protecção do ambiente em primeiro lugar!
O seu aparelho contém inúmeros materiais que podem ser recuperados ou reciclados.
Entregue-o num ponto de recolha para ser efectuada a reciclagem do mesmo.
43
unzureichenden Kenntnissen
verwendet werden, wenn sie
überwacht werden oder
bezüglich der sicheren
Verwendung des Geräts
unterrichtet wurden und die
potentiellen Gefahren genau
kennen.
Dieses Gerät kann von Kindern
ab 8 Jahren verwendet werden,
wenn sie beaufsichtigt werden
oder bezüglich der sicheren
Verwendung des Geräts
unterrichtet wurden und die
Risiken genau kennen. Die
Reinigung und Pflege durch den
Nutzer darf nicht durch Kinder
erfolgen, außer sie sind
mindestens 8 Jahre alt und
werden von einem Erwachsenen
beaufsichtigt.
Das Gerät erzeugt
Dampf, der
Verbrennungen
verursachen kann.
Gehen Sie mit dem Deckel und
Dosierstopfen vorsichtig um
(verwenden Sie, falls erforderlich,
einen Handschuh, einen
Topflappen usw.). Greifen Sie
den Dosierstopfen mittig.
Seien Sie vorsichtig, wenn
heiße Flüssigkeit in das
Küchengerät oder den Mixer
gegossen wird, da sie durch
plötzliches Aufwallen aus dem
Gerät spritzen kann.
Lassen Sie das Gerät nicht
laufen, wenn sich der
Dosierstopfen nicht in der
Deckelöffnung befindet, wenn
die Dichtung nicht an ihrem
Platz ist, wenn sich der
Dichtungsträger nicht im
Deckel befindet.
Bei falscher Verwendung des
Geräts besteht die Gefahr von
Verletzungen.
Die Klingen sind sehr
scharf: Gehen Sie
vorsichtig mit ihnen um,
um sich beim Leeren des
Behälters und der Reinigung
nicht zu verletzen.
Zum Stromanschluss
Das Gerät muss an eine geerdete
Steckdose angeschlossen werden.
• Das Gerät ist ausschließlich auf
einen Betrieb mit Wechselstrom
ausgelegt. Bitte stellen Sie
sicher, dass die Netzspannung
mit der auf dem Typenschild
des Geräts angegebenen
Spannung übereinstimmt.
• Trennen Sie das Gerät immer
vom Stromnetz, wenn Sie es
unbeaufsichtigt lassen und vor
der Montage, Demontage oder
Reinigung.
42
ist, oder zuvor hinsichtlich des
Gebrauchs des Geräts
unterwiesen.
Kinder müssen beaufsichtigt
werden, um sicherzustellen, dass
sie nicht mit dem Gerät spielen.
Halten Sie Ihr Gerät außerhalb
der Reichweite von Kindern.
Während des Betriebs des
Geräts erreichen einige Teile
hohe Temperaturen
(Edelstahlwand der Behälters,
transparente Teile des Deckels
und des Dosierstopfers,
Metallteile unter dem Behälter,
Korb). Sie können
Verbrennungen verursachen.
Greifen Sie das Gerät an den
kalten Kunststoffteilen (Griffe,
Motorblock). Die rote Heiz-
Kontrollleuchte gibt an, dass ein
Verbrennungsrisiko besteht.
Benutzen Sie Ihr Gerät nicht,
wenn es nicht richtig
funktioniert, wenn es beschädigt
wurde oder wenn das
Stromkabel oder der Stecker
beschädigt sind. Lassen Sie das
Kabel aus Sicherheitsgründen
nur in einer autorisierten
Kundendienstwerkstatt
austauschen (siehe Liste im
Serviceheft).
Ihre Maschine ist ausschließlich
Haushaltszwecken vorbehalten.
Bei Nichteinhaltung der
Anweisungen oder kommerzieller
oder unangemessener Nutzung
lehnt der Hersteller jegliche
Haftung ab und behält sich das
Recht vor, die Garantie zu
beenden.
Dieses Gerät ist nicht dafür
bestimmt, für folgende
Haushaltszwecke oder ähnliche
Zwecken verwendet zu werden:
- Küchenarbeitsbereich in
Geschäften, Büros oder an
anderen Arbeitsplätzen.
- Kochnischen für Personal in
Geschäften, Büros und anderer
Berufsumgebung.
-
auf landwirtschaftlichen Anwesen.
- für die Verwendung durch
Kunden von Hotels, Motels und
anderen Unterkünften.
- in Umgebungen wie
stezimmern.
Nur europäische Märkte:
Halten Sie das Gerät und das
Stromkabel außerhalb der
Reichweite von Kindern unter
8 Jahren.
Kinder dürfen nicht mit dem
Gerät spielen.
Dieses Gerät kann von Personen
mit verringerten körperlichen,
sensorischen oder mentalen
Fähigkeiten oder Personen mit
unzureichender Erfahrung oder
45
• Für die Zubereitung von Dampfgargerichten setzen
Sie den Korb mit dem in Stücke geschnittenen
Gemüse an seinen Platz und füllen den Behälter mit
0,5 l kaltem Wasser, ohne die Unterkante des Korbs
zu überschreiten (siehe Fig. 10 und 11).
• Platzieren Sie den Deckel (E) auf der Schüssel (D),
indem Sie die beiden Dreiecke aufeinander
ausrichten (siehe Fig. 2), Verriegeln Sie den Deckel,
ohne zu drücken, indem Sie ihn in Pfeilrichtung
drehen (siehe Fig. 3). Setzen Sie den Mixerbehälter
(D) auf den Motorblock (A), bis er einrastet
(siehe Fig. 4).
Das Gerät uft nur, wenn der Behälter und der
Deckel richtig auf dem Motorblock platziert und
verriegelt sind.
Wenn einer von ihnen falsch platziert oder nicht
richtig verriegelt ist (siehe Fig. 5 und 6), blinkt das
Logo wenn man eine Funktion aktiviert.
Das Gerät besitzt 3 Betriebsarten:
• Automatikbetrieb: Temperatur, Garzeit und
Mixdauer sind vorprogrammiert, um automatisch
Suppen oder Dampfgargerichte zuzubereiten.
• Manueller Betrieb: individuelle Einstellung der
Gartemperatur und Gardauer für eine Nutzung
gemäß Ihren Vorlieben.
• Mixerbetrieb: Auswahl der Motorgeschwindigkeit
ohne Verwendung der Garfunktion zur Herstellung
leckerer Smoothies oder Cocktails.
Anbringen des Behälters und der Deckeleinheit
• Reinigen Sie alle Zubehörteile (D, E und F) vor der
ersten Verwendung mit heißem Seifenwasser, nicht
jedoch den Motorblock (A).
• Vergewissern Sie sich, dass die gesamte Verpackung
entfernt wurde, bevor Sie das Gerät in Betrieb
nehmen.
• Legen Sie die Dichtung auf den Dichtungsträger
(siehe Fig. 1.a) und klipsen Sie alles auf den Deckel
(siehe Fig. 1.b).
INBETRIEBNAHME
Kundendienst
Verwenden Sie aus
Sicherheitsgründen nur Zubehör
oder Ersatzteile, die von
autorisierten
Kundendienstzentren des
Herstellers geliefert werden.
Benutzen Sie das Gerät nicht,
wenn es nicht richtig
funktioniert, wenn es beschädigt
wurde oder wenn das
Stromkabel oder der Stecker
bescdigt sind.
Lassen Sie das Kabel aus
Sicherheitsgru
̈nden nur in einer
Kundendienstwerkstatt
austauschen (siehe Liste im
Serviceheft).
Alle Eingriffe, die über die
Reinigung und normale Pflege
durch den Kunden hinausgehen,
müssen von einer
Kundendienstwerkstatt
ausgeführt werden.
44
• Bei falschem Anschluss erlischt
die Garantie.
• Ziehen Sie niemals am
Stromkabel, um das Gerät vom
Stromnetz zu trennen.
• Tauchen Sie das Gerät, das
Stromkabel oder den Stecker
nicht in Wasser oder andere
Flüssigkeiten.
• Das Stromkabel darf sich nie in
der Reichweite von Kindern, in
der Nähe von heißen
Geräteteilen, einer Hitzequelle
oder einer scharfen Kante
befinden oder diese berühren.
Zum falschen Gebrauch
Lassen Sie den Mixer nie ohne
Zutaten oder nur mit trockenen
Produkten laufen.
Geben Sie immer die festen
Zutaten zuerst in den Behälter,
bevor Sie die flüssigen Zutaten
hinzugeben; überschreiten Sie
dabei die 1,8l-Markierung (MAX)
an der Behälterinnenseite nicht
(siehe Fig. 8). Wenn der Mixer zu
voll ist, kann kochendes Wasser
herausspritzen. Achten Sie
darauf, genug Flüssigkeit
hinzuzugeben, so dass die
Min-Markierung erreicht wird
(siehe Fig. 7).
Einige Rezepte können aufgrund
des Auftretens von Blasen
besonders stark überkochen, vor
allem bei der Verwendung
tiefgefrorenen Gemüses. In
diesem Fall müssen Sie die
Mengen entsprechend
verringern.
Stecken Sie niemals Ihre Finger
oder andere Gegenstände in
den Mixerbelter, hrend das
Gerät uft.
Verwenden Sie den Behälter
nicht zum Tiefkühlen oder
Sterilisieren.
Stellen Sie das Gerät auf eine
stabile, hitzebesndige, saubere
und trockene Arbeitsfche.
Stellen Sie das Gerät nicht an
eine Wand oder einen Schrank:
Der entstehende Dampf könnte
sie bescdigen.
Lassen Sie nicht Ihre Haare,
einen Schal, eine Krawatte usw.
über die Schüssel hängen,
hrend das Gerät uft.
Die Zubehörteile sind nicht
mikrowellengeeignet.
Verwenden Sie das Gerät nicht
im Freien.
Überschreiten Sie niemals die
in der Gebrauchsanweisung
angegebene Maximalmenge.
Verstauen Sie das Gerät, wenn es
abgehlt ist.
• Die Temperaturinformation blinkt. Sie haben die
Möglichkeit, diese Information zu ändern. Stellen Sie
die Gartemperatur mit Hilfe der Tasten + (erhöhen)
und – (verringern) ein.
• Bestätigen Sie dann die gewählte Temperatur mit der
Taste OK.
• Die rote Kontrollleuchte leuchtet auf, um Sie zu
informieren, dass das Garen beginnt.
• Sie können den Motor jederzeit einschalten:
- auf langsamer Geschwindigkeit (Position 1), um
flüssige Zutaten zu mischen (Bsp.: Zubereitung von
Soßen).
- auf schneller Geschwindigkeit (ab Position 2), um feste
Lebensmittel zu mixen.
MIXERBETRIEB (ohne Garen)
• Wählen Sie eine Geschwindigkeit,
indem Sie den Auswahlschalter nach
rechts drehen. Das Mixen beginnt und
die Zeit wird auf dem Display angezeigt.
Im Mixerbetrieb können Sie bis zu 5 verschiedene
Mixgeschwindigkeiten auswählen.
Die Pulse-Geschwindigkeit befindet sich links von der
Position 0.
• Drehen Sie den Geschwindigkeits-Wahlschalter auf
die Position 0, um das Gerät auszuschalten.
• Drücken Sie auf den Griffschalter (d2), Dann nnen
Sie den Mixerbehälter (D) anheben. Wenn Sie eine
Betriebszeit mit automatischem Stopp
programmieren wollen:
• Passen Sie die Betriebszeit mit Hilfe der Tasten +
(erhöhen) und – (verringern) an.
• Wählen Sie eine Geschwindigkeit, indem Sie den
Auswahlschalter drehen. Die Zeit wird auf dem
Display heruntergezählt.
• Der Motor schaltet sich nach dem Herunterzählen
der Zeit automatisch ab.
Taste gescrushtes Eis: Mit der Taste „Ice“ können Sie
gescrushtes Eis herstellen. Sie können das Gerät nach
Belieben ausschalten, indem Sie auf die Taste „OFF“
drücken. Sie können maximal 6 bis 8 Eiswürfel crushen.
47
ice
max
0
• Dieses Gerät darf nicht untergetaucht werden. Halten
Sie den Motorblock (A) nicht unter fließendes Wasser.
• Reinigen Sie den Behälter sofort nach der
Verwendung.
• Füllen Sie 1 Liter heißes Wasser mit 2 oder 3 Tropfen
Spülmittel in den Behälter. Beachten Sie die
empfohlenen Wasser- und Spülmittelmengen. Zu viel
Spülmittel führt zu starkem Schäumen und kann die
Flüssigkeit so überlaufen lassen.
• Verwenden Sie das Selbstreinigungsprogramm
Autoclean: P3 oder P4 (abhängig vom Modell*), um
die Schüssel vorzureinigen.
• Trennen Sie das Gerät nach Programmende vom
Stromnetz.
• Drücken Sie auf den Griffschalter (d2), Dann können
Sie den Mixerbehälter (D) anheben.
• Stellen Sie den Behälter auf eine ebene Fläche.
• Entriegeln Sie den Deckel durch eine Vierteldrehung
im Uhrzeigersinn. Nehmen Sie den Deckel vorsichtig
ab.
Wenn die Teile abgekühlt sind, klipsen Sie den
Dichtungsträger des Deckels ab, indem Sie ihn an den
vorgesehenen Bereichen greifen.
• Reinigen Sie den Behälter schlussendlich nochmals
mit einem Schwamm.
• Spülen Sie die Behälterinnenseite sowie den Deckel
unter fließendem Wasser ab.
• Wenn der Heizbereich des Behälters stark
verschmutzt ist, lassen Sie ihn einige Stunden in
Wasser mit Spülmittel einweichen, damit er leichter
zu reinigen ist.
Gehen Sie mit den Klingen (d3) des
Mixerbehälters vorsichtig um, wenn Sie
sie reinigen oder den Behälter leeren.
Sie sind scharf.
• Verwenden Sie zum Reinigen des Motorblocks (A)
einen feuchten Lappen. Trocknen Sie ihn sorgfältig.
• Die abnehmbaren Teile (Deckel, Dichtungshalter,
Dichtung, Dosierstopfen, Garkorb) werden mit einem
Schwamm und heißem Seifenwasser gereinigt.
REINIGUNG DES GERÄTS
46
VERWENDUNG DES GERÄTS
AUTOMATIKBETRIEB MIT PROGRAMMEN
Verriegeln Sie den Deckel, nachdem Sie das Wasser und die Zutaten in den Behälter oder den Dampfkorb gegeben haben,
u
nd setzen Sie den Behälter auf den Motorblock (siehe Inbetriebnahme).
Wählen Sie eines der nachstehenden Automatikprogramme (Taste P) und bestätigen Sie (Taste OK).
Wenn das Programm beendet ist, ertönen 3 Pieptöne.
Entriegeln Sie den Behälter, indem Sie auf den Schalter (d2) im Handgriff drücken (siehe Fig. 9) und servieren Sie gleich
oder lassen Sie den Behälter zum Warmhalten (bis zu 40 Minuten) an seinem Platz.
Verfügbare Automatikprogramme
Temperatur (Max.) Anpassbare Zeit Mixen
P1 – Cremesuppe
(feine Textur)
100°C
25 Min.
(+ oder -10 Min.)
Maximalgeschwindigkeit
1 Min.
P2 – Passierte Suppe
(grobe Textur)
100°C
35 Min.
(+ oder -10 Min.)
Minimalgeschwindigkeit
13 Sek.
P3 – (nur für das Modell mit
Gareinsatz) - Dampfgaren mit
dem Gareinsatz und 50 ml
Wasser (abhängig vom Modell*)
100°C
30 Min.
(+ oder -20 Min.)
Nein
P3 – (oder P4 für das Modell mit
Gareinsatz) - Autoclean:
Selbstreinigungs-Programm
100°C
30 Sek.
(einstellbar bis
zu 1 Min.)
Maximal-
Geschwindigkeit
PRAKTISCHE TIPPS
• Achten Sie auf eine ausreichende Flüssigkeitsmenge
bis zur Min-Markierung (siehe Fig. 7) und darauf, die
Max-Markierung bei 1,8 l im Innern der Schüssel
nicht zu überschreiten (siehe Fig. 8).
• Einige Rezepte können aufgrund des Auftretens von
Blasen besonders stark überkochen, vor allem bei der
Verwendung tiefgefrorenen Gemüses. In diesem Fall
müssen Sie die Mengen entsprechend verringern.
• Die Zeit- oder Temperaturinformation blinkt: Sie
können diese Information ändern. Passen Sie, falls
erforderlich, die Zeit mit Hilfe der Tasten + (erhöhen)
oder (verringern) in Abhängigkeit von den
verwendeten Zutaten und dem Volumen an (siehe
Tabelle der Garzeiten für Suppen im Rezeptbuch).
• Im Garkorb (je nach Modell) können Sie dampfgaren
(mit P3 mit 0,5 Liter Wasser) oder bei einer
Zubereitung mit Stücken ganze Zutaten wie Fleisch,
Fisch, Gemüse gleichzeitig zusammen mit Ihrer
Suppe kochen (mit P1 oder P2).
• Nach Programmende wechselt das Gerät
automatisch für 40 Minuten in den
Warmhaltemodus, um das Gericht verzehrbereit zu
halten. Um das Warmhalten zu beenden, müssen Sie
nur auf die Taste OFF drücken.
• Wenn Sie den Deckel öffnen, auf den Griffschalter
drücken oder den Behälter entfernen, wird das
Warmhalten automatisch beendet.
• Wenn das Programm bereits läuft, haben Sie
jederzeit die Möglichkeit, das Gerät durch Drücken
auf die Taste P auszuschalten. Das Programm wird
dann unterbrochen. Sie haben die Möglichkeit, es
weiterlaufen zu lassen, indem Sie erneut auf P oder
die Taste OK drücken.
• Wenn Sie das falsche Programm gewählt haben und
es löschen wollen, drücken Sie 2 Sekunden lang auf
den Knopf OFF. So können Sie die Zeit und
Temperaturen zurücksetzen
MANUELLER BETRIEB
Passen Sie die Zeit mit Hilfe der Tasten + (erhöhen)
oder (verringern) in Abhängigkeit von den
verwendeten Zutaten und dem Volumen an (siehe
Tabelle der Garzeiten für Suppen im Rezeptbuch).
• Bestätigen Sie dann die gewählte Zeit mit der Taste OK.
49
A Motorblok
B Bedieningspaneel
b1 Selectieknoppen
- P - Automatische programma's
P1 : Veloutésoep / P2 : Gepureerde soep/
Stomen: P3 (afhankelijk van het model*)
Autoclean : P3 of P4 (afhankelijk van het
model*)
- -/+ - De kooktijd verkorten/verlengen of de
kooktemperatuur verlagen/verhogen
- OK/OFF De keuze van het
programma, de kooktijd of de
kooktemperatuur bevestigen / Het apparaat
uitschakelen
b2 Verwarmingscontrolelampje (als >50°C
aan de binnenkant van de kom)
b3 Snelheidsselectieknop
b4 Knop Ice crush (ijsblokjes crushen)
C Beeldscherm
c1 Weergave ingestelde temperatuur van
60 tot 100°C
c2 Weergave timer (tijd instelbaar van 0 tot
59 min)
c3 Weergave programma (P1, P2, P3 en P4
afhankelijk van het model*)
c4 Weergave beveiligingscontrolelampje
D Blenderkom met toebehoren
d1 Roestvrijstalen kom (Max-aanduiding =
1.8 liter)
d2 Pal handgreep
d3 Roestvrijstalen snijbladen
E Deksel met toebehoren
e1 Doseerdop
e2 Deksel
e3 Afdichtingsringhouder
e4 Afdichtingsring
F Kookmandje (afhankelijk van het model*)
f1 Handgreep
f2 Mand
Technische gegevens van het apparaat
Maximum temperatuur: 100°C
Vermogen: 1100W
Maximum programmeertijd: 59 minuten.
Ten aanzien van de
persoonlijke veiligheid
Lees de gebruiksaanwijzing
aandachtig voor het eerste gebruik
en bewaar deze zorgvuldig: Niet-
naleving ontheft de fabrikant van
alle aansprakelijkheid.
Laat kinderen dit apparaat niet
zonder toezicht gebruiken.
Dit apparaat mag niet worden
gebruikt door kinderen.
Bewaar dit apparaat en het snoer
In deze handleiding vindt u enkele gebruikstips om optimaal van de mogelijkheden van uw apparaat
gebruik te maken: veloutésoepen of gepureerde soepen, soepen met stukjes, sauzen en compotes,
smoothies, cocktails, stoomrecepten ...
buiten het bereik van kinderen.
Dit apparaat mag niet gebruikt
worden door personen (of
kinderen) met verminderde,
fysieke, zintuiglijke of mentale
capaciteiten, of personen die te
weinig ervaring of kennis hebben
tenzij ze onder de supervisie staan
van een persoon die voor hen
verantwoordelijk is of als ze
genoeg richtlijnen gekregen
hebben om het apparaat correct te
hanteren.
NL
BESCHRIJVING VAN HET APPARAAT
VEILIGHEIDSVOORSCHRIFTEN
48
WAS TUN, WENN IHR GERÄT NICHT FUNKTIONIERT?
P
R
O
B
LEM
E G
R
ÜNDE
LÖ
S
UNG
EN
Das
G
erät
f
unk
t
i
o
ni
ert
ni
c
h
t
.
Das
G
erät
i
st
ni
c
h
t
anges
t
ec
kt
.
St
ec
ken
Si
e
das
G
erät
an
ei
n
e
St
ec
kd
o
se
an.
Der
Behält
er
o
d
er
d
er
Dec
kel
si
n
d
ni
c
h
t
ri
c
ht
i
g
plat
z
i
ert
o
der
v
erri
egelt
.
Ü
berprüf
en
Si
e,
o
b
d
er
Beh
ält
er
un
d
der
Dec
kel
ri
c
ht
i
g
plat
z
i
ert
und
v
erri
eg
elt
s
i
n
d
,
w
i
e
i
n
d
en
Sc
h
em
at
a
d
er
G
ebrauc
h
s
an
wei
s
un
g
an
g
eg
eben
.
Bes
o
nd
ers
s
t
arke
V
i
brat
i
o
nen.
Das
G
erät
befi
ndet
si
c
h
ni
c
ht
auf
ei
ner
ebenen
F
läc
he,
das
G
erät
s
t
eh
t
n
i
c
ht
s
t
abi
l.
St
ellen
Si
e
das
G
erät
auf
ei
ne
eben
e
F
läc
he.
Z
u
h
o
hes
Vo
lum
en
der
Z
ut
at
en
V
erri
ng
ern
Si
e
di
e
M
eng
e
d
er
v
erarbei
t
et
en
Z
ut
at
en
.
Der
Dec
kel
lec
kt
.
Z
u
ho
hes
Vo
lum
en
der
Z
ut
at
en
V
erri
ng
ern
Si
e
di
e
M
en
g
e
d
er
v
erarbei
t
et
en
Z
ut
at
en
.
Der
Dec
kel
i
st
ni
c
h
t
ri
c
ht
i
g
plat
z
i
ert
o
d
er
v
erri
egelt
.
V
erri
eg
eln
Si
e
d
en
Dec
kel
ri
c
ht
i
g
auf
dem
Behält
er.
Der
Di
c
ht
ri
n
g
i
st
ni
c
h
t
v
o
rhanden
.
P
lat
z
i
er
en
Si
e
d
i
e
Di
c
ht
ung
auf
d
em
Di
c
ht
ungst
räger
und
kli
psen
Si
e
bei
des
i
n
d
en
Dec
kel.
Die Dich
tu
ng
wei
st Schn
i
t
te oder
Beschädigungen auf.
Wech
seln
Sie die Dich
tun
g, wen
d
en Sie
sich an eine autorisierte
K
u
n
d
en
d
i
en
s
t
w
er
k
s
tatt.
Die Klingen
bewegen s
ich
n
u
r schwer.
Zu
grobe
oder zu
har
te
Lebensmittelstücke
Verri
nger
n Si
e di
e Größe od
er Men
g
e
der verarbeiteten Zutaten.
F
ü
g
en
S
i
e
F
s
s
i
g
keit h
in
zu.
Anzeige „s
écu
Motorüber
lastung
d
ur
ch zu g
roße
Zutatenmenge oder zu grobe oder
h
ar
te
S
t
ü
cke.
o.
Las
sen
Sie den Motor abküh
len und
verringern Sie die Zutatenmenge im
Beh
älter
.
Anzeige „s
écu
+ Kontrollleuchte blinkt rot
Behälter
leer
,
fast leer od
er zu flüs
sig
es
Rezept
Füge
n Sie
b
is zur M
in-Markierung des
Behälters Flüssigkeit hinzu (si
ehe Fi
g. 7)
Anzeige „Err“
+ Kontrollleuchte blinkt rot
Das
Heizelement
fu
nkti
on
i
ert nich
t.
Wen
den
Si
e si
ch an eine autorisierte
Kundendienstwerkstatt.
Anzeige „ntc“
+
Kon
t
rollleuchte blinkt rot
Der Tem
perat
ur
sensor f
unk
tioniert
nicht mehr.
Wen
den
Si
e si
ch an
eine autoris
ierte
Kundendienstwerkstatt.
Das Gerät funktioniert immer noch nicht?
Wenden Sie sich in diesem Fall an eine autorisierte Kundendienstwerkstatt (siehe Liste im Serviceheft):
• Entsorgung der Verpackungsmaterialien und des Geräts
Die Verpackung besteht ausschließlich aus umweltfreundlichen Materialien, die nach den gültigen
Recycling-Bestimmungen entsorgt werden können.
Informieren Sie sich bei den geeigneten Stellen Ihrer Gemeinde über die Entsorgung des Geräts.
• Entsorgung elektronischer oder elektrischer Altgeräte:
RECYCLING
Helfen Sie, unsere Umwelt zu schützen!
Ihr Gerät enthält zahlreiche wieder verwertbare oder recycelbare Materialien.
Bringen Sie das Gerät zur Entsorgung zu einer Sammelstelle Ihrer Stadt oder Gemeinde
51
om het apparaat veilig te
kunnen hanteren en de risico's
kennen. De reinigings- en
onderhoudswerkzaamheden
mogen niet door kinderen
zonder toezicht worden
uitgevoerd tenzij ze ouder zijn
dan 8 jaar en onder toezicht
staan van een volwassene.
Uw apparaat geeft hete stoom
af die brandwonden kan
veroorzaken.
Ga voorzichtig om met het
deksel en de doseerdop (gebruik
indien nodig een handschoen,
een pannenlap ...). Houd de
doseerdop vast aan het
middelste gedeelte.
Wees voorzichtig wanneer u
een warme vloeistof in de
keukenrobot of menger giet.
De vloeistof kan uit het
apparaat spuiten wanneer
haar kookpunt wordt bereikt.
Gebruik het apparaat niet als
de doseerdop niet in de
opening van het deksel, de
afdichtingsring niet op de
afdichtingsringhouder en de
afdichtingsringhouder niet op
het deksel is geplaatst.
Let op voor verwondingen door
slecht gebruik van het apparaat.
Wees voorzichtig
wanneer u de kom leegt
en schoonmaakt: de
messen zijn zeer scherp.
Ten aanzien van de
elektrische aansluiting
U moet de stekker van het
apparaat in een geaard
stopcontact steken.
• Het apparaat is uitsluitend
geschikt om op wisselstroom te
werken. Controleer of de
voedingsspanning op de
gegevensplaat van het
apparaat overeenkomt met de
spanning van uw elektrische
installatie.
• Trek de stekker van het
apparaat uit het stopcontact
wanneer u het apparaat zonder
toezicht laat en voordat u het
monteert, demonteert, en
schoonmaakt.
• Als u het apparaat niet correct
aansluit, vervalt de garantie.
• Trek nooit aan het snoer om de
stekker van het apparaat uit het
stopcontact te trekken.
• Dompel het apparaat, het snoer
of de stekker nooit in vloeistof.
• Houd het apparaat nooit onder
de kraan.
• Laat het netsnoer niet binnen
50
Er moet toezicht op kinderen zijn,
zodat zij niet met het apparaat
kunnen spelen.
Bewaar uw apparaat buiten bereik
van kinderen.
Tijdens het gebruik kunnen de
onderdelen van het apparaat zeer
warm worden (randen van de
roestvrijstalen kom, doorzichtige
delen van het deksel en de dop,
metalen delen onder de kom,
mand). Ze kunnen brandwonden
veroorzaken. Houd het apparaat
vast aan de koude, plastic
onderdelen (handvaten,
motorblok). Het rode verwarmings -
controlelampje geeft aan dat er
gevaar voor verbranding bestaat.
Gebruik uw apparaat niet als het
niet correct werkt of als het
apparaat, het netsnoer of de
stekker is beschadigd. Om
gevaarlijke situaties te voorkomen,
dient u het netsnoer door een
erkend service center te laten
vervangen (zie bijgevoegde lijst).
Uw apparaat is uitsluitend
geschikt voor huishoudelijk
gebruik. De fabrikant is niet
verantwoordelijk en behoudt zich
het recht voor de garantie te
annuleren in geval van
commercieel of oneigenlijk gebruik
of niet-naleving van de instructies.
Dit apparaat is niet bedoeld voor
gebruik in huishoudelijke toepas -
singen zoals
- in keukens van winkels, kantoren en
andere werkomgevingen.
- in personeelskeukens van winkels,
kantoren en andere werkomge -
vingen.
- door de gasten van hotels, motels
of andere verblijfsvormen.
Uitsluitend voor de Europese
markten:
Bewaar het apparaat en het
snoer buiten het bereik van
kinderen jonger dan 8 jaar.
Kinderen mogen niet met het
apparaat spelen.
Dit apparaat mag worden
gebruikt door personen met
verminderde fysieke, mentale of
zintuiglijke capaciteiten of
personen die te weinig ervaring
of kennis hebben als ze onder
toezicht staan of als ze
richtlijnen hebben gekregen om
het apparaat veilig te kunnen
hanteren en de risico's kennen.
apparaat mag worden
gebruikt door kinderen
vanaf 8 jaar als ze onder
toezicht staan of als ze
richtlijnen hebben gekregen
53
• Om stoomgerechten te bereiden plaatst u het
mandje met de in stukjes gesneden groenten en vult
u de kom met 0,5 liter koud water (cf. Fig. 10 en 11).
• Zet de twee driehoeken op één lijn en plaats het
deksel (E) op de kom (D) (Cf. Fig. 2), draai het deksel
in de richting van de pijl om het te vergrendelen
zonder erop te duwen (Cf. Fig. 3) Plaats de
blenderkom (D) op het motorblok (A) tot u « klik »
hoort (Cf. Fig. 4)
Het apparaat werkt alleen als de kom en het
deksel correct zijn geplaatst en zijn vergrendeld op
het motorblok.
Wanneer een van beide onderdelen niet correct is
geplaatst of vergrendeld (Cf. Fig. 5 en 6), begint het
logo te knipperen wanneer we een functie
activeren.
Uw apparaat is voorzien van 3 werkingsmodi:
• Automatische programmeermodus: temperatuur,
bereidingsduur en mengduur zijn voorge -
programmeerd om soepen of stoomgerechten
te bereiden.
• Handmatige modus: persoonlijke instellingen van de
temperatuur en de kooktijd voor een gebruik dat
aangepast is aan uw wensen.
• Blendermodus: keuze van de motorsnelheid zonder
de kookfunctie te activeren om heerlijke smoothies,
cocktails, etc te bereiden.
Montage van de kom en het deksel met toebehoren
• Maak alle accessoires (D, E en F) , uitgezonderd het
motorblok (A). met warm zeepwater schoon voor het
eerste gebruik.
• Vóór het eerste gebruik controleert u of al het
verpakkingsmateriaal is verwijderd.
• Plaats de afdichtingsring op de afdichtings-
ringhouder (Cf. Fig. 1.a) en klik het geheel op het
deksel (Cf. Fig. 1.b).
Ingebruikname
Om gevaarlijke situaties te
voorkomen, dient u het netsnoer
door een erkend service center te
laten vervangen (zie bijgevoegde
lijst).
Elke handeling anders dan
gewone onderhouds- of
schoonmaakwerkzaamheden
dient door een erkend service
center uitgevoerd te worden.
52
het handbereik van kinderen
hangen of in aanraking komen
met of in de buurt hangen van
de warme onderdelen van het
apparaat, een warmtebron of
scherpe randen
Ten aanzien van een slecht
gebruik
Gebruik de blenderkom nooit
zonder ingrediënten of alleen
met droge voedingsmiddelen.
Doe altijd eerst de vaste
ingrednten in de kom en voeg
daarna de vloeibare
ingrediënten toe. Respecteer
altijd de MAX-aanduiding 1,8 L
aan de binnenkant van de kom.
(Cf. Fig. 8). Als de blender te vol
is, kan er kokend water uit
spuiten. Zorg voor voldoende
vloeistof. Vul het apparaat tot
boven de MIN-aanduiding
(Cf. Fig. 7).
Tijdens bepaalde bereidingen
worden luchtbelletjes gevormd
en kan de kom overlopen. Wees
vooral voorzichtig als u
diepvriesgroenten gebruikt.
Gebruik kleinere hoeveelheden
om overlopen te voorkomen.
Steek nooit uw vingers of andere
voorwerpen in de blenderkom
wanneer het apparaat in
werking is.
Gebruik de kom niet om
ingrediënten in te bewaren (in te
vriezen, te steriliseren).
Zet het apparaat op een stabiel,
hittebestendig, schoon en droog
werkvlak.
Zet het apparaat niet naast een
muur of kast: de geproduceerde
stoom kan de elementen
beschadigen.
Zorg ervoor dat er geen lang
haar, sjaals, stropdassen, etc.
boven de kom hangen wanneer
het apparaat in werking is.
Plaats de accessoires nooit in
een magnetron.
Het apparaat niet in de open
lucht gebruiken.
Overschrijd nooit de maximale
hoeveelheid die wordt
aangegeven in de
gebruiksaanwijzing.
Berg het apparaat op wanneer
het is afgekoeld.
Service
Voor uw eigen veiligheid dient u
geen andere accessoires of
reserveonderdelen te gebruiken
dan die door de erkende service
centra worden geleverd.
Gebruik uw apparaat niet als het
niet correct werkt of als het
apparaat, het netsnoer of de
stekker is beschadigd.
• De informatie over temperatuur knippert : u heeft de
mogelijkheid om deze informatie te wijzigen. Regel
de kooktemperatuur met de + (verlengen) en -
(verkorten) knoppen.
• Druk vervolgens op de knop OK om de gekozen
temperatuur te bevestigen.
• Het rode controlelampje licht op om aan te geven
dat de bereiding is gestart.
• U kunt de motor op elk moment in bedrijf stellen:
- op een lage snelheid (stand 1) om vloeibare
ingrediënten te mengen (bv.: om sauzen te bereiden).
- op een hoge snelheid (vanaf stand 2) om vaste
ingrediënten te mengen.
BLENDERMODUS (zonder koken)
• Draai de selectieknop naar rechts om
een snelheid te kiezen. Het mixen start
en de tijd wordt op het display
weergegeven.
In de blendermodus kunt u tot 5 verschillende
mixsnelheden selecteren.
De pulse snelheid bevindt zich links van de stand 0.
• Draai de snelheidsselectieknop op stand 0 om het
apparaat uit te schakelen.
• Druk op de pal (d2) en verwijder de blenderkom (D).
Als u een werkingstijd met automatische
uitschakeling wilt programmeren:
• Regel de werkingstijd met de + (verlengen) en -
(verkorten) knoppen.
• Draai aan de selectieknop om een snelheid te kiezen.
Het aftellen van de tijd wordt weergegeven op het
display.
• De motor schakelt automatisch uit aan het einde van
het aftellen.
Knop gecrusht ijs: de knop “Iceactiveert de functie
voor het bereiden van gecrusht ijs. U kunt het apparaat
uitschakelen door op de knop “OFF” te drukken. U kunt
maximaal 6 tot 8 ijsblokjes fijnstampen.
55
ice
max
0
• Houd het apparaat nooit onder de kraan. Houd het
motorblok (A) niet onder stromend, warm water.
• Maak de kom onmiddellijk schoon na gebruik.
• Vul de kom met 1 liter warm water en voeg 2, 3
druppels afwasmiddel toe. Houd u aan de
vastgestelde hoeveelheden water en afwasmiddel.
Als u te veel afwasmiddel gebruikt, wordt er te veel
schuim gevormd en wordt de kans op overlopen
vergroot.
• Gebruik het automatische programma Autoclean : P3
of P4 (afhankelijk van het model*) om de kom voor
te wassen.
• Trek de stekker van het apparaat uit het stopcontact
na afloop van het programma.
• Druk op de pal (d2) en verwijder de blenderkom (D).
• Zet de kom op een vlak werkblad.
• Draai het deksel een kwartslag in tegen de klok in om
het te ontgrendelen. Verwijder het deksel voorzichtig.
• Wanneer de onderdelen zijn afgekoeld, verwijdert u
de afdichtingsringhouder van het deksel. Gebruik de
handgrepen.
• Eindig het reinigen van de kom met een spons.
• Spoel de binnenkant van de kom en het deksel onder
stromend water.
• Als het verwarmingselement zeer vuil is, laat u het
onderdeel enkele uren in zeepwater weken om het
schoonmaken te vergemakkelijken.
Wees voorzichtig wanneer u de messen
(d3) van de blenderkom schoonmaakt
en de kom leegt. De messen zijn zeer
scherp.
• Gebruik een vochtige doek om het motorblok (A),
schoon te maken. Droog het daarna zorgvuldig af.
• De verwijderbare elementen (deksel, rubberhouder,
rubber, doseerdop, kookmand) kunnen met een spons
en warm zeepwater schoongemaakt worden.
HET APPARAAT SCHOONMAKEN
54
GEBRUIK VAN HET APPARAAT
PROGRAMMEERMODUS
Wanneer u het water en de ingrediënten in de kom of in het stoommandje heeft gedaan, vergrendelt u het deksel en
p
laatst u de kom op het motorblok (zie 'Ingebruikname').
Selecteer een van de hieronder voorgestelde, automatische programma's (knop P) en bevestig uw keuze (knop OK).
Wanneer het programma stopt, klinken er 3 pieptonen.
Druk op de pal (d2) aan de binnenkant van de handgreep (cf. Fig. 9) om de kom te ontgrendelen en dien onmiddellijk
op of laat de kom staan en maak gebruik van de warmhoudfunctie (tot 40 minuten).
Ontdek de geadviseerde, automatische programma's
Temperatuur (Max) Instelbare tijd Mixen
P1 – Veloutésoep
(fijne textuur)
100°C
25 min.
(+ of -10 min)
Max. snelheid
1 min
P2 – Gepureerde soep
(dichte textuur)
100°C
35 min.
(+ of -10 min)
Min. snelheid
13s
P3 – (alleen voor het model met
kookmandje ) – Stomen met het
kookmandje en 50 cl water
(afhankelijk van het model*)
100°C
30 min.
(+ of -20 min)
Nee
P3 – (of P4 voor het model met
kookmandje) - Auto clean :
automatisch
schoonmaakprogramma
100°C
30 s
(instelbaar tot 1 min)
Max. snelheid
HANDIGE TIPSS
• Zorg voor voldoende vloeistof. Vul het apparaat tot
boven de MIN-aanduiding (Cf. Fig. 7). Respecteer de
MAX-aanduiding 1,8 L aan de binnenkant van de
kom (Cf. Fig. 8).
• Tijdens bepaalde bereidingen worden luchtbelletjes
gevormd en kan de kom overlopen. Wees vooral
voorzichtig als u diepvriesgroenten gebruikt. Gebruik
kleinere hoeveelheden om overlopen te voorkomen.
• De informatie over tijd of temperatuur knippert: u
heeft de mogelijkheid om deze informatie te
wijzigen. Stel de tijd in met de knoppen + (verlengen)
en - (verkorten) afhankelijk van de gebruikte
ingrediënten en de bereide hoeveelheid (zie tabel
met de kooktijden van de soepen in het
receptenboekje).
• Met het stoommandje (afhankelijk van het model)
kunt u stoomgerechten bereiden (op P3 met 0.5 liter
water), of hele ingrediënten zoals vlees, vis, groenten
koken als u soep met stukjes wilt maken (op P1 of
P2).
• Na afloop van de programma's, schakelt het
apparaat automatisch over naar de
warmhoudmodus om de bereiding serveerklaar te
houden. Deze fase duurt 40 minuten. Druk op de
knop OFF om de warmhoudmodus uit te schakelen.
• Als u het deksel opent, op de pal drukt of de kom
verwijdert, wordt de warmhoudmodus automatisch
uitgeschakeld.
• Wanneer het programma is gestart, kunt u het op elk
moment onderbreken door op de knop P te drukken.
Het programma schakelt over naar de pauzemodus.
Druk opnieuw op P of op de knop OK om de bereiding
voort te zetten.
• Als u het verkeerde programma heeft gekozen en u
het programma wilt annuleren, houdt u de knop OFF
2 seconden ingedrukt. Daarna kunt u de tijd en de
temperatuur opnieuw instellen.
HANDMATIGE MODUS
• Stel de kooktijd in met de knoppen + (verlengen) en
- (verkorten) afhankelijk van de gebruikte
ingrediënten en de bereide hoeveelheid (zie tabel
met de kooktijden van de soepen in het
receptenboekje).
• Druk op de knop OK om het geselecteerde
programma te bevestigen.
≈´Uœ… «∞∑bË¥d
±U «∞FLq ≠w •U‰ ∞r ¥LJs ¢AGOq «∞LM∑Z
«∞LAUØq
«_ß∂U»
«∞∫Ku‰
«∞LM∑Z ô ¥FLq
≈≥∑e«“«‹ “«zb…
¢ºdÒ» ±s «∞GDU¡
«∞AHd«‹ ô ¢b˸ °ºNu∞W
®U®W «∞Fd÷ ¢Fd÷ "ytfas"
®U®W «∞Fd÷ ¢Fd÷ "ytfas" +
±R®d {uzw √•Ld ¥u±i
®U®W «∞Fd÷ ¢Fd÷ "
rrE"
+ ±R®d {uzw √•Ld ¥u±i
®U®W «∞Fd÷ ¢Fd÷ "
ctn"
+ ±R®d {uzw √•Ld ¥u±i
«∞∑GKOn ±R∞n ±s ±u«œ îUÅW ô ¢ÔAJq îDd«Î ´Kv «∞∂OµW, Ë«∞∑w ¥LJs «∞∑ªKh ±MNU °Lu§V ≈§d«¡«‹
«∞∑bË¥d Ë≈´Uœ… «∞∑BMOl ≠w ±MDI∑p .
∞K∑ªKh ±s «∞πNU“ °∫b –«¢t. ¥Ôd§v «ù¢BU‰ °LdØe «∞ªb±U‹ «∞FU±W «∞Lª∑h ≠w °Kb„.
>
«∞∑ªKh ±s «∞LM∑Z Ë ±u«œ «∞∑GKOn «∞∑U°FW ∞t.
¥∫∑uÍ ≥c« «∞LÔM∑Z ´Kv ±u«œ ÆOÒLW ÅMU´OUΠ˥LJs ≈´Uœ… ¢BMOFNU √Ë ¢BKO∫NU.
√Ëœ´NU ≠w ±d«Øe ¢πLOl «∞LNLö‹ «∞LÔª∑BW.
•LU¥W «∞∂OµW √Ëô Î !
«∞LM∑Z ¨Od ±uÅu‰ °U∞∑OU¸ «∞JNd°Uzw
√ËÅq «∞LM∑Z °U∞∑OU¸ «∞JNd°Uzw
«ù°d¥o Ë«∞GDU¡ ∞OºU ≠w ±JU≤NLU
«∞B∫O` √Ë √≤NU ¨Od ±IHKOs
¥Ôd§v «∞∑QØb √Ê «ù°d¥o Ë«∞GDU¡ ≠w
±uÆFNLU «∞B∫O` ˱ÔIHöÊ •ºV ±U
¢u{∫t «∞dßu «∞Ld≠IW.
«∞LM∑Z ¨Od ±∑Lu{l ≠u‚ ßD` ±M∂ºj
Ë£U°X, «∞LM∑Z ¨Od ±º∑Id
{l «∞LM∑Z ≠u‚ ßD` ±M∂ºj Ë£U°X
ØLOW «∞LJu≤U‹ ±d¢HFW §b«Î
îHn ØLOW «∞LJu≤U‹
ØLOW «∞LJu≤U‹ ±d¢HFW §b«Î
îHn ØLOW «∞LJu≤U‹
«∞GDU¡ ∞Of ≠w ±uÆFt «∞B∫O` √Ë «≤t
¨Od ±IHq
«¨Ko «∞GDU¡ °AJq ±Ô∫Jr ´Kv «ù°d¥o
«∞∫KIW «∞LU≤FW ∞K∑ºd» ¨Od ±u§uœ…
¸ØV «∞∫KIW «∞LU≤FW ∞K∑ºd» ´Kv
«∞∫U±KW Ë«ÆHq «∞u•b… ´Kv «∞GDU¡
«∞∫KIW «∞LU≤FW ∞K∑ºd» ±IDFW «Ë ¢U∞HW
«ß∑∂b‰ «∞∫KIW «∞LU≤FW ∞K∑ºd» √Ë
«¢Bq °LdØe îb±W ±ÔF∑Lb.
ÆDl «∞DFU Ø∂Od… √Ë ÆUßOW
îHn ±s •πr ÆDl «∞DFU √Ë ØLOW «∞LJu≤U‹
≠w «ù°d¥o. «{n °Fi «∞ºu«zq
«∞∫Lq «∞e«zb ´Kv «∞L∫d„ ¢Ôº∂∂t ØLOW
«∞LJu≤U‹ «∞J∂Od… √Ë ÆDl «∞DFU –«‹
«_•πU «∞J∂Od… √¥CUÎ
«¢d„ «∞L∫d„ ∞Jw ¥∂dœ, £r îHn ØLOW
«∞LJu≤U‹ ≠w «ù°d¥o
«ù°d¥o ≠U¸⁄, ≠U¸⁄ ¢Id¥∂UÎ √Ë ØLOW
«∞ºu«zq ¨Od ØU≠OW ≠w «∞uÅHW
«{n «∞ºu«zq «∞v «ù°d¥o ∞Lº∑uÈ
´ö±W «∞∫b «_œ≤v
(fC ®Jq 7)
´MUÅd «∞∑ºªOs ô ¢FLq
«¢Bq °LdØe îb±W ±ÔF∑Lb
«∞LπºU‹ «∞∫d«¸¥W ô ¢FLq
«¢Bq °LdØe îb±W ±ÔF∑Lb
±U“«‰ «∞LM∑Z ô ¥FLq ?
«´d÷ «∞LM∑Z ´Kv ±dØe îb±W ±ÔF∑Lb («≤Ed «∞IUzLW ≠w Ø∑OÒV «∞ªb±W)
>
«_§Ne… «ô∞J∑dË≤OW √Ë «∞JNd°UzOW «∞LM∑NOW «∞Bö•OW :
56
UW APPARAAT WERKT NIET. WAT NU?
P
R
O
B
LEM
EN
O
O
R
Z
A
KEN
O
P
LO
S
S
I
NG
EN
H
et
apparaat
werk
t
ni
et
De
s
t
ek
ker
z
i
t
n
i
et
i
n
h
et
st
o
pc
o
nt
ac
t
.
St
eek
de
s
t
ek
ker
van
h
et
app
araat
i
n
h
et
s
t
o
p
c
o
nt
ac
t
.
De
k
o
m
o
f
h
et
deksel
z
i
j
n
ni
et
c
o
rr
ec
t
geplaat
st
o
f
v
er
gr
endeld.
C
o
nt
r
o
leer
o
f
de
k
o
m
en
h
et
dek
sel
c
o
rr
ec
t
z
i
j
n
geplaat
st
en
v
er
gr
endeld
v
o
lgen
s
d
e
s
c
h
em
a'
s
i
n
d
e
g
ebrui
k
s
aan
w
i
j
z
i
n
g
O
v
erm
at
i
g
e
t
ri
lli
ngen
H
et
apparaat
st
aat
ni
et
o
p
een
vlakke
en
st
abi
ele
o
nder
gr
o
nd.
Z
et
h
et
apparaat
o
p
een
vlak
ke
o
n
d
er
gr
o
nd.
De
ho
ev
eelh
ei
d
i
ngr
ed
i
ënt
en
i
s
t
e
gr
o
o
t
.
V
erm
i
n
der
de
h
o
ev
eelh
ei
d
i
ngr
edi
ënt
en
H
et
deksel
lekt
De
h
o
ev
eelh
ei
d
i
ng
r
edi
ënt
en
i
s
t
e
gr
o
o
t
.
V
erm
i
nder
de
h
o
ev
eelh
ei
d
i
ngr
edi
ënt
en
H
et
d
ek
sel
i
s
ni
et
c
o
rr
ec
t
geplaat
st
o
f
v
er
gr
endeld.
V
er
g
r
en
d
el
het
deksel
c
o
rr
ec
t
o
p
de
k
o
m
.
De
afdi
c
ht
i
ng
sri
n
g
i
s
ni
et
gep
laat
st
.
P
laat
s
d
e
afdi
c
ht
i
ng
sri
n
g
o
p
d
e
afd
i
c
ht
i
ngsri
ngho
uder
en
kli
k
het
g
eh
eel
o
p
h
et
d
ek
s
el.
De afdich
tin
g
sring is g
ebarsten of
versleten.
Vervang de afdich
tin
gsring. Neem
contact op met een erkend service
cen
ter
.
De messen dr
aai
en niet v
rij rond
De st
uk
jes
zi
jn te g
root
of
te har
d.
Maak kleinere stu
kjes
of v
ermind
er d
e
hoeveelheden. Voeg vloeistof toe.
'S
E
CU' v
er
s
chi
jn
t
op het
s
cherm
De mot
or
i
s
overbelast d
oor een te
grote hoeveelheid ingrediënten of te
h
ar
d
e
of
te
g
rote
s
t
u
k
jes
.
Laat d
e motor afkoelen en v
ermind
er
de hoeveelheden in de kom.
'S
E
CU' v
er
s
chi
jn
t
op het
s
cherm
+ rood controlelampje knippert
De kom
is
leeg
of bi
jna leeg of de
bereiding is niet vloeibaar genoeg
V
oeg
v
loei
s
tof toe tot h
et min
imum
niveau van de kom
(Cf. Fig. 7
).
Weerga
v
e
«
E
r
r »
+ rood controlelampje knippert
De ver
warm
ing
sweerstand w
erkt ni
et.
Neem cont
ac
t op met een Erken
d
Service Center.
Weerga
v
e
«
n
tc
»
+ rood controlelampje knippert
De temperat
uur
sensor 1 w
erkt ni
et
meer.
Neem cont
ac
t op met een Erken
d
Service Center.
Uw apparaat werkt nog steeds niet?
Ga naar een erkend service center (zie bijgevoegde lijst).
• Vernietiging van de verpakking en het apparaat
De verpakking bestaat voor 100% uit milieuvriendelijk materiaal dat in overeenstemming met de
bepalingen omtrent afvalverwerking kan worden vernietigd.
Breng het apparaat naar een gemeentelijk afvalinzamelpunt.
• Elektrisch of elektronisch product aan het eind van de levenscyclus
AFVALVERWERKING
Bescherm het milieu!
Uw apparaat bevat verschillende, voor terugwinning of recycling geschikte materialen.
Breng het apparaat naar een afvalinzamelpunt voor een correcte verwerking.
57
≈ß∑FLU‰ «∞LM∑Z
Ë{FOW «∞∂d≤U±Z
°Fb √Ê ¢u{l «∞LU¡ Ë«∞LJu≤U‹ ≠w «ù°d¥o √Ë ≠w ßKW «∞∂ªU¸, «ÆHq «∞GDU¡ Ë ¸ØV «ù°d¥o ´Kv Ë•b… «∞L∫d„ («≤Ed
«∞v ≠Id… "Æ∂q «ùß∑FLU‰ ∞KLd… «_Ë∞v").
≈î∑d √•b «∞∂d«±Z «_Ë¢u±U¢OJOW «∞LÔI∑d•W √œ≤UÁ ( «∞e¸
P) Ë“¸ «∞∑∫Io (“¸ «∞Lu«≠IW KO)
´Mb «≤∑NU¡ «∞∂d≤U±Z, ¥ÔDKo «∞LM∑Z £öÀ ≈®U¸«‹ Åu¢OW ∞K∑M∂Ot.
•d¸ «ù°d¥o °u«ßDW «∞CGj ´Kv «∞e≤Uœ (
2d) «∞Lu§uœ ´Kv «∞LI∂i
(fC ®Jq 9), ËÆb «∞DFU ´Kv «∞Hu¸, √Ë «¢d„
«ù°d¥o ≠w ±JU≤t ∞K∫HUÿ ´Kv «∞DFU ßUîMUÎ (∞GU¥W 04 œÆOIW)
≈¸®Uœ«‹ ´LKOW
>
¥Ôd§v «∞∑QØb √Ê «∞ºu«zq ØU≠OW ∞Jw ¢GLd ´ö±W «∞∫b «_œ≤v
(fC ®Jq 7), Ë°U∞∑U∞w ô ¢∑ªDv ´ö±W «∞∫b «_ÆBv 8,1
∞∑d «∞L∫Hu¸… ≠w œ«îq «ù°d¥o (fC ®Jq 8).
>
Æb ¢Ôº∂V °Fi ËÅHU‹ «∞DNw ©u≠UÊ ±ÔHU§v¡,
∞LU ¥M∑Z
´MNU ±s ≠IU´U‹ ≥u«zOW, °U_îh ´Mb «ß∑FLU‰ «∞ªCU¸
«∞LÔ∏KπW. ≠w ≥cÁ «∞∫U‰, ¥d§l «_±d «∞Op °∑ªHOn «∞JLOU‹
°LU ¥∑MUßV.
> «∞LFKu±U‹ «∞LFdË{W ´s «∞∫d«¸… Ë«∞uÆX ¢u±i: ¥LJMp
¢Fb¥q ≥cÁ «∞LFKu±U‹. ´bÒ«∞uÆX ØLU ¥πV °LºU´b
«_“¸«¸ (+) ∞Ke¥Uœ… Ë (-) ∞û≤IU’, ≈´∑LUœ«Î ´Kv «∞LJu≤U‹
«∞Lº∑FLKW Ë«∞JLOW «∞Ld¨u» ¢∫COd≥U («≤Ed §bË
√ËÆU‹ «∞DNw ∞KAu¸°U‹ ≠w ØÔ∑OÒV «∞uÅHU‹).
> ¥LJMp «∞DNw ´Kv «∞∂ªU¸ °u«ßDW ßKW «∞∂ªU¸ (•ºV
«∞Luœ¥q) («ß∑FLq 3P ±l 005 ±K∑d ±s «∞LU¡), √Ë ËÅHW
®u¸°W ßLOJW Ë©Nw §LOl «∞LJu≤U‹ ±∏q «∞K∫LW Ë«∞ºLp
Ë«∞ªCU¸ ≠w ≤Hf «∞uÆX ØLU ≠w «∞Au¸°W («ß∑FLq 1P
√Ë 2P).
> ≠w ≤NU¥W «∞∂d«±Z, ¥∫U≠k «∞LM∑Z √Ë¢u±U¢OJOUÎ ´Kv «∞DFUÂ
ßUîMUÎÎ ∞Lb… 04 œÆOIW, Ë°U∞∑U∞w ¥∂Iv §U≥e«Î ∞K∑MUË∞ªö‰
≥cÁ «∞H∑d…. ∞Jw ¢uÆn ´LKOW «∞L∫U≠EW ´Kv «∞DFßUîMUÎ,
«{Gj ´Kw “¸ «∞∑uÆn "FFO"
> «–« ≠∑∫X «∞GDU¡, «{Gj ´Kv «∞e≤Uœ ∞d≠l «∞GDU¡, Ë°c∞p
¢∑uÆn ´LKOW «∞∑ºªOs √Ë¢u±U¢OJOUÎ.
> ´Mb±U ¥∂b√ «∞∂d≤U±Z °U∞FLq, ¥LJMp ¢uÆOn «∞LM∑Z ´s
«∞∑AGOq ≠w √Í ËÆX °u«ßDW «∞CGj ´Kv «∞e¸ P. Ë°c∞p
¥ÔB∂` «∞∂d≤U±Z ≠w Ë{FOW «∞∑uÆOn «∞LRÆX, Ë¥LJMp
≈´Uœ… «∞∑AGOq °u«ßDW «∞CGj ´Kv «∞e¸ P ±d… £U≤OW, √Ë
°U∞CGj ´Kv “¸ «∞Lu«≠IW KO.
> ≠w •U«î∑OU¸„ °d≤U±πUÎ ´s ©d¥o «∞ªDQ, Ë¢d¨V ≠w
≈∞GUzt, «{Gj ´Kv “¸ «∞∑uÆn "FFO" ∞Lb… £U≤O∑Os ±LU
¥ºL` ∞p ≈´Uœ… °d±πW «∞uÆX Ë«∞∫d«¸….
Ë{FOW «∞∑AGOq ¥bË¥UÎ
> ´bÒËÆX «∞DNw °LºU´b… «_“¸«¸ (+) ∞Ke¥Uœ… Ë (-)
∞û≤IU’, ≈´∑LUœ«Î ´Kv «∞LJu≤U‹ «∞Lº∑FLKW Ë«∞JLOW
«∞Ld¨u» ¢∫COd≥U («≤Ed §bˉ √ËÆU‹ «∞DNw ∞KAu¸°U‹
≠w ØÔ∑OÒV «∞uÅHU‹).
> ≥c« ¥º∑b´v «∞∑QØOb ´Kv «∞uÆX «∞Lª∑U¸ °U∞CGj ´Kv “¸
«∞Lu«≠IW KO.
> «∞LFKu±U‹ «∞LFdË{W ´s «∞∫d«¸… Ë«∞uÆX ¢u±i, ¥LJMp
¢GOOd ≥cÁ «∞LFKu±U‹. ´bÒ‰ œ¸§W •d«¸… «∞DNw °LºU´b…
«_“¸«¸ (+) ∞Ke¥Uœ… Ë (-) ∞û≤IU’.
«∞∂d«±Z «_Ë¢u±U¢OJOW «∞LÔI∑d•W
1P - ®u¸°W °J∏U≠W «∞Jd¥LU
(¢dØO∂W îHOHW)
2P - ®u¸°W ßLOJW
(¢dØO∂W ±dØe…)
3P -
(≠Ij ∞KLuœ¥ö‹ «∞LeËœ… °ºKW ∞K∂ªU¸)
©Nw ´Kv «∞∂ªU¸ ±l ßKW ∞K∂ªU¸ Ë 005
±KK∑d ±U¡ (•ºV «∞Luœ¥q)
3P -
(√Ë 4P ∞KLuœ¥ö‹ «∞LeËœ… °ºKW ∞K∂ªU¸)
¢MEOn √Ë¢u±U¢OJw: °d≤U±Z ∞K∑MEOn
«_Ë¢u±U¢OJw.
œ¸§W «∞∫d«¸… («∞∫b «_ÆBv)
001 œ¸§W ±R¥W
001 œ¸§W ±R¥W
001 œ¸§W ±R¥W
001 œ¸§W ±R¥W
ËÆX ÆU°q ∞K∑Fb¥q
52 ϮOIW
(+ √Ë - 01 œÆUzo)
53 ϮOIW
(+ √Ë - 01 œÆUzo)
03 ϮOIW
(+ √Ë - 02 œÆOIW)
03 ϮOIW
(ÆU°KW ∞K∑Fb¥q
∞GU¥W 1 œÆOIW)
«∞ªKj
«∞ºd´W «∞IBuÈ
œÆOIW Ë«•b…
«∞ºd´W «∞b≤OU
31 £U≤OW
ô
«∞ºd´W «∞IBuÈ
«∞∑MEOn Ë«∞BOU≤W
> ≥c« ¥º∑b´v «∞∑QØOb ´Kv œ¸§W «∞∫d«¸… °U∞CGj ´Kv “¸
«∞Lu«≠IW KO.
> ¥ÔC«∞LR®d «∞Cuzw «_•Ld ∞Kbô∞W ´Kv Ê ´LKOW
«∞DNw Æb °b√‹.
> ¥LJMp ¢Fb¥q «∞L∫d„ ≠w √Í ±d•KW •ºV ±U¥Kw:
- «∞ºd´W «∞∂DOµW («∞LuÆl 1) ∞ªKj «∞LJu≤U‹ ±s «∞ºu«zq
(´Kv ß∂Oq «∞L∏U‰: ∞FLq «∞BKBW).
- «∞ºd´W «∞ºd¥FW («∞LuÆl 2 ËÅU´b«Î) Leà «∞LJu≤U‹
«∞BK∂W.
Ë{FOW «∞ªö◊ (œËÊ «∞DNw)
> ≈î∑d «∞ºd´W °Sœ«¸… ±M∑Iw «∞ºd´W «∞v
§NW «∞OLOs. ¢∂b√ ´LKOW «∞Leà ˥ENd
«∞uÆX ´Kv «∞AU®W.
≠w Ë{FOW «∞ªö◊, ¥LJMp î∑OU¸ 5 ßd´U‹ ±ª∑KHW
∞Lª∑Kn √≤u«Ÿ «∞LeÃ.
¥LJs «¥πUœ «∞ºd´W «∞L∑IDFW ´Kv ¥ºU¸«∞LuÆl "0".
> •uÒ‰ ±ÔM∑Iw «∞ºd´W «∞v «∞LuÆl "0" ∞Jw ¢uÆn «∞LM∑Z ´s
«∞∑AGOq.
> «{Gj ´Kv «∞e≤Uœ (2d) £r «¸≠l ≈°d¥o «∞ªö◊ (D). ≈–«
¸¨∂X ≠w °d±πW «∞uÆX ≠w ≈•«∞FLKOU∞Jw ¥∑uÆn
«∞LM∑Z ´s «∞∑AGOq √Ë¢u±U¢OJOUÎ :
> «{∂j ËÆX «∞FLKOW °LºU´b… «_“¸«¸ (+) ∞Ke¥Uœ… Ë (-)
∞û≤IU’.
> •bœ îOU¸ «∞ºd´W °u«ßDW ¢∫u¥q ±M∑Iw «∞ºd´W. ¥ÔFd÷
«∞Fb «∞FJºw ´Kv «∞AU®W.
> ¥∑uÆn «∞L∫d„ √Ë¢u±U¢OJOUÎ ´Mb±U ¥M∑Nw «∞Fb «∞FJºw.
“¸ ß∫o «∞∏KZ : ¥uÆn “¸ («∞∏KZ) "ecI" ´LKOW ß∫o «∞∏KZ.
¥LJMp ≈¥IU· «∞LM∑Z ØLU ¥πV °U∞CGj “¸ «∞∑uÆn "FFO".
¥LJMp ß∫o ±s 6 «∞v 8 ±JF∂U‹ £KZ ≠w «∞∫b «_ÆBv.
> ô ¢GLd «∞LM∑Z °U∞LU¡. ô ¢Cl Ë•b… «∞LÔ∫d„ (A) ¢∫X
«∞LU¡ «∞πU¸¥W.
> ≤EÒn «ù°d¥o ≠u¸«Î °Fb «ùß∑FLU‰.
> ≈±ú «ù°d¥o °K∑d Ë«•b ±s «∞LU¡ ±l IDW Ë «£M∑Os ±s
ßUzq «∞∑MEOn. «ß∑FLq ≠Ij «∞JLOW «∞∑w «∞L∫bœ… ±s «∞LU¡
Ë ßUzq «∞∑MEOn. ≈Ê «∞e¥Uœ… ≠w ØLOW ßUzq «∞∑MEOn ßu·
¢RœÍ «∞v “¥Uœ… ≠w «∞d¨u… Ë°U∞∑U∞w ¥∫bÀ «∞Du≠UÊ.
> «ß∑FLq °d≤U±Z «∞∑MEOn : «_Ë¢u±U¢OJw 3P √Ë 4P (•ºV
ǰLuϴq
) ∞∑MEOn «ù°d¥o ¢LNOb¥UÎ.
> ´Mb±U ¥∑uÆn «∞∂d≤U±Z , «≠Bq «∞LM∑Z ´s «∞∑OU¸
«∞JNd°Uzw.
> «{Gj ´Kv «∞e≤Uœ (2d) £r «¸≠l ≈°d¥o «∞ªö◊ (D).
> {l «∞ªö◊ ≠u‚ ßD` ±M∂ºj.
> •d¸ «∞GDU¡ °Sœ«¸¢t ¸°l œË¸… °S¢πUÁ ´IU¸» «∞ºU´W . «¸≠l
«∞GDU¡ °Jq ´MU¥W Ë•d’.
> °Fb √Ê ¢∂dœ §LOl «_§e«¡, ≠p ±AU°p •U±KW «∞∫KIW «∞∑U°FW
∞KGDU¡ °LºU´b… ≤EU «∞º∫V.
> ≤EÒn «∞GDU¡ °u«ßDW «ßHMπW.
> «¨ºq «∞πe¡ «∞b«îKw ∞û°d¥o ¢∫X «∞LU¡ «∞πU¸¥W, ËØc∞p
«_±d °U∞Mº∂W ∞KGDU¡.
> ≠w •U‰ «Å∂` ƺr «∞∑ºªOs ≠w «ù°d¥o ±∑ÔºªUÎ ∞b¸§W
±∑Ib±W, «¢dØt ±MIu´UÎ ∞∂Cl ßU´U‹ °Le¥Z ±s «∞LU¡ ËßUzq
«∞∑MEOn ∞Jw ¥LJs ¢MEOHt °Fb –∞p.
> ¥Ôd§v «îc «∞∫ODW Ë«∞∫c¸ ´Mb
¢MEOn «∞AHd«‹ (3d) ≠w °d¥o
«∞ªö◊, Ë´Mb ¢Hd¥m «∞u´U¡ _≤NU
•Uœ… §b«Î.
> «ß∑FLq ÆDFW ÆLU¸©∂W ∞∑MEOn Ë•b«∞L∫d„ (A).
§Hn °Fb –∞p §Ob«Î.
> ≈Ê «_§e«¡ «∞IU°KW ∞KHBq («∞GDU¡, •U±KW «∞∫KIW, «∞∫KIW
«∞LU≤FW ∞K∑ºd», «∞ºb«œ…, ßKW «∞DNw) ¥LJs ¢MEOHNr
°u«ßDW «ßHMπW °U∞LU¡ «∞ºUîs Ë«∞BU°uÊ.
5958
> ¢ÔCU· «∞LJu≤U‹ «∞πU±bœ«zLUÎ Æ∂q
ßJV √Í ≤uŸ ±s ±Ju≤U‹ «∞ºu«zq,
œËÊ Ê ¢∑ªDv ´ö±W «∞∫b «_ÆBv
8,1 ∞∑d «∞L∫Hu¸… œ«îq «ù°d¥o
(
fC ®Jq 8). ≈–« Ø«∞ªö◊ ±KOµ
°U∞LJu≤U‹, Æb ¥HOi «∞LU¡ «∞LGKw
«∞v «∞ªU¸Ã. ¥Ôd§v «∞∑QØb ±s ˧uœ
ØLOW ØU≠OW ±s «∞ºu«zq ¢ÔGDw ´ö±W
«∞∫b «_œ≤v (
fC ®Jq 7).
> Æb ¢Ôº∂V °Fi √≤u«Ÿ «∞LJu≤U‹
≠OCU≤UÎ ±ÔHU§µUÎ, LU ¥M∑Z ´MNU ±s
≠IU´U ≥u«zOW, °U_îh ´Mb
«ß∑FLU‰ «∞ªCU¸ «∞LÔ∏KπW. ≠w ≥cÁ
«∞∫U‰, ¥d§l «_±d «∞Op °∑ªHOn
«∞JLOU‹ °LU ¥∑MUßV.
> ô ¢Cl √ÅU°Fp Ë Í ®w¡ ¬îd
≠w Ë´U¡ «∞ªö◊ √£MU¡ «∞∑AGOq.
> ô ¢º∑FLq «ù°d¥o Øu´U¡ ∞∑∏KOZ
«∞DFU √Ë _¨d«÷ «∞∑FIOr.
> {l «∞ªöÒ ´Kv ßD` ±º∑uÌ,
£U°X, EOn, §U·, ˱IÂ
∞K∫d«¸….
> ô ¢Cl «∞LM∑Z °U∞Id» ±s §b«¸ √Ë
îe«≤W : ≠Ib ¥Ô∑KHNU «∞∂ª
«∞LÔ∑BU´b.
> ô ¢«∞AFd «∞Du¥q, ¸°DU‹ «∞FMo,
˨Od≥U √Ê ¢∑b∞v ≠u‚ ≈°d¥o «∞LM∑Z
√£MU¡ «∞∑AGOq.
> ô ¢Cl Í ±s «∞LÔK∫IU‹ w ≠dÊ
«∞LOJdËË¥n.
> ô ¢º∑FLq «∞LM∑Z îU¸Ã «∞LMe‰.
> ô ¢∑ªDv «∞∫b «_ÆBv ∞KLJu≤U‹
«∞LÔAU¸ «∞ONU ≠w «ù¸®Uœ«‹.
> {l «∞LLM∑Z §U≤∂UÎ °LÔπdœ «ù≤∑NU¡
±s «ß∑FLU∞t.
îb±W ±U °Fb «∞∂Ol
> ±s √§q ßö±∑p, ô ¢º∑FLq
«∞LK∫IU‹ Ë ÆDl «∞GOU¸ ¨Od «∞∑w
¢u≠d≥U ±d«Øe îb±W ±U °Fb «∞∂Ol
«∞LÔF∑Lb….
> ¥Ôd§v «∞∑uÆn ´s «ß∑FLU‰ «∞LM∑Z
≈–« ∞r ¥Fb ¥FLq °AJq Å∫O`, √Ë
≈–« √ÅOV °FDq, √Ë ≈–« ØUÊ «∞ºKp
«∞JNd°Uzw «∞∑U°l ∞t ¢U∞HUÎ.
Æ∂q «ùß∑FLU‰ ∞KLd… «_Ë∞v
§ÔNÒe ≥c« «∞LM∑Z °∏öÀ Ë{FOU‹ ∞K∑AGOq :
> Ë{FOW «∞∂d≤U±Z «_Ë¢u±U¢OJw : ≈Ê œ¸§W «∞∫d«¸…
Ë√ËÆU‹ «∞DNw Ë«∞ªKj ≥w ±Ô∂d±πW ±º∂IUÎ ∞∑∫COd
«∞Au¸°U‹ Ë«∞IOU °∑u∞Ob «∞∂ªU¸ √Ë¢u±U¢OJOUÎ ∞KDNw
´Kv «∞∂ªU¸.
> «∞Ë{FOW «∞ObË¥W : {∂j œ¸§W «∞∫d«¸… ËËÆX «∞DNw
¥bË¥ûß∑FLU‰ ∞Ld… Ë«•b… ºV «∞Lu«ÅHU‹
«∞∑w ¢d¨∂NU.
> Ë{FOW «∞ªö◊ : î∑OU¸ ßd´W «∞L∫d„ œËÊ
«ß∑FLU‰ Ë™Uzn «∞DNw ∞∑∫COd °Fi «∞FBUzd
√Ë «∞JuØ∑Oö‹.
¢dØOV «ù°d¥o ËË•b… «∞GDU¡ :
> Æ∂q «ùß∑FLU‰ ∞KLd… «_Ë∞v, ¢ÔGºq §LOl «∞LK∫IU‹
(E,D Ë F) °U∞LU¡ «∞ºUîs Ë«∞BU°uÊ ±U ´b« Ë•b…
«∞LÔ∫d„ (A).
> ¥Ôd§v «∞∑QØb √Ê §LOl ±u«œ «∞∑GKOn Æb √“¥KX ´s
«∞LM∑Z Æ∂q «∞∂b¡ °∑AGOKt.
>
{l «∞∫KIW «∞LU≤FW K∑ºd» ´Kv •U±K∑NU (fC ®Jq
a1
), Ë«®∂p «∞u•b… ≠w «∞GDU¡ (fC ®Jq b1).
> ∞KDNw ´Kv «∞∂ªU¸ , {l «∞ºKW ≠w ±u{FNU Ë≠ONU
«∞ªCU¸ «∞LÔIDFW, Ë«±ú «ù°d¥o °JLOW 5,0 ∞∑d ±s
«∞LU¡ «∞∂U¸œ œËÊ √Ê ¢∑FbÈ ±º∑uÈ ÆFd «∞ºKW
(fc
®Jq 01 Ë 11
).
> ¸ØV «∞GDU¡ (E) ´Kv «ù°d¥o (D) °∫OY ¥∑IU°q
«∞L∏K∏UÊ
(fC ®Jq 2), «ÆHq «∞GDU¡ °Sœ«¸¢t ∫u «∞ºNr
(fC ®Jq 3) œËÊ √Ê ¢CGj ´KOt. {l ≈°d¥o «∞ªö◊
(D)
´Kv Ë•b… «∞LÔ∫d„
(A) «∞v Ê ¢ºLl Åu‹
«ùÆHU‰
(fC ®Jq 4).
> ßu· ¥LJs ¢AGOq «∞LM∑Z ≠Ij ´Mb±U ¥JuÊ
«ù°d¥o Ë«∞GDU¡ ±ÔdØ∂UÊ ≠w ±u{FNLU «∞B∫O`,
˱ÔIHöÊ ´Kv Ë•b… «∞LÔ∫d„.
≠w •U‰ ´b «∞∑dØOV «∞B∫O` √Ë ´b «ùÆHU‰ _•b «_§e«¡
(fC ®Jq 5 Ë 6), ¥∂b√ ¸±e «∞IHq °U∞u±Oi ´Mb±U ¢IuÂ
°∑HOFq √Í Ë™OHW ±s «∞u™Uzn.
6160
> ¥πV ±d«Æ∂W «_©HU‰ Ë«∞∑QØb °Q≤Nr
ô ¥KF∂uÊ °U∞LM∑Z.
> ¥Ôd§v «∞∫HUÿ ´Kv «∞LM∑Z °FOb«Î ´s
±Ô∑MUˉ «_©HU‰.
> ´Mb «ß∑FLU‰ «∞LM∑Z, ¢d¢Hl •d«¸…
°Fi §e«zt («ùß∑U≤Kf ß∑Oq
§U≤V «ù°d¥o, «_§e«¡ «∞AHU≠W ±s
«∞GDU¡ Ë«∞ºb«œ…, «_ƺU «∞LFb≤OW
¢∫X «ù°d¥o, «∞ºKW). ≠S≤NU ¢Ôº∂V
«∞∫dË‚. ¥Ôd§v «ù±ºU°U∞LM∑Z ±s
«_§e«¡ «∞∂öß∑OJOW «∞∂U¸œ…
(«∞LIU°i, Ë•b… «∞L∫d„). ¥ÔCw¡
±R®d «∞∫d«¸… «_•Ld ≠w •U‰
îDd «∞∫d¥o.
> ô ¢º∑FLq «∞LM∑Z ≈–« ØUÊ ô ¥FLq
°JHU¡…, √Ë ≈–« √ÅOV °QÍ ´Dq, √Ë
≈–« ØUÊ «∞ºKp «∞JNd°Uzw «∞∑U°l ∞t
√Ë «∞IU°f ¢U∞H. ∞Jw ¢∑πMÒV
«_îDU¸ «∞LÔ∫∑LKW, ¥πV √Ê ¢Ôº∑∂b‰
≥cÁ «∞IDl °u«ßDW ±dØe îb±W
±F∑Lb («≤Ed «∞IUzLW w Ø∑OÒV
«∞ªb±W «∞Ld≠o).
> ÅÔLr ≥c« «∞LM∑Z ∞ûß∑FLU‰
«∞LMe∞w, Ë≠w œ«îq «∞LMe‰ ≠Ij. ∞s
¢JuÊ «∞AdØW «∞LBMÒFW ±ºRË∞W ´s
√¥W √´DU‰, Ë¢∫∑Hk °∫INU ≠w ≈∞GU¡
«∞CLU≤W ≈–« ¢r «ß∑FLU‰ «∞LM∑Z
°AJq ¢πU¸Í, √Ëw U‰ ´
«∞∑IOÒb °Uù¸®Uœ«‹ «∞Ld≠IW.
> ∞r ¥ÔFbÒ ≥c« «∞LM∑Z öß∑FLU‰ w
√±UØs «ùÆU±U‹ ±∏q «∞L∫ö
«∞∑πU¸¥W, «∞LJV, Ë«_•u«‰
«∞LÔAU°NW «∞∑U∞OW
:-
- √±UØs «∞DNw «∞LªBBW DUÆr
«∞Lu™HOs ≠w «∞L∫ö‹ Ë «∞LJU¢V,
Ë «_±UØs «∞LNMOW «_îdÈ.
- «∞Le«¸Ÿ .
- «ôß∑FLU‰ ±s Æ∂q ´Lö¡ «∞HMUœ‚ Ë
«∞Meô¡ Ë √±UØs «ùÆU±W «_îdÈ .
- ≠w ¨d· «∞M Ë«±UØs ¢MUˉ
«∞HDu¸, Ë«_±UØs «∞LÔAU°NW.
∞úßu«‚ «_˸˰OW ≠Ij
> ¥Ôd§v «∞∫HUÿ ´Kv «∞LM∑Z Ë«∞ºKp
«∞JNd°Uzw °FOb«Î ´s ±Ô∑MUˉ «_©HU‰
±Ls ≥r œËÊ ßs «∞∏U±MW.
> ´b «∞ºLUÕ ∞ú©HU‰ √Ê ¥∑ªcË« ±s
«∞LM∑Z ∞F∂W °Os «¥b¥Nr.
> ¥LJs Ê ¥Ôº∑FLq ≥c« «∞LM∑Z
°u«ßDW «_®ªU«∞c¥s ¥FU≤uÊ
ÆBu¸«Î ≠w Æu«≥r «∞HOe¥UzOW, √Ë
«∞∫ºOW √Ë ¢MIBNr «∞ª∂d…, Ë
°u«ßDW «_®ªU’ ±Ls ∞Of ∞b¥Nr
«∞LFd≠W «∞∑U±W °∑AGOq «∞LM∑Z, ≈–«
¢KIu« «∞∑FKOLU Ë «ù¸®Uœ«‹
«∞u«{∫W ´s ØOHOW «ß∑FLU‰ «∞LM∑Z
°Dd¥IW ¬±MW, Ë«œ¸Øu« «_îDU¸ «∞∑w
Æb ¢M∑Z ´s «ùß∑FLU‰ «∞ªU©v¡.
> ¥LJs Ê ¥Ôº∑FLq ≥c« «∞LM∑Z
°u«ßDW «_©HU‰ «∞c¥s ô ¢Iq
√´LU¸≥r ´s 8 ßMu«‹, ®d◊ √Ê
¥ªCFu« ∞KLÆ∂W Ë –« ¢KIu«
«∞∑FKOLUË «ù¸®Uœ«‹ «∞u«{∫W
´s ØOHOW «ß∑FLU‰ «∞LM∑Z °Dd¥IW
¬±MW, Ë«œ¸Øu« «_îDU¸ «∞∑w Æb ¢M∑Z
´s «ùß∑FLU«∞ªU©v¡. ô ¥ÔºL`
∞ú©HU «∞IOUÂ °Q´LU‰ «∞∑MEOn
Ë«∞BOU≤W ±U ∞r ¥Ju≤u« u‚ ßs
«∞∏U±MW (8) ±s ´Ld≥r, Ë√Ê ¥Ju≤u«
¢∫X ±d«Æ∂W ®ªh ¸«®b ±ºRˉ
´s ßö±∑Nr.
> ≥c« «∞LM∑Z ¥uÒ∞b
«∞∂ªU¸ «∞cÍ ¥LJs √Ê
¥Ôº∂V «∞∫dË‚.
¥Ôd§v «∞∑FU±q ±l «∞GD
Ë«∞ºb«œ… °Jq ´MU¥W («ß∑FLq
ÆHU“«‹ «∞HdÊ √Ë •U±KW «∞Ib˸
≈–« ∞e «_±d). «¸≠l «∞ºb«œ
°u«ßDW «∞Iºr «∞LdØeÍ.
>
¥Ôd§v «ù≤∑∂UÁ ´Mb ßJV «∞ºu«zq
«∞ºUîMW ≠w ±Ô∫CÒd «∞DFU ≠w
«∞ªö◊, √Ë ≠w «∞ªö◊, ≠Ib ¥Bb¸
´s «∞ªö°Fi «∞d–«– ≠w U‰
ߪs «∞LM∑Z ≠πQ….
>
ô ¢ÔAGÒq «∞LM∑Z ≈Ê ∞r ¢Js
«∞ºb«œ… ≠w ±uÆFNU ≠w ≠∑∫W
«∞GDU¡, √Ë ≈–« ∞r ¢Js «∞∫KIW ≠w
•U±K∑NU, √Ë ≈–« ØU≤X •U±KW
«∞∫KIW ∞OºX £U°∑W ≠w «∞GDU¡.
>
¥Ôd§v «∞∫c¸ ≠w •U‰ «ùß∑FLU‰
«∞ªU©v¡ ∞KLM∑Z ≠Ib ¥Ôº∂V –∞p
îDd «ùÅU°W °U∞πdËÕ.
> «∞AHd«‹ •Uœ… §b«Î:
¥Ôd§v «∞∑FU±q ±FNU
°Jq •d’ Ë•c¸ •∑v
ô ¢Ôº∂V «∞πdËÕ ∞MHºp √£MU¡
¢Hd¥m √Ë ¢MEOn «ù°d¥o.
«∞∑uÅOq °U∞∑OU¸ «∞JNd°Uzw
> ¥πV ¢uÅOq «∞LM∑Z «∞v ±I∂f
ØNd°Uzw ±R¸Ò÷.
> ÅÔLr ≥c« «∞LM∑Z OFLq °U∞∑OU¸
«∞JNd°Uzw «∞L∑MUË» ≠Ij. ¥Ôd§v
«∞∑QØb √Ê Æu… «∞∑OU¸ «∞LcØu¸… ´Kv
∞u§W °OU≤U‹ «∞LM∑Z ¢∑u«≠o ±l ¢u¢d
®∂JW «∞JNd°U¡ ´Mb„.
> ¥Ôd§v ≠Bq «∞LM∑Z ´s «∞∑O
«∞JNd°Uzw œ«zL –« ¢Ôd„ ±s œËÊ
¸ÆU°W, √Ë Æ∂q «∞Hp Ë«∞∑dØOV, √Ë ´Mb
«∞∑MEOn.
> ≈Ê Í îDQ ≠w «∞∑uÅOq °U∞∑OU¸
«∞JNd°Uzw ßu· ¥ÔKGv °Muœ
«∞CLU≤W.
> ô ¢HBq «∞LM∑Z ´s «∞∑O
«∞JNd°Uzw °AbÒ «∞ºKp «∞JNd°Uzw.
> ô ¢GLd «∞LM∑Z, «∞ºKp «∞JNd°Uzw √Ë
«∞IU°f ≠w «Í ≤uŸ ±s «∞ºu«zq.
> ô ¢GLd ≥c« «∞LM∑Z °U∞LU¡.
> ¥Ôd§v «∞∫HUÿ ´Kv «∞ºKp
«∞JNd°Uzw °FOb«Î ´s ±Ô∑M«_©HU‰,
Ëô ¢b´t ¥Ld ≠u‚ √Ë °U∞Id» ±s √Í
±Bb¸ •d«¸Í √Ë ≠u√§e«¡ «∞LM∑Z
«∞∫U¸…, Ëô ≠u‚ «∞eË«¥U «∞∫Uœ….
•u‰ «ùß∑FLU‰ «∞ªU©v¡
> ô ¢ÔAGÒq ≈°d¥o «∞ªö±s ˧
«∞LJu≤U‹ ≠w œ«îKt, √Ë °LJu≤U
§U≠W √Ë ÆUßOW ≠Ij.
6362
°U“|U≠X ØdœÊ
Çt ØU¸È «≤πU ®uœ «Öd œß∑~UÁ ®LU ØU¸ ≤Lv ØMbÈ
±AJq
´KX
¸«Á •q
œß∑~UÁ ØU¸ ≤Lv ØMb.
«¸¢FU®U‹ °Og «“ •b
«“ ©d|o œ¸» ≤AX ±v ØMb
¢}Gt ≥U °t ¸«•∑v ≤Lv ÇdîMb
"«|LMv" (ytfas) ¸« ≤LU|g ±v œ≥b
"«|LMv" (ytfas) + Çd«⁄ ≤AU≤~d Æd±e œ¸
•U‰ ÇALJ‡ “œÊ ¸« ≤LU|g ±v œ≥b
"îDU" (rrE) +
Çd«⁄ ≤AU≤~d Æd±e
"
ctn" + Çd«⁄ ≤AU≤~d Æd±e œ¸
•U‰ ÇALJ‡ “œÊ ¸« ≤LU|g ±v œ≥b
°º∑t °MbÈ ±M∫Bd«" «“ ±u«œ ßU“ÖU¸ °U ±∫}j “|ºX œ¸ßX ±v ®uœ Øt ±v ¢u«≤b °U ¢u§t °t ±Id¸«‹
¸«|Z °U“|U≠X œË¸ «≤b«î∑t ®uœ.
«Öd ®LU ±U|q °t œË¸ «≤b«î∑s œß∑~UÁ ≥º∑}b, ∞DHU °t ±dØe îb±U‹ ±MUßV œ¸ ±MDIt îuœ ¸§uŸ ØM}b.
> œË¸ «≤b«î∑s ±u«œ °º∑t °MbÈ Ë œß∑~UÁ.
œß∑~UÁ ®LU •UËÈ ±u«œ «¸“®LMbÈ «ßX Øt ±v ¢u«≤b «•}U¡ |U °U“|U≠X ®uœ.
∞DHU ¬Ê ¸« °t |J‡ ≤IDt §Ll ¬Ë¸È “°U∞t ≥UÈ ±∫Kv °∂d|b Øt œ¸ ¬Ê œË¸ «≤b«î∑t îu«≥b ®b
°t ±∫Oj “|ºX ≠Jd ØM}b!
œß∑~UÁ °t °d‚ ËÅq ≤AbÁ «ßX
œß∑~UÁ îuœ ¸« °t ±M∂l °d‚ ËÅq ØMOb
Øu“Á Ë œ¸» œ¸±∫q Å∫}` ≤}ºX |U °t
œ¸ß∑v ÆHq ≤AbÁ «ßX.
°d¸ßv ØM}b Øt Øu“Á Ë œ¸» °t œ¸ß∑v
Æd«¸ Öd≠∑t Ë ÆHq ®bÁ «ßX °t Ä}~}dÈ «“
≤Luœ«¸ œß∑u¸«∞FLq.
œß∑~UÁ °d ¸ËÈ ßD` ÅU· Æd«¸ œ«œÁ
≤Lv ®uœ, œß∑~UÁ £U°X Ë ÄU|b«¸ ≤}ºX
œß∑~UÁ ¸« œ¸ |J‡ ßD` ÅU· Æd«¸ œ≥}b
•πr ±u«œ °}g «“ •b °Uô ±v °U®b
±Ib«¸ ±u«œ ≠d¬Ë¸È ®bÁ ¸« ØU≥g œ≥}b
•πr ±u«œ °}g «“ •b °Uô ±v °U®b
±Ib«¸ ±u«œ ≠d¬Ë¸È ®bÁ ¸« ØU≥g œ≥}b
œ¸» °t œ¸ß∑v Æd«¸ ≤~d≠∑t |U ÆHq ≤AbÁ
«ßX
œ¸» ¸« ±∫Jr œ¸ËÊ Øu“Á ÆHq ØM}b
Ë«®d {b ¬» ±u§uœ ≤Lv °U®b
Ë«®d {b ¬» ¸« œ¸ ±Nd Ë ±U±q
Æd«¸ œ≥}b Ë Ë«•b ¸« œ¸ œ¸» °âº∂U≤}b
Ë«®d {b ¬» °d‘ œ«œÁ ®bÁ |U ¬ß}V
œ|bÁ «ßX
Ë«®d ¸« ¢Fu|i ØM}b |U °U |J‡ ±dØe
îb±U‹ ±πU“ ¢LU” °~}d|b
¢Jt ≥UÈ ±u«œ ¨c«zv °}g «“ •b °e¸¯ |U
ߪX ±v °U®Mb
«≤b«“Á |U ±Ib«¸ ±u«œ d¬Ë¸È ®bÁ ¸«
ØU≥g œ≥}b. ±Ib«¸È ±U|l «{U≠t ØM}b
ßM~}Mv °}g «“ •b ±u¢u¸ ≤U®v «“
±Ib«¸ °}g «“ •b °e¸¯ ±u«œ |U ¢Jt ≥UÈ
°}g «“ •b °e¸¯ ±u«œ ¨c«zv ±v °U®b
«§U“Á œ≥}b ±u¢ß®uœ Ë ±Ib«¸
±u«œ ±u§uœ œ¸ Øu“Á ¸« ØU≥g œ≥}b
Øu“Á îU∞v, ¢Id|∂U îU∞v «ßX |U °t «≤b«“Á ØU≠v
±U|l œ¸ œß∑u¸ ¨c« ±u§uœ ≤Lv °U®b
±UœÁ ¢U ´ö±X ßD` •b«Æq Øu“Á «{U≠t
ØM}b
(fC ®Jq 7)
«∞LMX Öd±U ØU¸ ≤Lv ØMb
°U |J‡ ±dØe îb±U‹ ±πU“ ¢LU” °~}d|b
ßMºu¸ œ±U œ¥~d ØU¸ ≤Lv ØMb
°U |J‡ ±dØe îb±U‹ ±πU“ ¢LU” °~}d|b
œß∑~UÁ ®LU ≥Mu“ ØU¸ ≤Lv ØMb?
°t |J‡ ±dØe ßdË|f ±πU“ ±d«§Ft ØM}b (∞}ºX ±u§uœ œ¸ Ø∑U°ât îb±U‹ ¸« ¸Ë|X ØM}b).
> ±∫Buô‹ ±MICv ®bÁ «∞J∑dË≤}Jv Ë «∞J∑d¥Jv:
AR
´Mb Æd«¡… ≥c« «∞b∞Oq, ßu· ¢πb °Fi «ù¸®Uœ«‹ «∞∑w ±s ®Q≤NU ±ºU´b¢p ùß∑JAU· §LOl
«ù•∑LUô‹ «∞LLJMW ≠w ≥c« «∞LM∑Z : ±s ¢∫COd «∞Au¸°W «∞ªHOHW √Ë «∞LÔdØe… , «∞v «∞Au¸°U‹ «∞bßLW,
«∞BKBU‹ Ë°u¸¥Ot «∞Hu«Øt, «∞ªözj, «∞JuØ∑Oö‹ Ë«∞uÅHU‹ «∞∑w ¢F∑Lb ´Kv «∞∂ªU¸, Ë«∞J∏Od ¨Od≥U.
•u‰ «∞ºö±W «∞AªBOW
> ¥Ôd§v Æd«¡≈¸®Uœ«‹ «ùß∑FLU‰
°∫d’ Ë´MU¥W Æ∂q ≈ß∑FLU‰ «∞LM∑Z
∞KLd… «_Ë∞v Ë«ù•∑HUÿ °NU ∞K∫U§W
«∞ONU ±º∑I∂öÎ: s ¢∑∫Lq «∞AdØW
«∞LÔBMÒFW √¥W ±ºRË∞OW ≠w •U‰ ´bÂ
«∞∑IOÒb °S¸®«‹ «ùß∑FLU‰
«∞Ld≠IW.
> ô ¥ÔºL` ∞ú©HU‰ °Sß∑FLU‰ «∞LM∑Z
œËÊ ¸ÆU°W .
> ¥πV √Ê ô ¥∑r ¢AGOq ≥c« «∞LM∑Z
°u«ßDW «_©HU‰.
¥Ôd§v «∞∫HUÿ ´Kv «∞LM∑Z Ë«∞ºKp
«∞JNd°Uzw «∞∑U°l ∞t °FOb«Î ´s ±Ô∑MUË
«_©HU‰.
> ∞r ¥ÔF ≥c« «∞LM∑Z ûß∑FLU‰
°u«ßDW ®ªU (°Ls ≠ONr
«_©HU‰) ±Ls ô ¥∑L∑FuÊ °U∞Ib¸…
«∞πºb¥W, √Ë °Uù±JU≤U‹ «∞FIKOW
«∞∑U±W, Ë –« ØU≤ ¥FU≤uÊ ±s
«∞IBu¸ Ë «∞MIh ≠w «∞ª∂dË
«∞LFd≠W, ±U r ¥Ju≤ ¢∫X ¸´U¥W
®ªh ∞b¥t «∞LFd≠W «∞∑ÒU±W Ë «∞b¸«¥W
≠w «ß∑FLU‰ «∞LM∑Z ±s √§q
ßö±∑Nr.
ËÅn √§e«¡ «∞LM∑Z
A Ë•b… «∞LÔ∫d„
B “¸ ∞u•W «∞∑∫Jr
1b √“¸«¸ «ù≤∑IU¡
-P - °d«±Z √Ë¢u±U¢OJOW
1P :®u¸°W îHOHW / 2P : ®u¸°W ßLOJW
©Nw ´Kv «∞∂ªU¸ : 3P (•ºV «∞Luœ¥q)*
¢MEOn √Ë¢u±U¢OJw: 3P √Ë 4P (•ºV «∞Luœ¥q)*
- (-/+) “¥Uœ…/≈≤IU’ ≠∑d… «∞DNw √Ë œ¸§W «∞∫d«¸….
- ±u«≠o/≈¥IU· - «∞∑∫Io ±s ≈≤∑IU¡ «∞∂d≤U±Z,
ËÆX «∞DNw √Ë «∞∫d«¸…/≈¥IU· «∞LM∑Z.
2b ±R®d «∞∫d«¸… «∞Cuzw (≈–« < ±s 05
œ¸§W ±R¥W œ«îq «ù°d¥o).
3b “¸ «≤∑IU¡ «∞ºd´W
4b “¸ ß∫o «∞∏KZ (∞º∫o ±ÔJF∂U‹ «∞∏KZ)
C ®U®W «∞Fd÷
1c ¢Fb¥q ´d÷ «∞∫d«¸… ±s 06 «∞v 001
œ¸§W ±R¥W.
2c ´d÷ «∞uÆX (ÆU°q ∞K∑Fb¥q ±s 0 «∞v 95
ϮOIW).
3c ´d÷ «∞∂d«±Z (1P,2P,3P Ë4P
•ºV «∞Luœ¥q)
4c ´d÷ ±R®d «_±UÊ
D Ë•b… «°d¥o «∞ªö◊
1d
«°d¥o ≈ß∑U≤Kf ß∑Oq (ßFW ÆBuÈ = 8,1 ∞∑d)
2d ±I∂i ±l “≤Uœ
3d ®Hd«‹
≈ß∑U≤Kf ß∑Oq
E Ë•b… «∞GDU¡
1e
ßbÒ«œ… «∞Lu“Ÿ
2e ¨DU¡
3e •KIW «∞∫U±KW
4e •KIW ±U≤FW ∞K∑ºd»
F ßKÒW «∞DNw (•ºV «∞Luœ¥q)
1f
±I∂i
2f ßKÒW
°OU≤U‹ «∞LM∑Z «∞∑IMOW :
«∞∫b «_ÆBv ∞K∫d«¸… : 001 œ¸§W ±R¥W
«∞Iu… : 0011 Ë«◊
«∞∂d±πW «∞IBuÈ ∞KuÆX : 95 œÆOIW
≈¸®Uœ«‹ ±s √§q «∞ºö±W
6564
«ß∑HUœÁ «“ œß∑~UÁ
®}uÁ °d≤U±t
≥M~U±v Øt ¬» Ë ±u«œ œ¸ Øu“Á |U ß∂b °ªU¸ Æd«¸ œ«œÁ ®bÁ, œ¸» ¸« ÆHq ØM}b Ë Øu“Á ¸« œ¸ Ë«•b ±u¢u¸ Æd«¸ œ≥}b
(Æ∂q «“ «Ë∞}s «ß∑HUœÁ ¸« ¸Ë|X ØM}b).
¥Jv «“ °d≤U±t ≥UÈ îuœØU¸ ¢uÅ}t ®bÁ –|q ¸« «≤∑ªU» ØdœÁ (œØLt P) Ë ¢Uz}b ØM}b (œØLt KO).
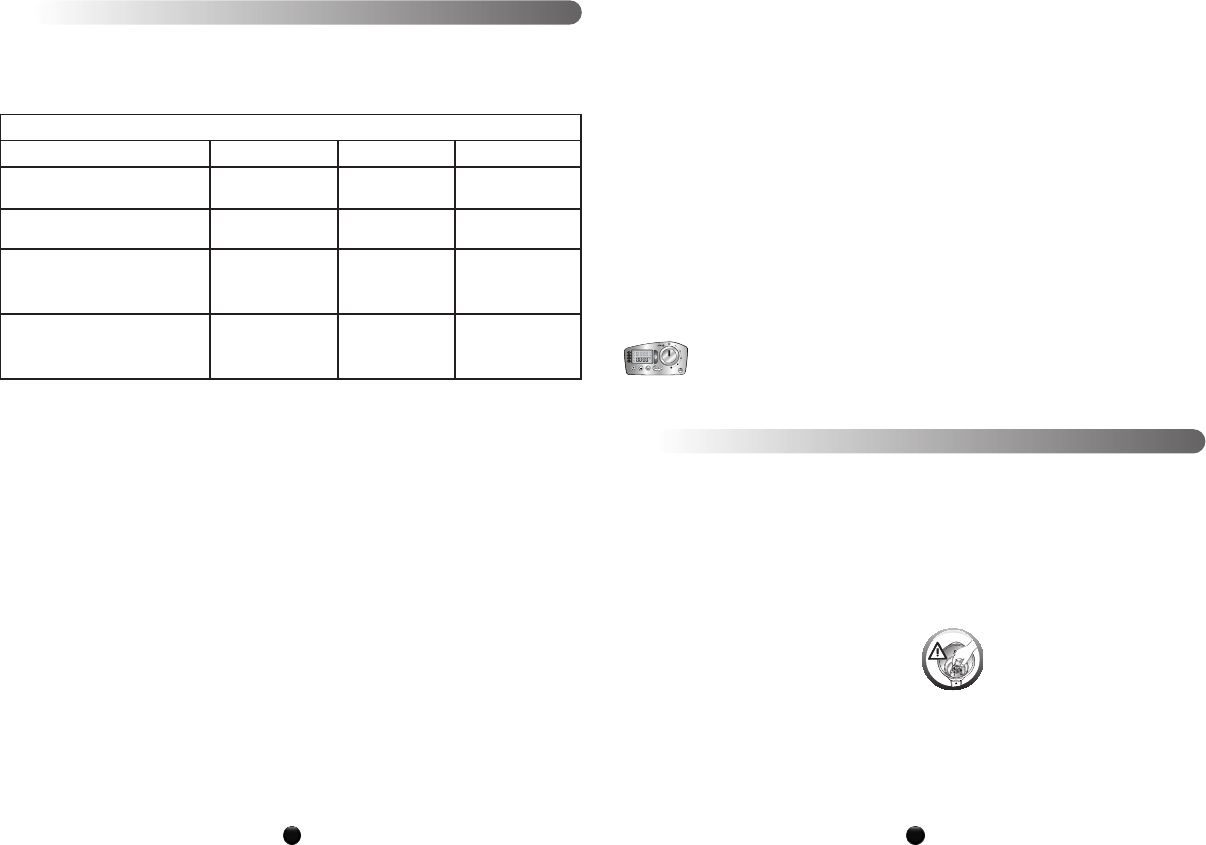
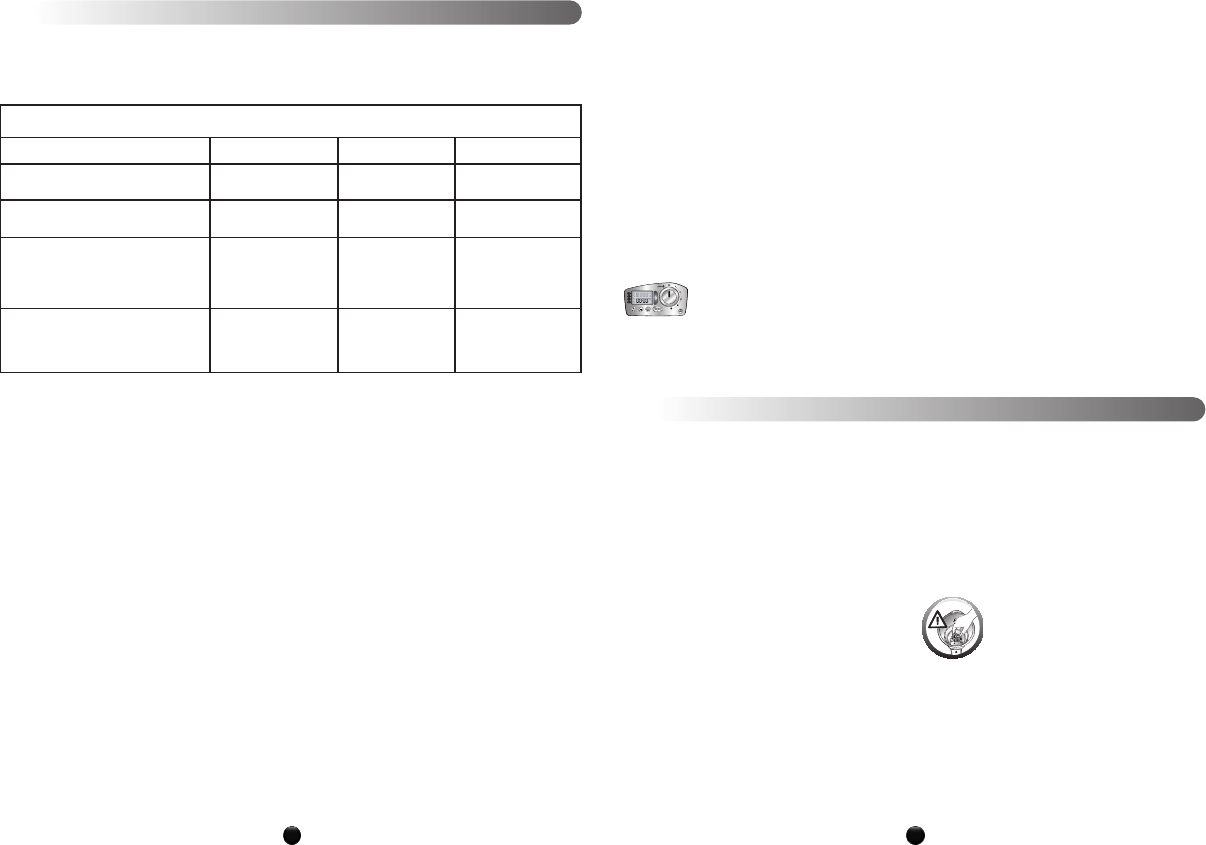
“±U≤v Øt °d≤U±t °t ÄU|UÊ ¸ß}b, œß∑~UÁ
3 °u‚ ±v “≤b.
°U ≠AU¸ œ«œÊ ±U®t (2d) Ë«Æl œ¸ œ«îq œß∑t, Øu“Á ¸« °U“ ØM}b (
fC ®Jq 9
) Ë ≠u¸«" ßdË ØM}b |U Øu“Á ¸« §UÈ
Öd ≤~t œ«¸|b (¢U 04 œÆ}It).
¸«≥MLUÈ ´LKv
> «©L}MUÊ •UÅq ØM}b Øt ®LU °t «≤b«“Á ØU≠v ±U|l °d«È
Äu®g ≤AU≤~d ±∫bËœ ØMMbÁ ØuÇJ‡ œ«¸|b (
fC ®Jq 7
).
Ë ±d«ÆV ≠d«¢d ≤d≠∑s «“ ≤AU≤~d ±∫bËœ ØMMbÁ •b«Ø∏d
8.1 ∞}∑d •J‡ ®bÁ œ¸ œ«îq Øu“Á °U®}b (
fC ®Jq 8
).
>
°dîv œß∑u¸«∞FLq ≥U ±LJs «ßX °t œ∞}q ¢AJ}q •∂U»,
±ªBuÅU" ≥M~U «ß∑HUœÁ «“ ß∂e|πU‹ ±MπLb, ≤UÖNUÊ ∞∂d|e
®u≤b. œ¸ «|s ±u¸œ, ®LU ±IUœ|d ¸« ±∑MUßV °U ¬Ê ØU≥g œ≥}b.
> «©ö´U‹ “±UÊ Ë œ±U ÇALJ±v “≤Mb: ®LU ±v ¢u«≤}b «|s
«©ö´U‹ ¸« ¢G}}d œ≥}b. “±UÊ ¸« œ¸ Åu¸‹ ∞eË °U ØLJ‡
œØLt ≥UÈ (+) «≠e«|g Ë (-) ØU≥g, ¢ME}r ØM}b, °º∑t °t
≤uŸ ±u«œ «ß∑HUœÁ ®bÁ Ë ±Ib«¸ ±u«œ ¢AJ}q œ≥MbÁ
(§bË “±UÊ ÄªX Ë Äe °d«È ßuÛ œ¸ œ≠∑dÇt
œß∑u¸«∞FLq ¸« ¸Ë|X ØM}b).
> °U ß∂b ĪX Ë Äe (°d ©∂o ±b‰) ®LU ±v ¢u«≤}b °ªU¸Äe
ØMOb («“ 3P °U 5.0 ∞}∑d ¬» «ß∑HUœÁ ØM}b), |U °d«È
œß∑u¸ «∞FLq ≥UÈ ßuÛ œ∞ác|d Ë ±u«œ ¢AJ}q œ≥MbÁ Øq
ĪX Ë Äe ±U≤Mb Öu®X, ±U≥v, ß∂e|πU‹ œ¸ ≥LUÊ “±UÊ
°d«È ßuÛ îuœ («“ 1P |U 2P «ß∑HUœÁ ØM}b).
> œ¸ ÄU|UÊ °d≤U±t ≥U, œß∑~UÁ °t ©u¸ îuœØU¸ œß∑u¸ ¨c« ¸«
°t ±b04 œÆ}It Öd ~t ±v œ«¸œ Äf «“ ¬Ê ¬±UœÁ
±Bd· ±v °U®b. °d«È ±∑uÆn ØdœÊ ¸Ë≤b Öd ®bÊ,
≠Ij œØLt "FFO" ¸« ≠AU¸ œ≥}b.
>
«Öd °d«È °U“ ØdœÊ œ¸», ±U®t ¸« ≠Aœ≥}b |U Øu“Á ¸«
°dœ«¸|b, ¸Ë≤b Öd ®bÊ °t ©u¸ îuœØU¸ ±∑uÆn îu«≥b ®b.
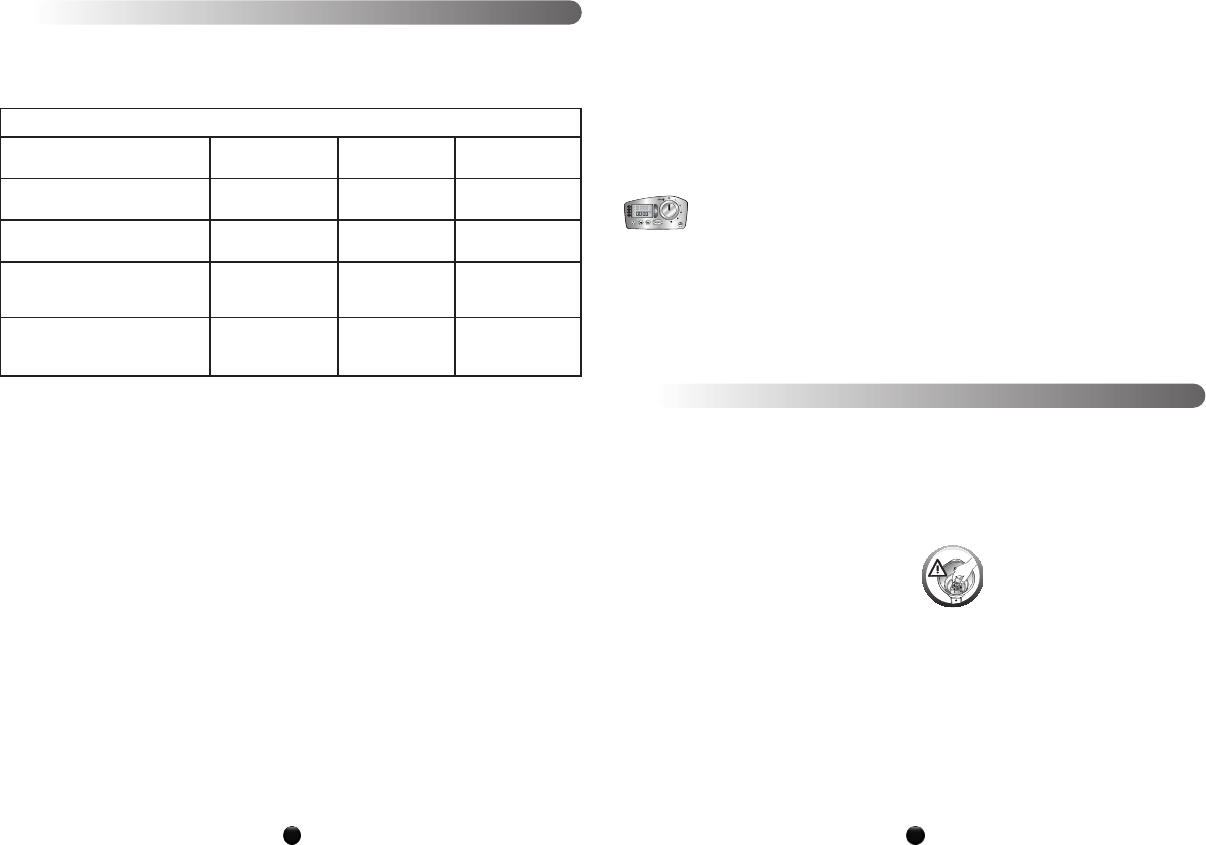
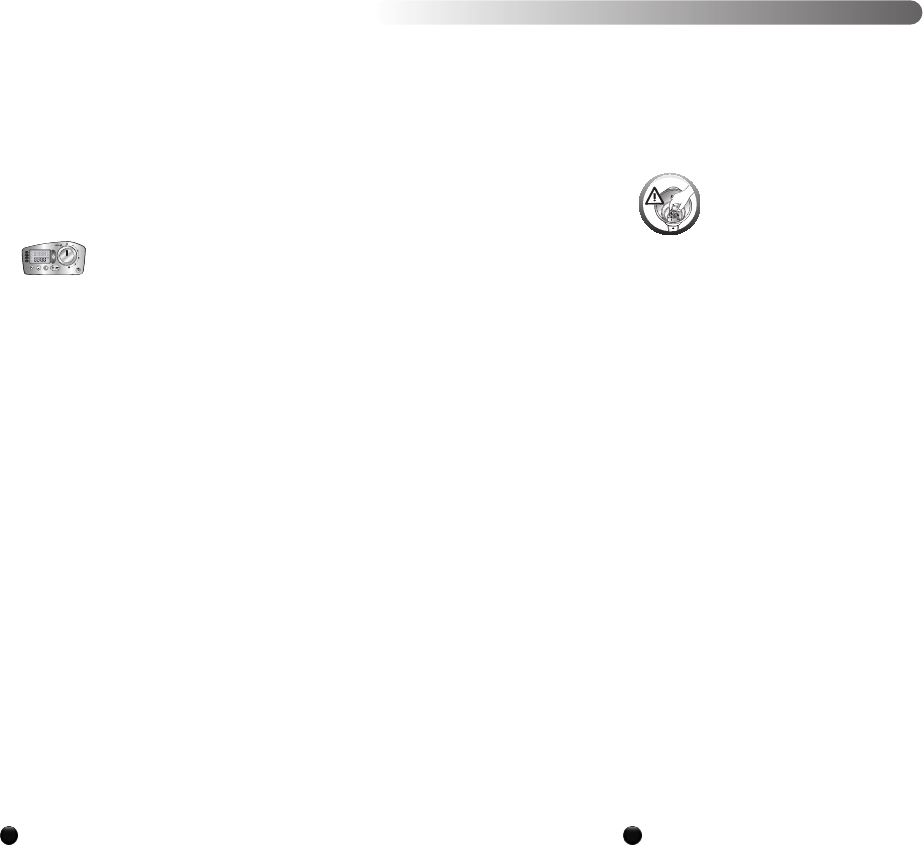
> ≥M~U±v Øt «|s °d≤U±t ¬¨U“ ®bÁ «ßX, ®LU ±v ¢u«≤}b
œß∑~UÁ ¸« ≥d “±UÊ °U ≠Aœ«œÊ °d œØLt P ±∑uÆn ØM}b.
Äf «“ ¬Ê °d≤U±t œ¸ •U‰ ±JY «ßX Ë ®LU ±v ¢u«≤}b ¬≤d«
°U ≠AU¸ œ«œÊ œË°U¸Á °d œØLt P |U œØLt KO ±πbœ«" ¸«Á
«≤b«“È ØM}b.
> «Öd ®LU °d≤U±t «È Øt «≤∑ªU» ±v ØM}b «®∑∂UÁ «ßX Ë
®LU ±U|K}b Øt ¬≤∞Gu ØM}b, œØLt "FFO" ¸« °d«È 2 £U≤}t
≠AU¸ œ≥}b Øt °t ®LU «§U“Á îu«≥b œ«œ ¢U “±UÊ Ë œ¸§t
•d«¸‹ ¸« ±πbœ«" ¸«Á «≤b«“È ØM}b.
®OuÁ œß∑v
>
“±UÊ ÄªX Ë Äe ¸« °U ØLJ‡ œØLt ≥UÈ (+) «≠e«|g, Ë (-)
ØU≥g,
¢ME}r ØM}b, °º∑t °t ≤uŸ ±u«œ «ß∑HUœÁ ®bÁ Ë
±Ib«¸ ±u«œ ¢AJ}q œ≥MbÁ (§bˉ “±UÊ ÄªX Ë Äe °d«È
ßuÛ œ¸ œ≠∑dÇt œß∑u¸«∞FLq ¸« ¸Ë|X ØM}b).
> ßáf ®LU °U|b “±UÊ «≤∑ªU» ®bÁ ¸« °U ≠AU¸ œ«œÊ °d
œØLt KO ¢Uz}b ØM}b.
> «©ö´U‹ ±d°u◊ °t œ¸§t •d«¸ÇALJ‡ ±v “≤b, ®LU
®LU ±}∑u«≤}b «|s «©ö´U‹ ¸« ¢G}}d œ≥}b. œ¸§t •d«¸‹
ĪX Ë Äe ¸« °U ØLJ‡ œØLt ≥UÈ (+) «≠e«|g, Ë (-) ØU≥g,
¢ME}r ØM}b.
´d{t °d≤U±t ≥UÈ «¢u±U¢}J‡ ¢uÅ}t ®bÁ
1P - ßuÛ îU±t «È
(°U≠X ≤U“؇)
2P - ßuÛ Äd¢U»
(°U≠X ±∑d«Ør)
3P - (≠Ij °d«È ±b‰ °U ß∂b ĪX Ë Äe) -
ĪX Ë Äe °U °ªU¸ Ë
005 ±}Kv ∞}∑d
¬» (°º∑t °t ±b‰*).
3P - (¥U 4P °d«È ±b‰ °U ß∂b≥U) - ¢LOe
®bÊ îuœØU¸: °d≤U±t ¢LOe ØdœÊ
îuœØU¸.
œ±U (•b«Ø∏d)
°C 001
°C 001
°C 001
°C 001
“±UÊ ÆU°q ¢ME}r
52 ϮOIt
(+ ¥U - 01 œÆOIt)
53 ϮOIt
(+ ¥U - 01 œÆOIt)
03 ϮOIt
(+ ¥U - 01 œÆOIt)
03 ϮOIt
(¢MEOr Äc¥d ¢U1 œÆOIt)
«î∑ö◊
°OA∑d¥s ßd´X
1 ϮOIt
ØL∑d¥s ßd´X
31 £U≤Ot
≥Oê
•b «Ø∏d ßd´X
¢L}e ØdœÊ œß∑~UÁ
> °Fb «“ ¬Ê ®LU °U|b °U AU¸ œ«œÊ °d œØLt KO œ±UÈ
«≤∑ªU» ®bÁ ¸« ¢Uz}b ØM}b.
> Çd«⁄ ≤AU≤~d Æd±e ¸Ë®s ±v ®uœ ¢U °t ®LU «©öŸ œ≥b
Øt ĪX Ë Äe ®dËŸ ®bÁ «ßX.
> œ¸ ≥d ≤IDt «È ®LU ±v ¢u«≤}b ±u¢u¸ ¸« °d ¸ËÈ ≥d ±u¸œ
–|q ¢ME}r ØM}b:
- ßd´X Ør (±uÆF}X 1) °d«È ±ªKu◊ ØdœÊ ±u«œ ±U|l
(°t ´Mu«Ê ±∏U‰ °d«È ßf).
- ßd´X ßd|l (±uÆF}X 2 °t °Fb) °d«È ±ªKu◊ ØdœÊ
±u«œ §U±b.
®}uÁ ±ªKu◊ Øs (°bËÊ ÄªX Ë Äe)
> ßd´X ¸« °U ÇdîU≤bÊ «≤∑ªU°~d ßd´X
°t ßLX ¸«ßX «≤∑ªU» ØM}b. «î∑ö◊
®dËŸ ±v ®uœ Ë “±UÊ °d ¸ËÈ ÅH∫t
≤LU|g ™U≥d ±v ®uœ.
œ¸ ®}uÁ ±ªKu◊ Øs, ®LU ±v ¢u«≤}b ¢U 5 ßd´X ¸« °U
«≤u«Ÿ ±ª∑Kn «î∑ö◊ «≤∑ªU» ØM}b.
ßd´X ÄU∞f ±v ¢u«≤b œ¸ ßLX Çé ±uÆF}X "0" Ä}
®uœ.
> «≤∑ªU°~d ßd´X ¸« °âdîU≤}b ¢U "0" °d«È ±∑uÆn ØdœÊ
œß∑~UÁ Æd«¸ Ö}dœ.
> °d ¸ËÈ ±U®t (2d) ≠AU¸ œ≥}b ßáf Øu“Á ±ªKu◊ Øs
(D) ¸« °dœ«¸|b. «Öd ±v îu«≥}b “±UÊ ´LKJdœ ¸« °d≤U±t
¸|eÈ ØM}b Øt °Du¸ îuœØU¸ ±∑uÆn ®uœ:
> “±UÊ ´LKJdœ ¸« °U ØLJ‡ œØLt (+) «≠e«|g Ë (-)
ØU≥g ¢ME}r ØM}b.
> ßd´X ¸« °U ÇdîU≤bÊ «≤∑ªU°~d ßd´X «≤∑ªU» ØM}b.
“±UÊ ®LU¸‘ °d ¸ËÈ ÅH∫t ≤LU|g ™U≥d ±v ®uœ.
> ±u¢u¸ °t Åu¸‹ îuœØU¸ œ¸ ÄU|UÊ “±UÊ ®LU¸‘ ±∑uÆn
±v ®uœ.
œØLt ¥a îdœ Øs: œØLt "ecI" ´LKJdœ îdœ ØdœÊ |a ¸« ≤AUÊ
±v œ≥b. ®LU ±v ¢u«≤}b œ¸ Åu¸‹ eË °U ≠AU¸ °d œØLt
"FFO" œß∑~UÁ ¸« ±∑uÆn ØMOb.
®LU ±v ¢u«≤}b •b«Ø∏d 6 ¢U 8 ÆDFt |a ¸« îdœ ØM}b.
> œß∑~UÁ ¸« œ¸ ¬» ¨u©t ˸ ≤JM}b. «“ Æd«¸ œ«œÊ Ë«•b
±u¢u¸ (A) “|d ¬» ¸Ë«Ê œ«⁄ «Ø}b«" îuœœ«¸È ØM}b.
> Øu“Á ¸« °ö≠UÅKt Äf «“ «ß∑HUœÁ ¢L}e ØMOb.
> Øu“Á ¸« °U 3 ∞}∑d ¬» œ«⁄ ≥Ld«Á °U 2 |U 3 ÆDdÁ ±∫Bu‰
¢L}e ØdœÊ Äd ØM}b. ≠Ij «“ ±Ib«¸ ¢uÅ}t ®bÁ ¬» Ë ±U|l
®º∑Au «ß∑HUœÁ ØM}b. “|UœÁ ¸ËÈ œ¸ ±U|l ®º∑Au
±Mπd °t «|πUœ ≠uÂ Ë œ¸ ≤∑}πt ∞∂d|e ®bÊ ±v Ödœœ.
> «“ °d≤U±t «¢u±U¢}J‡ : 3P ¥U 4P (°º∑t °t ±b‰*) ÆU°q
¢ME}r ±v Ödœœ ¢U Øu“Á «“ Ä}g ®º∑Au ®uœ.
> ≥M~U±v Øt °d≤U±t ±∑uÆn ®bÁ «ßX, œß∑~UÁ ¸« «“ °d‚
§b« ØM}b.
> °d ¸ËÈ ±U®t (2d) ≠AU¸ œ≥}b ßáf Øu“Á ±ªKu◊ Øs
(D) ¸« °dœ«¸|b.
> ¢M@ ¸« °d ¸ËÈ |J‡ ßD` ÅU· Æd«¸ œ≥}b.
> ÆHq œ¸» ¸« °U ÇdîU≤bÊ ¬Ê °t ¥J‡ ¸°l œ¸ §NX ´Id°t
ßU´X °U“ ØMOb.
œ¸» ¸« °U œÆX °dœ«¸|b.
> ËÆ∑v ÆDFU‹ ßdœ ≥º∑Mb, Ë«®d •U±q œ¸» ¸« °U ØLJ‡
ß}º∑r ËÅq ØdœÊ °U“ ØMOb.
> ¢L}e ØdœÊ Øu“Á ¸« °U ØLJ‡ |J‡ «ßHMZ ¢LU ØM}b.
> œ«îq Øu“Á ¸« ®º∑Au œ≥}b Ë œ¸» ¸« ≤}e œ¸ “|d ¬»
¸Ë«Ê ®º∑Au œ≥}b.
> œ¸ Åu¸¢}Jt °ªg œ«⁄ ¢M@ Øu“Á °ºOU¸ Ø∏}n «ßX,
°d«È ÇMb ßU´X œ¸ ±ªKu◊ ¬» Ë ±U|l ®u|MbÁ î}f ØM}b
¢U °t ¢L}e ®bÊ ¬Ê ØLJ‡ ØMb.
> ≥M~¢L}e ØdœÊ ¢}Gt U (3d) œ¸
Øu“Á ±ªKu◊ Øs Ë ≥M~U ¢ªK}t
ØUßt ±u«™V °U®}b ÇuÊ ¬≤NU ¢}e
≥º∑Mb.
> «“ ¥JÄU¸Çt ±d©u» °d«È ¢L}e ØdœÊ Ë«•b ±u¢u¸ (A)
«ß∑HUœÁ ØM}b. ¬≤d« °U œÆX îAJ‡ ØM}b.
> ÆDFU‹ §®b≤v ¸», ±Nd Ë ±u •U±q, Ë«®d, Øö≥J‡
Īg ØMMbÁ, ß∂b ĪX Ë Äe) ¸« ±v ¢u«Ê °U |J‡ «ßHMZ Ë
¬» ÅU°uÊ œ«⁄ ¢L}e Ødœ.
6766
i
ce
max
0
> ≥L}At ±u«œ §U±b ¸« Æ∂q «“ ¸|ª∑s
œ¸ ±u«œ ±U|l «{U≠t ØM}b, °bËÊ
¬≤Jt «“ ´ö±X Ø∏d
8.1 ∞}∑d
•J‡ ® œ¸ œ«îq Øu“Á ¢πUËØM}b
(
fC ®Jq 8). «Öd ±ªKu◊ Øs °}g
«“ •b Äd «ßX, ¬» §u‘ ±LJs
«ßX °t °}dËÊ ÄU®} ®uœ.
«©L}M •UÅq ØM}b Øt °d«È
Äu®g œ«œÊ ≤AU≤~d ØuÇJ
±∫bËœÁ °t «≤b«“Á ØU≠v ±U|l ˧uœ
œ«¸œ (
fC ®Jq 7).
>
°dîv œß∑u¸«∞FLq ≥U °t œ∞}q ¢AJ}q
•∂ ±ªBuÅU" ≥M~v Øt «
ß∂e|πU‹ ±MπLb «ß∑HUœÁ ±v ®uœ,
±LJs «ßX UÖN∞∂d|e ®u≤b. œ¸
«|s ±u¸œ, ®LU °U|b ±IUœ|d ¸«
±∑MUßV °U ¬Ê ØU≥g œ≥}b.
> «“ Æd«¸ œ«œÊ «≤~A∑|U ≥d Ç}e
œ|~d œ¸ •U∞v Øt œß∑~UÁ œ¸ •U
ØU¸ ØdœÊ «ßX, îuœœ«¸È ØM}b.
> «“ Øu“Á °t ´Mu«Ê ¥J™d· °d«È
«≤πLUœ |U {b ´Hu≤v ØdœÊ
«ß∑HUœÁ ≤JM}b.
> œß∑~UÁ ¸« œ¸ ¥J ßD` ÄU|b«¸,
±IUË œ¸ °d«°d d«¸‹, ¢L}e, Ë
îAJ‡ Æd«¸ œ≥}b.
>
«“ Æd«¸ œ«œÊ œß∑~UÁ œ¸ ØMU¸ œ|u«¸ |U
¥JØLb îuœœ«¸È ØM}b: °ªU¸ ±LJs
«ßX °t ¬≤NU ¬ß}V ¸ßU≤b.
> «§U“Á ≤b≥}b ±u≥UÈ ®LU, ¥J‡
¸ËßdÈ |U |J‡ Ød«Ë«‹ œ¸ ±}UÊ
Ç}e≥UÈ œ|~d °d ¸ËÈ Øu“Á ¬Ë|e«Ê
®uœ œ¸ •U∞v Øt œß∑~UÁ œ¸ •U
ØU¸ ØdœÊ «ßX.
> ≥d|J «“ ∞u«“ §U≤∂v ¸« œ¸
±U|JdËË|u Æd«¸ ≤b≥}b.
> «“ œß∑~ °}dËÊ « ß∑LUÊ
«ß∑HUœÁ ≤JM}b.
> ≥dÖe «•b«Ø∏d ±Ib«¸ ±Mb¸Ã œ¸
œß∑u¸«∞FLq ≥U ≠d«¢d ≤dË|b.
> ≥dÖUÁ œß∑~îMJ®b, ¬Ê ¸«
î}dÁ ØM}b.
îb±U‹ Äf «“ ≠dË‘
> °d«È «|LMv î, ««ß∑HUœÁ «“
∞u«“ §U≤∂v |U ÆDFU‹ |bØv «¸«zt
®bÁ ¨}d «“ ±d«Øe îb±U±πU
Äf «“ ≠dË‘ îuœœ«¸È ØM}b.
> «Öd œß∑~UÁ °t œ¸ß∑v ØU¸ Lv
ØMb, «Öd ¬ß}V œ|bÁ «ßX |U ß}r
°d‚ |U Äd|e îd«» «ßX, «“ œß∑~UÁ
«ß∑HUœÁ ≤JM}b.
Æ∂q «“ «Ë∞}s «ß∑HUœÁ
œß∑~UÁ ®LU œ«¸«È 3 ®}uÁ ØU¸ ØdœÊ «ßX:
> ®}uÁ °d≤U±t îuœØU¸: œ¸§t •d«¸‹, ĪX Ë Äe Ë
«î∑ö◊ “±UÊ, Ä}g °d≤U±t ¸|eÈ ®bÁ ≥º∑Mb °d«È
œ¸ßX ØdœÊ ßuÛ Ë «≤πU °ªU¸Äe «¢u±U¢}J‡.
> ®}uÁ œß∑v : ¢ME}LU‹ ®ªBv œ¸ œ±U Ë ±UÊ
ĪX Ë Äe °d«È |J‡ °U¸ «ß∑HUœÁ, ±v ¢u«≤b °U ¢u§t
°t îu«ßX ®LU «≤πU ®uœ.
> ®}uÁ «î∑ö◊ : ßd´X ±u¢u¸ ¸« °bËÊ «ß∑HUœÁ «“
´LKJdœ ĪX Ë Äe °d«È œ¸ßX ØdœÊ «ßLu¢}e |U
ØuØ∑q îu®LeÁ, «≤∑ªU» ØM}b.
Æd«¸ œ«œÊ Øu“Á Ë Ë«•b œ¸» :
> Æ∂q «“ «ß∑HUœÁ °d«È «Ë∞}s °U¸, ≥Lt ∞u«“ §U≤∂v
(
E,D Ë F) °t §e Ë«•b ±u¢u¸ (A) ¸« œ¸ ¬»
ÅU°uÊ Öd °Auz}b.
> «©L}MUÊ •UÅq ØMOb Øt ¢LU °º∑t °MbÈ Æ∂q «“ °t
ØU¸ «≤b«î∑s œß∑~UÁ °dœ«®∑t ®bÁ «ßX.
>
Ë«®d ¸« œ¸ ±Nd Ë ±u •U±q Æd«¸ œ≥}b (fC ®Jq a1),
Ë Ë«•b ¸« °d ¸ËÈ œ¸» °âº∂U≤}b (
fC ®Jq b1).
> °d«È °ªU¸Äe ØdœÊ, ß∂b °U ß∂e|πU‹ °d‘ îu¸œÁ
¸« œ¸ §UÈ îuœ Æd«¸ œ«œÁ Ë Øu“Á ¸« °U 5.0 ∞}∑d ¬»
ßdœ °bËÊ ≠d«¢d ¸≠∑s «“ ÄU|}s ß∂b Äd ØM}b
(fc
®Jq 01 Ë 11
).
> œ¸» (E)¸« œ¸ Øu“Á (D)¢U œË ±∏KY Æd«¸ œ≥Ob
(fC
®Jq 2
),
œ¸» ¸« °bËÊ ≠A°U ÇdîU≤¬Ê œ¸
§NX ≠Kg ÆHq ØM}b
(fC ®Jq 3)
¢M@ ±ªKuØs
(D) ¸« œ¸ Ë«•b ±u¢u¸ (A) Æd«¸ œ≥}b ¢U “±U≤v Øt
Åb«È ØK}J‡ ¸« °AMu|b
(fC ®Jq 4).
>
œß∑~UÁ ≠Ij “±U≤v ®dËŸ °t ØU¸ ±v ØMb Øt Øu“Á
Ë œ¸» °t œ¸ß∑v œ¸ §UÈ îuœ Æd«¸ Öd≠∑t Ë °d
¸ËÈ Ë«•b ±u¢u¸ ÆHq ®bÁ °U®b.
œ¸Åu¸‹ ≤Uœ¸ßX Æd«¸ Öd≠∑s |U ÆHq ®bÊ |Jv |U ÆDFt œ|~d
(fC ®Jq 5 Ë 6)
, ´ö±X ÆHq ®dËŸ °t ÇALJ‡ “œÊ ±v
ØMb ËÆ∑v ®LU ¥J‡ ´LKJdœ ¸« ≠FU‰ ±v ØM}b.
6968
> ØuœØUÊ °U|b ¢∫X ≤EU¸‹ °U®Mb ¢U
«©L}M UÅq ®uœ Øt ¬≤NU °U
œß∑~UÁ °U“È ≤Lv ØMMb.
> œß∑~UÁ ¸« œË¸ «“ œß∑d” ØuœØUÊ
≤~t œ«¸|b.
> œ¸ ≥M~ «ß∑HUœÁ «“ œß∑~UÁ,
°dîv ÆDFU‹ °t œ±UÈ ° ±v ¸ßMb
LX ≠uôœ {b ≤@ Øu“Á,
ƺL∑N®H œ¸» Ë Øö≥J‡,
±IU©l ≠Kœ¸ “|d Øu“Á, ß∂b)¬≤NU
±v ¢u«≤Mb ±u§V ßuî∑~v ®u≤b.
°uß}Kt ÆDFU‹ Äöß∑}Jv ß
(œß∑~}dÁ, Ë«•b ±u¢u¸) °t œß∑~UÁ
œßX °e≤}b.
> «Öd îDd ßuî∑~v ˧uœ œ«®∑t
°U®b, Ç≤AU≤~d Æd±e Öd±U
Äb|b«¸ ±v ®uœ. «Öd œß∑~°t
œ¸ß∑v ØU¸ Lv ØMb, «Öd ¬ß}V
œ|bÁ «ßX |U ß}r °d‚ |U Äd|e ¬ß}V
œ|bÁ «ßX, «“ «ß∑HUœÁ «“ œß∑~UÁ
îuœœ«¸È ØM}b. °d«È §KuÖ}dÈ «“
≥dÖu≤t îDd, ß}r ¸« ¢ußj |J‡
±dØe îd|b ±πU“ ¢Fu|i ØMOb
(∞}ºX ±u§uœ œ¸ œ≠∑dÇt îb±U‹
¸« ¸Ë|X ØMOb).
> œß∑~Ij °d«È «ß∑HUœÁ œ«îKv
©d«•v ®bÁ «ßX. ¢u∞}b ØMMbÁ ≤∂U|b
≥dÖu≤t ±ºµu∞}∑v ¸« Æ∂u‰ ØMb Ë •o
îuœ ¸« °d«È ∞Gu ØdœÊ ÖU¸«≤∑v œ¸
Åu¸‹ «ß∑HUœÁ ¢πU¸È |U ≤U±MUßV
|U ´b Ä}~}dÈ «“ œß∑u¸«∞FLq U
±∫Huÿ ≤~t œ«¸œ.
>
«|s œß∑~UÁ °d«È ±BU¸· îU≤~v |U
±AU°t, ±U≤Mb «ß∑HÁ œ¸ ±}e
¬®áeîU≤t, œ¸ ±GU“Á ≥U, «œ«¸«‹ Ë
±∫}j ØU¸≥UÈ œ|~d ±MUßV ≤}ºX.
- œ¸ ¬®áU≤t °d«È «ß∑HUœÁ
ØU¸ØM œ¸ ±GU“Á ≥U, «œ«¸« Ë
ßU|d ±∫}j ≥UÈ •d≠t «È.
- œ¸ ±e«¸Ÿ.
- «ß∑HUœÁ ¢ußj ±A∑d|UÊ ≥∑q |U
±∑q, |U œ|~d ±JUÊ ≥UÈ ±ºJu≤v.
- œ¸ ¢ª∑ªu«» Ë ±∫}j Åd·
Å∂∫U≤t Ë ±∫}j ≥UÈ ±AU°t œ|~d.
≠Ij °U“«¸≥UÈ «¸ËÄUzv:
> œß∑~ Ë ß}r ¬Ê ¸« îU¸Ã œß∑d
ØuœØUÊ “|d
8 ßU‰ ßs ≤~t œ«¸|b.
> ØuœØUÊ ∂U|b «œß∑~°t ´Mu«Ê
¥J‡ «ß∂U» °U“È «ß∑HUœÁ ØMMb.
> «|s œß∑~UÁ ±LJs «ßX ¢ußj
«≠d«œÈ °U ≤U¢u«≤v §ºLv, •ºv |U
–≥Mv, |U «≠d«œÈ °U œ«≤g Ør |U ≥}ê
«“ œß∑~UÁ, «ß∑HUœÁ ®uœ, ¢U ±U≤v
Øt ¬≤NU ¢∫X ≤EU¸‹ ±MUßV ≥º∑Mb
Ë œß∑u¸«∞FLq «ß∑HUœÁ «|Ls «“
œß∑~UÁ ¸« œ¸|U≠X ØdœÁ «≤b, Ë ¢U
“±U≤v Øt îDd«{LMv ¸« œ¸Ø‡
±v ØMMb.
> «|s œß∑~UÁ ±LJs «ßX ¢ußj
ØuœØUÊ •b«Æq
8 ßU∞t «ß∑HUœÁ
®uœ, ≥M~U±v Øt ¬≤NU ØU±ö" ¢∫X
≤EU¸‹ ±v °U®Mb Ë œß∑u¸«∞FLq
«ß∑HUœÁ «|Ls «“ œß∑~UÁ ¸« œ¸|U≠X
ØdœÁ «≤b Ë ¢U “±U≤v Øt îDd«‹
{LMv ¸« œ¸Ø‡ ±v ØMMb.
¢L}e ØdœÊ Ë ≤~Nb«¸È « œß∑~UÁ
≤∂U|b °bËÊ EU¸ ¢ußj ØuœØUÊ
«≤πU ®, ±~d «|MJt ¬≤NU °}g «
(
8) ßU‰ ßs œ«®∑t Ë ¢ußj |J‡ ≠dœ
°U∞m ¢∫X ≤EU¸‹ °U®Mb.
>
œß∑~UÁ ®LU °ªU¸ °}dËÊ
±v œ≥b Øt ±v ¢u«≤b
°U´Y ßuî∑~v ®uœ.
°t œ¸» Ë Øö≥J‡ Īg ØMMbÁ
°U œÆX œßX °e≤}b (œ¸ Åu¸‹
∞eË « |J œß∑Jg |U
œß∑~}dÁ ™d· «ß∑HUœÁØMOb).
Øö≥J‡ Īg ØMMbÁ ¸« °uß}Kt
°ªg ±dØeÈ ≤~t œ«¸|b.
>
±d«ÆV °}b “±U≤v Øt ±U¥l œ«⁄
œ¸ ≠d¬Ë¸È ØMMbÁ ±u«œ ¨c«zv |U
±ªKu◊ Øs ¸|ª∑t ±v ®uœ ÇuÊ
±LJs «ßX œ¸ Åu¸‹ §u®}bÊ
≤UÖNU≤v «“ œß∑~ °t °}dËÊ
ÄU®}bÁ ®uœ.
> «Öd Øö≥Jœ¸ ßu¸«Œ œ¸ œ¸»
Æd«¸ œ«œÁ AbÁ, «Öd Ë«®d œ¸
±Nd Ë ±u ±∫U≠k Æd«¸ ≤~d≠∑t
|U «Öd ±Nd Ë ±u •U±q œ¸ œ¸»
£U°X ≤A «ßX, «“ ¸Ë®s
ØdœÊ œß∑~UÁ îuœœ«¸È ØM}b.
> œ¸ Åu¸‹ «ß∑HUœÁ ≤Uœ¸ßX «“
œß∑~UÁ, ¬ÖUÁ «“ îDd Åb±t
°U®}b.
> ¢}Gt ≥U °º}U¸ ¢}e ≥º∑Mb:
°t ¬≤NU °U œÆX œßX °e≤}b ¢U
«|MJt œ¸ •U∞v Øt
Øu“Á
¸« ¢ªK}t ±v ØM}b |U œ¸ ≥M~U ¢L}e
ØdœÊ, °t îuœ¢UÊ ¬ß}V ≤dßU≤}b.
«¢BU‰ °t ±M∂l °d‚
> œß∑~UÁ °U|b °t |J‡ ßuØX °U «¢BU
“±}Mv ËÅq ®uœ.
> œß∑~Ij °d«È Ø°U §d|
±∑MUË» ©d«•v ®bÁ «ßX. °d¸ßv
ØMOb Øt Ë∞∑U˛ ÅH∫t «©ö´U‹
œß∑~°U ±M∂l °d‚ œ«îKv ±DU°IX
œ«®∑t °U®b.
> ≥L}At œß∑~UÁ ¸« «“ ±M∂l °d‚ §
ØM}b «Öd ¬Ê ¸« °bËÊ ≤EU¸‹ ¸≥U ±v
ØM}b Ë ≤}e Æ∂q «“ ±u≤∑U˛, «“ ≥r °U“
ØdœÊ «§e«¡ Ë ¢L}e ØdœÊ ¬Ê.
> ≥dÖu≤t îDU œ¸ «¢BU‰ ±u§V ∞Gu
®d«|j {LU≤X îu«≥b ®b.
> M~U ÆDl œß∑~, «“ ØA}bÊ ß}r
°d‚ «ØOb«" îuœœ«¸È ØMOb.
> «“ ¨u©t ˸ ØdœÊ œß∑~UÁ, ß}r |U
Äd|e œ¸ ±U|FU‹ îuœœ«¸È ØM}b.
> œß∑~UÁ ¸« œ¸ ¬» ¨u©t ˸ ≤JM}b.
> ß}r °d‚ °U|b œË¸ «“ œß∑d
ØuœØUÊ ≤~Nb«®∑t ® Ë ∂U|b
≤eœ|J‡ ¥U œ¸ ¢LU” °U ÆDFU‹ œ«⁄
œß∑~UÁ, ±MU°l Öd±U |U Öu®t ≥UÈ
¢}e Æd«¸ œ«œÁ ®uœ.
«ß∑HUœÁ ≤Uœ¸ßX
> ≥dÖe ¢M@ ±ªKu◊ Øs ¸« °bËÊ ±u«œ
|U ≠Ij °U ±∫Buô‹ îAJ‡ ¸Ë®s
≤JM}b.
7170
FA
°U îu«≤bÊ «|s ¸«≥MLU, ®LU °t °dîv œß∑u¸«∞FLq ≥UÈ ØU¸°d œßX ±v |U°}b Øt °t ®LU ØLJ‡ îu«≥b
Ødœ ¢U Ä∑U≤º}q ØU±q œß∑~UÁ ¸« ØAn ØMOb: ßuÛ îU±t «È |U ¨K}k, ßuÛ œ∞ác|d, ßf Ë Äu¸Á
±}uÁ, «ßLu¢}e, ØuØ∑q Ë œß∑u¸«∞FLq ≥UÈ ±∂∑Mv°d °ªU¸ Ë î}Kv °}A∑d ¸« œ¸ßX ØM}b.
œß∑u¸«∞FLq ≥UÈ «|LMv
> Æ∂q «“ «ß∑HUœÁ «“ œß∑~ °d«È
«Ë∞}s °U¸, œß∑u¸«∞FLq ≥U ¸« °U
œÆX îu«≤bÁ Ë °d«È «ß∑HUœÁ œ¸
¬|MbÁ ≤~t œ«¸|b: œ¸ Åu¸‹ ≥dÖu≤t
«ß∑HUœÁ Øt ±DU°o °U œß∑u¸«∞FLq
≥U ≤∂U®b, ¢u∞}b ØMMbÁ ≥}â~u≤t
±ºµu∞}∑v ¸« ≤ªu«≥b Äc|d≠X.
> «§U“Á b≥}b ØuœØ°bËÊ ≤EU¸‹
«“ œß∑~UÁ «ß∑HUœÁ ØMMb.
> «|s œß∑~UÁ ≤∂U|b ¢ußj ØuœØUÊ °t
ØU¸ «≤b«î∑t ®uœ.
œß∑~UÁ Ë ß}r ¬Ê ¸« œË¸ «“
œß∑d” ØuœØUÊ ≤~t œ«¸|b.
> «|s œß∑~°d«È «ß∑HUœÁ «≠d«œ
U±q ØuœØUÊ) °U U¸ßUzv
§ºLv, •ºv |U ¸Ë«≤v |U
«®ªU’ °bËÊ ¢πd°t Ë ¬ÖU≥v
ßUî∑t ≤AbÁ «ßX, ±~d ¬≤Jt ¢∫X
≤EU¸‹ ≠dœÈ Øt ±ºµu‰ «|LMv ¬≤NU
°uœÁ |U ¬±u“‘ «ß∑HUœÁ «“ œß∑~UÁ
¸« °t ¬≤NU œ«œÁ °U®b.
®‡‡dÕ œß‡‡∑~‡UÁ
A Ë«•b ±u¢u¸
B ÄMq ØM∑d‰
1b œØLt ≥UÈ «≤∑ªU»
-P - °d≤U±t ≥UÈ «¢u±U¢}J‡
1P : ßuÛ ÄdîU±t / 2P : ßuÛ ¨K}k
°ªX Ë Äe °U °ªU¸: 3P (°º∑t °t ±b‰)*
¢LOe ®bÊ îuœØU¸: 3P ¥U
4P
(°º∑t °t ±b‰)*
- (-/+)
ØU≥g/«≠e«¥g “±UÊ ÄªX Ë Äe |U œ¸§t •d«¸‹
- FFO/ KO -
«´∑∂U¸ ßMπv «≤∑ªU» °d≤U±t, “±UÊ
ĪX Ë Äe|U œ¸§t •d«¸‹/œß∑~UÁ ¸« ±∑uÆn ØM}b.
2b Çd«⁄ ≤LU|A~d •d«¸‹ («Öd < °C 05 œ¸
œ«îq Øu“Á)
3b œØLt «≤∑ªU°~d ßd´X
4b
œØLt îdœ Øs ¥a (°d«È îdœ ØdœÊ ¢Jt ≥UÈ |a)
C ÅH∫t ≤LU¥g
1c ÅH∫t ≤LU|g ¢ME}r œ±U «“ 06 °t °C 001
2c ÅH∫t ≤LU|g ¢U|Ld
(“±UÊ ÆU°q ¢ME}r «“ 0 ¢U 95 œÆ}It).
3c ÅH∫t ≤LU|g °d≤U±t (1P,2P,3P Ë4P
°º∑t °t ±b‰*)
4c ≤LU¥g ≤AU≤~d «¥Ls
D Ë«•b Øu“Á ±ªKu◊ Øs
1d ≠uôœ {b “≤@ Øu“Á
(±∫bËœÁ •b «Ø∏d = 8.1 ∞O∑d)
2d œß∑t °U ÖOdÁ
3d ¢}Gt ≥UÈ ≠uôœÈ {b “≤@
E Ë«•b œ¸»
1e Øö≥p Īg ØMMbÁ
2e œ¸»
3e ±Nd Ë ±u •U±q
4e Ë«®d {b ¬»
F ß∂b ĪX Ë Äe (°º∑t °t ±b‰)
1f œß∑t
2f ß∂b
«©ö´U‹ ≠Mv œß∑~UÁ:
•b«Ø∏d œ±U :
°C 001
°d‚ : 0011 Ë«‹
•b«Ø∏d “±UÊ °d≤U±t ≤u|ºv: 95 œÆ}It
œß∑u¸«∞FLq ≥UÈ «|LMv
72
1

Brauchen Sie Hilfe? Stellen Sie Ihre Frage.

Forenregeln

Missbrauch melden von Frage und/oder Antwort

Libble nimmt den Missbrauch seiner Dienste sehr ernst. Wir setzen uns dafür ein, derartige Missbrauchsfälle gemäß den Gesetzen Ihres Heimatlandes zu behandeln. Wenn Sie eine Meldung übermitteln, überprüfen wir Ihre Informationen und ergreifen entsprechende Maßnahmen. Wir melden uns nur dann wieder bei Ihnen, wenn wir weitere Einzelheiten wissen müssen oder weitere Informationen für Sie haben.

Art des Missbrauchs:

Zum Beispiel antisemitische Inhalte, rassistische Inhalte oder Material, das zu einer Gewalttat führen könnte.

Beispielsweise eine Kreditkartennummer, persönliche Identifikationsnummer oder unveröffentlichte Privatadresse. Beachten Sie, dass E-Mail-Adressen und der vollständige Name nicht als private Informationen angesehen werden.

Forenregeln

Um zu sinnvolle Fragen zu kommen halten Sie sich bitte an folgende Spielregeln:

Neu registrieren

Registrieren auf E - Mails für Moulinex LM9021B1 wenn:


Sie erhalten eine E-Mail, um sich für eine oder beide Optionen anzumelden.


Das Handbuch wird per E-Mail gesendet. Überprüfen Sie ihre E-Mail.

Wenn Sie innerhalb von 15 Minuten keine E-Mail mit dem Handbuch erhalten haben, kann es sein, dass Sie eine falsche E-Mail-Adresse eingegeben haben oder dass Ihr ISP eine maximale Größe eingestellt hat, um E-Mails zu erhalten, die kleiner als die Größe des Handbuchs sind.

Ihre Frage wurde zu diesem Forum hinzugefügt

Möchten Sie eine E-Mail erhalten, wenn neue Antworten und Fragen veröffentlicht werden? Geben Sie bitte Ihre Email-Adresse ein.


Info