172 173
Pl
En
Jp
Fr
Es
Pt
Ru
Se
Nl
De
It
Dk
Hu
Cz
Fi
No
Ro
Pl
En
Jp
Fr
Es
Pt
Ru
Se
Nl
De
It
Dk
Hu
Cz
Fi
No
Ro
Podsumo
Uwaga — korzystanie z elemen
lub regulacji, czy też wykonywanie procedur w
sposób inny
podręczniku, może spow
niebezpieczne promieniowanie
1.
baterii”)
2. Regulacja dioptrii
Przeprowadź regulację dioptrii, aby uzyskać
wyraźny obraz na ekranie L
Najpier
w kierunku przeciwnym do ruchu wskazówek
zegara. Następnie włącz zasilanie, ab
ekran LCD podczas spoglądania przez dalmierz
laserowy Nikon. Obróć pierścień regulacji dioptrii w
prawo
Jeśli regulacja dioptrii nie zostanie
przeprowadzona, właściw
obiekcie może nie być mo
3. Pomiar
Przed rozpoczęciem pomiaru spraw
urządzenia.
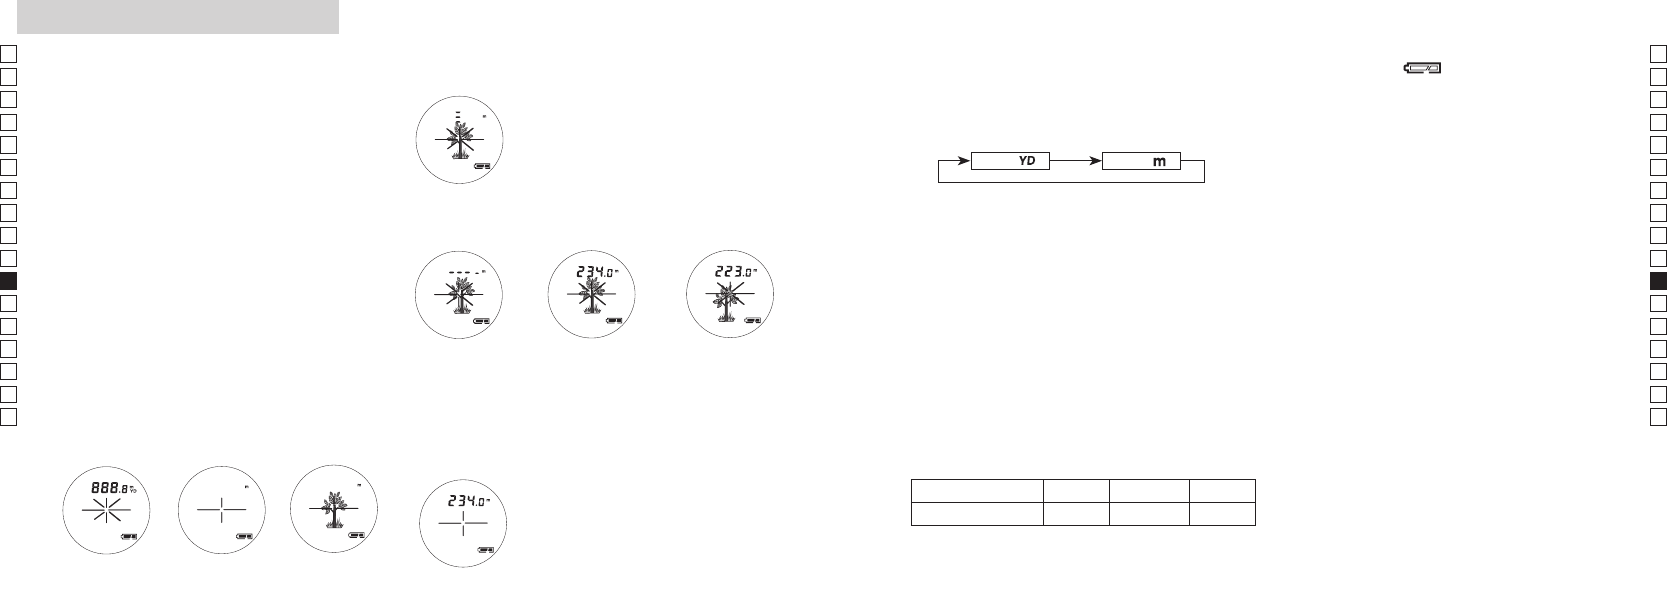
Measurement
1. Press the POWER button for power-on.
(Power turns off 8 seconds after the last
operation.)
Immediately after power-on.
(Initializing)
Stand-by. Target focusing.
2. Aim at the target
.
3. Press POWER button once to start
continuous measurement for 8 seconds.
(Single measurement mode is not
available with this laser rangefinder.)
Measuring.
4. For 8 seconds, the internal display shows “distance” and “fail to measure” indicator alternately.
(Laser irradiation mark is blinking.)
Failure to measure or
unable to measure distance.
Displays the measured
figure. (Target 1)
Displays the measured
figure. (Target 2)
5. After continuous measurement, the measured results are displayed for 8 seconds, then power
turns off.
If you press the POWER button during power-on (while the internal display is lit), another
8-second measurement starts.
1. Naciśnij przycisk
POWER (Zasilanie) w celu
włączenia urządzenia.
2. Skieruj na cel.
Natychmiast po
włączeniu.(Inicjalizacja)
T Ustawianie na celu.
3. Naciśnij przycisk POWER (Zasilanie) jeden raz, aby rozpocząć
ciągły pomiar przez 8 sekund. (
niedostępny w tym modelu dalmierza laserowego
Pomiar
4. Przez 8 sekund wewnętrzny ekran wyświetla na przemian wskazanie
„odległość”
Pomiar zakończon
niepowodzeniem
lub brak możliwości
dokonania pomiaru.
Wyświetlanie
pomierzonej
wartości. (Cel 1)
Wyświetlanie
pomierzonej
wartości. (Cel 2)
Measurement
1. Press the POWER button for power-on.
(Power turns off 8 seconds after the last
operation.)
Immediately after power-on.
(Initializing)
Stand-by. Target focusing.
2. Aim at the target
.
3. Press POWER button once to start
continuous measurement for 8 seconds.
(Single measurement mode is not
available with this laser rangefinder.)
Measuring.
4. For 8 seconds, the internal display shows “distance” and “fail to measure” indicator alternately.
(Laser irradiation mark is blinking.)
Failure to measure or
unable to measure distance.
Displays the measured
figure. (Target 1)
Displays the measured
figure. (Target 2)
5. After continuous measurement, the measured results are displayed for 8 seconds, then power
turns off.
If you press the POWER button during power-on (while the internal display is lit), another
8-second measurement starts.
5. Po wykonaniu ciągłego pomiaru przez 8 sekund wyświetlane
są wyniki, a następnie zasilanie jest wyłączane. Po naciśnięciu
przycisku POWER (Zasilanie) podczas włączonego zasilania (gdy
wewnętrzny wyświetlacz jest aktywny ) rozpoczyna się kolejny
pomiar 8-sekundowy.
Przykładowo, podczas mierzenia odległości do flagi na polu
golfowym skanowanie flagi podczas pomiaru pozwala łatwiej
uzyskać odcz
się żadne obiekty, najkrótszy wynik to odległość do flagi.
4.
(domyślne us
1.
2.
lub dłużej.
3.
zmieniona, puść prz
4.
wyświetlone w wybranej jednostce miary.
Metry [ ]Jardy [ ]
6. Informacja o
Migaj oznas
k
7
Uż
pan
Nacisk
MOD
włą
można r
dalmi
po
włąc
5. Wyświetlanie odległości
Dalmierz COOLSHO
pierwszego planu.
W prz
przdalmierz
wyświetli na ekranie LCD odległość do najbliższego
celu.
np.) dokonując pomiaru na drzewie r
domem;
wyświetlona zostanie wartość
drzewa). Jest to przydatne podczas gry w golfa.
Drzewo Ogr Dom
Odległość do celu 115 m 123 m 128