8 25
TROUBLESHOOTING
Most treadmill problems can be solved by following the steps below. Find the symptom that applies, and
follow the steps listed. If further assistance is needed, please call our Customer Service Department.
PROBLEM: The power does not turn on
SOLUTION: a. Make sure that the power cord is plugged into a properly earthed outlet (see page 9). If an extension
cord is needed, use only a 3-conductor, 1 mm
2
(14-gauge) cord that is no longer than 1.5 m (5 ft.).
b. After the power cord has been plugged in, make sure that the key is fully inserted into the console.
c. Check the circuit breaker located on the treadmill
near the power cord. If the switch protrudes as
shown, the circuit breaker has tripped. To reset the
circuit breaker, wait for five minutes and then press
the switch back in.
d. Check the on/off switch located on the treadmill
near the power cord. The switch must be in the on
position.
PROBLEM: The power turns off during use
SOLUTION: a. Check the circuit breaker located on the treadmill frame near the power cord (see c. above). If the
circuit breaker has tripped, wait for five minutes and then press the switch back in.
b. Make sure that the power cord is plugged in. Unplug the power cord, wait for five minutes, and
then plug the power cord back in.
c. Remove the key from the console. Reinsert the key fully into the console.
d. Make sure that the on/off switch is in the on position.
e. If the treadmill still will not run, please call our Customer Service Department.
PROBLEM: The displays of the console do not function properly
SOLUTION: a. Remove the key from the console and unplug the
power cord. Carefully tip the treadmill down as
shown in drawing a. Remove the Screws (66) from the
hood. Raise the Uprights (110) and carefully remove
the hood.
Locate the Reed Switch (35) and the Magnet (30) on
the left side of the Pulley (29). Turn the Pulley until the
Magnet is aligned with the Reed Switch. Make sure
that the gap between the Magnet and the Reed
Switch is about 3 mm (1/8 in.). If necessary, loosen
the Screw (49) and move the Reed Switch slightly.
Retighten the Screw. Re-attach the hood, and run the
treadmill for a few minutes to check for a correct
speed reading.
Tripped
c
Reset
30
66
110
a
29
Top
View
49
3mm
35
On
Position
d
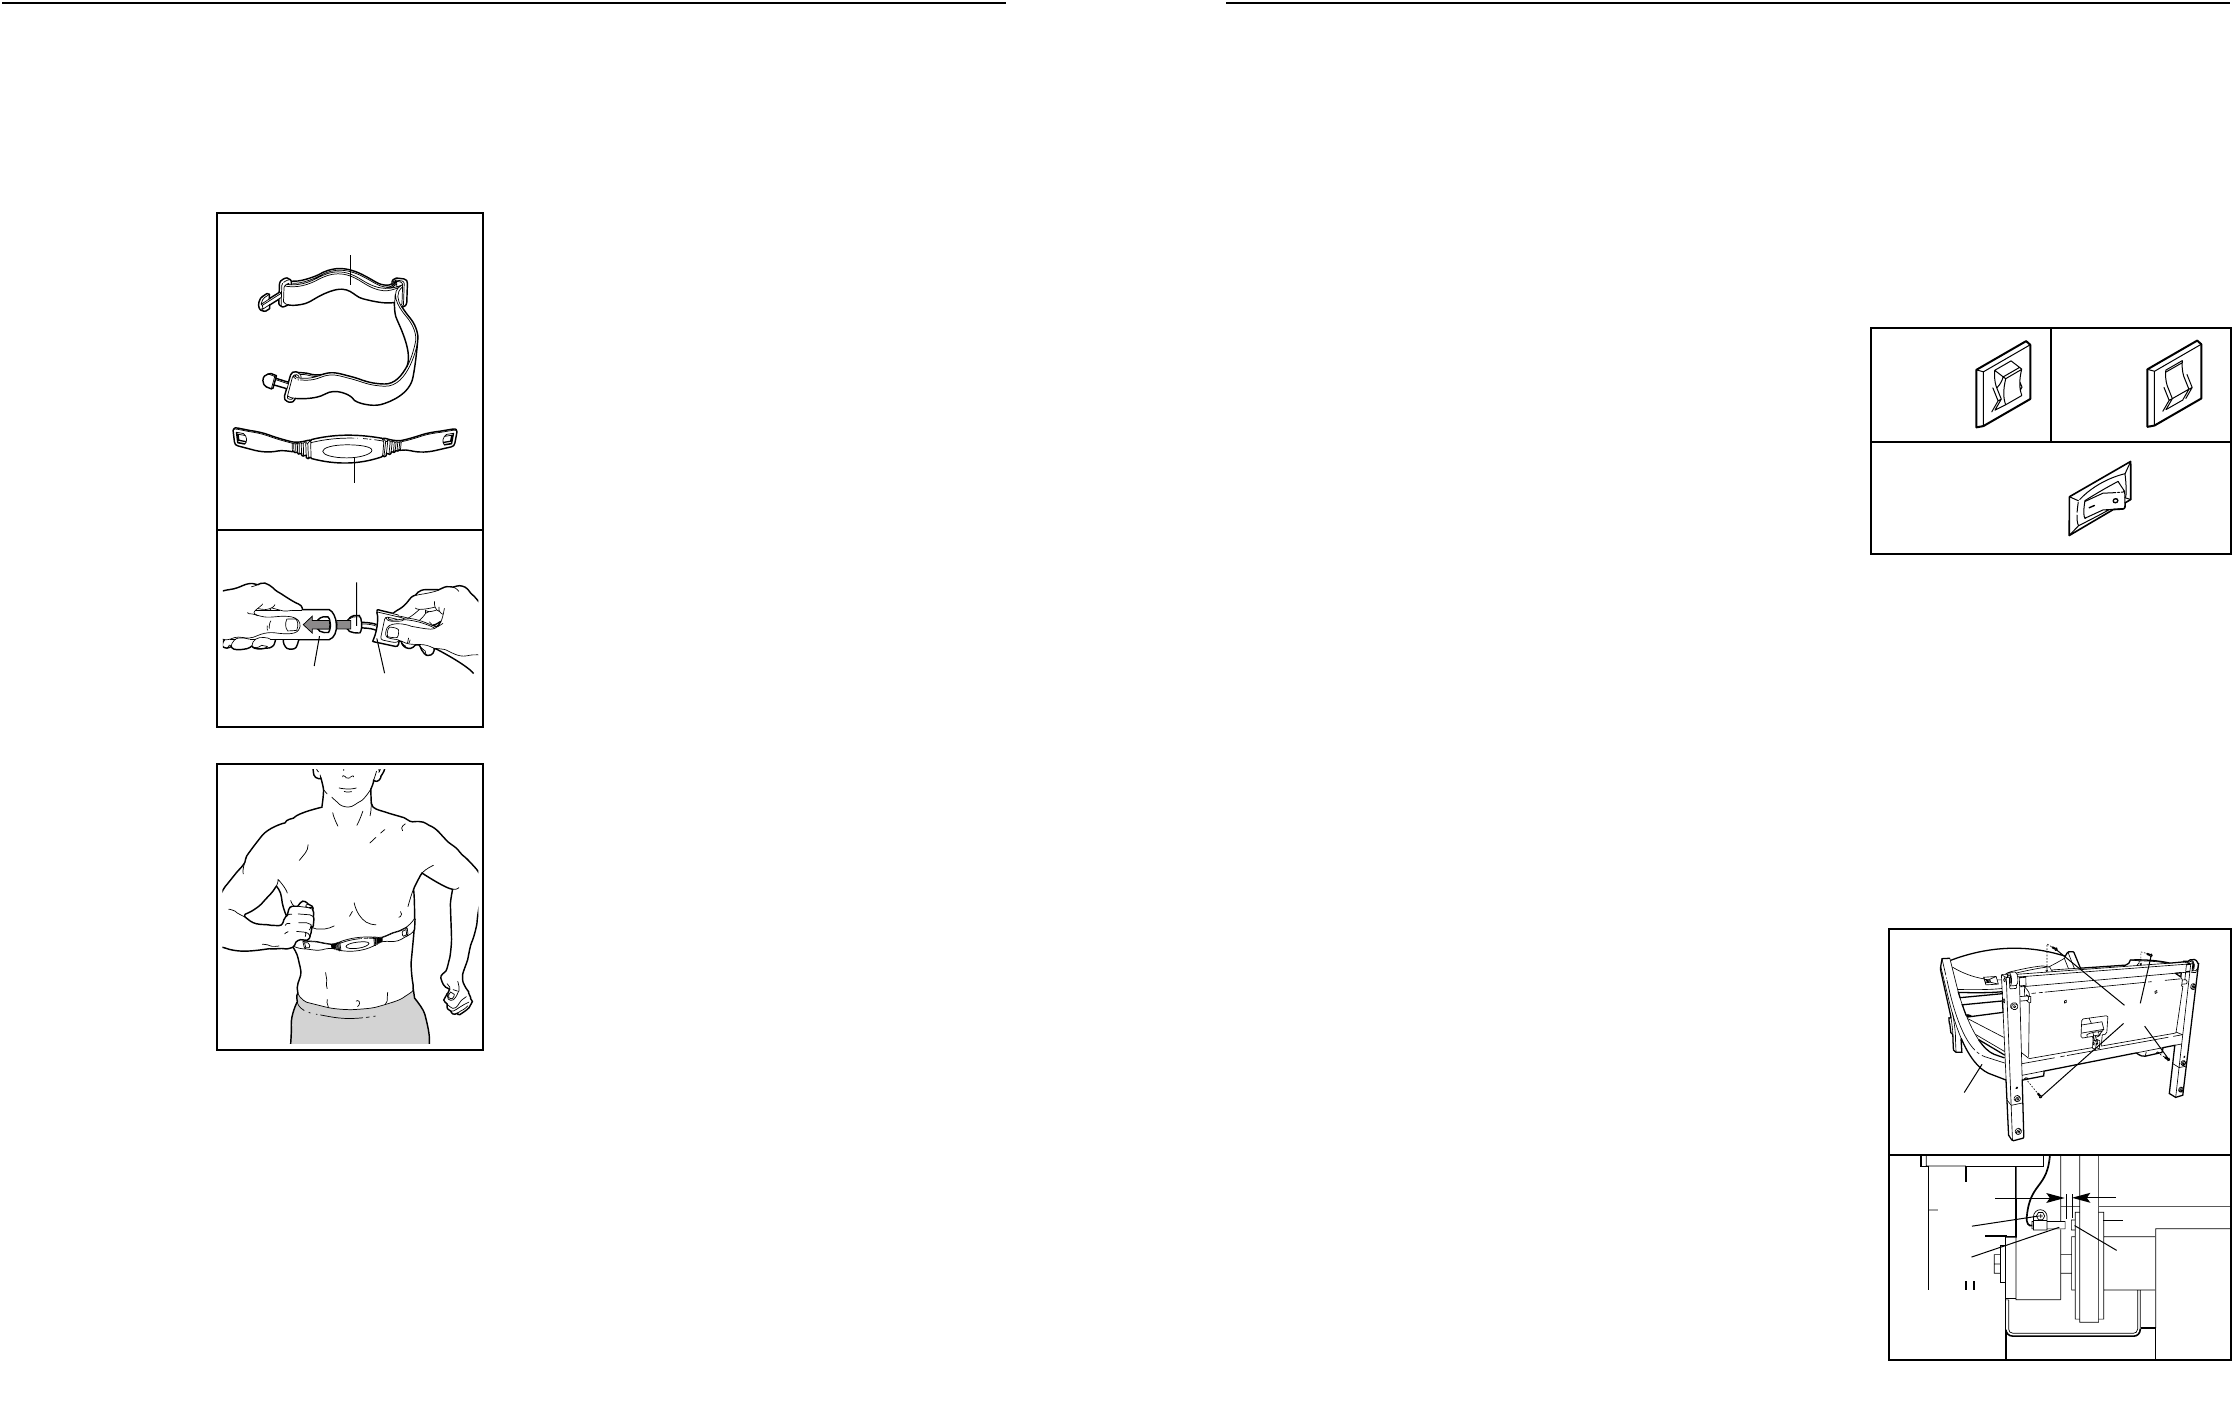
HOW TO PUT ON THE CHEST PULSE SENSOR
Before you use the chest pulse sensor, please read all
instructions on this page.
The chest pulse
sensor consists of
two components:
the chest strap and
the sensor unit.
If the chest strap is
not connected to
the sensor unit,
refer to drawing 2.
Insert one of the
tabs on the chest
strap through one
end of the sensor
unit. Make sure to
press the end of the
sensor unit under
the buckle on the
chest strap—the
tab should be al-
most flush with the
sensor unit.
Next, wrap the chest
pulse sensor around
your chest and at-
tach the other end of
the chest strap to
the sensor unit.
Adjust the length of
the chest strap, if
necessary. The
chest pulse sensor
should be under
your clothes, tight
against your skin,
and as high under the pectoral muscles or breasts as
is comfortable. Make sure that the logo on the sensor
unit is facing forward and is right-side-up.
Pull the sensor unit away from your body a few inches
and locate the two electrode areas on the inner side.
The electrode areas are the areas covered by shallow
ridges. Using saline solution such as saliva or contact
lens solution, wet both electrode areas. Return the
sensor unit to a position against your chest.
CHEST PULSE SENSOR CARE AND MAINTENANCE
• Thoroughly dry the chest pulse sensor after each
use. The chest pulse sensor is activated when the
electrode areas are wetted and the heart rate
monitor is put on; the chest pulse sensor shuts off
when it is removed and the electrode areas are
dried. If the chest pulse sensor is not dried after
each use, it may remain activated longer than nec-
essary, draining the battery prematurely.
• Store the chest pulse sensor in a warm, dry place.
Do not store the chest pulse sensor in a plastic bag
or other container that may trap moisture.
• Do not expose the chest pulse sensor to direct
sunlight for extended periods of time.
• Do not expose the chest pulse sensor to tempera-
tures above 50° C (122° F) or below -10° C (14° F).
• Do not excessively bend or stretch the sensor unit
when using or storing the chest pulse sensor.
• Clean the sensor unit periodically using a damp
cloth; never use alcohol, abrasives, or chemicals.
The chest strap may be hand washed and air dried.
CHEST PULSE SENSOR TROUBLESHOOTING
The instructions on the following pages explain how
the chest pulse sensor is used with the console. If
the letters “PLS” appear in the Heart Rate/Calories
display, or if the displayed heart rate is excessively
high or low, try the steps below.
• Make sure that you are wearing the chest pulse sen-
sor as described at the left. If the chest pulse sensor
does not function when positioned as described,
move it slightly lower or higher on your chest.
• Use saline solution such as saliva or contact lens
solution to wet the two electrode areas on the sensor
unit. If heart rate readings do not appear until you
begin perspiring, re-wet the electrode areas.
• As you walk or run on the treadmill, position your-
self near the centre of the walking belt. For the con-
sole to display heart rate readings, the user must
be within arm’s length of the console.
Chest Strap
Sensor Unit
Tab
Buckle
Sensor
Unit
1
2
HOW TO USE THE CHEST PULSE SENSOR