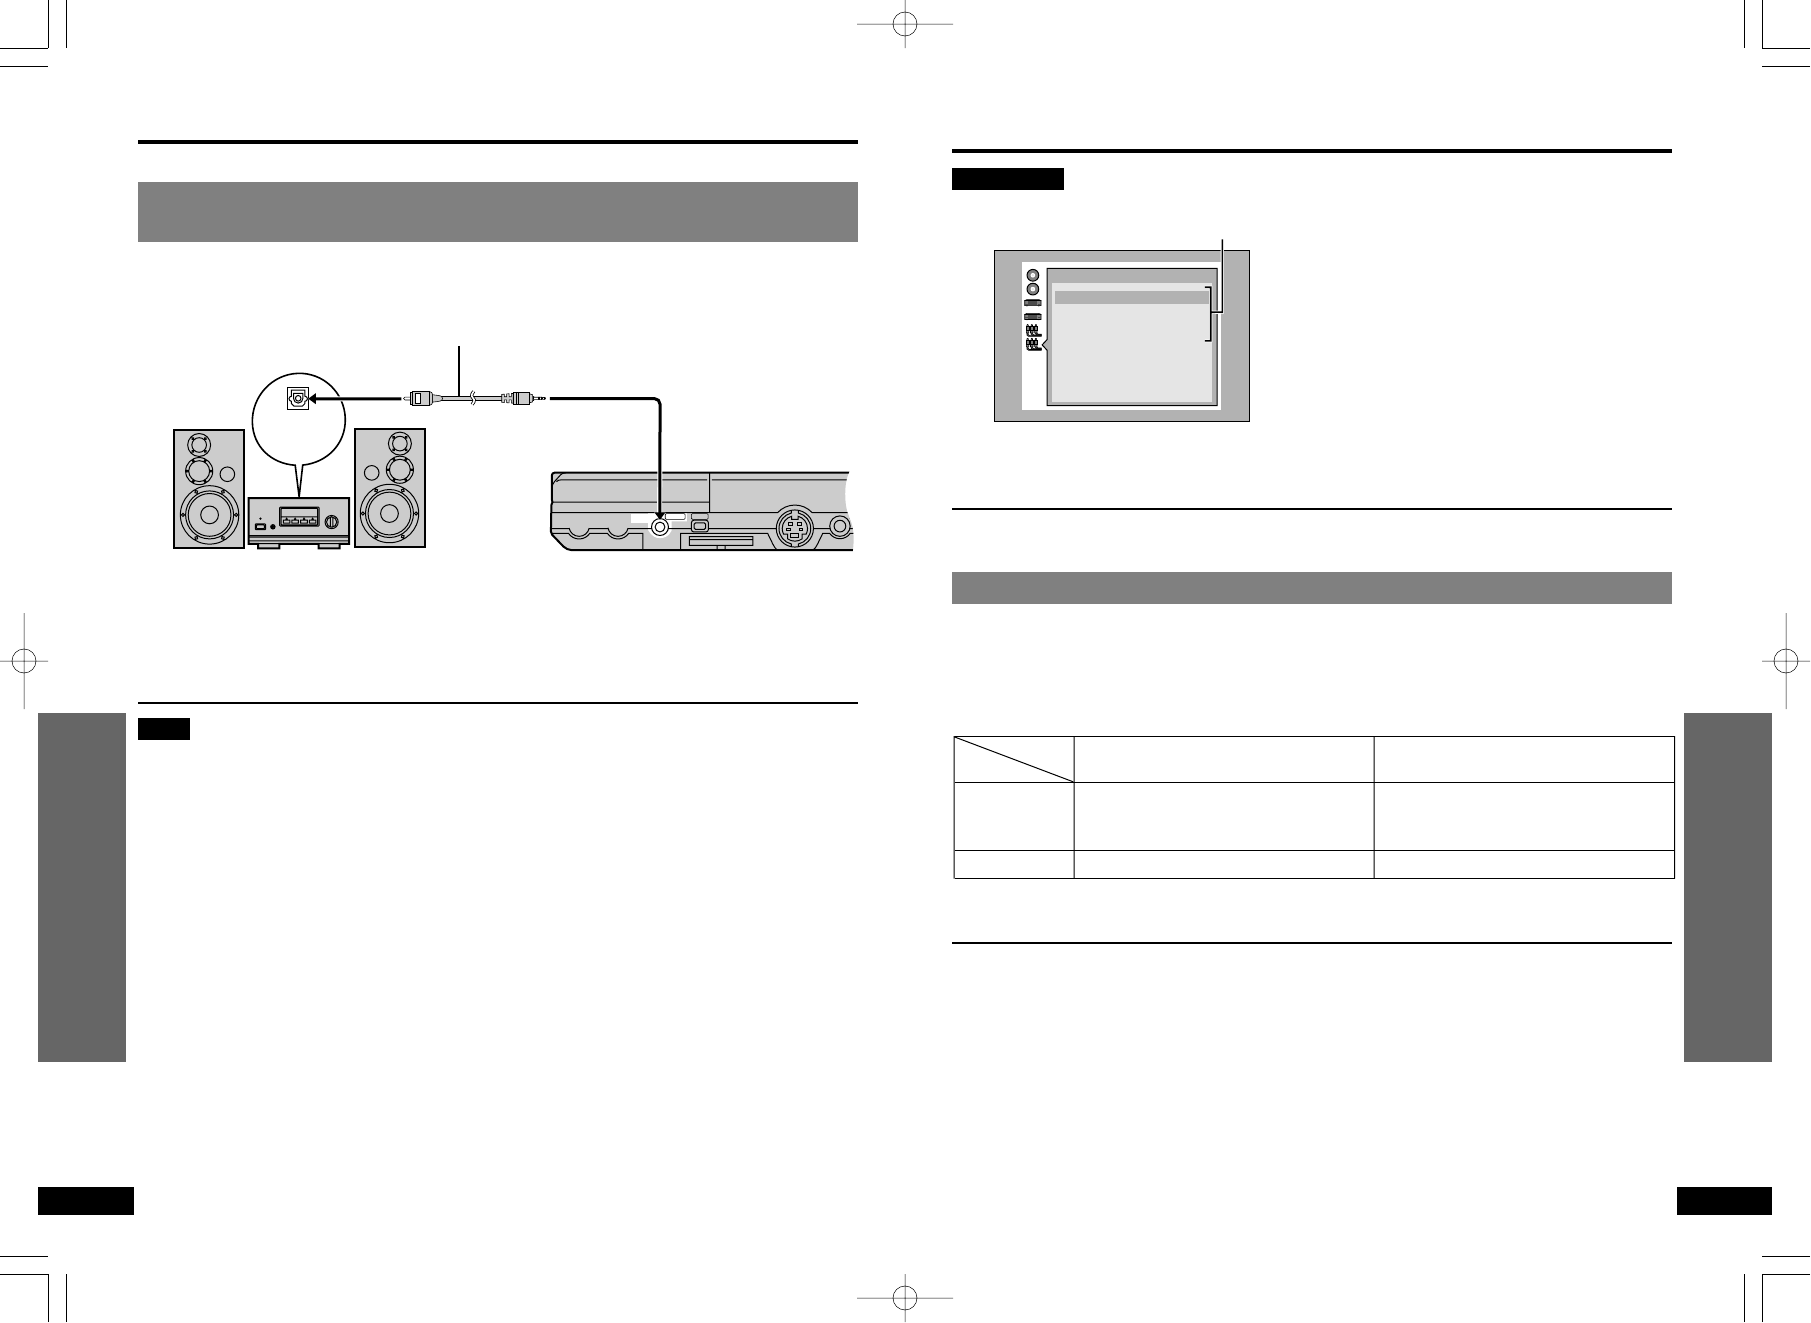
This unit
2-channel digital amplifier
or mini-system
Optical fiber cable
Optical digital
audio input terminal
Do not bend when connecting.
ODigital recordingN
You can record the digital signal directly onto an MD.
≥Use an optical fiber cable for digital connection. Ensure the following conditions are met.
≥1. There is no copy guard recorded on the disc.
≥2. The recording equipment can handle a sampling frequency of 48 kHz/16 bit.
≥3. Settings in “6 Digital Audio Output” (➡ page 39, “Digital settings”) have been set as fol-
lows:
≥3. PCM Down Conversion: Yes
≥3. Dolby Digital/MPEG: PCM
≥3. DTS Digital Surround: Off
Enjoying more powerful sound
∫ To return to the previous menu
Press [RETURN].
Settings
∫ PCM Down Conversion: Output during play of DVDs recorded in 96 kHz linear PCM.
No : When you have connected an amplifier with stereo phono cables
Yes: When you have connected an amplifier with an optical fiber cable
Yes: Copyright protection limits digital output to 48 kHz/16 bit
When playing DVDs recorded in 96 kHz
Sound is output as follows in accordance with the connections and settings you have made.
§The connected equipment must be able to handle 96 kHz LPCM in order to take advantage of high
quality audio found on these discs.
∫ Dolby Digital: Output during play of DVDs recorded with Dolby Digital.
Bitstream: When you have connected a unit with a built-in Dolby Digital decoder
PCM : When you have connected a unit that doesn’t have a built-in Dolby Digital decoder
∫ DTS Digital Surround: Output during play of DVDs recorded with DTS Digital Surround.
Off : When you have connected a unit that doesn’t have a built-in DTS decoder (No digital sig-
nal is output.)
Bitstream: When you have connected a unit with a built-in DTS decoder
∫ MPEG: Output during play of DVDs recorded with MPEG.
PCM : When you have connected a unit that doesn’t have a built-in MPEG audio decoder
Bitstream: When you have connected a unit with a built-in MPEG audio decoder
Digital settings
Factory Preset
Preparation
Turn on this unit and the equipment you have
connected.
While stopped
1 Press [SETUP] or [MENU] to
show the initial settings screen.
2 Use the cursor jockey [3, 4] to
select “6 Digital Audio Output”
and press [ENTER].
3 Use the cursor jockey [3, 4] to
select an item and press
[ENTER]. (For details, see below)
4 Press [RETURN] to complete the
settings.
Connection
Setting
No
Yes
Analogue
Output as 96 kHz
Converted and output as 48 kHz
Digital
No output (Audio will be output at
96 kHz if the DVD has not had copyright
protection recorded on it.
§
)
Converted and output as 48 kHz/16 bit