Remove the air lter unit beforehand with the previously described procedure of “Removing the air lter unit”.
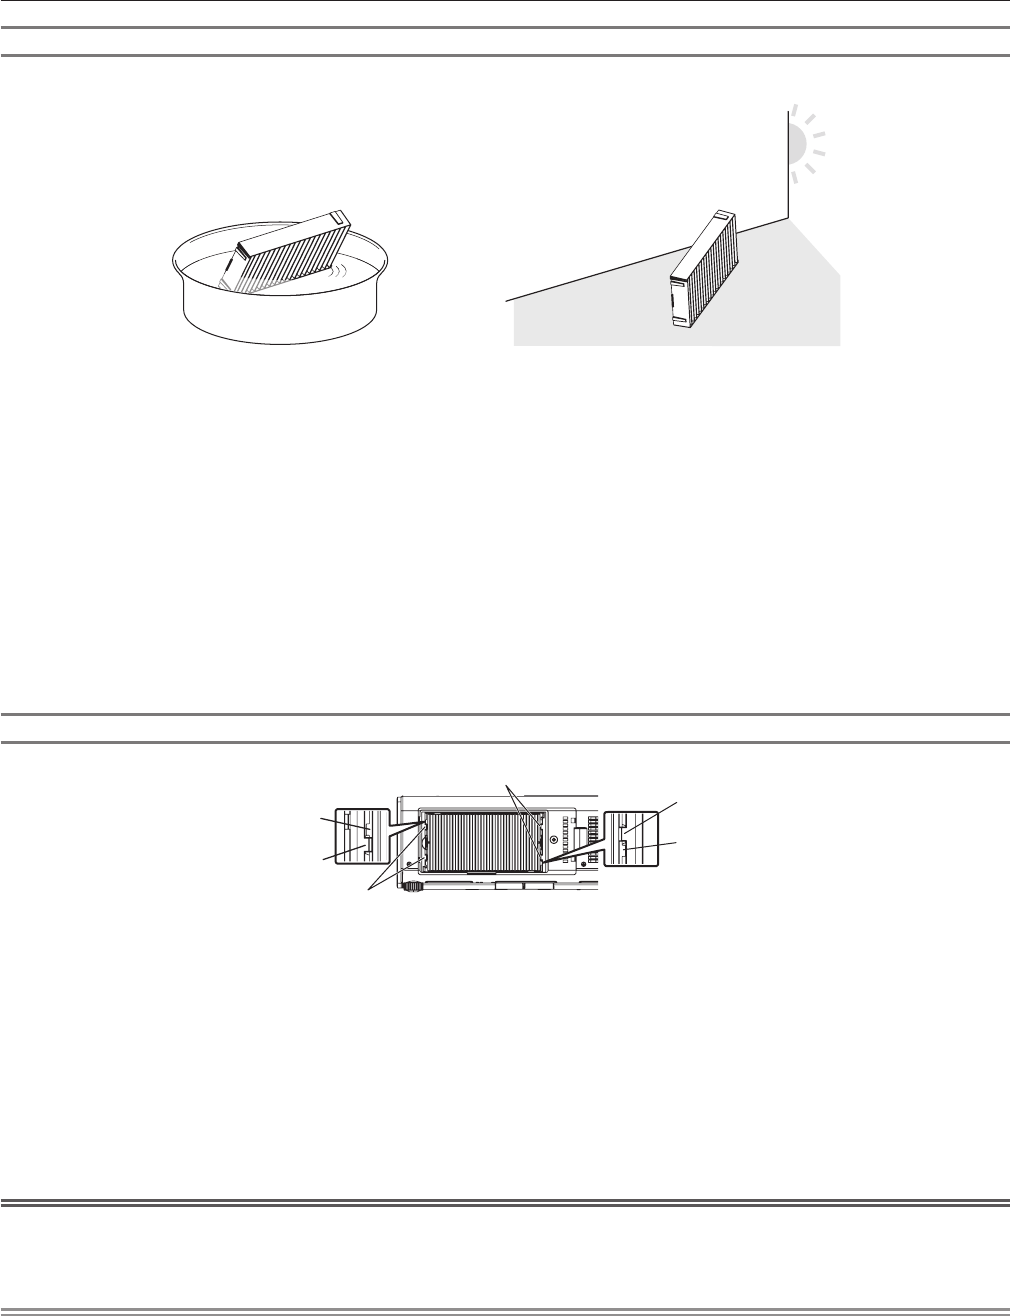
Fig. 1Fig. 2
1) Wash the air filter unit. (Fig. 1)
i) Soak the air filter unit in cold or warm water and then lightly rinse it.
fDo not use cleaning tools such as brushes.
fWhen rinsing, hold the frame of the air lter unit without putting strong pressure on the lter unit.
ii) Rinse the air filter unit two to three times using fresh water each time.
fInsufcient rinsing may result in odors.
2) Dry the air filter unit. (Fig. 2)
fLet the air lter unit naturally dry off in a well-ventilated place where there is little dust and is not exposed to direct sunlight.
fDo not dry using drying devices such as dryers.
fAfter the air lter is dried, proceed to “Attaching the air lter unit” (x page 158).
Attaching the air lter unit
Protrusion of the air filter unit
Tabs on the projector body
Tabs on the projector body
Protrusion of the air filter unit
Groove on the projector body
Groove on the projector body
1) Attach the air filter unit to the projector.
fThe air lter unit has no difference between top and bottom, but is two-sided. Match the protrusion position of the air lter with the
grooves on the projector body.
fHook the air lter unit frame at the exhaust port side to the two tabs of the back side of the projector’s air lter unit compartment and
perform Step 2) in “Removing the air lter unit” in the reverse order to attach.
fConrm that the tabs of the air lter unit compartment of the projector body are hooked to the air lter unit frame.
2) Attach the air filter cover to the projector and use a Phillips screwdriver to tighten the air filter cover
screw.
fPerform Step 2) in “Removing the air lter unit” (x page 157) in the reverse order.
Attention
fAfter washing the air lter unit, dry it thoroughly before attaching it back to the projector. Attaching a wet unit will cause an electric shock or
malfunction.
fDo not disassemble the air lter unit.
Note
fMake sure that the air lter unit is properly attached before using the projector. If it is not properly attached, the projector will suck in dirt and
dust causing a malfunction.
fIf you use the projector without attaching the air lter unit, the lter indicator <FILTER> ashes in red and the message appears on the
projection screen for approximately 30 seconds.
fReplace the air lter unit with the new optional Replacement Filter Unit (Model No.: ET-EMF320) if it is damaged or if the dirt does not come
off even after washing.
fAir lter replacement is recommended after cleaning the unit two times.
fThe dust-proof properties may be reduced after each cleaning.
Libble nimmt den Missbrauch seiner Dienste sehr ernst. Wir setzen uns dafür ein, derartige Missbrauchsfälle gemäß den Gesetzen Ihres Heimatlandes zu behandeln. Wenn Sie eine Meldung übermitteln, überprüfen wir Ihre Informationen und ergreifen entsprechende Maßnahmen. Wir melden uns nur dann wieder bei Ihnen, wenn wir weitere Einzelheiten wissen müssen oder weitere Informationen für Sie haben.
Art des Missbrauchs:
Forenregeln
Um zu sinnvolle Fragen zu kommen halten Sie sich bitte an folgende Spielregeln:
Lesen Sie zuerst die Anleitung;
Schauen Sie nach, ob die Frage bereits gestellt wurde;
Stellen Sie die Frage so deutlich wie nur einigermaßen möglich;
Erwähnen Sie was Sie bereits versucht haben um das Problem zu lösen;
Ist Ihr Problem von einem Besucher gelöst dann lassen Sie ihn / sie wissen in diesem Forum;
Falls Sie reagieren möchten, so verwenden Sie bitte das Antworten- Formular;
Da ihre Frage für alle Besucher sichtbar ist, sollten Sie lieber keine persönliche Daten erwähnen.
Neu registrieren
Registrieren auf E - Mails für Panasonic PT-DZ10KE wenn:
neue Frage gestellt werden
neue Handbücher vorhanden sind
Sie erhalten eine E-Mail, um sich für eine oder beide Optionen anzumelden.
Das Handbuch wird per E-Mail gesendet. Überprüfen Sie ihre E-Mail.
Wenn Sie innerhalb von 15 Minuten keine E-Mail mit dem Handbuch erhalten haben, kann es sein, dass Sie eine falsche E-Mail-Adresse eingegeben haben oder dass Ihr ISP eine maximale Größe eingestellt hat, um E-Mails zu erhalten, die kleiner als die Größe des Handbuchs sind.
Ihre Frage wurde zu diesem Forum hinzugefügt
Möchten Sie eine E-Mail erhalten, wenn neue Antworten und Fragen veröffentlicht werden? Geben Sie bitte Ihre Email-Adresse ein.