10. After washing in water, apply shaver oil (provided with your shaver)
to the foil and trimmer blade, run the shaver without shaving for
approximately ten seconds. The wipe the surface of the foil and
trimmer blade with tissue or a soft cloth.
CARE OF THE FOIL, CUTTER AND TRIMMER
1. Always remove shaver from the charging base before cleaning.
2. Slide the switch to the OFF position, then remove the foil
holder and expose the trimmer.
3. Use the rotary washer provided to clean the foil holder,
cutter, trimmer and body.
4. After cleaning retract the trimmer to its original position
and replace the foil holder.
5. The shaver body may be wiped clean with a moist cloth
CAUTION: Never use alcohol, benzene or thinner.
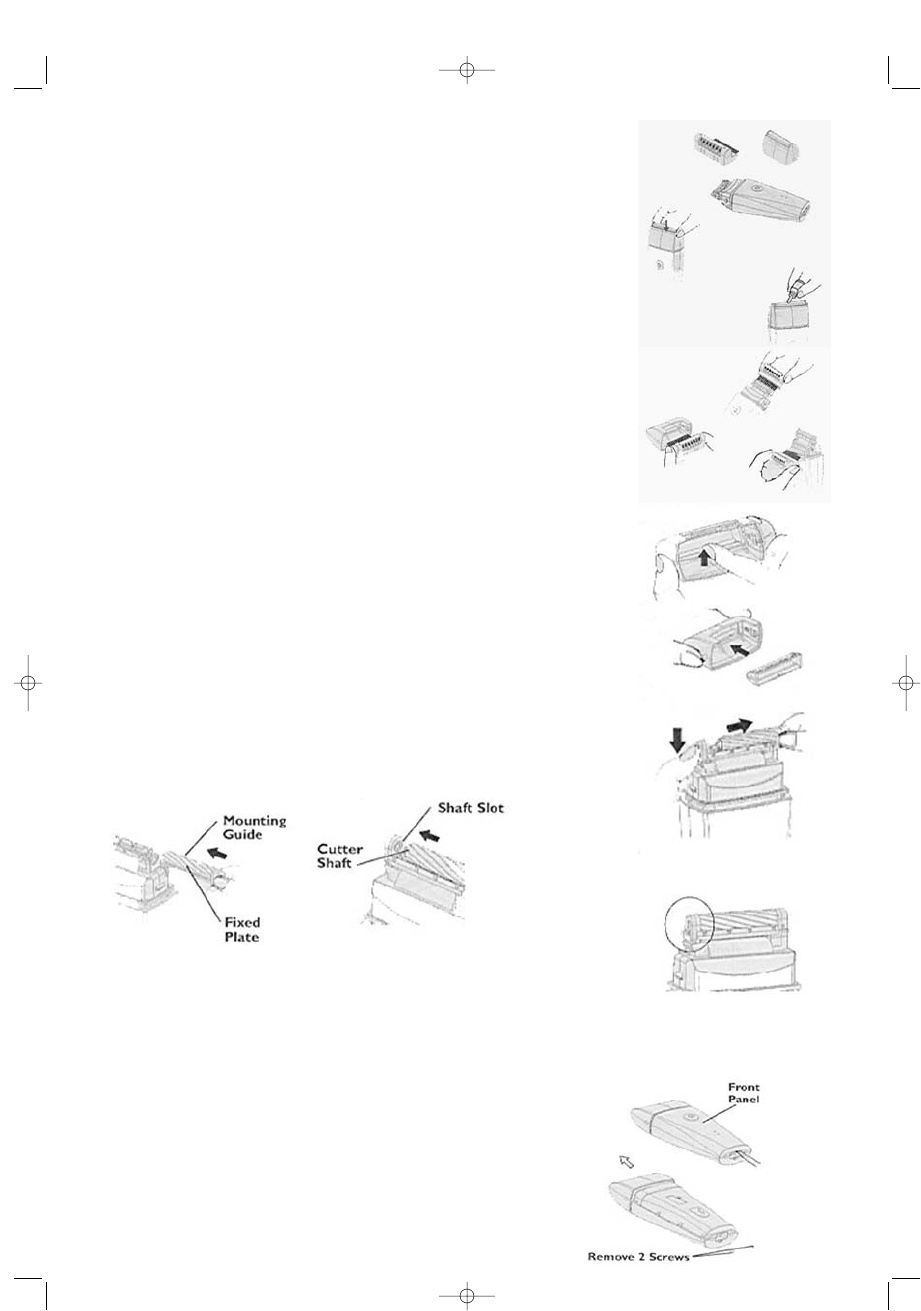
REPLACING THE FOIL
1. Remove the foil holder
2. Remove the foil from protrusions of the foil holder.
The foil holder has one protrusion on the front and
two protrusions on the back.
3. Attach a new foil to the foil holder. Attach one depression
of the foil to one protrusion (on the front) of the foil holder
and two depressions to two protrusions on the back.
4. Attach the new foil holder.
CAUTION: Make sure the foil is attached properly.
REPLACING THE CUTTER
CAUTION: remove all hair / whiskers before removing the cutter.
(clumping of whiskers in the gear may result in shaver malfunction.)
1. Remove the cutter
2. Attach a new cutter
3. Insert the fixed plate horizontally into the mounting guide.
4. Insert the cutter shaft into the shaft slot.
CAUTION: Make sure cutter is securely inserted.
Improper assembly may result in malfunction of the shaver.
RECHARGEABLE BATTERY REMOVAL AND RECYCLING INSTRUCTIONS
PROCEDURE
CAUTION: To avoid a possible electric shock hazard, do not connect the
charging base after opening the shaver.
1. Slide the ON/OFF switch up to the ON position and discharge
the Ni-Cd batteries until the shaver stops operating.
2. Remove the front panel with a flat screwdriver.
3. Remove the two screws of bottom with a screwdriver,
and remove the movement unit.
4. Remove the Ni-Cd batteries and cut
The lead wire at the jointed position to the terminals
10