I General User Manual 25
18.2.2 Removing the rear wheel
If your bike is equipped with derailleur gears, shi
down to the smallest sprocket. The rear derailleur
does not prevent the wheel om being removed in
this position.
If quick-release devices are tted to your bike,
open them (see
Chapter 9.2.2 "Operating the
quick-release device").
If axle nuts are tted to your bike, release these
by turning them anticlockwise using a suitable
spanner.
Fold the rear derailleur backwards slightly.
Li the bike up slightly.
Pull the wheel out of the ame.
If the rear wheel still does not come out, open the
quick-release device rther by turning the lock nut
anticlockwise.
Strike the wheel om above gently with the palm
of your hand to shi it.
The wheel should drop out.
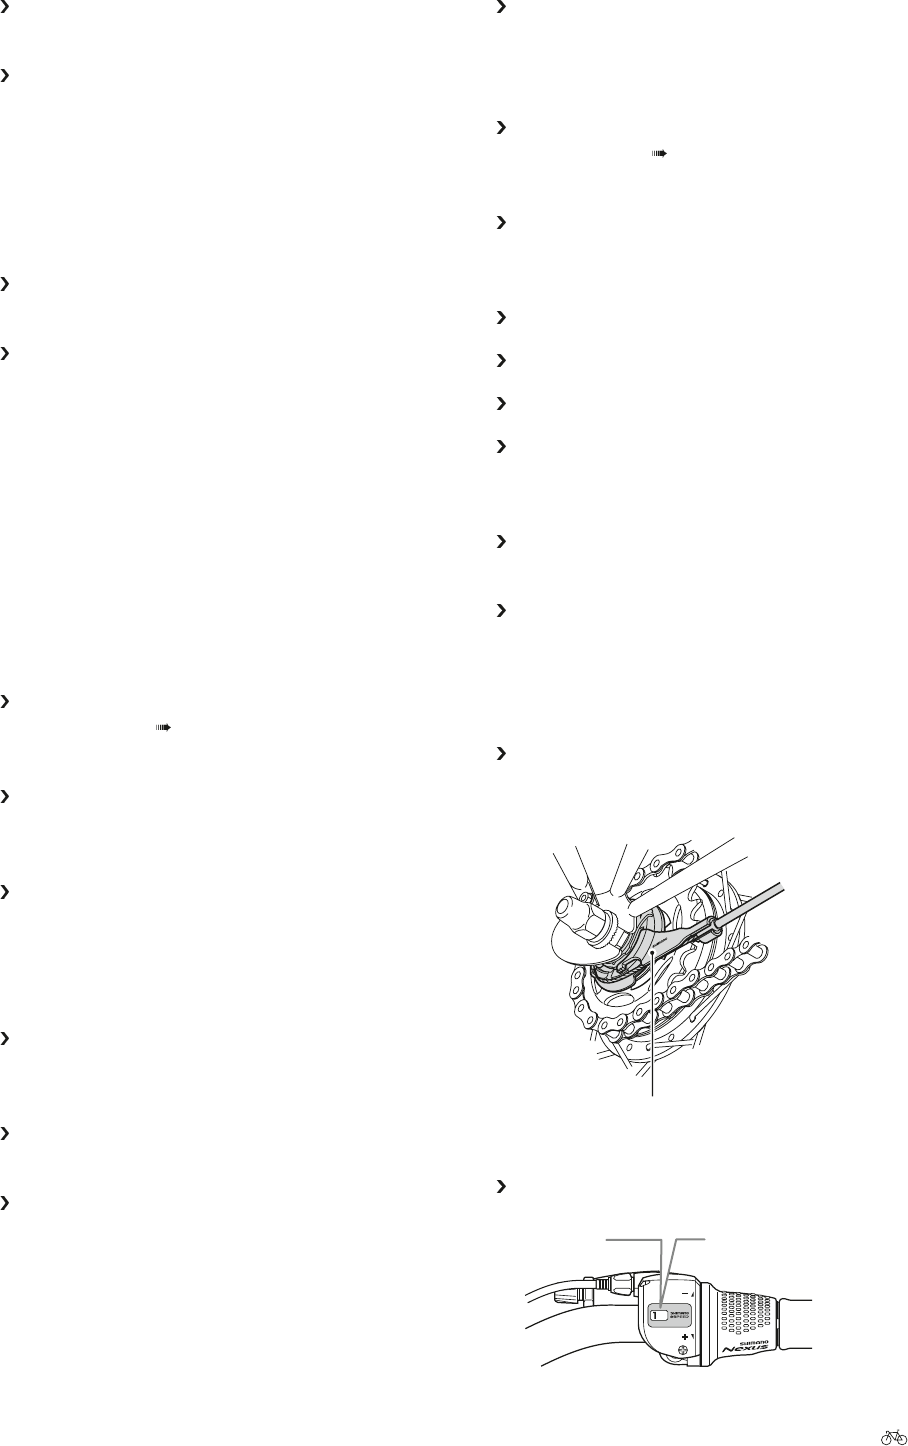
The example here shows the removal of a Shimano hub gear:
Disconnect the shiing cable to remove the rear wheel
Disconnect the cable om the cassette joint to
remove the rear wheel om the ame
Cassette joint
1. Set the Revo-shi lever to 1.
Set to 1
18.1.3 Opening the side-pull calliper brake
Open the quick-release lever on the brake arm or
brake lever.
If no quick-release brake mechanisms are tted,
deate the tyre. The wheel can now be pulled out
between the brake pads.
18.1.4 Releasing the hub gears, roller, drum
or back-pedal brakes
Undo the cable clamping screw or quick-release
device on the brake arm.
With back-pedal brakes, the screw connection of
the brake arm on the chain stay must be released.
18.2 Removing the wheel
Please note that the work steps described here are for a
specic example.
Please observe the information by the relevant manufac-
turer or consult your specialist cycle shop.
18.2.1 Removing the ont wheel
If quick-release devices are tted to your bike,
open them (see
Chapter 9.2.2 "Operating the
quick-release device").
If axle nuts are tted to your bike, release these
by turning them anticlockwise using a suitable
spanner.
If the dropouts are specially formed to prevent the
ont wheel om falling out, continue loosening
the nuts by turning them anticlockwise. Once the
washers and nuts are clear of the dropouts, pull the
ont wheel out of the fork.
If your bike is equipped with metal wheel locking
devices, continue loosening the nuts by turning
them anticlockwise.
Pull the metal locking devices apart until they are
clear of the dropout.
Now pull the ont wheel out of the fork.