Assembly
Assembling the bounce mat
In order to avoid accidents,
when attaching the springs to
the bounce mat, it is
absolutely necessary to have
second person assist with
assembly.
If handled improperly springs
can recoil and cause you serious
injury. Proceed with extreme
caution!
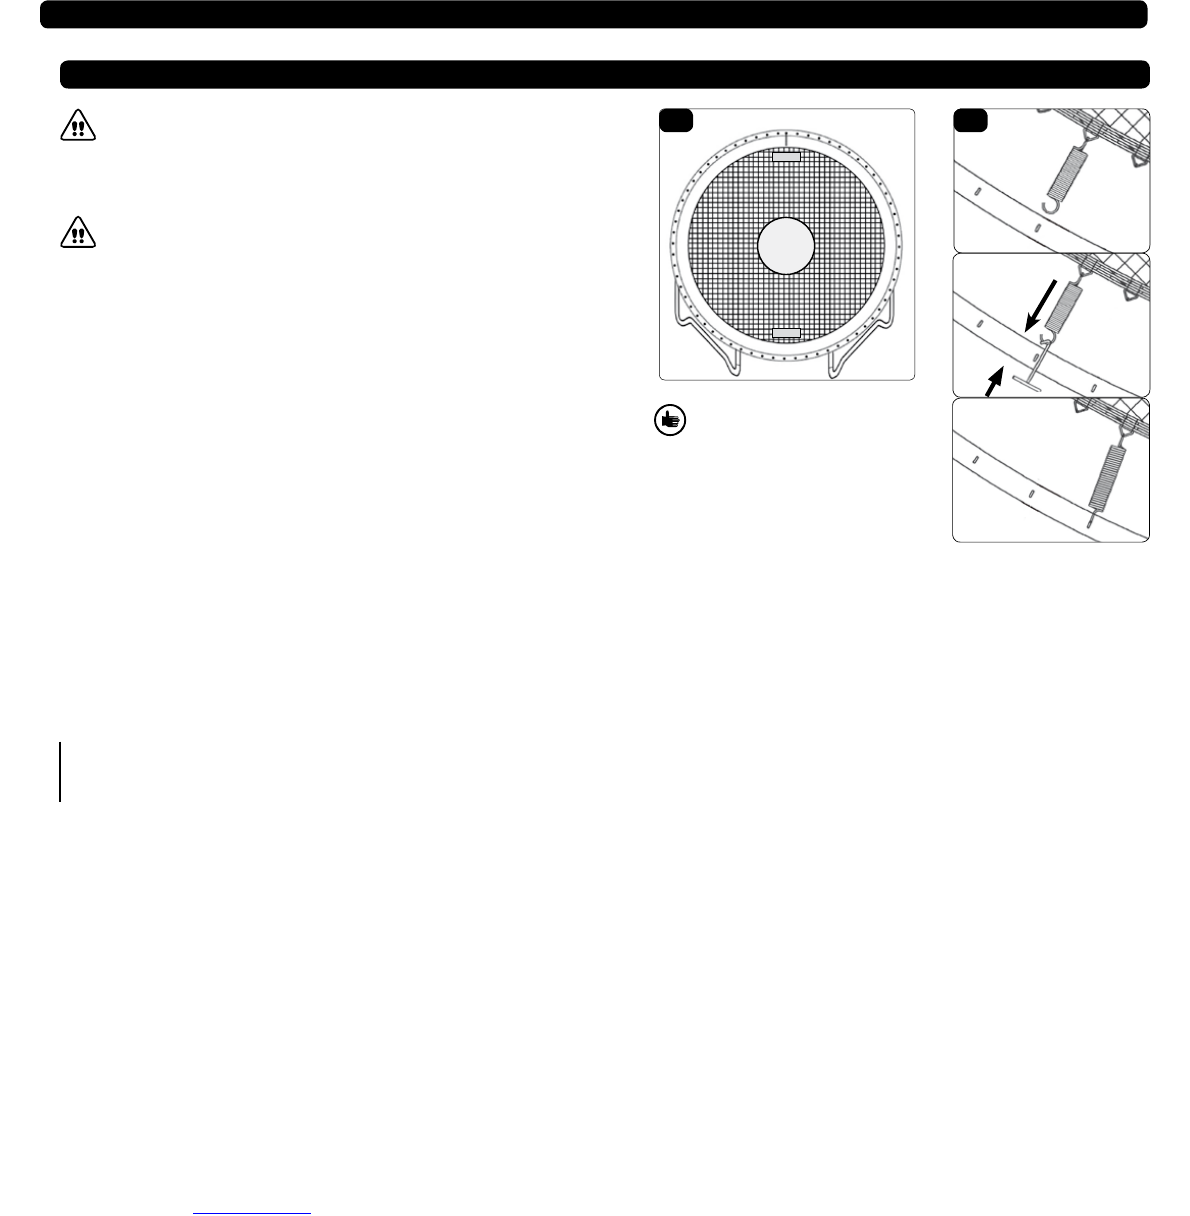
Step 1:
Lay the bounce mat (1) within the
crossframe. Altogether there are 88
springs, 88 V-rings and 88 holes in
the frame. None of these parts is
numbered, therefore carefully follow the
instructions to be sure they connect
with one another.
Step 2:
Select any random point along the
crossframe. Then fasten one spring (7).
After inserting the hook of the spring
into a v-ring of the bounce mat, use the
special tool (9) as illustrated to pull the
spring to the cross frame and hang it
on.
Step 3:
Now count off 22 holes on the cross-
frame and likewise 22 V-rings. Attach a
spring to the 22
nd
hole. Again count off
22 holes on the cross-frame and the
V-rings (you should now be at the 44
th
hole) and attach a spring.
Repeat the processs. You should now
be at the 66
th
hole.
At this point in the assembly you should
have altogether 4 springs attached, one
each at points 0, 22, 44 and 66. This
equalized distribution of tension is
crucial for the proper assembly of the
bounce mat.
Step 4:
Now attach springs at every 11
th
hole
and the corresponding V-ring.
In addition to the springs attached thus
far, now holes 11, 33, 55 and 77 be
provided with springs.
Step 5:
Now attach a spring and the correspon-
ding V-ring to the following holes.
5, 16, 27, 38, 49, 60, 71 and 82.
Step 6:
Now attach a spring and the correspon-
ding V-ring to the following holes.
3, 8, 14, 19, 25, 30, 36, 41, 47, 52, 58, 63,
69, 74, 80 and 85.
Step 7:
Attach the remaining springs. If you
should determine that you have skipped
a hole and V-ring connection, count
again and insert the individual spring so
as to get the right connections.
2
(7)
(9)
1
(1)
Be sure that at least one war-
ning notice of the bounce mat is
located halfway between the two
support feet.
Trampoline