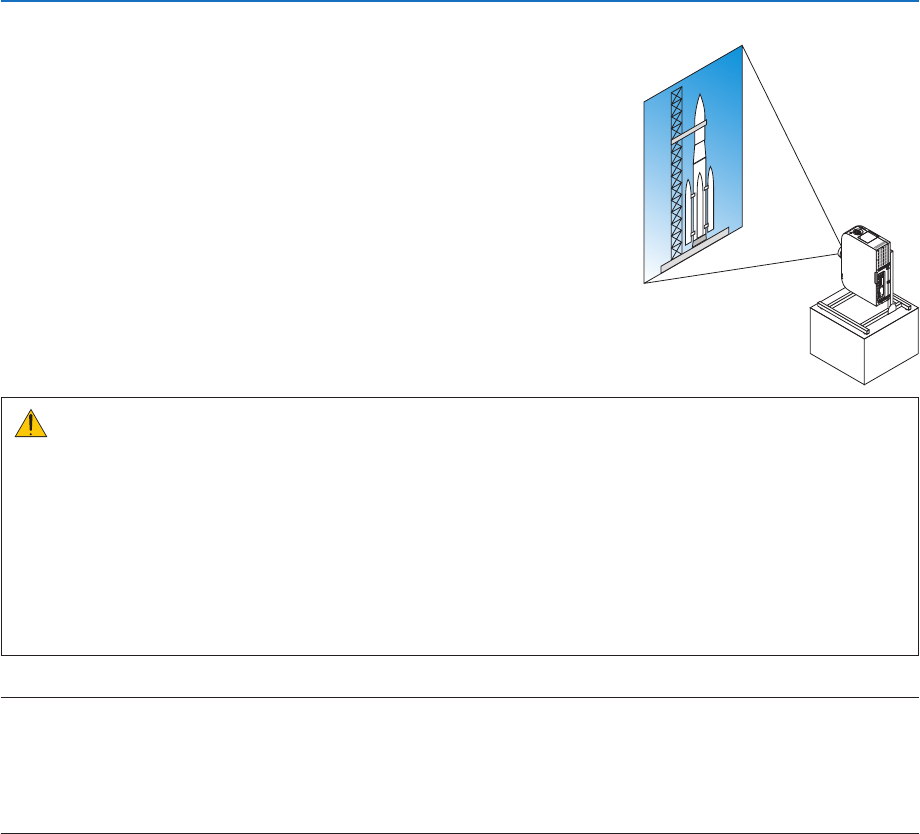
Portrait screens from a computer can be projected by installing the projector in
a vertical orientation. All the screens such as the on-screen menu will be rotated
in an counter-clockwise direction.
The projector is equipped with a sensor to automatically detect the installation
state.
When the projector is installed in a portrait configuration for the first time with
the lamp lit up, a caution message to indicate that the operating time of the
lamp may be shortened will be displayed.
This message will automatically disappear when the installation state of the
projector is returned to the original state.
Precautions during installation
• Please do not install the projector in a vertical orientation on top of the floor or table on its own. The intake vent may be
obstructed, resulting in the projector getting warm and the possibility of fire and malfunction occurring.
• For vertical installation, install the projector with the intake vent (filter) facing downwards. A stand for supporting the
projector needs to be made for this purpose. In this case, the stand must be designed such that the center of gravity of
the projector is located well within the legs of the stand. If not, the projector may fall over and result in injury, damage
and malfunction.
• Do not use the lens shift function when performing portrait projection. Use the position of the lens shift mechanism in
the center (lens center).
NOTE:
• The lamp replacement time (as a guide)* is about 2000 hours for portrait projection.
* Replacement time is not guaranteed.
• When installing in a portrait conguration for the rst time, portrait projection cannot be used when the number of lamp hours used shown under [INFO.] → [USAGE
TIME] → [LAMP HOURS USED] in the on-screen menu exceeds 1900 hours.
• When the [FAN MODE] is set to a mode other than [AUTO], portrait projection cannot be used.
Design and manufacturing conditions for the stand
Please engage an installation service provider for the design and manufacture of the customized stand to be used for portrait
projection. Please ensure that the following are complied with when designing the stand.
1. Maintain an opening of at least 310 × 170 mm so as not to obstruct the intake vent / filter of the projector.
2. Maintain a distance of at least 130 mm between the projector intake vent and the floor (for the opening of the filter cover).
3. Use the four screw holes at the back of the projector to secure it to the stand.
Screw hole center dimension: 200 × 250 mm
Screw hole dimension on the projector: M4 with a maximum depth of 8 mm.
* Please design the stand such that the rear legs at the back of the projector do not contact the stand. The front legs can
be turned and removed.
4. Horizontal adjustment mechanism (for example, bolts and nuts in four locations)
5. Please design the stand such that it does not topple over easily.
Libble nimmt den Missbrauch seiner Dienste sehr ernst. Wir setzen uns dafür ein, derartige Missbrauchsfälle gemäß den Gesetzen Ihres Heimatlandes zu behandeln. Wenn Sie eine Meldung übermitteln, überprüfen wir Ihre Informationen und ergreifen entsprechende Maßnahmen. Wir melden uns nur dann wieder bei Ihnen, wenn wir weitere Einzelheiten wissen müssen oder weitere Informationen für Sie haben.
Art des Missbrauchs:
Forenregeln
Um zu sinnvolle Fragen zu kommen halten Sie sich bitte an folgende Spielregeln:
Lesen Sie zuerst die Anleitung;
Schauen Sie nach, ob die Frage bereits gestellt wurde;
Stellen Sie die Frage so deutlich wie nur einigermaßen möglich;
Erwähnen Sie was Sie bereits versucht haben um das Problem zu lösen;
Ist Ihr Problem von einem Besucher gelöst dann lassen Sie ihn / sie wissen in diesem Forum;
Falls Sie reagieren möchten, so verwenden Sie bitte das Antworten- Formular;
Da ihre Frage für alle Besucher sichtbar ist, sollten Sie lieber keine persönliche Daten erwähnen.
Neu registrieren
Registrieren auf E - Mails für Ricoh PJ WU6181N wenn:
neue Frage gestellt werden
neue Handbücher vorhanden sind
Sie erhalten eine E-Mail, um sich für eine oder beide Optionen anzumelden.
Das Handbuch wird per E-Mail gesendet. Überprüfen Sie ihre E-Mail.
Wenn Sie innerhalb von 15 Minuten keine E-Mail mit dem Handbuch erhalten haben, kann es sein, dass Sie eine falsche E-Mail-Adresse eingegeben haben oder dass Ihr ISP eine maximale Größe eingestellt hat, um E-Mails zu erhalten, die kleiner als die Größe des Handbuchs sind.
Ihre Frage wurde zu diesem Forum hinzugefügt
Möchten Sie eine E-Mail erhalten, wenn neue Antworten und Fragen veröffentlicht werden? Geben Sie bitte Ihre Email-Adresse ein.