3
EN
(*) Depending on model
After a few seconds water will emerge from the soleplate, rinsing any impurities
out of the steam chamber (fig.5).
Move the steam control to steam position after approx.
1 minute. Plug in the iron and allow the iron to heat up again. Wait until the
remaining water has evaporated. Unplug from the mains and allow the iron to fully
cool down.
USE
4 • Filling the water tank
IMPORTANT Before filling the water tank, unplug the iron and set the steam
control to dry position .
Tilt the iron. Open the filling inlet (fig.6). Pour in water up to the max mark (fig.7).
Close the filler inlet (fig.8) and return the iron to the horizontal.
5 • Setting the temperature
Set the iron temperature to suit the type of material using the temperature control
dial (fig.3).
Temperature control*: The temperature control light indicates that the soleplate is
heating up. When the temperature control light goes off (fig.9), the set temperature
is reached and you can begin ironing.
set temperature is reached and you can begin ironing.
Electronic temperature control*: The traffic lights tell you whether the soleplate is
at the selected temperature (fig.10).
IMPORTANT The iron takes longer to cool down than to heat up. We
recommend that you start with fabrics to be ironed at a low temperature.
For mixed fabrics set the temperature for the most delicate fabric.
TIP Always spray starch onto the reverse side of the fabric to be ironed.
6 • Dry ironing
Set the variable steam control to (fig.11) and set the temperature to suit the
type of material (care points •, ••, •••).
7 • Steam ironing
You can steam iron from temperature setting •• upwards.
Steam function* The steam quantity can be set to between no steam (minimum
steam quantity) and (maximum steam quantity) (fig.12). We recommend setting
to maximum steam quantity only when the iron is at temperature setting •••.
Auto Steam function* Set the steam button to (fig.13) and the steam quantity will
adjust automatically to the soleplate temperature
8 • Shot of steam (from temperature setting •• upwards)
IMPORTANT Leave an interval of 4 seconds between each shot and wait until
the flow of steam is finished before standing the iron on its heel.
Press the shot of steam button to generate a powerful jet of steam and remove
stubborn creases (fig.14).
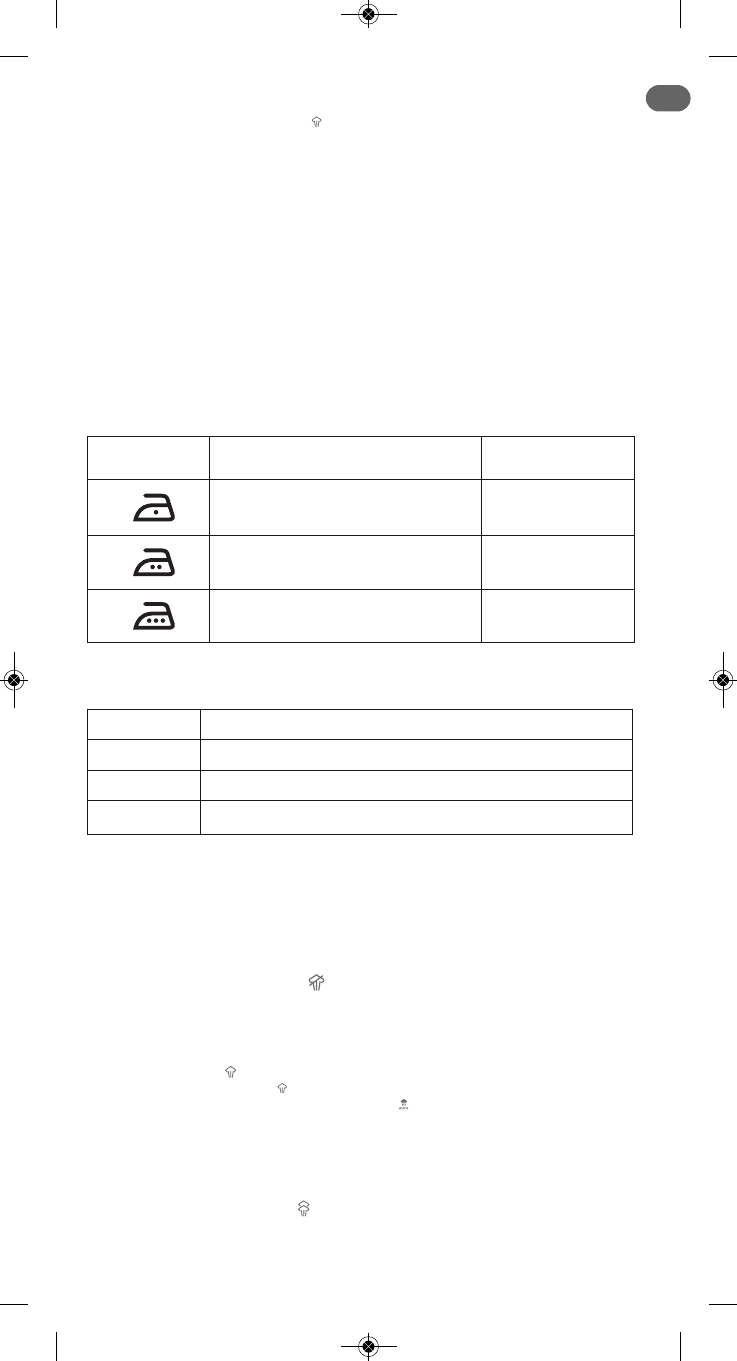
Ironing label Fabric
Temperature
control
Synthetic fibres, e.g. viscose,
polyester…
•
Silk, wool
••
Cotton, linen
•••
YELLOW The soleplate is still too cold for the selected material.
GREEN The soleplate is at the right temperature for the selected material.
RED The soleplate is still too hot for the selected material.
AUTO- OFF The automatic electronic cut-out* is active.