31
Computer Input
Press the Point Left/Right but-
ton to adjust value.
Press the MENU button and the On-Screen Menu will appear.
Press the Point Left/Right button to move the red frame pointer
to the Image Adjust Menu icon.
1
2
Press the Point Down button to move the red frame pointer to
the item that you want to adjust, and then press the SELECT
button. The level of each item is displayed. Adjust each level by
pressing the Point Left/Right button.
Move the red frame pointer to
the item to be selected and
then press the SELECT button.
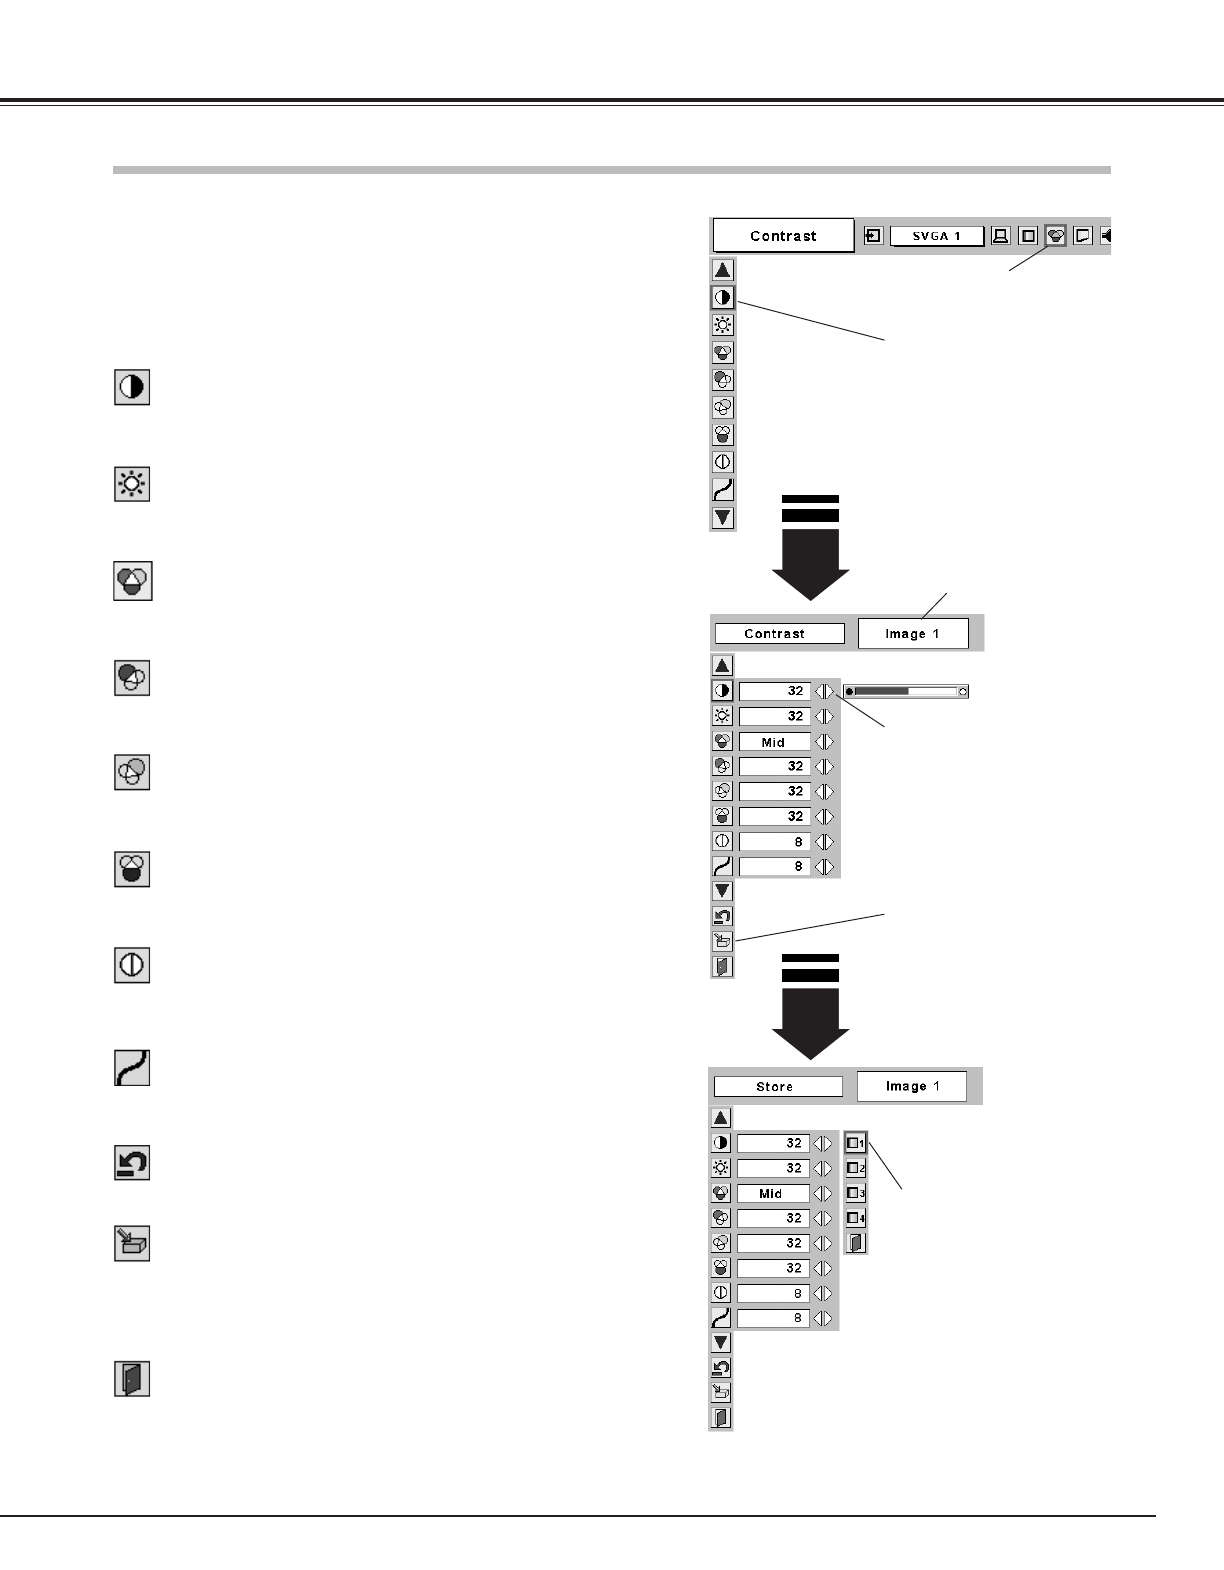
Image Adjust Menu
Press the Point Left button to decrease contrast and the Point Right
button to increase contrast. (From 0 to 63.)
Press the Point Left button to adjust image darker and the Point Right
button to adjust image brighter. (From 0 to 63.)
Contrast
Brightness
Press the Point Left/Right button to obtain better balance of contrast.
(From 0 to 15.)
Gamma
Image Level Menu
Move the red frame pointer to
any of Image 1 to 4 where you
want to set and then press
the SELECT button.
Store icon
Press the SELECT button at
this icon to store the adjust-
ment.
Image Adjust Menu icon
Press the Point Left button to lighten red tone and the Point Right
button to deepen red tone. (From 0 to 63.)
White balance (Red)
Press the Point Left button to lighten green tone and the Point Right
button to deepen green tone. (From 0 to 63.)
White balance (Green)
Press the Point Left button to lighten blue tone and the Point Right
button to deepen blue tone. (From 0 to 63.)
White balance (Blue)
Selected Image level
Press the Point Left button or the Point Right button for Color temp.
level that you want to select. (XLow, Low, Mid, or High)
Color temp.
Press the Point Left button to soften the image and the Point Right
button to sharpen the image. (From 0 to 15.)
Sharpness
Image Level Adjustment
Resets all adjustment to their previous levels.
Reset
Store
Closes the Image Adjust Menu.
Quit
To store the image data adjusted manually, move the red frame
pointer to the Store icon and press the SELECT button. The Image
Level Menu will appear. Move the red frame pointer to the Image 1
to 4 where you want to set and then press the SELECT button.