40
Setting
Terminal
The COMPUTER IN 2/MONITOR OUT terminal on the back of the
projector can be used as computer input or monitor output by
switching Terminal with the Point Left/Right button.
To use the terminal as computer input or RGB Scart 21-Pin Video
input, select Computer 2. To use the terminal as monitor out, select
Monitor out.
Terminal cannot be switched into Monitor out after selecting
Computer 2. In this case, select other input source such as Computer
1 or Video, and you will select Terminal.
Standby mode
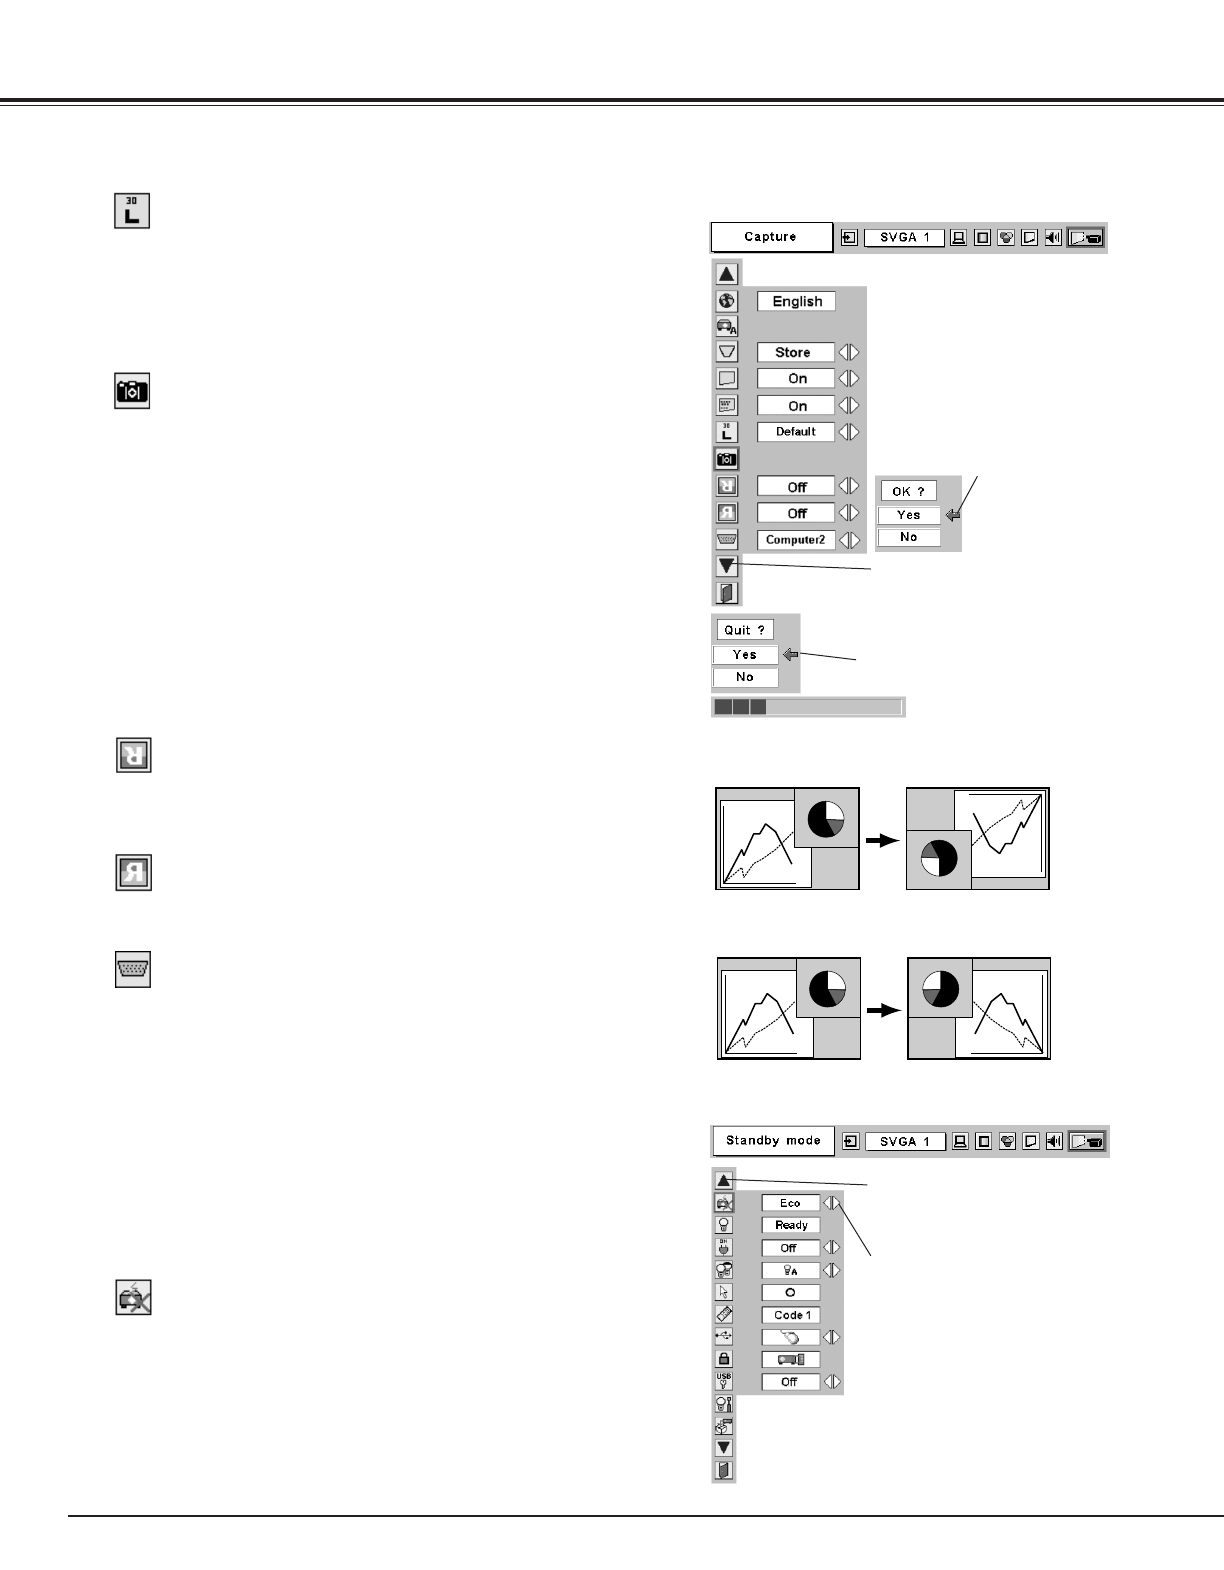
Ceiling
Rear
Ceiling
When this function is “On,” the picture is top/bottom and left/right
reversed. This function is used to project the image from a ceiling
mounting the projector.
Rear
When this function is “On,” the picture is left/right reversed. This
function is used to project the image to a rear projection screen.
Press the SELECT button at this
icon to display previous items.
Standby mode
This function is available when using Multi Card Imager optionally
supplied, and it reduces standby energy when selecting Eco.
Eco ···· reduces standby energy.
Normal ···· consumes normal standby energy.
Capture
This function is used to capture the image being projected and use it
for a starting-up display or interval of presentations. After capturing
the projected image, go to the Logo function and set it as “User”.
Then the captured image will be displayed when turning on the
projector next time or pressing the NO SHOW button. (p22)
To capture the image, select [Yes]. To cancel the Capture function,
select [No].
Before capturing an image, select Standard in the Image Select Menu
to capture a proper image. (See page 30, 36.)
A signal from a computer can be captured up to XGA(1024 x 768). A
signal from video equipment can be captured except for 720p, 1035i,
and 1080i. When capturing the image that has been adjusted by the
Keystone function, the adjustment data is automatically reset and the
projector captures an image without keystone adjustment.
Select [Yes] to
capture the
projected image.
Select [Yes] to
stop capturing.
Capture
Logo
This function decides what to be displayed when starting up.
User ···· the image you captured
Default ···· the factory-set logo
Off ···· count-down only
Press the SELECT button at this
icon to display other items.
Move the pointer to item
and then press POINT
LEFT/RIGHT button(s).