57
Appendix
USB Key Lock Function
(This is optional function. Optionally supplied USB Key needed.)
USB Key lock
USB Key lock
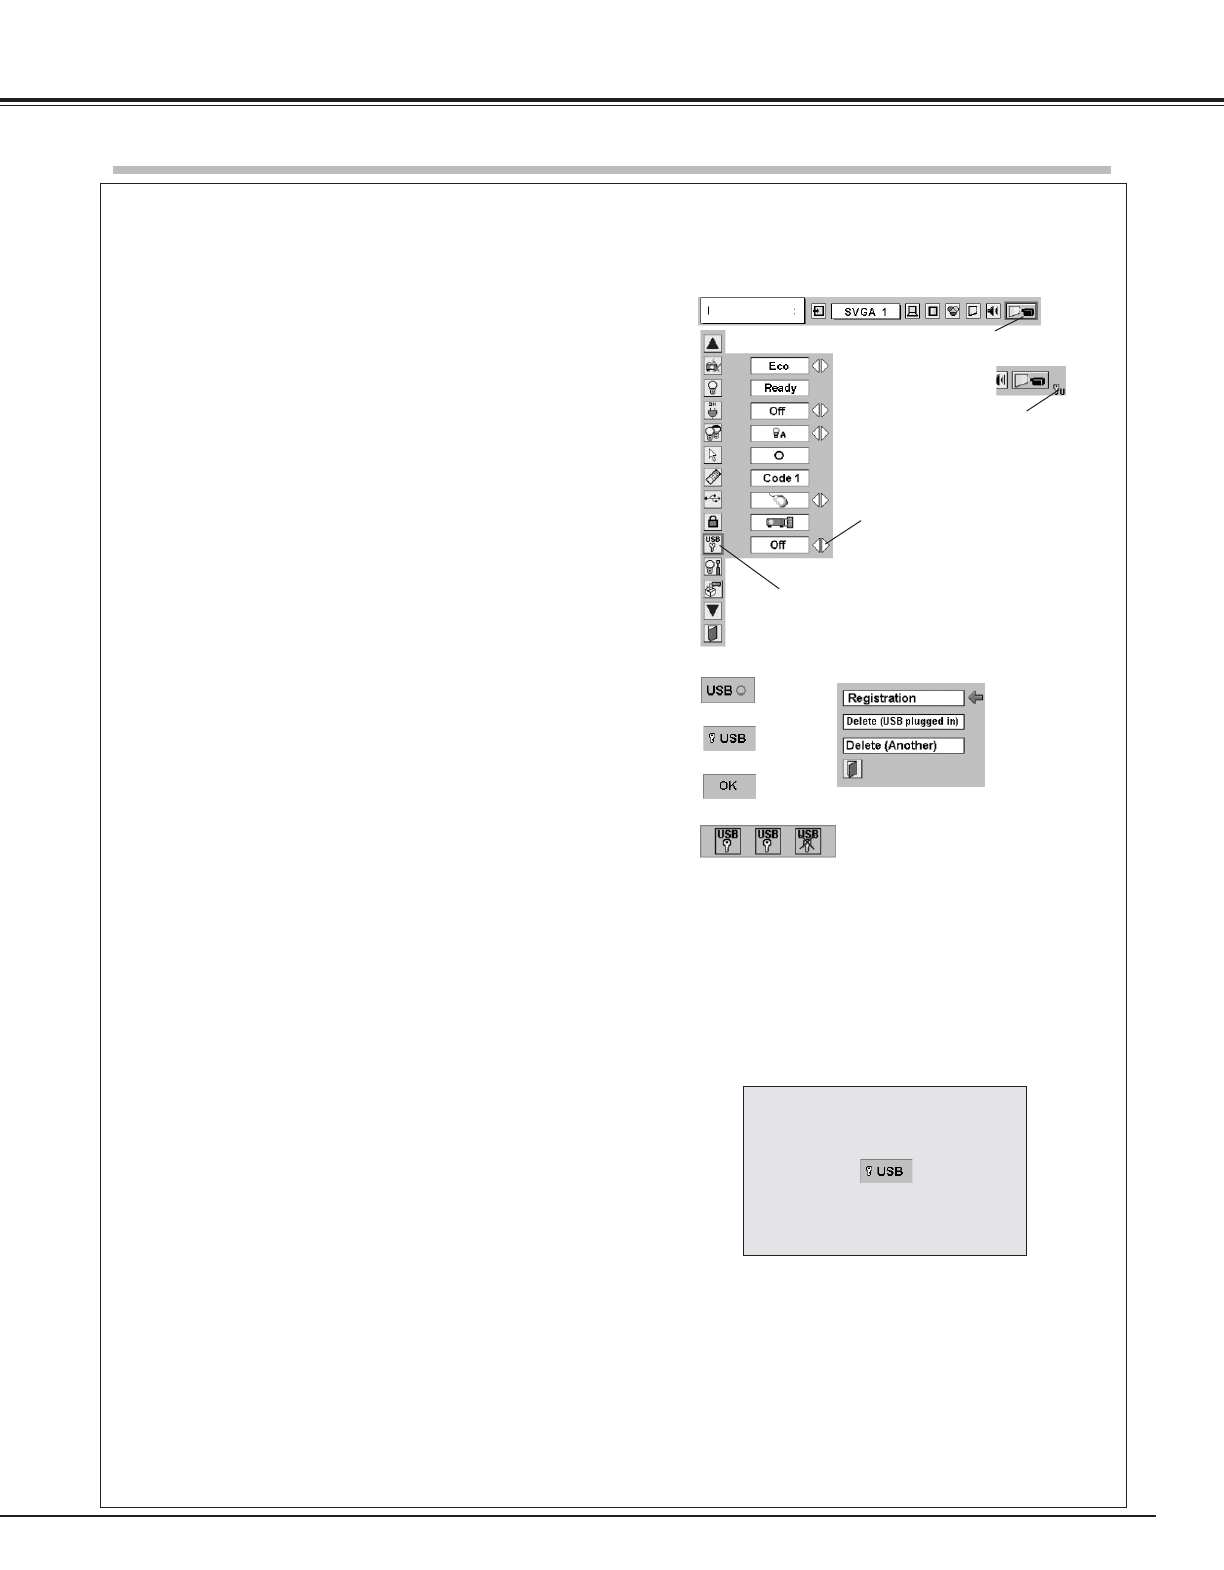
Move the pointer to item
and then press POINT
LEFT/RIGHT button(s).
(Off, On1 or On2)
When pressing the SELECT
button at USB key lock, the
USB key lock Menu appears.
By using optionally supplied Projector USB Key, operation of the projector can be restricted by the projector owner. Once
the projector is locked with the USB Key, only the owner who has key can operate the projector.
When the USB KEY LOCK is set, a
USB KEY mark will appear on the
MENU BAR.
Key registration
Before using the USB key, you must register USB key into the
projector.
Turn the projector ON and connect the USB Key to the USB
terminal located on the rear of the projector. (See Item
u on
page10)
A USB key icon (A) will appear on screen and the USB Key
connected to the terminal will be automatically registered into
the projector. (Do not disconnect the USB Key while the icon
is displayed on screen.
If you like to have another USB key registered, follow the
procedure below:
Deleting key registration
With the USB Key plugged in, select "DELETE (USB plugged
in)" from the USB Key registration menu (B) and press the
SELECT button. OK icon will appear on screen and the
registration will be cleared. If you select "Delete (Another)",
the registration of another USB Key which is not connected to
the projector will be cleared.
Press the Menu button and On-Screen Menu will appear.
Press the Point Left/Right button to move the frame
pointer to the Setting menu icon.
Press the Point Down button to move the red frame
pointer to the USB Key Lock icon, then press the SELECT
button. USB Key Lock menu will appear
Press the Point Left/Right button and select one of the
following key lock modes.
Projector is not locked with USB Key.
Off
On1
On2
Need the USB Key every time the Projector is turned on.
After having inserted and certified the USB KEY, it can be
removed from the projector without interrupting
projector operation.
Need the USB Key to turn the Projector on after AC
power cord is reconnected to the AC outlet.
Setting Menu icon
(A)
(B)
(C)
(D)
(E)
Connect first key to the USB terminal on the projector.
Press the Menu button and On-Screen Menu will appear.
Press the Point Left/Right button to move the red frame
pointer to the Setting menu icon.
Press the Point Down button to move the red frame
pointer to the USB Key Lock icon, then press the SELECT
button. USB Key Lock menu will appear.
Press the SELECT button again and USB Key registration
menu (B) will appear.
Select "Registration" with Point Up/Down button and press
the SELECT button. A USB key icon (C) will appear. For
about 30 seconds while the USB key icon is on screen,
remove the first registered USB Key from the projector
and connect another USB Key which you wish to register
as second key to the projector. After that, OK icon (D) will
appear for a little while to make sure the USB Key is
registered.
Up to two keys can be registered into the projector. If you
attempt to register third key, an X mark (E) will be displayed to
prohibit the registration.
1)
2)
3)
4)
5)
To lock the projector with USB key
1)
2)
Note:
When turning the projector ON again with the projector
set to USB KEY LOCK On1 or On2 position, a screen
indicating USB KEY LOCK will appear after the
countdown. At that time, if the registered USB KEY is
not inserted within 3 minutes, the automatically turned
off.
3)