Setting
49
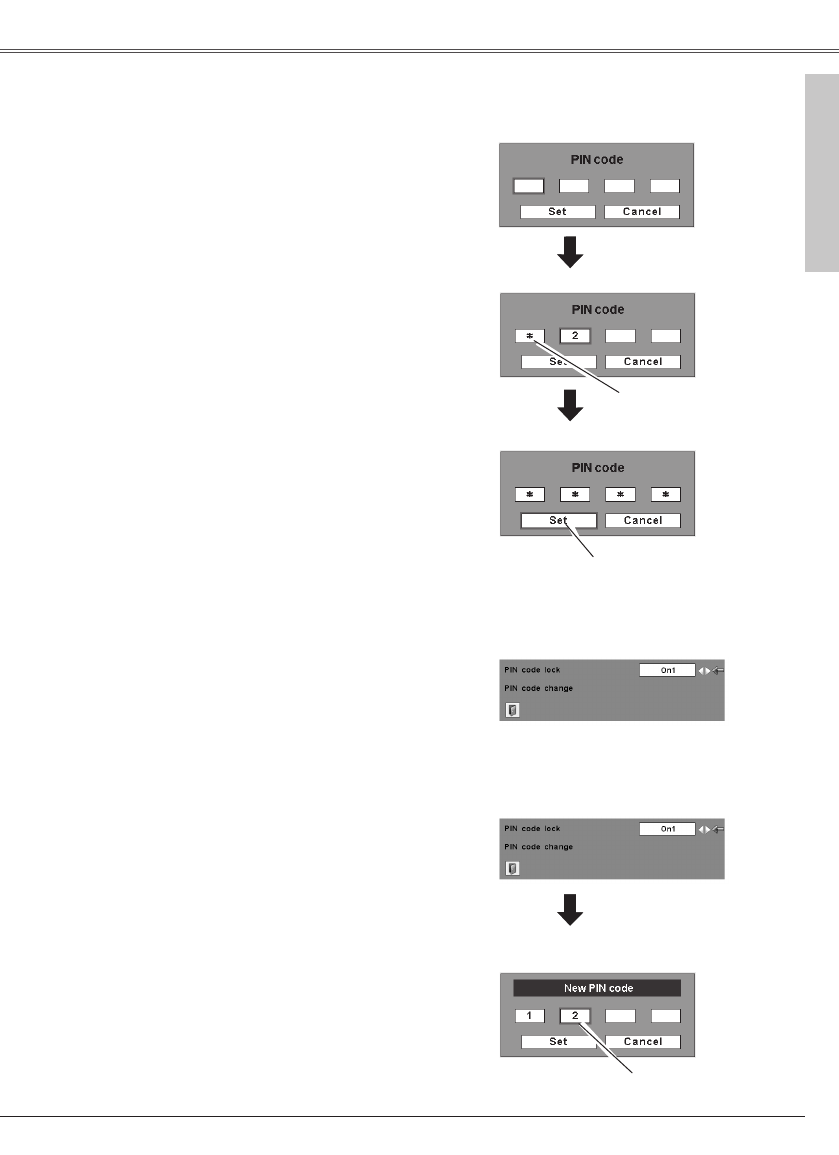
To Enter the PIN code
Select a number by pressing the Point ed buttons.
And then press the Point 8 button to fix the number
and move the pointer. The number changes to "✳".
If you fixed an incorrect number, move the pointer
to the number you want to correct by pressing the
Point 7 button, and then select the correct number
by pressing the Point ed buttons.
Repeat this step to complete entering a four-digit
number.
After entering the four-digit number, move the
pointer to "Set" by pressing the Point 8 button.
Press the SELECT button so that you can change
the following PIN code lock settings.
If you entered an incorrect PIN code, "PIN code"
and the number (✳✳✳✳) turns red. Enter a PIN
code all over again.
The PIN code can be changed to your desired four-
digit number.
Select "PIN code change" with the Point d button,
and press the SELECT button to display the New
PIN code input dialog box.
Select a number by pressing the Point ed buttons.
And then press the Point 8 button to fix the number
and move the pointer. Repeat it to complete
entering a four-digit number. After entering the four-
digit number, move the pointer to "Set" by pressing
the Point 8 button. Then press the SELECT button.
To Change the PIN code
CAUTION:
WHEN YOU HAVE CHANGED THE PIN CODE,
WRITE DOWN THE NEW PIN CODE IN COLUMN
OF THE PIN CODE NO. MEMO ON PAGE 65, AND
KEEP IT SECURELY. IF YOU FORGET YOUR PIN
CODE, THE PROJECTOR CAN NO LONGER BE
STARTED.
Select Off, On1, or On2 with the Point 7 8 buttons
and then move the red framed pointer to "Quit" with
the Point d button. Press the SELECT button to
close the dialog box.
To Change the PIN code lock setting
Change the PIN code
Select PIN code change and
press the SELECT button.
The New PIN code input
dialog box appears.
The input numbers are being
displayed for confirmation.
Change the PIN code lock setting
Select a desired setting with
the Point 7 8 buttons.
Enter a PIN code
The input numbers change
to "✳" for security.
Move the pointer to "Set" by pressing
the Point 8 button. And then press
the SELECT button.
Setting