8. TROUBLESHOOTING
8-1. Precautions before Performing Inspection or Repair
NOTE
After checking the self-diagnostics monitor, turn the power OFF before starting inspection or repair.
High-capacity electrolytic capacitors are used inside the outdoor unit controller (inverter). They retain an electrical charge
(charging voltage DC 310V) even after the power is turned OFF, and some time is required for the charge to dissipate. Be
careful not to touch any electrified parts before the controller LED (red) turns OFF.
If the outdoor controller is normal, approximately 30 seconds will be required for the charge to dissipate. However, allow
at least 5 minutes for the charge to dissipate if there is thought to be any trouble with the outdoor controller.
1: If the operation lamp blinks every 0.5 seconds immediately when the
power is turned ON, there is an external ROM (OTP data) failure on the
indoor circuit board, or a ROM socket insertion problem, or the ROM
has not been installed.
2: The failure mode is stored in memory even when the power is not ON.
Follow the procedure below to perform diagnostics.
8-2. Method of Self-Diagnostics
Follow the procedure below to perform detailed trouble diagnostics.
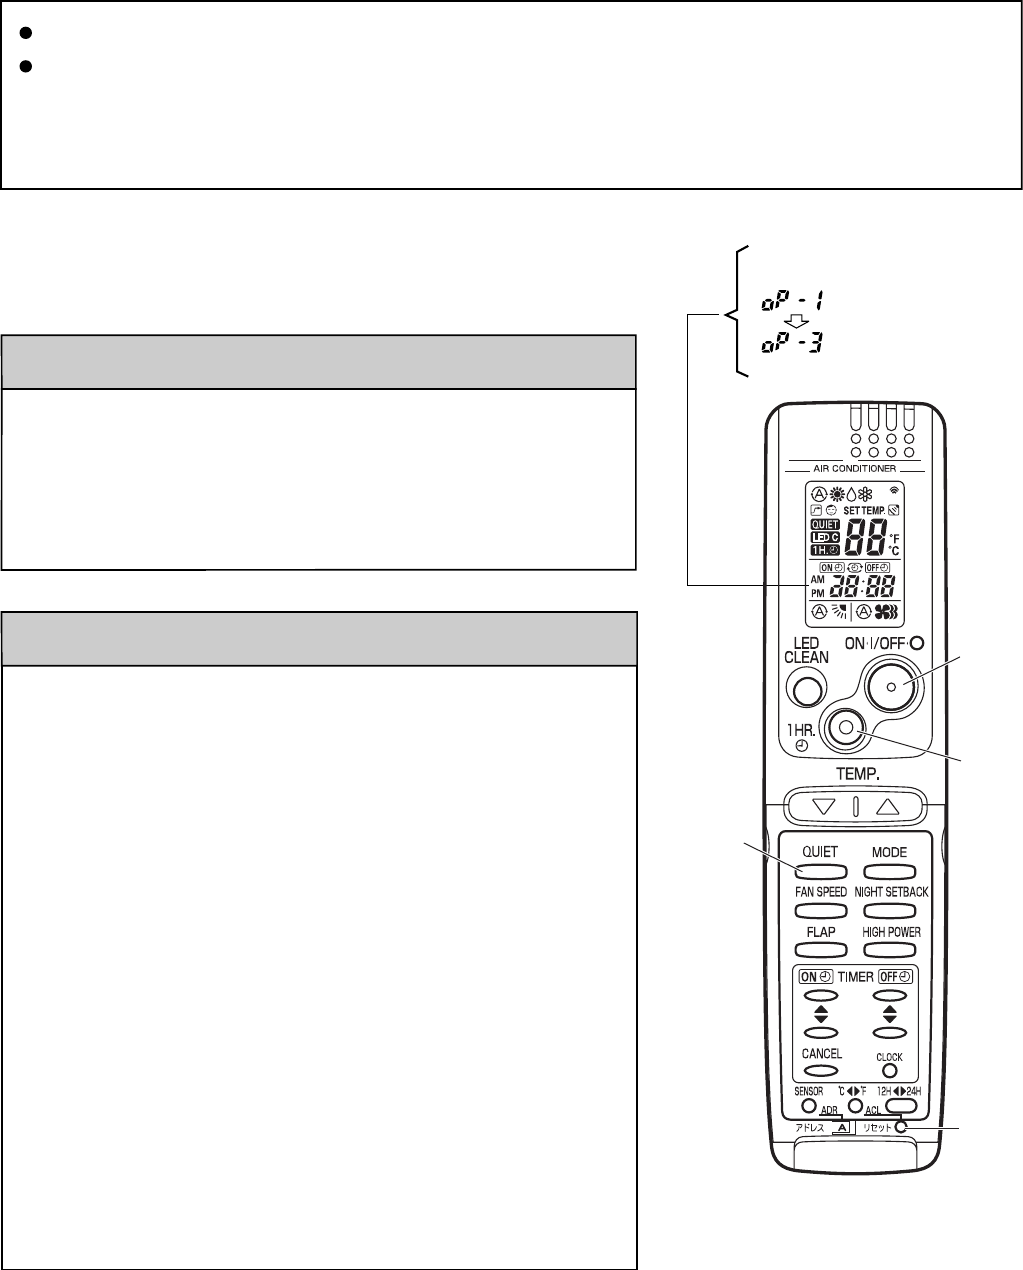
< Clock display >
Test run mode
Self-diagnostics mode
PROCEDURE
Step 1: Press and hold the remote controller QUIET button and 1 HR
TIMER button. Then, press and hold the ACL (reset) button with a
pointed object such as the tip of a pen. After 5 seconds, release
ACL button first, then release QUIET and 1 HR TIMER buttons,
"oP-1" (test run) appears, blinking in the remote controller clock
display area.
Step 2: Next, press the 1 HR TIMER button once to change the display
from "oP-1" to "oP-3" (self-diagnostics). (The display continues to
blink.)
Step 3: Finally press the ON/OFF button to engage self-diagnostics mode.
• The self-diagnostics function utilizes the 3 indicator lamps on the main
unit, in combinations of ON lamps, blinking lamps, and OFF lamps, to
report the existence of sensor trouble or a protective operation. (The
lamps blink or remain ON for 5 seconds, then turn OFF for 2 seconds.)
Self-diagnostics is completed when the buzzer sounds 3 short beeps.
• A maximum of 3 self-diagnostics reports are displayed, for 5 seconds
each, beginning with the most recent report. Following this display the
lamps turn OFF. In order to view the self-diagnostics results again,
press the ON/OFF button again.
• The 3 lamps remain OFF if no trouble has occurred.
<IMPORTANT> After self-diagnostics is completed, be sure to press the
ACL (reset) button to return to normal mode. The air
conditioner will not operate if this is not done.
After turning on power to the air conditioner, use the remote controller and
follow the steps below to execute self-diagnostics.
1HR.
TIMER
button
ON/OFF
operation
button
ACL
(Reset)
button
QUIET
button