285If and when
Remove the bulb holder
When changing a bulb, you must first remove the bulb hold-
er.
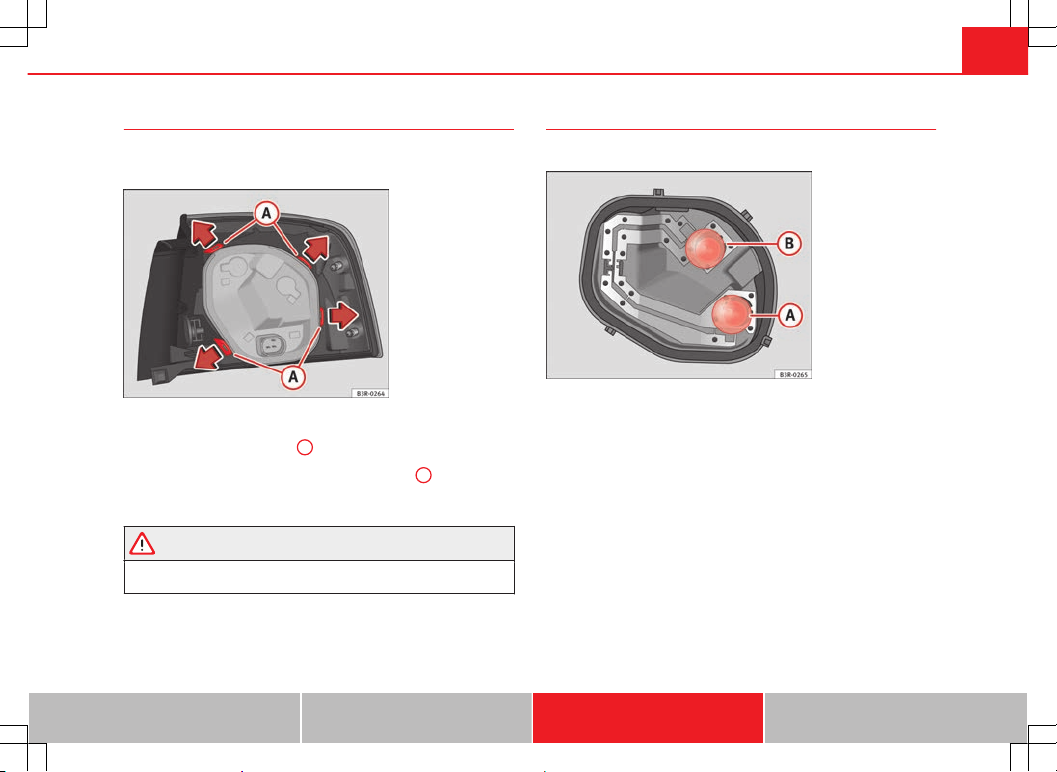
Fig. 225 Retaining tabs
on reverse side of tail
light
There are four securing tabs on the inside of the tail light unit.
–Release the retaining tabs A ⇒ Fig. 225.
–Lift the bulb carrier off in direction of the arrow B.
–Change the defective bulb ⇒ page 285 ⇒ page 286.
WARNING
If a bulb is replaced in a tail light assembly with LED, do not pull too hard
on the bulb holder. This may damage the wiring of the LED module.
Changing bulbs
All bulbs can be changed easily in the bulb holder.
Fig. 226 Position of the
bulbs in the bulb holder:
Example: Outer left tail
light
The bulbs are secured with a bayonet fastener. The table below
gives an overview of the bulb positions.
–Lightly press the defective bulb into the bulb holder, then turn it
to the left and remove it.
–Fit the new bulb, pressing it into the bulb holder and turn it to
the right as far as it will go.
–Use a cloth to remove any fingerprints from the glass part of the
bulb.
–Check whether the new bulb is working.
–Re-install the bulb holder ⇒ page 286.
Safety First Operating Instructions Practical Tips Technical Specifications

