753105
21
Zoom out
Zoom in
Vorherige Seite
1/100
Nächste Seite
5 Mounting of the control unit
Caution - damage to the device: Do not use a cordless screwdriver to mount the control unit.
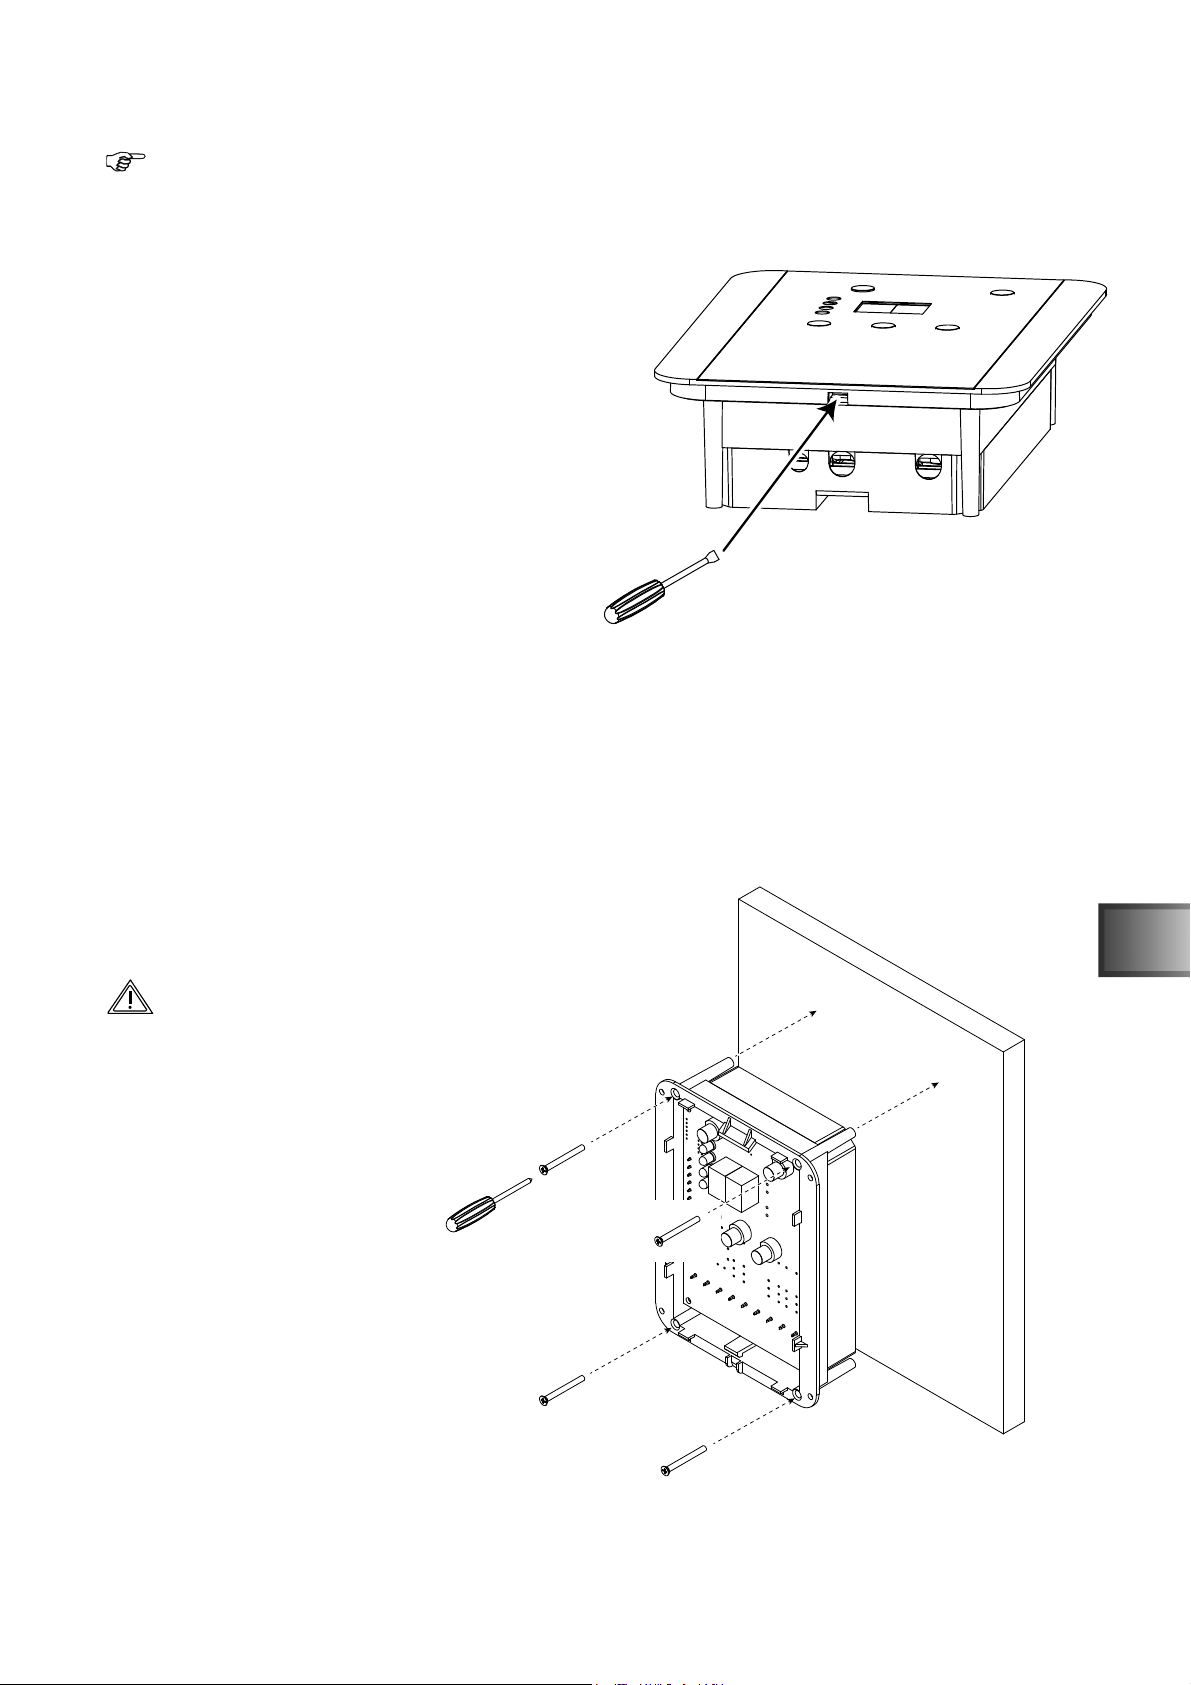
5.1 Removal of the front lid
In order to mount the control unit to the wall, the front
cover of the control unit must be removed. To this end,
use a fl at screwdriver with a breadth of approx. 3mm.
Guide the screwdriver into the intended opening on
the underside of the control
The lid is held on by a snap-on hook.
Press this carefully inwards until the lid becomes detached.
Now remove the lid from the control unit.
After the operating element is attached to the wall,
the lid must be replaced.
First of all, mount the lid on its upper edge into the control unit housing.
Now press the underside against the housing until the lid locks into place again.
Fig 6 Remove lid
5.2 Surface mounting
Use the long screws contained in the scope of supply to mount the
control unit. Do not use a larger diameter under any circumstances.
This can cause irreparable damage to the housing.
When inserting the screws, ensure no damage
is caused to any cables installed in the wall.
This can cause serious injury to people and
serious damage to property.
Fig. 7 Surface mounting
WE DO IT FIRST.
Instructions for installation and use – only for experts P. 7/14
EN
21

Brauchen Sie Hilfe? Stellen Sie Ihre Frage.

Forenregeln

Missbrauch melden von Frage und/oder Antwort

Libble nimmt den Missbrauch seiner Dienste sehr ernst. Wir setzen uns dafür ein, derartige Missbrauchsfälle gemäß den Gesetzen Ihres Heimatlandes zu behandeln. Wenn Sie eine Meldung übermitteln, überprüfen wir Ihre Informationen und ergreifen entsprechende Maßnahmen. Wir melden uns nur dann wieder bei Ihnen, wenn wir weitere Einzelheiten wissen müssen oder weitere Informationen für Sie haben.

Art des Missbrauchs:

Zum Beispiel antisemitische Inhalte, rassistische Inhalte oder Material, das zu einer Gewalttat führen könnte.

Beispielsweise eine Kreditkartennummer, persönliche Identifikationsnummer oder unveröffentlichte Privatadresse. Beachten Sie, dass E-Mail-Adressen und der vollständige Name nicht als private Informationen angesehen werden.

Forenregeln

Um zu sinnvolle Fragen zu kommen halten Sie sich bitte an folgende Spielregeln:

Neu registrieren

Registrieren auf E - Mails für Sentiotec IS2 wenn:


Sie erhalten eine E-Mail, um sich für eine oder beide Optionen anzumelden.


Das Handbuch wird per E-Mail gesendet. Überprüfen Sie ihre E-Mail.

Wenn Sie innerhalb von 15 Minuten keine E-Mail mit dem Handbuch erhalten haben, kann es sein, dass Sie eine falsche E-Mail-Adresse eingegeben haben oder dass Ihr ISP eine maximale Größe eingestellt hat, um E-Mails zu erhalten, die kleiner als die Größe des Handbuchs sind.

Ihre Frage wurde zu diesem Forum hinzugefügt

Möchten Sie eine E-Mail erhalten, wenn neue Antworten und Fragen veröffentlicht werden? Geben Sie bitte Ihre Email-Adresse ein.


Info