Select 4. Auto Synchronization and press ≤≥ to
select:
On:• Sets the clock automatically the same with
the digital signal time. (Only if digital signal is
available).
Off:• Press <> to set your system Date or
system Time manually by using the digit
buttons on your remote control.
When the clock setting is completed, follow the 5.
on-screen instructions to exit.
Automatically switch the TV off (Off time)
Off time switches the TV to standby at a specified time.
NOTE
Before using off time function, you have to set the time •
on your TV correctly. (See page 16 “Set the clock”)
Press 1. MENU / EXIT on the remote control and
select Features ≥ Time.
Press 2. OK or ≥ to enter Time menu.
Press 3. <> to select Time and press OK or ≥
to enter.
Press 4. > to select Timer and press ≤≥ to
select:
Off: • Disable Timer.
On:• Press > to highlight the Off Time box
and set and power off time by using the digit
buttons on your remote control.
Follow the on-screen instructions to exit.5.
Automatically switch the TV to standby
(Sleep timer)
Sleep timer switches the TV to standby after a defined
period of time.
Press 1. MENU / EXIT on the remote control and
select Features ≥ Time.
Press 2. OK or ≥ to enter Time.
Press 3. <> to select Sleep Timer.
Press 4. ≤≥ to select the period of time before
TV enters to standby.
Follow the on-screen instructions to exit.5.
NOTE
When you press any button on the remote control with •
less than three minutes left in the countdown, Sleep
timer will be automatically canceled.
TV menu
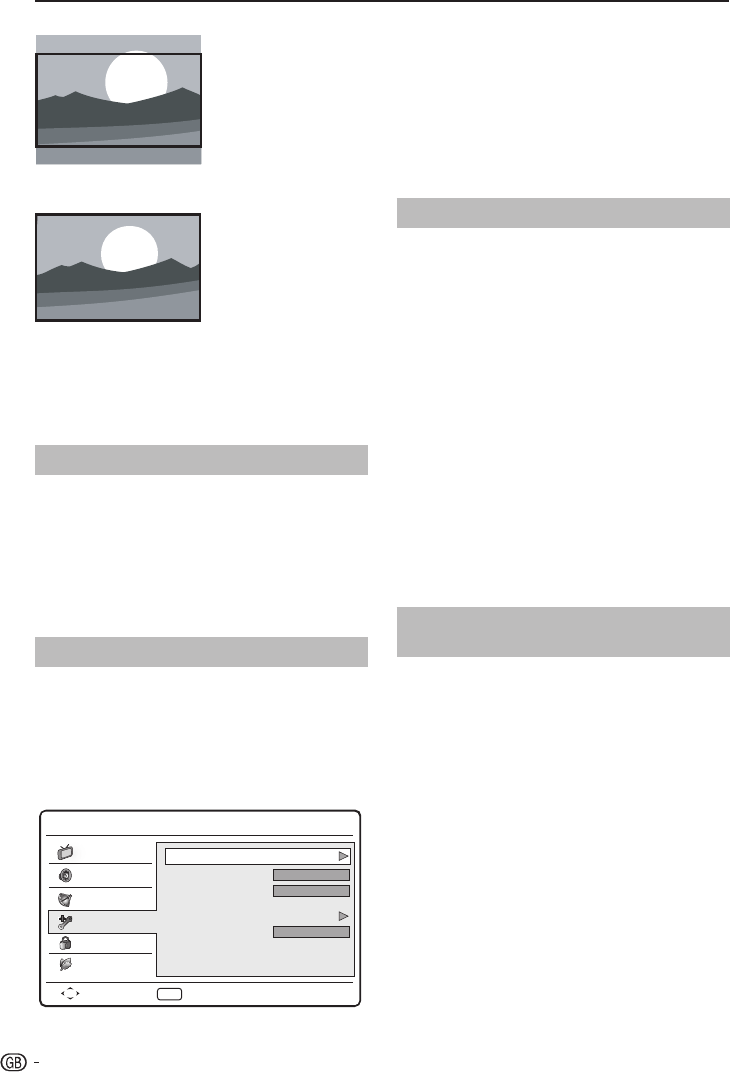
Zoom 2 (Not for HD)
Scales the classic 4:3
format to 16:9.
Wide
Stretches the classic 4:3
format to 16:9.
NOTE
When source input is PC mode, only Full screen and 4:3 •
are available.
For 4:3 PC input signal, picture format 4:3 and Wide •
screen are available.
For other input signals, only Wide screen is available.•
Change the time zone
Press 1. MENU / EXIT on your remote control and
select Features > Time.
Press 2. OK or ≥ to enter Time.
Select 3. Time zone and press ≤≥ to select your
time zone.
Follow the on-screen instructions to exit.4.
Set the clock
Press 1. MENU / EXIT on the remote control and
select Features ≥ Time.
Press 2. OK or ≥ to enter Time menu.
Press 3. <> to select Time and press OK or ≥
to enter.