17286
11
Zoom out
Zoom in
Vorherige Seite
1/80
Nächste Seite
9
Precaution: The paper cutter is mounted on the printer (receipt side). Take caution when
installing paper rolls.
The register can print receipts and journals. For the printer, you must install the paper rolls (receipt and journal
paper rolls) provided with the register.
Install the paper rolls according to the procedure shown below with the power cord connected and the mode
switch set to the PGM position:
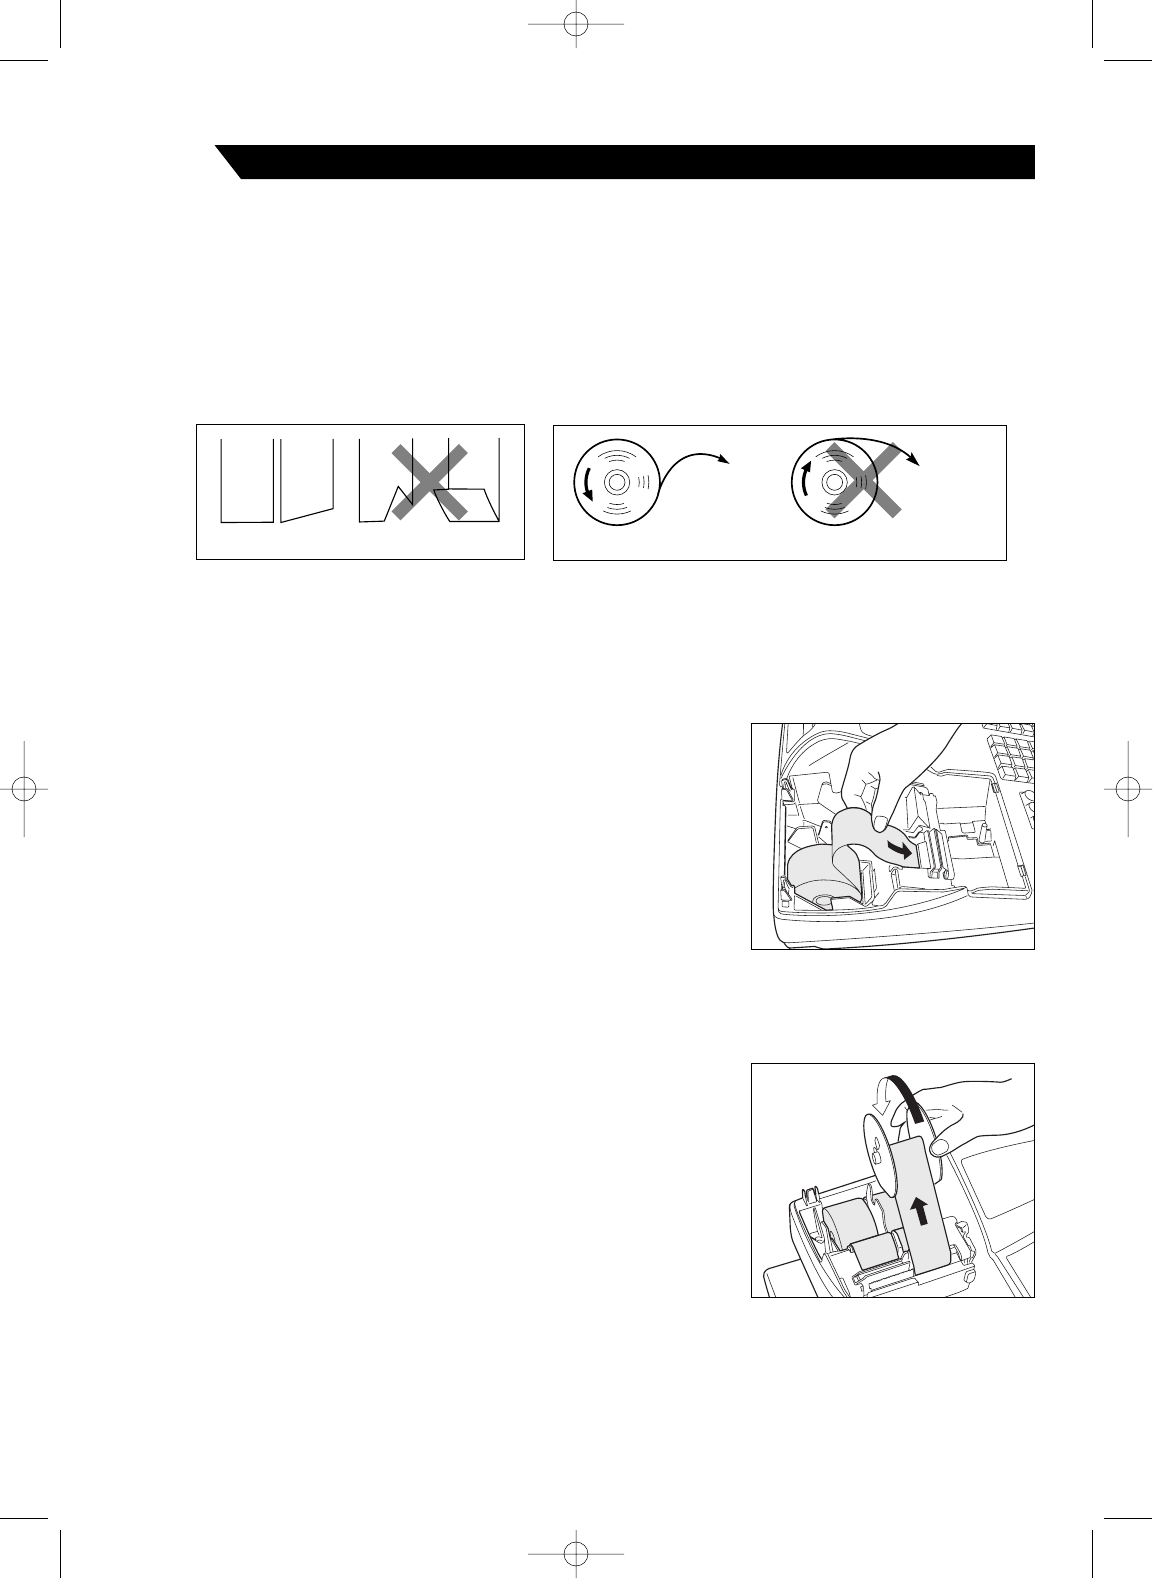
How to cut a paper roll and set it in the paper roll cradle:
1. Cut off approximately one revolution of each paper roll. Make sure each paper end is cut as illustrated
above.
2. Set a paper roll in the paper roll cradle of the receipt side as illustrated above.
3. Insert the end of the paper roll into the paper chute until it is caught by
the printer auto-feed and comes out of the top of the printer. If the
printer does not catch the paper, feed the paper while pressing the
{
key.
4. Cut off excess paper with the paper cutter.
5. Set a paper roll in the paper roll cradle of the journal side.
6. Insert the end of the paper into the paper chute of the printer until it is caught by the printer auto-feed and
comes out of the top of the printer. If the printer does not catch the paper, feed the paper while pressing the
}
key.
7. Insert the end of the paper into the slit in the take-up spool. (Press the
}
key to feed more paper if required.)
8. Wind the paper two or three turns around the spool shaft.
9. Set the spool on the bearing, and press the
}
key to take up excess
slack in the paper.
10.Replace the printer cover.
Correct Incorrect
To the printer
Incorrect
To the printer
Correct
Installing paper rolls
4
A301_1(En) 03.4.24 7:35 PM Page 9
11

Brauchen Sie Hilfe? Stellen Sie Ihre Frage.

Forenregeln

Missbrauch melden von Frage und/oder Antwort

Libble nimmt den Missbrauch seiner Dienste sehr ernst. Wir setzen uns dafür ein, derartige Missbrauchsfälle gemäß den Gesetzen Ihres Heimatlandes zu behandeln. Wenn Sie eine Meldung übermitteln, überprüfen wir Ihre Informationen und ergreifen entsprechende Maßnahmen. Wir melden uns nur dann wieder bei Ihnen, wenn wir weitere Einzelheiten wissen müssen oder weitere Informationen für Sie haben.

Art des Missbrauchs:

Zum Beispiel antisemitische Inhalte, rassistische Inhalte oder Material, das zu einer Gewalttat führen könnte.

Beispielsweise eine Kreditkartennummer, persönliche Identifikationsnummer oder unveröffentlichte Privatadresse. Beachten Sie, dass E-Mail-Adressen und der vollständige Name nicht als private Informationen angesehen werden.

Forenregeln

Um zu sinnvolle Fragen zu kommen halten Sie sich bitte an folgende Spielregeln:

Neu registrieren

Registrieren auf E - Mails für Sharp XEA301 wenn:


Sie erhalten eine E-Mail, um sich für eine oder beide Optionen anzumelden.


Andere Handbücher von Sharp XEA301

Sharp XEA301 Bedienungsanleitung - Deutsch - 384 seiten

Sharp XEA301 Bedienungsanleitung - Deutsch - 80 seiten

Sharp XEA301 Bedienungsanleitung - Englisch, Holländisch, Französisch - 384 seiten

Sharp XEA301 Bedienungsanleitung - Spanisch - 80 seiten


Das Handbuch wird per E-Mail gesendet. Überprüfen Sie ihre E-Mail.

Wenn Sie innerhalb von 15 Minuten keine E-Mail mit dem Handbuch erhalten haben, kann es sein, dass Sie eine falsche E-Mail-Adresse eingegeben haben oder dass Ihr ISP eine maximale Größe eingestellt hat, um E-Mails zu erhalten, die kleiner als die Größe des Handbuchs sind.

Ihre Frage wurde zu diesem Forum hinzugefügt

Möchten Sie eine E-Mail erhalten, wenn neue Antworten und Fragen veröffentlicht werden? Geben Sie bitte Ihre Email-Adresse ein.


Info