8. Pushing handles (Fig. 2)
CAUTION: Risk of falling - Firmly fix
the handles before use of the rollator.
CAUTION: Risk of falling - Do not
exceed the maximum adjustment,
your rollator will not be stable
anymore.
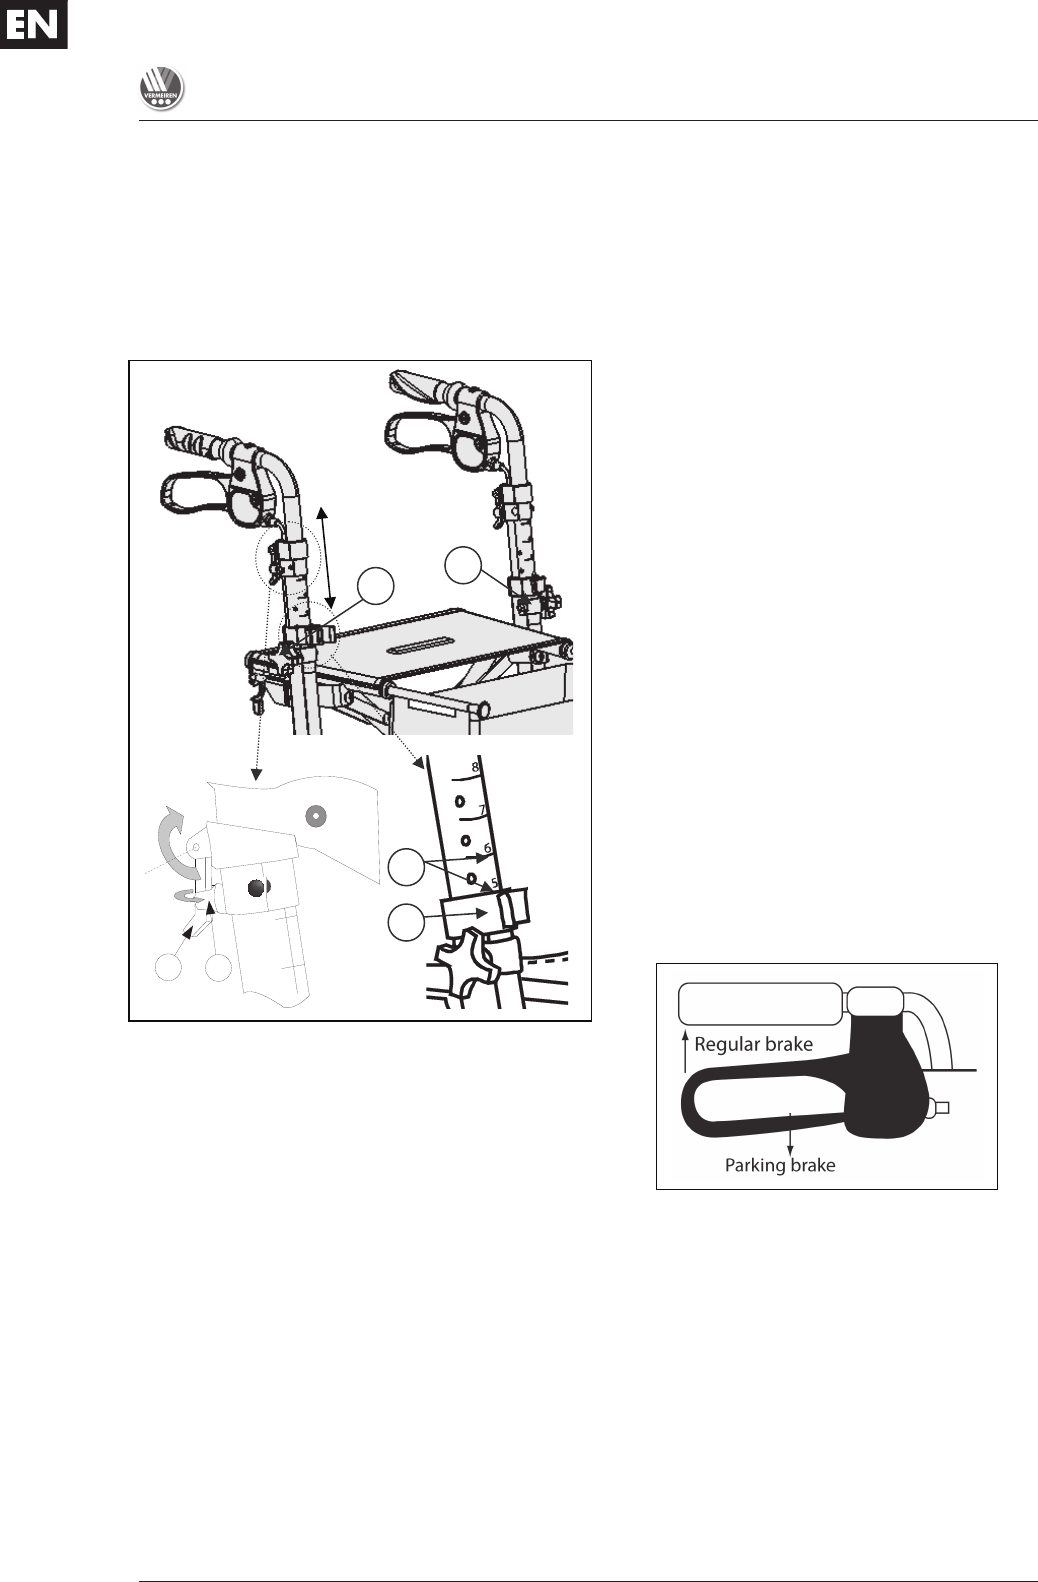
Fig. 2 – Adjustment pushing handle
The pushing handles can be adjusted in
height by following steps:
• Pull the lever c up.
• Turn the button (just below the lever c)
d to the outside of the frame.
• Remove the star knob e from the screw.
• Turn the clip f around the axle of the
pushing handle.
• Remove clip f.
• Adjust the handles to the desired
position. When standing straight, the
handles should be as high as your wrists.
Leave your arms hanging loose. The
minimum and maximum adjustments can
be seen on the marks on the inner tubes
which slide into the frame. Check that
the mark line g
gg
g is at the same position
with the outer tube h
hh
h where the
pushing handle slides into the frame.
Otherwise you could damage the
mechanism.
• Mount clip f in the hole of the frame.
• Turn the clip f around the axle of the
pushing handle until the hole comes over
the screw.
• Mount the star knob e to the screw.
• Turn the button d to the begin position
(to the inside).
• Push the lever c down, till the lever c is
mounted in button d.
9. Brake system (Fig. 3)
WARNING: Good operation of the
brakes is influenced by wear and
contamination of the wheels
(water, oil, mud, ...) - Check the
condition of the wheels before each
use.
WARNING: The brakes can wear -
Check the operation of the
brakes before each use.
The rollator has been equipped with a
multifunctional brake system. The brake
handles underneath the pushing handles are
regular brakes as well as parking brakes.
For the usage of a short brake (regular
brakes), pull the brake handle upwards
(toward the pushing handle).
For the usage of a long brake (parking brake),
push the brake handle downwards till you
hear a locking sound of the brake. The wheels
(use both parking brakes left and right
simultaneously) are now blocked until you pull
the parking brakes upwards again.
Fig. 3 – Pushing handle / brake
10. Basket
WARNING: Risk of falling, tipping over
- Do not overload the shopping
basket.
The shopping basket is meant to be mounted
on the front side. Mount the shopping basket
with the four clips to the two tubes.
The maximum carrying weight from the
shopping basket is 5 kg.
9
8
1
2
1
2