554953
47
Zoom out
Zoom in
Vorherige Seite
1/71
Nächste Seite
E-37
English
Recording disc(s) on both sides
of a tape automatically
* A Video-CD cannot be recorded by this method.
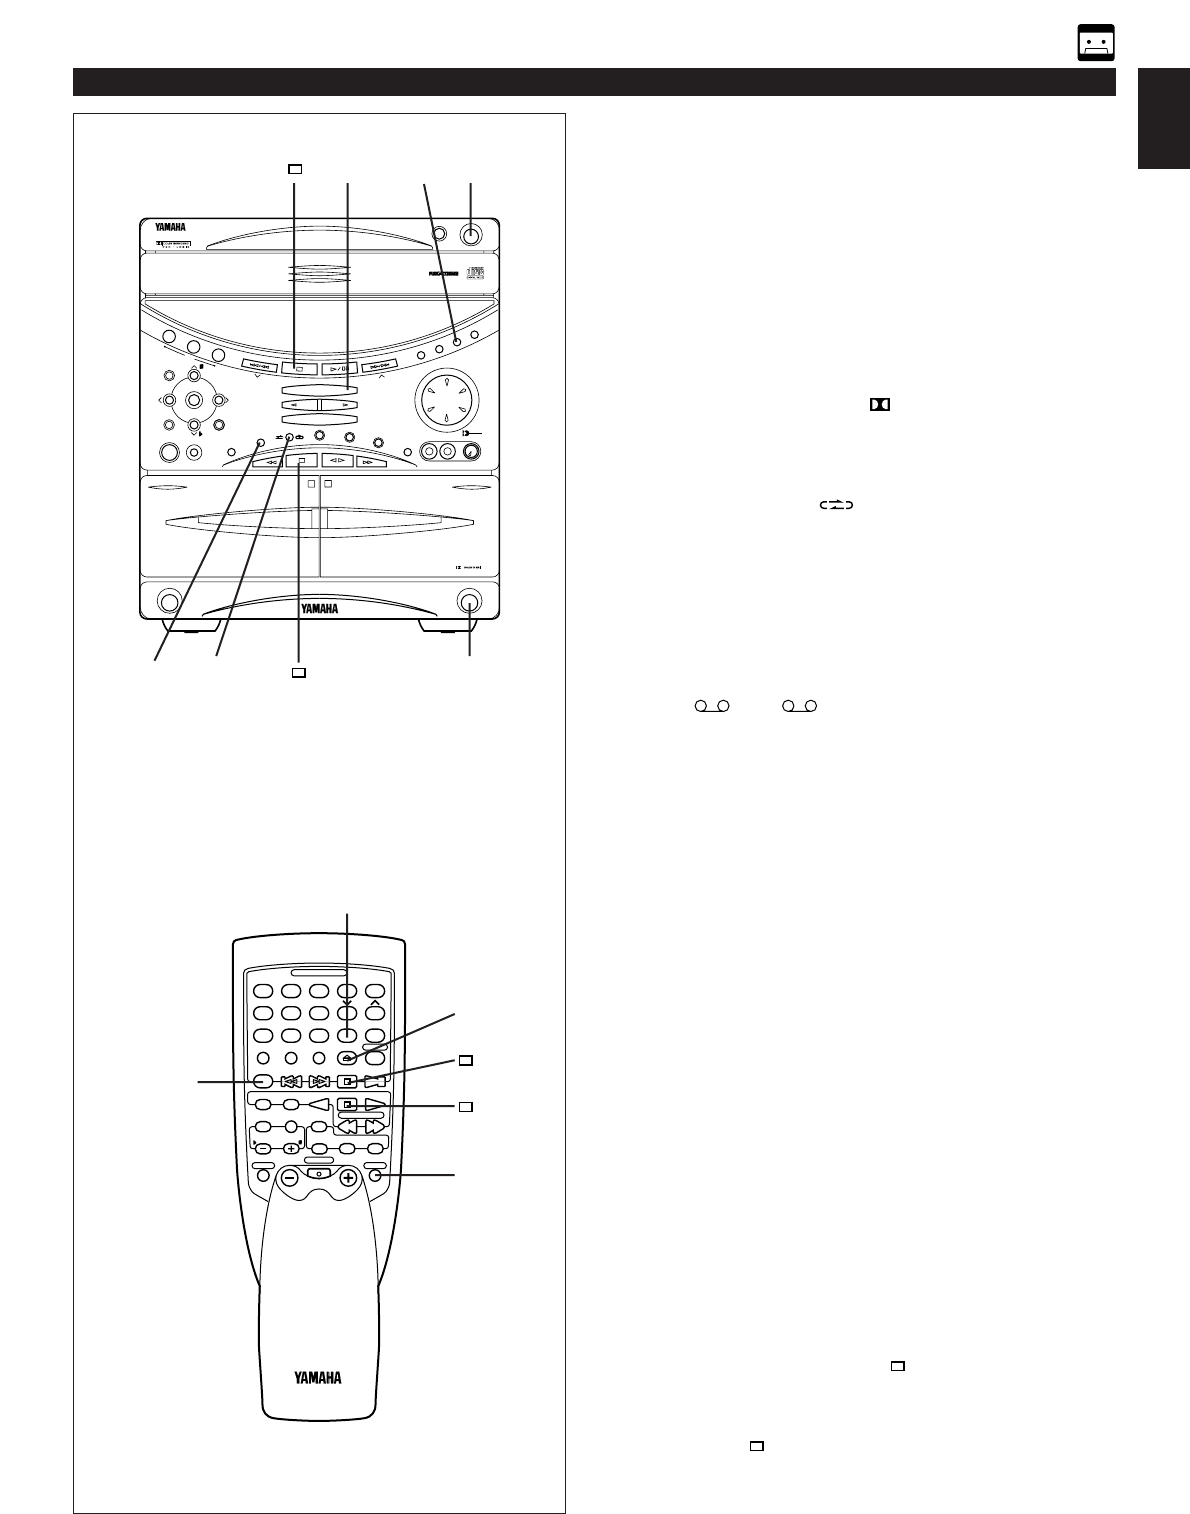
1 Press the CD input selector button and load the disc to be
recorded.
2 Select the disc by pressing the DISC SKIP button.
3 Load a tape into the deck 2 cassette compartment.
4 When recording with the Dolby NR system, press the
DOLBY NR button so that “ B” lights up on the display.
If not, turn it off.
* For details, refer to the “Dolby B Type Noise
Reduction” on page 31.
5 If the reverse mode “ ” is not selected, press the
reverse MODE selector button to select it.
6 Press the EDIT button. (“EDIT” appears on the display.)
disc playback and recording starts. Recording is carried
out on side A and B of the tape continuously.
* If the tape has not rewound to the end, it is rewound to
the end rapidly before recording starts.
Recording starts from the first part of the tape on which
recording can be done.
* A ” (or “ B”) on the display shows the side of
the tape on which recording is being carried out.
* When the recording on side A finishes while a track is
being played back, the sound is automatically faded
out, and then the recording stops.
The recording on side B starts from the beginning of
the same track.
Notes
When this Video-CD player is in the all disc play mode, if
the tape’s total possible recording time is longer than the
total playing time of the selected disc, tracks on another
disc are recorded continuously.
In this case, as many as three discs can be recorded
automatically.
During recording, the DISC CHANGE button on the Video-
CD player is disabled.
The Video-CD player’s repeat play mode will be canceled
during this recording mode.
Recording programmed tracks
Programmed tracks from one or more discs can also be
recorded in the same way.
11 Program desired tracks from one or more discs. (Refer to
page 21 for the programming procedure.)
22 Follow steps 3–6 described above.
To cancel this function
Before recording, press the stop button of the Video-CD
player or the tape deck.
To stop recording
Press the stop button of the tape deck.
(At this time, disc playback automatically stops.)
RECORDING CD/VIDEO-CD SOURCES
1
PLAYBACK
2
REC
/
PLAYBACK
EJECT
OPEN/CLOSE
DISC CHANGE
MINI COMPONENT SYSTEM
GX
90VCD
1
2
3
DISC
PROGRAM
USER
VOLUME
MEMORY
REC/PAUSE
MODE
HOUR MIN
NORMAL
DUBBING
HIGH
MEMORY
TIME ADJ
DOLBY NR
AUTO/MAN’L
TIMER
TIMER REC
MUSIC
POWER
PHONES
A/B/C/D/E
RANDOM
REPEAT
EDIT
DISPLAY
CD
INPUT INPUT
TAPE
1/2
EJECT
Active Servo
Technology
MIC MIXING
P
R
E
S
E
T
/
T
U
N
I
N
G
/
B
A
N
D
VIDEO CD
Version 2.0
/
Playback Control
ECHO ECHO
4 5 3
1 6 1
1
1
2
2
3
3
4
4
5
5
TIME
A
DISC SKIP
PROG
B
TAPE
C
EDIT
D
+I0
E
OPEN/CLOSE
INDEXMODE
6
6
7
7
8
8
9 0
CD
PRESET
TUNER
TAPE
RETURN
STOP PLAYPLAY
REC/ PAUSE TAPE 1/2
MUSIC
TEST FLAT
CENTER/REAR
/DELAY
PROGRAM
USER
POWER
INPUTSLEEP
VOLUME
REPEAT
PREV NEXT
SELECT
ECHO/KEY
LEVEL
6
1
1
2
47

Brauchen Sie Hilfe? Stellen Sie Ihre Frage.

Forenregeln

Missbrauch melden von Frage und/oder Antwort

Libble nimmt den Missbrauch seiner Dienste sehr ernst. Wir setzen uns dafür ein, derartige Missbrauchsfälle gemäß den Gesetzen Ihres Heimatlandes zu behandeln. Wenn Sie eine Meldung übermitteln, überprüfen wir Ihre Informationen und ergreifen entsprechende Maßnahmen. Wir melden uns nur dann wieder bei Ihnen, wenn wir weitere Einzelheiten wissen müssen oder weitere Informationen für Sie haben.

Art des Missbrauchs:

Zum Beispiel antisemitische Inhalte, rassistische Inhalte oder Material, das zu einer Gewalttat führen könnte.

Beispielsweise eine Kreditkartennummer, persönliche Identifikationsnummer oder unveröffentlichte Privatadresse. Beachten Sie, dass E-Mail-Adressen und der vollständige Name nicht als private Informationen angesehen werden.

Forenregeln

Um zu sinnvolle Fragen zu kommen halten Sie sich bitte an folgende Spielregeln:

Neu registrieren

Registrieren auf E - Mails für Yamaha GX-90VCD wenn:


Sie erhalten eine E-Mail, um sich für eine oder beide Optionen anzumelden.


Das Handbuch wird per E-Mail gesendet. Überprüfen Sie ihre E-Mail.

Wenn Sie innerhalb von 15 Minuten keine E-Mail mit dem Handbuch erhalten haben, kann es sein, dass Sie eine falsche E-Mail-Adresse eingegeben haben oder dass Ihr ISP eine maximale Größe eingestellt hat, um E-Mails zu erhalten, die kleiner als die Größe des Handbuchs sind.

Ihre Frage wurde zu diesem Forum hinzugefügt

Möchten Sie eine E-Mail erhalten, wenn neue Antworten und Fragen veröffentlicht werden? Geben Sie bitte Ihre Email-Adresse ein.


Info