Every celestial object can be exactly determined by these
coordinates.Using setting circles prerequisites an advanced observing
technique. If you use them for the first time, first point a bright star
(the guide star) with known coordinates and adjust the setting circles
to them. Now you can do a “star hop” to the next star with known
coorditates and compare the setting circles with them. By this way,
you will learn which precise handling is necessary for a successful
pointing.
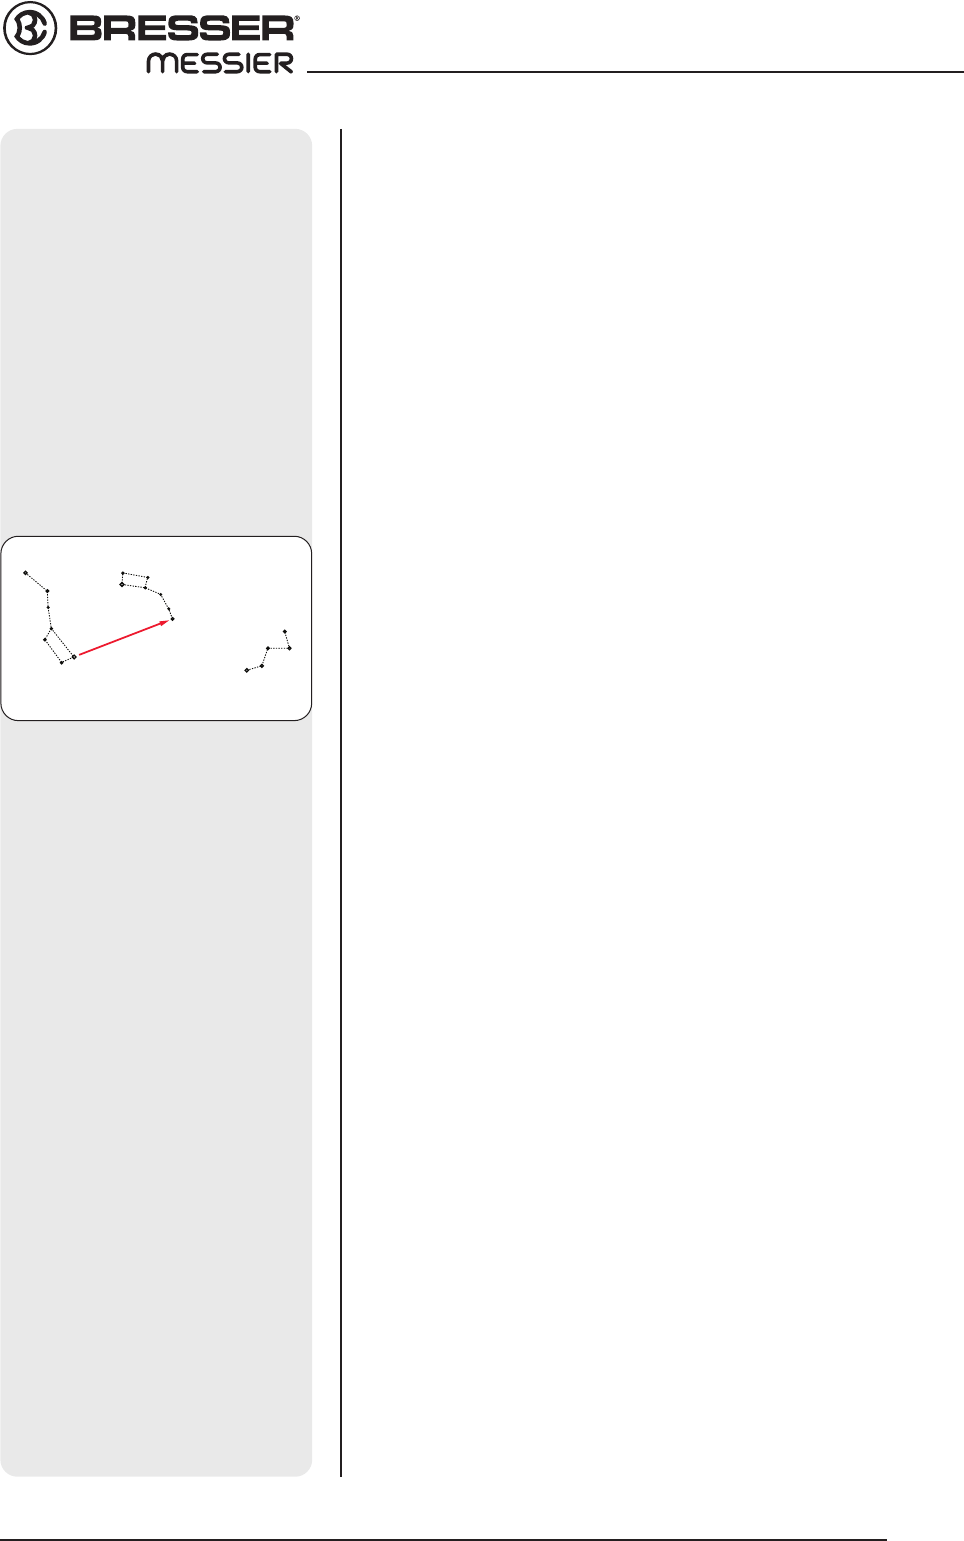
Locating the Celestial Pole
To get basic bearings at an observing location, take note of where the
Sun rises (East) and sets (West) each day. After the site is dark, face
North by pointing your left shoulder toward where the Sun set. To
precisely point at the pole, find the North Star (Polaris) by using the
Big Dipper as a guide (Fig. 35).
Note:
For nearly every purpose (except long-term astrophotography)
average settings of the mount’s azimuth and latitue are sufficient.
Therefore it is not necessary to spend too much time on perfekt
aligning the celestial pole!
Setting Circles
Setting circles included with the Messier-Series models permit the
location of faint celestial objects not easily found by direct visual
observation. With the telescope pointed at the North Celestial Pole,
the Dec. circle (19, Fig. 1d) should read 90° (understood to mean
+90°). Each division of the Dec. circle represents a 1° increment. The
R.A. circle (31, Fig. 1d) runs from 0hr to (but not including) 24hr, and
reads in increments of 5min.
Using setting circles requires a developed technique. When using the
circles for the first time, try hopping from one bright star (the
calibration star) to another bright star of known coordinates. Practice
moving the telescope from one easy-to-find object to another. In this
way, the precision required for accurate object location becomes
evident.
To use the setting circles to locate an object not
easily found by direct visual observation:
Insert a low-power eyepiece, such as a 25mm, into the focuser
assembly. Pick out a bright star with which you are familiar (or is
easily located) that is in the area of the sky in which your target
object is located. Look up the R.A. coordinate of the bright star, and
also of the object you wish to locate, in a star atlas. Point the object
at the bright star. Then loosen the R.A. setting circle lock knob (32,
Fig. 1d) and turn the R.A. setting circle to read the correct R.A.
coordinate of the bright star; lock the R.A. setting circle lock knob
onto the object. Next, loosen the R.A. lock (33, Fig. 1d) and turn the
telescope in R.A. to read the correct R.A. coordinate of the object.
Tighten the R.A. lock (33, Fig. 1d). If the procedure has been followed
carefully, the desired object should now be in the telescopic field of a
low-power eyepiece.
If you do not immediately see the object you are seeking, try
searching the adjacent sky area. Keep in mind that, with the 25mm
eyepiece, the field of view of the Messier series is about 0.5°.
Because of its much wider field, the viewfinder may be of significant
Looking at or near the Sun will cause instant and irreversible damage to your eye!
23
APPENDIX A: CELESTIAL COORDINATES
Abb. 34: Locating Polaris