75
Advanced Setup – Part 1 Advanced Setup – Part 1
ENGLISH
ENGLISH
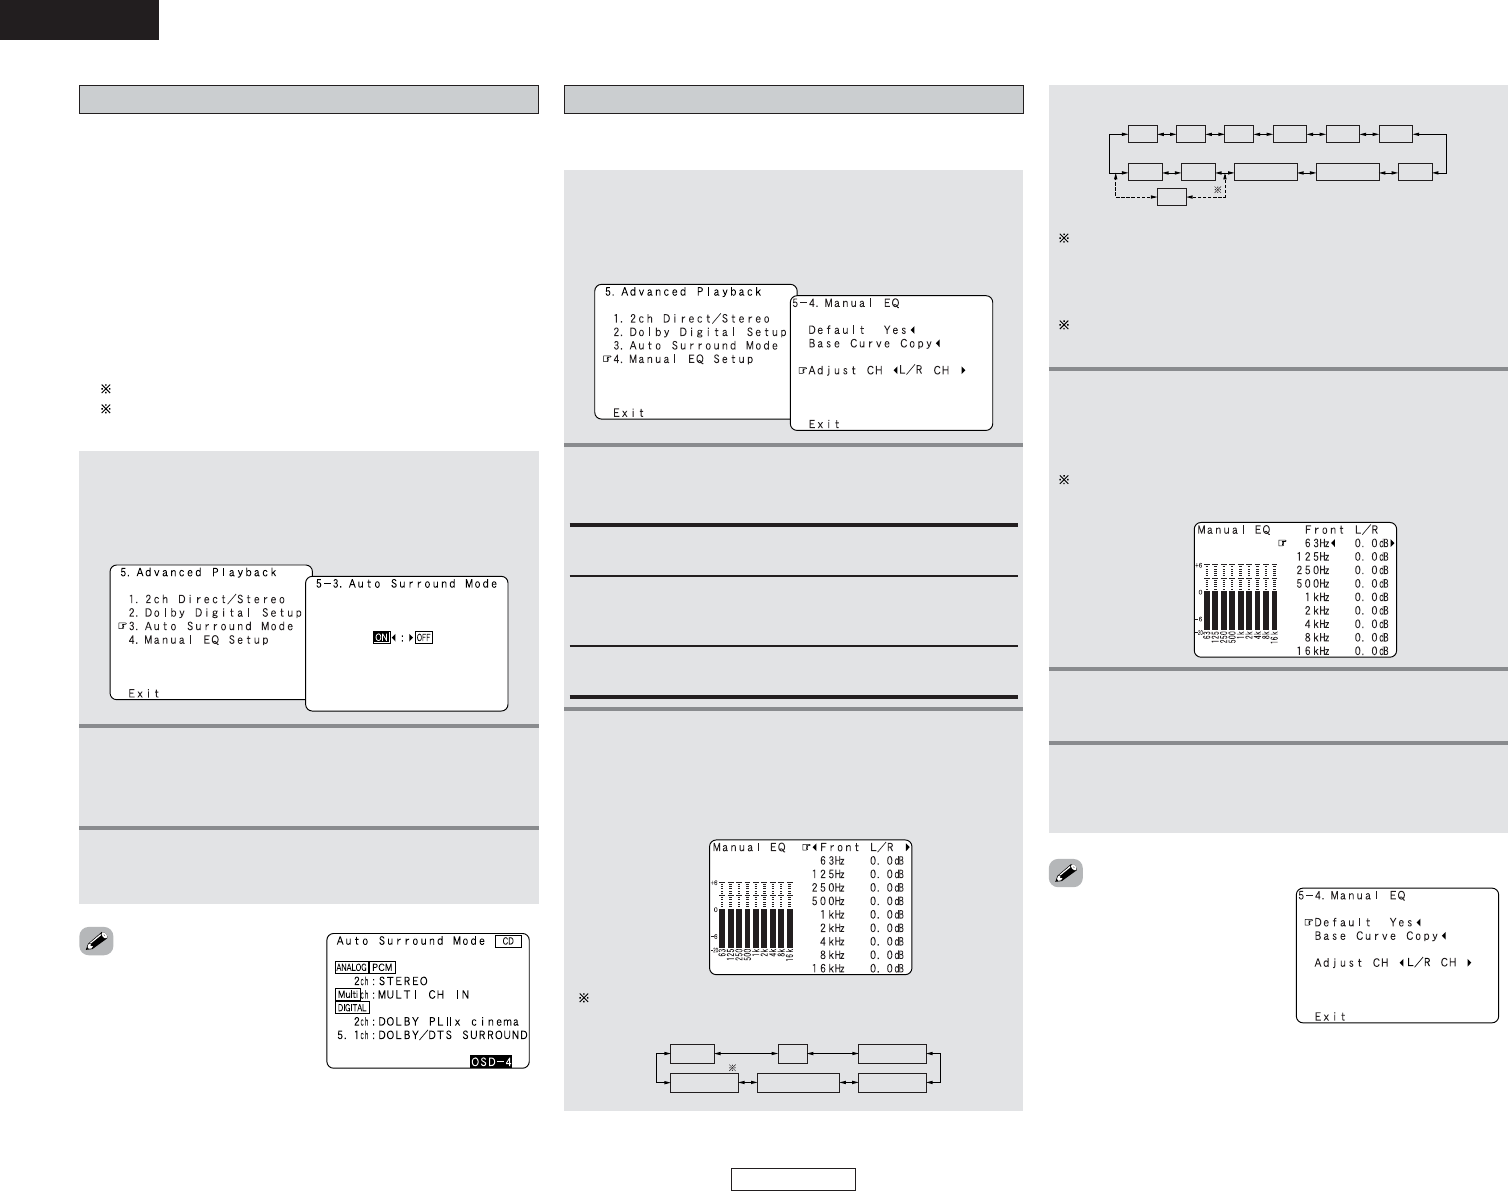
Setting the Auto Surround Mode
The surround mode used at last for the four types of input signals
shown below is stored in the memory, and the signal is
automatically played with that surround mode the next time it is
input.
Note that the surround mode setting is also stored separately for
the different input sources.
q Analog and PCM 2-channel signals (STEREO)
w 2-channel signals of Dolby Digital, DTS or other multi-
channel format (DOLBY PLIIx Cinema)
e Multi-channel signals of Dolby Digital, DTS or other multi-
channel format (DOLBY/DTS SURROUND)
r PCM and DSD multi-channel signals other than Dolby
Digital and DTS (MULTI CH IN)
Default settings are indicated in ( ).
During playback in the PURE DIRECT mode, the surround
mode does not change even if the input signal is changed.
Setting the Manual EQ Setup
Allows you to adjust the tonal quality of the various speakers
(except the subwoofer) while listening to a music source.
1
Press the CURSOR
DD
or
HH
button to select
“Manual EQ Setup” at the “Advanced
Playback” menu, then press the ENTER button.
• The “Manual EQ” screen appears.
2
Press the CURSOR
FF
or
GG
button to select the
adjustment mode, then press the ENTER button.
All CH:
All channels can be adjusted simultaneously.
L/R CH:
The left and right channels of the pair of speakers can be
adjusted simultaneously.
Each CH:
The channels can be adjusted separately.
1
Press the CURSOR
DD
or
HH
button to select “Auto
Surround Mode” at the “Advanced Playback”
menu, then press the ENTER button.
• The “Auto Surround Mode” screen appears.
2
Press the CURSOR
FF
or
GG
button to select “ON”
if you want to use the auto surround mode,
“OFF” if you do not want to use it.
3
Press the ENTER button to enter the setting.
• The “Advanced Playback” menu reappears.
• The various settings applied in
the auto surround mode can be
checked via the on screen
display. Simply press the ON
SCREEN button.
3
Press the CURSOR
FF
or
GG
button to select the
speaker to be set.
• The screen switches to the character input screen.
Example: When “L/R CH” is selected.
The display changes as follows.
When the surround back speaker setting is set to “1spkr” at
“Speaker Configuration”, this is set to “SB”.
e Select “All CH”
In this case, speaker selection is not performed.
If a value is already set for the FL channel, the data stored
for the FL channel is displayed.
q Select “L/R CH”
w Select “Each CH”
4
Press the CURSOR
DD
or
HH
button to select the
frequency, then press the CURSOR
FF
or
GG
button to adjust the gain level.
Each frequency can be adjusted the range from –20 dB to
+6 dB in 0.5 dB step.
5
Press the ENTER button to enter the setting.
• The “Manual EQ” screen reappears.
6
Press the CURSOR
DD
or
HH
button to select
“Exit”, then press the ENTER button.
• The “Advanced Playback” menu reappears.
• “Base Curve Copy” is
displayed after performing the
Auto Setup.
•To restore the settings to their
defaults, select “Default Yes
0”, then press the CURSOR
FF
button.