19
11.8 Cutting round timber
Fig. 19
Fig. 20
Use a suitable wedge to prevent round
timber from turning under the pressure of
the cut.
Auxiliary wedge supports
Wedge supports should be used when
cutting round timber. Position and secure
steel tips so that round timbers of varying
diameters can be held by the tips.
Auxiliary round timber holder
When round timber cutting is carried out
frequently, a suitable holder corresponding
to the current workpiece dimensions should
be used.
12 Bandsawing
accessories
12.1 Fine-cutting equipment
Small radii can be cut with the fine-cutting
equipment (smallest radius 5 mm).
Parts supplied
Upper (51) and lower (52) saw blade
guides.
Accessory equipment required
Bandsaw blade, 3 mm wide
Fitting
Remove the wide bandsaw blade.
Remove the upper guide unit and replace
with the upper saw blade guide (51) from
the fine-cutting equipment. Mount the back
guide roller (12) with its axis to prevent
distortion.
Change the lower guide unit in the same
way.
Fit the bandsaw blade (3 mm). Adjust the
blade to run in the middle of the pulleys.
Set the upper and lower saw blade guides
to the back of the saw blade and secure in
position.
Feeding the workpiece
Feed the workpiece in slowly because of the
blade’s narrow toothing.
Observe the safety recom-
mendation for bandsawing.
When cutting small radii, the bandsaw blade
must not be caused to twist. It must be
allowed to cut itself free.
Avoid unnecessary retracing. Take care that
the blade is not pulled out of the groove in
the roller if retracing is required.
12.2 Circle-cutting
equipment
Technical specifications:
Max. workpiece thickness . . . . . . . 160 mm
Max. workpiece diameter . . Ø ca. 400 mm
Parts supplied
The circle-cutting equipment consists of an
arm (62), centring pin (63) and two knurled
screws (61).
Function
The workpiece rotates around the centring
pin (63) and the circle is cut. For cutting a
cone, set the bandsaw table at an angle.
Mounting
Push the arm (62) into the blade guard and
secure in position with the knurled screw
(61).
Adjusting
Lower the blade guard onto the workpiece.
Push the arm (62) into the blade guard until
the desired workpiece radius is reached.
The centre of rotation should be at approxi-
mately the height of the middle of the blade
or slightly in front of it. This setting is
achieved by twisting the bent centring pin
(63)
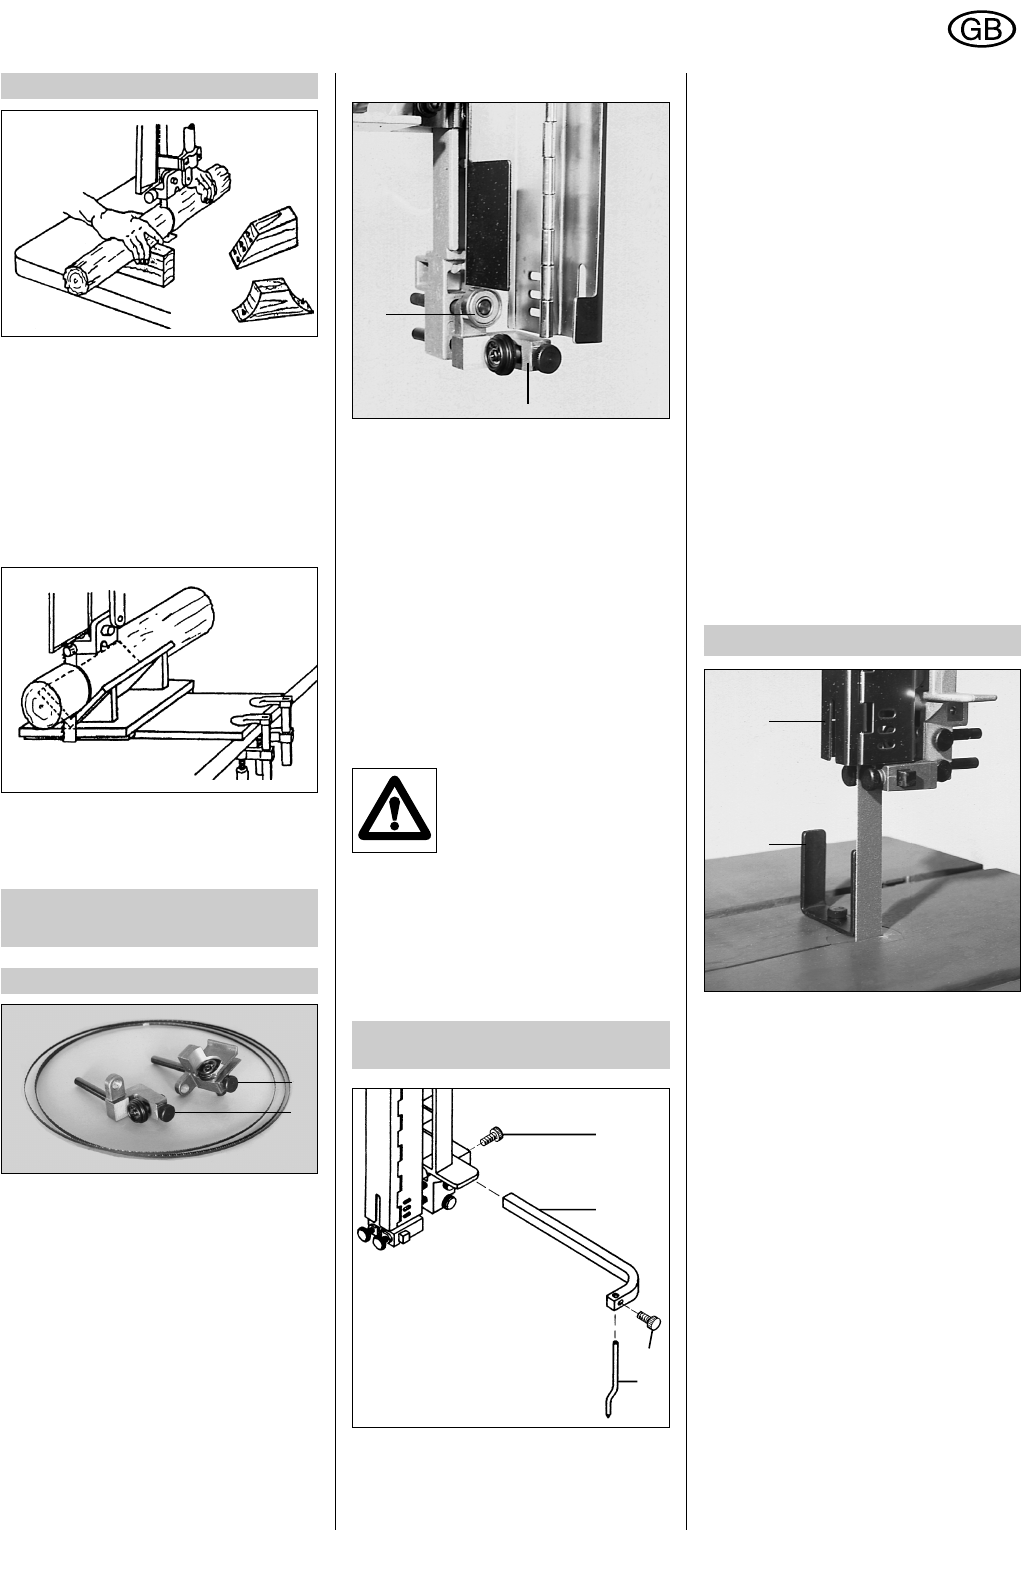
13 Belt sanding
Accessory equipment required
Sanding belt (20 mm wide)
The sanding block (28) with its hexagon-
head screw and washer are supplied as
standard parts of the machine equipment.
Fitting
A sanding belt can be fitted in place of the
bandsaw blade.
Tighten the belt only lightly.
Secure the back guide roller and guide pins,
so that they do not touch the belt.
Lower the blade guard (11) as far as possi-
ble.
Depending on whether straight or curved
surfaces are to be sanded, the straight or
curved side of the sanding block (28) should
be secured in position to provide support
behind the sanding belt.
52
51
Fig. 21
Fig. 22
12
51
Fig. 23
61
62
63
61
Fig. 24
28
11
ENGLISH