22 11
THE INFORMATION MODE/DEMO MODE
The console features an information mode that keeps
track of the total number of hours that the treadmill has
been operated and the total number of miles that the
walking belt has moved. The information mode also
allows you to switch the console from miles per hour to
kilometres per hour. In addition, the information mode
allows you to turn on and turn off the demo mode.
To select the information mode, hold down the Stop
button whilst inserting the key into the console. When
the information mode is selected, the following informa-
tion will be shown:
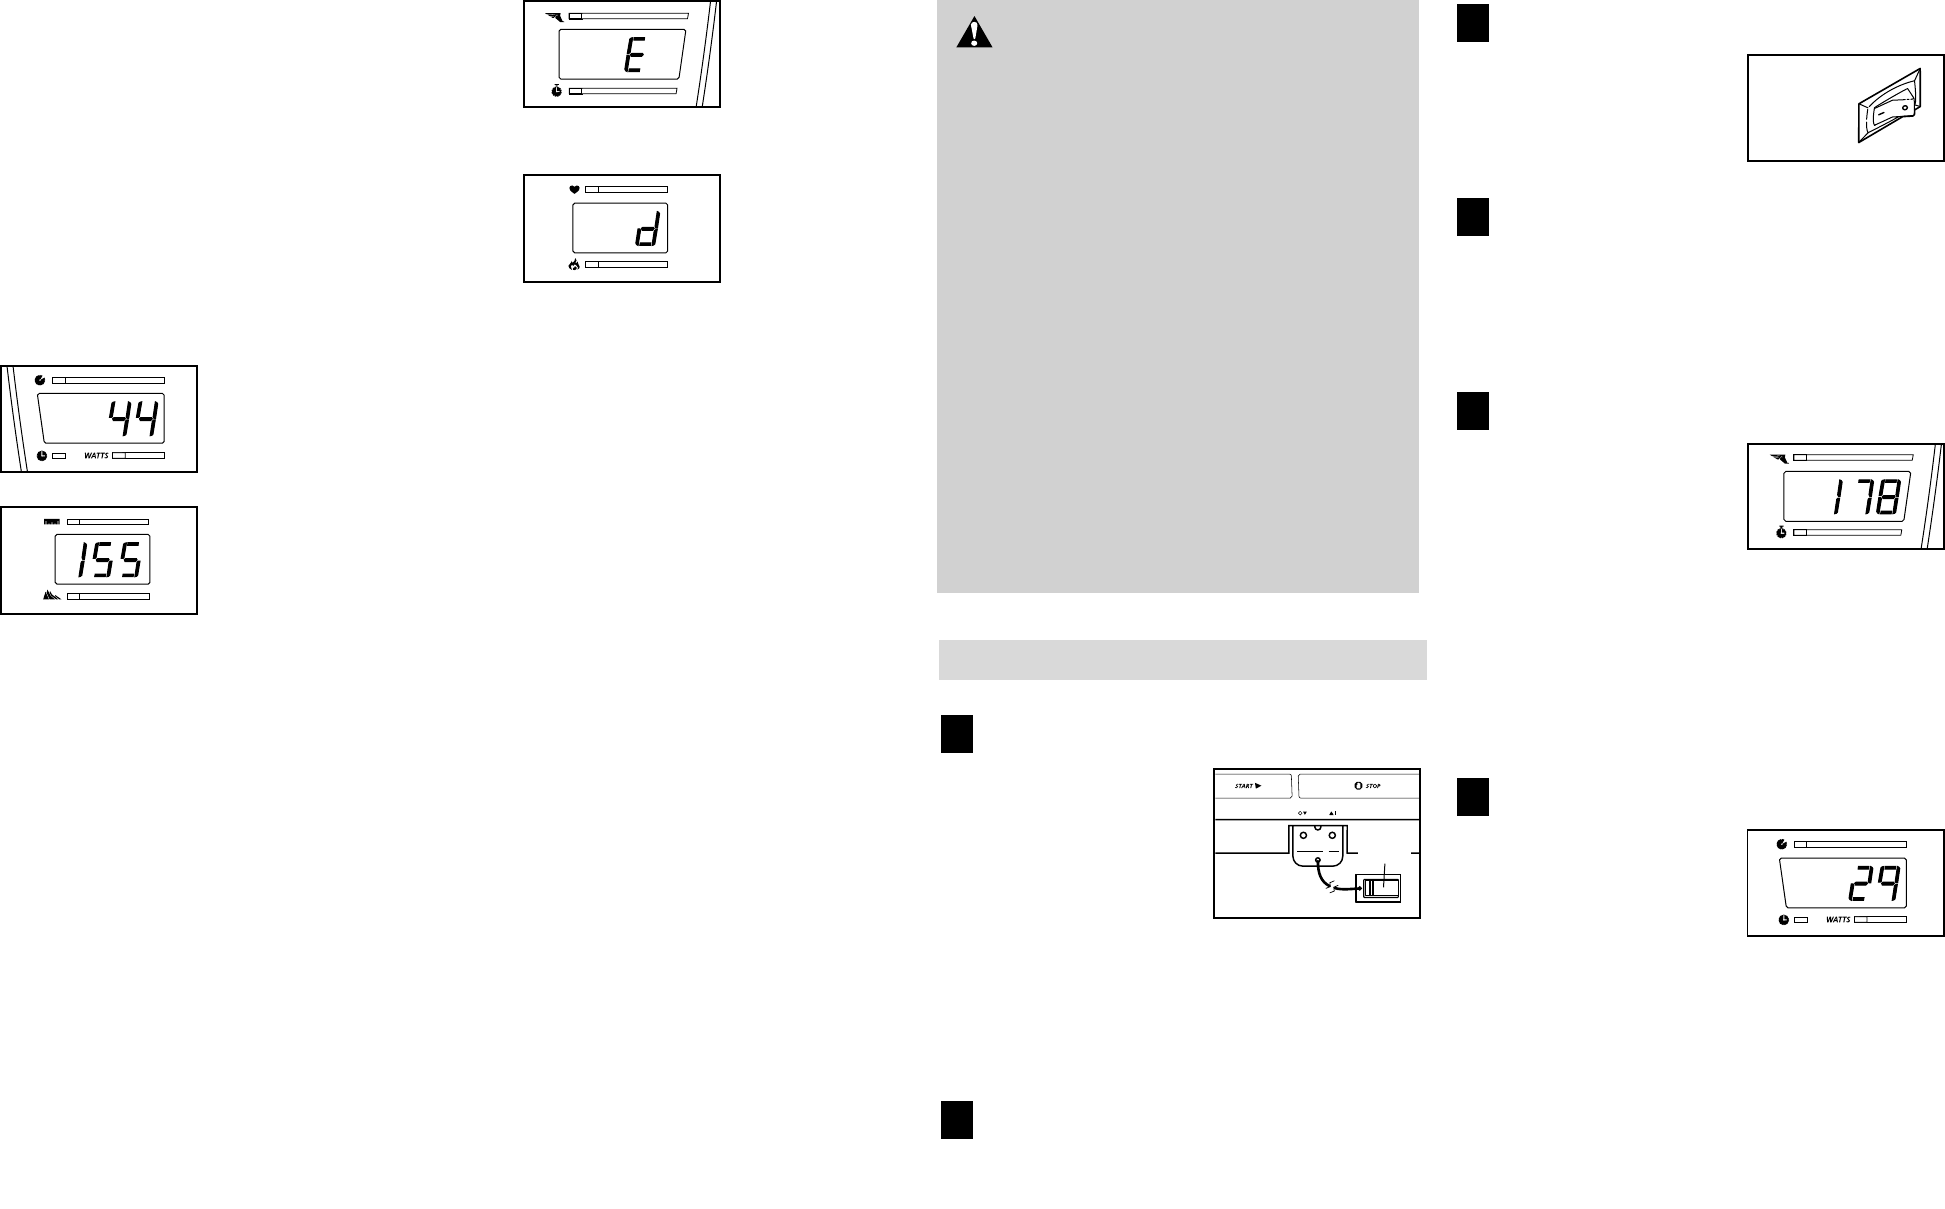
The Time/Watts display will
show the total number of
hours that the treadmill has
been used.
The Distance/Incline
display will show the total
number of miles that the
walking belt has moved.
An E, for English miles, or an
M, for metric kilometres, will
appear in the Speed/ Pace
display. Press the Speed +
button to change the unit of
measurement.
IMPORTANT: The Heart
Rate/Calories display
should be blank. If a “d” ap-
pears in the display, the con-
sole is in the “demo” mode.
This mode is intended to be
used only when a treadmill is displayed in a store.
When the console is in the demo mode, the power cord
can be plugged in, the key can be removed from the
console, and the displays and indicators on the console
will automatically light in a preset sequence, although
the buttons on the console will not operate. If a “d” ap-
pears in the Heart Rate/Calories display when the
information mode is selected, press the Speed –
button so the Heart display is blank.
To exit the information mode, remove the key from the
console.
GETTING STARTED
Attach the clip to the waistband of your clothes.
Stand on the foot pads
of the treadmill. Find
the clip attached to the
key and slide the clip
onto the waistband of
your clothes. Next, in-
sert the key into the
console. Test the clip
by carefully taking a few steps backward until
the key is pulled from the console. If the key is
not pulled from the console, adjust the posi-
tion of the clip as needed. Then, remove the key
from the console.
Plug in the power cord.
See HOW TO PLUG IN THE POWER CORD on
page 9.
Move the on/off switch to the on position.
Locate the on/off switch
on the treadmill near the
power cord. Move the
on/off switch to the on
position.
Insert the key fully into the console.
Stand on the foot pads of the treadmill. Make sure
that the clip is securely attached to the waistband
of your clothes. Next, insert the key into the con-
sole. After a moment, various displays and indica-
tors on the console will light.
Enter your weight.
Although you can use
the console without
entering your weight, the
console will display your
calorie expenditure more
accurately if you enter
your weight. To enter your weight, press either of
the Weight (WT.) buttons. The current weight set-
ting will appear in the Speed/Pace display. Press
the Weight buttons again to enter your weight. A
few seconds after the buttons are pressed, the
weight setting will disappear from the display.
Your weight will then be saved in memory.
Enter your age, if necessary.
Although you can use
the console without en-
tering your age, some
features on our Web site
may require you to enter
your age (see page 21).
To enter your age, press either of the AGE but-
tons. The current age setting will appear in the
Time/Watts display. Press the AGE buttons again
to enter your age. A few seconds after the buttons
are pressed, the age setting will disappear from the
display. Your age will then be saved in memory.
6
5
4
3
2
1
CAUTION:Before operating the
console, read the following precautions.
• Do not stand on the walking belt when turn-
ing on the power.
• Always wear the clip (see the drawing below)
whilst operating the treadmill.
• Adjust the speed in small increments to
avoid sudden jumps in speed.
• The pulse sensor is not a medical device.
Various factors, including the user’s move-
ment, may affect the accuracy of heart rate
readings. The pulse sensor is intended only
as an exercise aid in determining heart rate
trends in general.
• To reduce the possibility of electric shock,
keep the console dry. Avoid spilling liquids
on the console and place only a sealed water
bottle in the water bottle holder.
On
Position
Clip