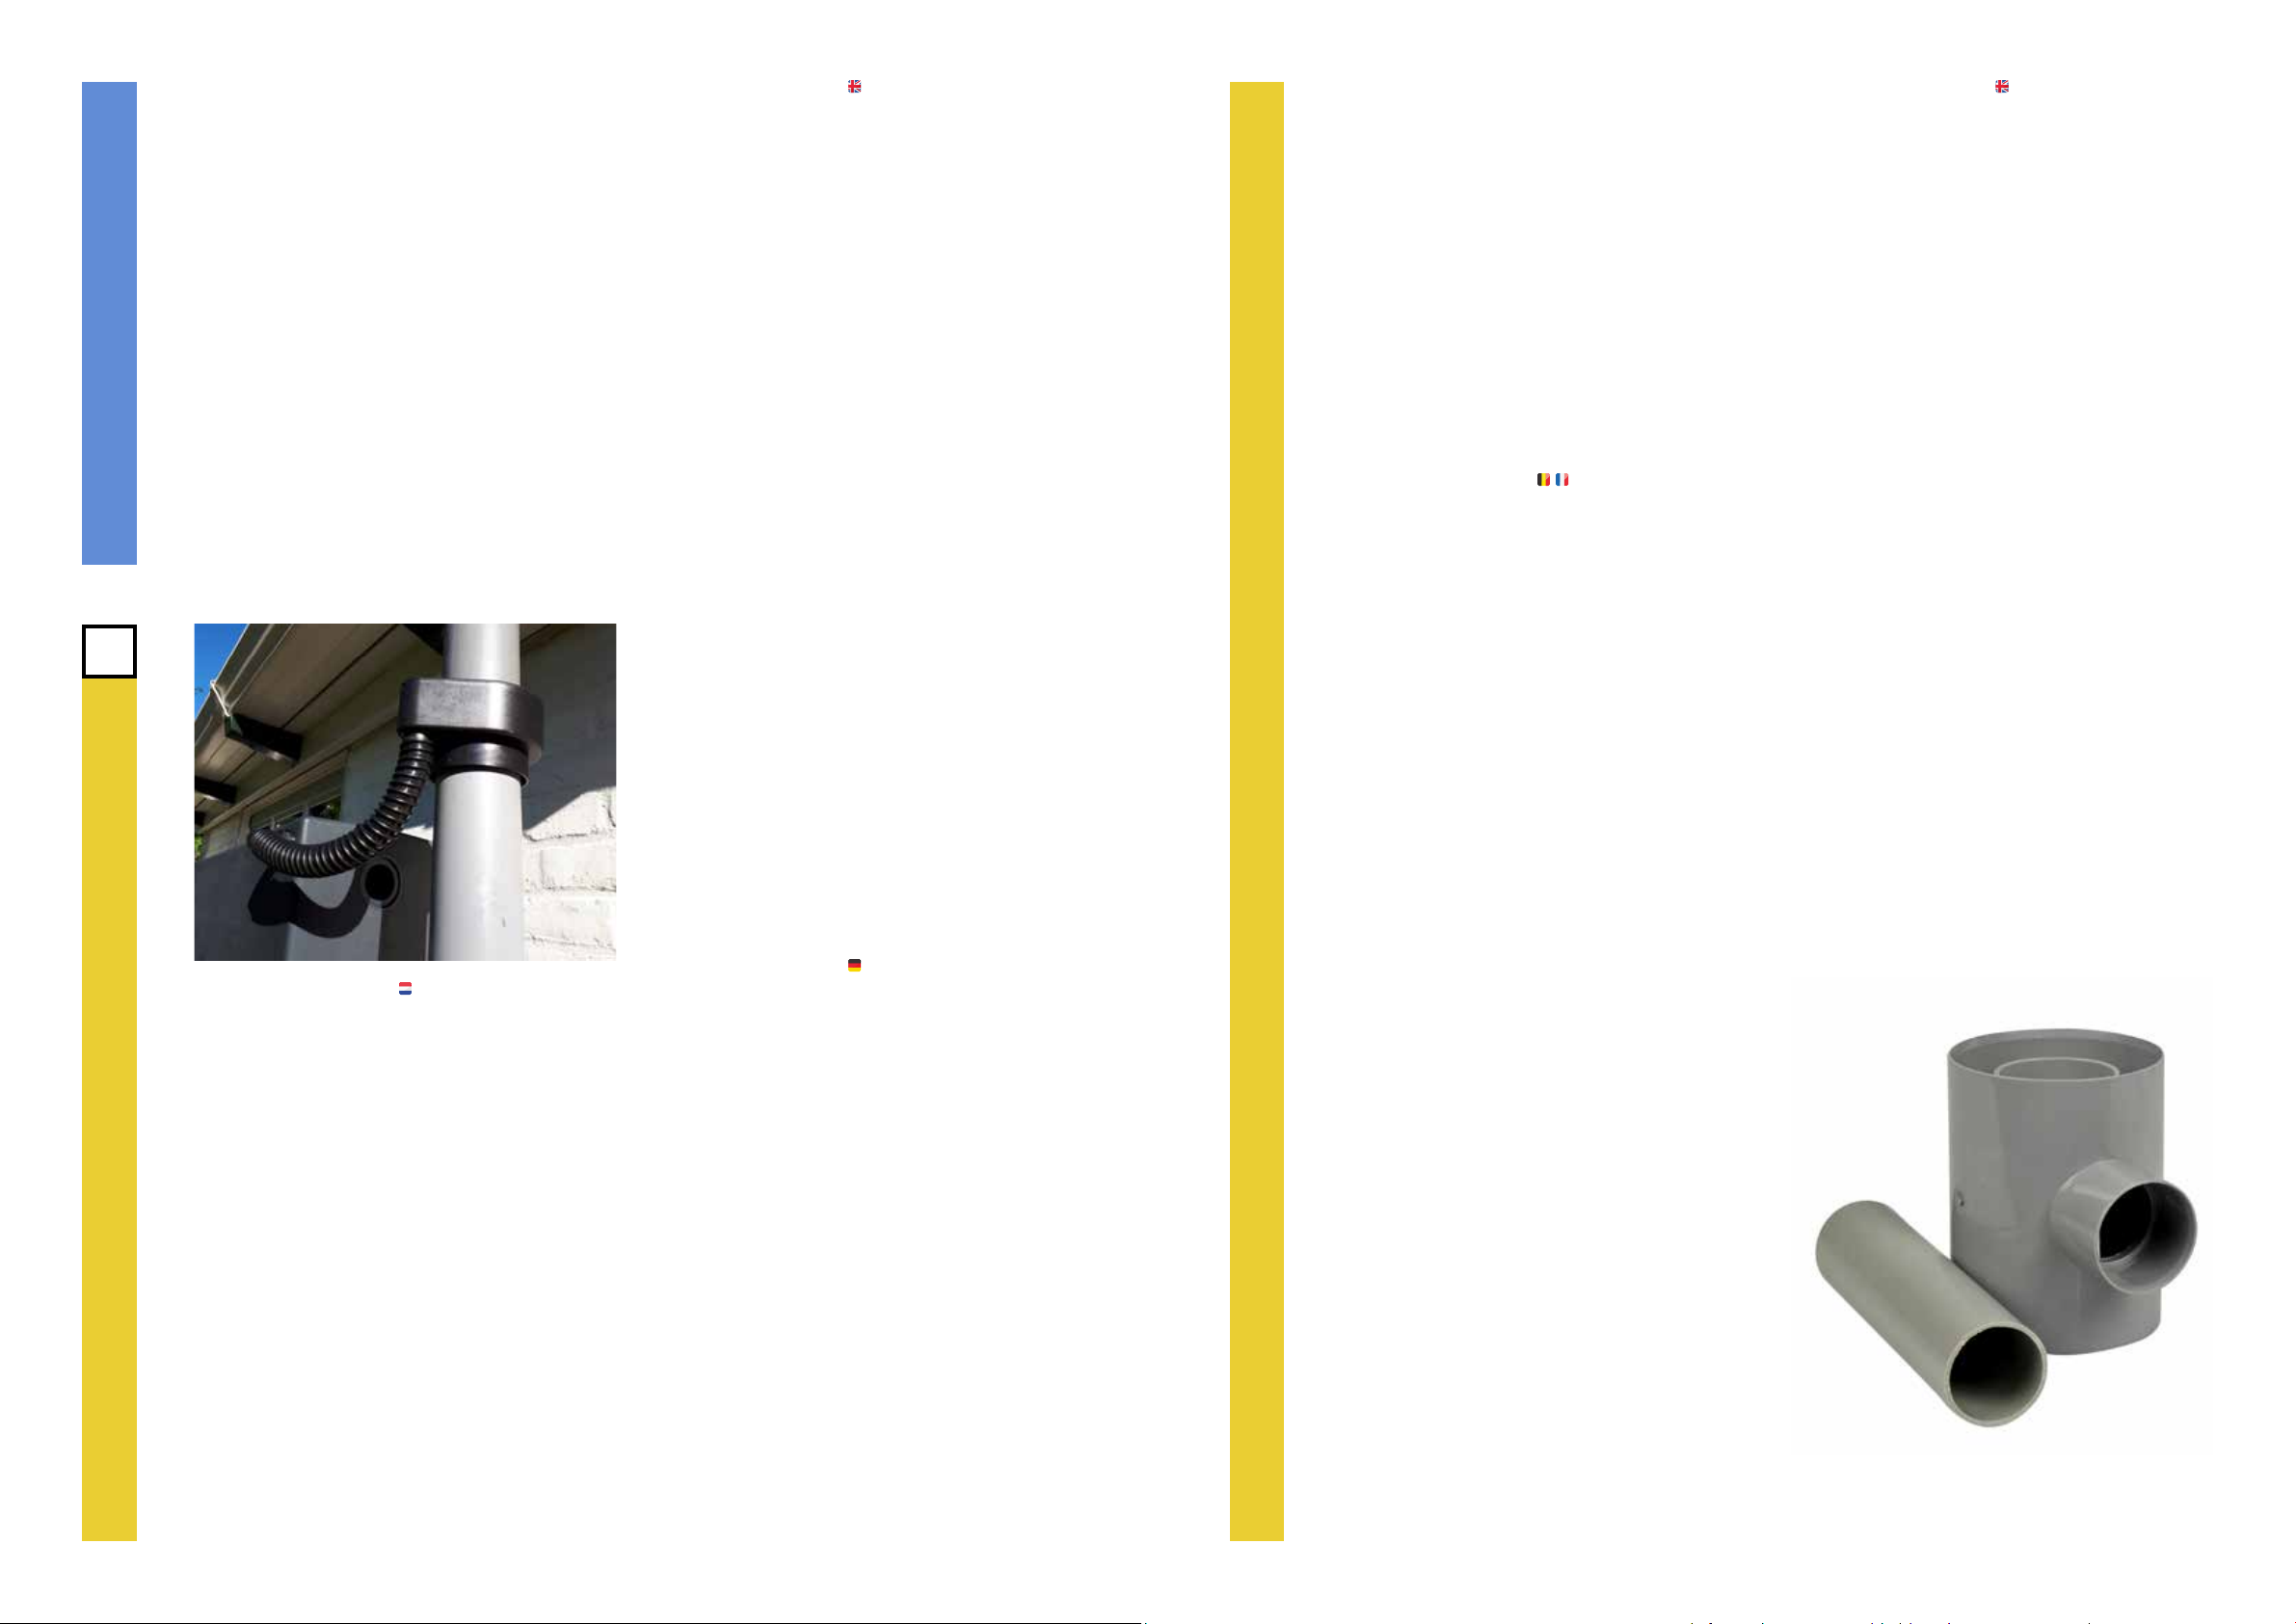
7 . Aanslui ten van de regenwateraanv oer
Het aans luiten van de re genwatera anvoer kan op
twe e manier en:
a) Via een regentonvulautomaat . Zwar te uitvoering
• U zaagt de reg enpijp do or op de h oo gte van het
aansluitgat aan de vo or zijde v an het bo vens te
Rainbl ock ® elem ent (zie foto).
• U plaats t d e regentonvulautom aat zoals
be sc hreven in de g ebruik s aanwijzing / handlei ding
(zie verpakking ).
• U maakt e en do or vo er (b oor 2 0 mm) in het schroef-
gat. L et op: de s chroefdr aad niet b es chadigen !
• Met het mee gel everde kopp els tuk en exib ele bui s
sluit u de v ulautomaat aan op h et Rainblo ck®
element.
b) Vi a de aan sl uiti nge n op he t Rain blo ck® e lem ent
met een Grijze uitvoeri ng
In het bov ens te Rainblo ck® ele ment kunt u aan
de bo vens te zijkant een do or vo er met d e houtb oo r
d= 28 maken. O ok kunt u eventue el de aan sluiting
maken in een v an de bo vens te gaten van de R ain-
blo ck®. Houdt rekening met d e hoo gte,
de aanvoe r buis mo et horizontaal naar d e Rainblo ck®
lop en om de we rking niet te verliezen. ( zie hie r voo r
de gebru iksaanwijz ing van de regent onvulaut omaat )
U plaat s t de me eg eleverde rub beren afdic hting in
de uit sp aring van de d oor voer. V er volge ns sluit u hie r
een PE /PP bui s d=32mm op aan , welke u aansluit
op de v ulautomaat . U heef t hier e en verlo op 4 0/ 3 2
en een b uis( j e) d=32 mm voor no dig welke niet i s
mee geleverd.
Dringend advies : plaats boven in de hemelwateraf-
voerp ijp een bl adv anger o m blad te weren uit h et
systeem.
7 . Anschlus s der Regen wasser versorgung
Der Ans chluss der Regenwas ser ver sorgung kan n auf
zwei Ar ten er folgen:
a) Über einen Regentonnenfüllautomat en.
Schwarze Version
• Sie säge n das Fallrohr in Höhe des A ns chlus sl ochs
an der V orderseite des oberen Ra inblock® E lements
durch (siehe Foto).
• Sie montieren e inen Regentonnenfül lautoma t wie
in der Bedienungsanleitu ng/Gebrauchsanweisung
bes chrieben (siehe V erpackung) .
• Sie machen eine n Durchgang (2 0 mm Bohren) in
das S chraube nloch . Bit te be achten Sie: Be s chädigen
Sie nicht das G ewinde !
• V erbinden Sie den Regenton nenfüllaut omat mit
dem Rainbl ock® Ele ment mit Hilfe d er mitgeliefer ten
Kupplung und des exiblen S chlauch es .
b) Übe r die A ns chl üs se zum R ainb lo ck® E leme nt
in grauer Ausführung
Im obe ren Rainblo ck® Element könne n Sie mit dem
Holzb ohrer d= 28 auf der S eite ein Lo ch her s tellen.
Al s Alternativ könn en Sie die Verbindung in einem
7
dans le trou d e racco rdement sup érieur de l ’un des
deux él ément s inférieur s Rainblo ck®. Placez ensui te
le troisi ème élé ment au- de s sus de l ’un des d eux
éléme nts infé rieurs . Puis v is sez l e troisiè me élém ent
sur le p oteau (voir 5). Placez en suite le quatrième
éléme nt de la mêm e manière. Le s deux él ément s
supéri eurs ne s ont pa s racco rdés de s deux c ôtés mais
l ’un à l ’aut re .
A T TENTION: V eill ez à ce que le s joint s en cao utchouc
soie nt bien pla cés dan s le s éléme nts R ainblock ®, à
ce que le tube n e dépa ss e pa s trop dans l ’ élém ent
Rainblo ck® et ajoutez éventuell ement un lubriant
uniquement sur l e caou tchouc sup érieur, an qu’il
glis se f acil ement dans l e trou de l'él ément Rainblo ck®
supéri eur . Vériez le s rac cordement s p our évi ter les
fuites e ntre les élé ment s . T rav aillez prude mment .
6 . Positioning the third and fourth element
Now create a pas s age wi th the d=28 mm woo d drill
bit for t he water conn ec tion at the b ot tom of the third
eleme nt (see al so 4). Th e top of the Rainblo ck el e-
ment s have already b een tte d with a drill hol e. Po si-
tion the co nnec ting tube w ith the t wo rubb er ga sket s
in the top conne c ting hol e of one of th e bot tom t wo
Rainblo ck® ele ment s . The n po sitio n the third ele -
ment on top of the b ot tom t wo elem ents . N ow sc rew
the third eleme nt to the pos t s (s ee 5). T hen p osit ion
the four th el ement in the s ame w ay . The t wo top el e -
ment s will not b e conne c ted toget her .
PLEASE NOTE: Make sure the rubber g asket s are
prope rly se cured in the R ainblock ® elem ents , t he
tube do esn’ t protrud e too f ar into the Rainblo ck®
eleme nt and only a dd a lubricant to the top rubb er if
nece s sar y , making sure it c an easil y slid e into the hole
of the top Rainbl ock® e lement . Che ck the conne c-
tions to avoid any leak age b etwe en the e lement s .
Work carefull y.
der ob eren Lö cher de s Rainblo ck® he rs tellen . Bit te
Höhe b eachten , die Zuleitung mus s horizontal zum
Rainbl ock ® verlauf en, um ihre Funktio n nicht zu
verlier en. (siehe dafür die Gebrauchsanweisung des
Regentonnenfülla utomat en) Sie setzen die m it -
gelie fer te Gumminip pe ldichtung in die Aus s parung
der Durchf ührung ein. Dann s chließ en Sie einen
PE/ PP-R ohr d=32mm an, d en Sie am Füllautomaten
anschließen. Sie benötigen ein 40/ 32- Gradient u nd
ein Rohr(Röhrchen) d=32 mm, da s /die nicht enthalten
is t /sin d .
Dringender Ratschlag: Set zen S ie einen Laubscheider
in das Fallrohr , um Blät ter aus dem Sy stem f ern-
zuhal ten .
7 . Rac corde ment de l ’arrivée d’eau de plu ie
Le rac cordement d e l’arrivé e d’eau de pluie p eut
s’ef fe c tuer de deux m anières :
a) Par l e biai s d' un s ys tèm e de rem pli ss age
automatique version Noire
• V ou s sci ez le tuyau d e récupér ation de s pluie s à
la hauteur du trou de rac cordeme nt à l’avant de
l'él ément sup éri eur Rainbl ock ® (voir p hoto).
• Vous pla cez le s y stème d e remplis s age automatique
du puis ard comme dé crit dans l e mo de d’emplo i/
manuel (voir emb allage).
• V ou s réalis ez un pas s age (pe rceus e 20 mm) dans le
trou pour la v is . At tention : ne p as end ommager l e
letag e !
• Avec la pièc e de jonc tio n fournie et le tube exible ,
racco rdez le s ys tème d e remplis s age automatique
à l'él ément R ainblo ck®.
b) Par le b iais d es r acco rde ment s su r l’élé ment
Rain blo ck® avec u ne ver sio n Gri se
Dans l 'éléme nt Rainblock ® supé rieur , v ous p ouvez
réalise r un pas sa ge au niveau du côté sup érieur au
moyen du fo ret à bois d = 28 . Vous pou vez aus si éven -
tuellement réalis er la j onc tion dan s l'un de s trous
supéri eurs du Rainbl ock®. T enez c ompte de la hauteur ,
la conduite d ’alimentation doi t aller à l’h orizontale
vers l e Rainblo ck® p our ne pa s perdre le fon cti onne -
ment (voir p our ce f aire le mo de d’emplo i du sy s tème
de remplis s age automatiqu e du puis ard). V o us pla cez
l’obt uration en caoutchouc four nie dans l'évidement
du pas s age. Ensui te, vous r accordez un tuyau P E/PP
d=32 mm que vou s racco rdez au s ys tème d e remp li s-
sag e automatique. Po ur ce f aire, vous avez b es oin
d'un rétréci ss ement 4 0/ 32 et d' un tuyau
d=32 mm non fo urnis .
Cons eil urgent : en haut du tuy au d'éva cuation de s
eaux de pluie , plac ez un récupér ateur de feuille s pour
éviter la p rése nce de fe uilles dan s le s ys tème .
7 . Conn ec ting t he rainwater su ppl y
Conne ctin g the rainwater supp ly c an be do ne in t wo
dif ferent ways:
a) V ia a l ling m achi ne, b lac k vers ion
• Y ou cut the d owns pou t level w ith the co nnec tion
hole at th e front of the top Rainbl ock® e leme nt
(s e e p h oto) .
• Y ou p osit ion the r ain barrel lling machine as
des cribe d in the u ser in stru cti ons /manual
(se e pac kaging).
• Y ou create a fee dthrough (2 0 mm drill) in the screw
hole . Pleas e note: do no t damage the s crew thread!
• Connec t the lling mac hine to the Rainblo ck®
eleme nt with the sup plie d conne cti on pie ce and
exible tu be.
b) Vi a the c onne c tio ns on t he Rai nbl oc k® ele ment
wit h a grey ver sio n
Y ou c an create a fee dthrough wit h the d=28 woo d
drill bit on the top s ide of the top R ainblock ® ele -
ment . Y ou c an als o po s sibl y create a connec tion in
one of the top R ainblo ck® hol es . D o bear th e height
in mind, as th e suppl y pipe mu s t be ho rizontal to the
Rainblo ck® in order n ot to los e it s ef fec t . (Pleas e refer
to the rain barrel lling machine ’s use r ins truc tion s)
Y ou p o sition th e supplie d rubb er seal in t he recess o f
the feedthr ough. Y ou subseq uent ly conne c t a d=32mm
PE/ PP tube to this , which you th en conne c t to the
lling machine. You will nee d a 4 0/ 32 a dapter and
a d=32 mm tube which i s not supp lied .
Urgent adv ice: pla ce a leaf c atcher at the top
of the rainwater dr ainage pip e to keep leave s out
of the s ys tem .