A-10 Recording
E
A-11Recording
RECORDING
DRIVE MODES
Single-frame advance, continuous advance,
bracketing (both single-frame and continuous
advance), and a 10 sec. and 2 sec. self-timer can be
selected by rotating the drive-mode dial.
Self-timer (p. 57)
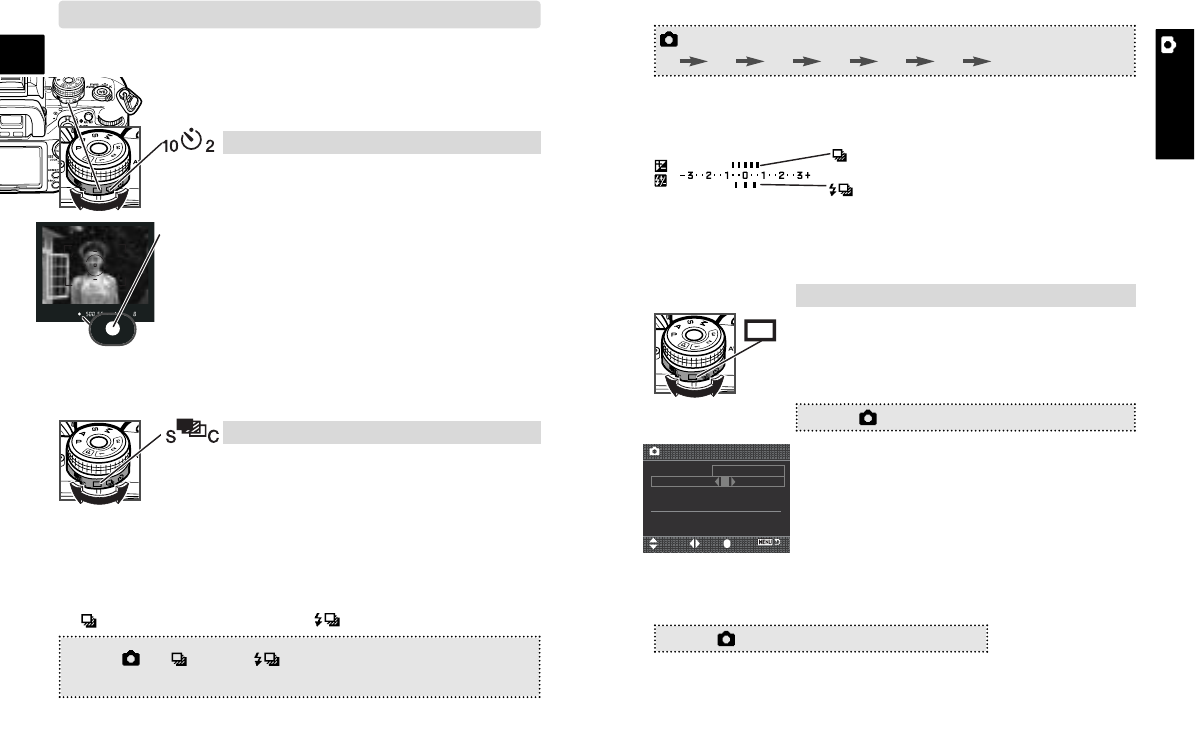
1. Place the camera on a tripod, then turn the
drive-mode dial to the 10s or 2s self-timer posi-
tion.
2. Center the subject in the focus frame, and press
the shutter-release button partway down to con-
firm the focus.
3. Press the shutter-release button all the way
down to start the timer.
•Turn the camera off or select another drive mode
to cancel 10-second self-timer countdown. The 2
second self-timer countdown cannot be can-
celed.
Bracketing (p. 58)
Interval (p. 78)
1. Turn the drive-mode dial to the single-
frame advance position.
4. Press the shutter-release button to start bracketing.
• The corresponding index disappears as the images are taken.
Flash bracketing: 0.5Ev/3frames
Exposure bracketing: 0.3Ev/5frames
(Example)
1. Turn the drive-mode dial to single-frame advance
(S) or continuous advance (C) bracketing.
• When the flash is raised, a flash bracket is made.
2 > Bracket order > Select option* > •:enter > MENU
(*0 – +, or – 0 +)
3. Select the bracket order.
(Continued on the next page.)
• The Ev scale displays the number of frames and bracketing
increment.
2. Setup the interval parameters.
MENU > 3 > Interval > Setup > •:enter
3. Use the up/down keys to select the param-
eter to be set among the interval period,
number of frames, and start time.
4. Use the left/right keys to set the parameter.
MENU > 3 > Interval > Start > •:enter > MENU
7. Confirm focus and press the shutter-release button to start the
interval recording.
:move :sel. :enter
Interval
5. Press the central button to complete the operation.
6. To start the interval series, execute the following:
No. of frames 2
Start time No delay
Interval 1 min
30s - 60min
MENU > 2 > setup or setup > Select option* > •:enter
(
*0.3Ev/3frames
, 0.3Ev/5frames, 0.5Ev/3frames, 0.5Ev/5frames)
2. Set the bracketing increment and number of frames for the
bracket on the menu.
exposure bracket flash bracket
(p. 56-58)