Commissioning
10
General Instructions
All programming runs must be supervised, as the drives
operate at full force and at half the normal speed. Ensure that
no persons or objects are located within the operating range of
the gate.
• During the programming run, the “WL” LED or the connected warning
lamp are flashing, irrespective of position of DIL switch 4.
• During the commissioning runs, the force necessary to properly open
and close the gate, the runtime and the delay upon closing are evaluated
and stored by the control system.
• If a programming run is interrupted before it is completed (“WL” LED is
on during opening or closing), all previously saved values are deleted.
Preparation for Standard Operation
Caution!
Risk of short circuit! Prior to adjusting the DILswitch settings,
disconnect control unit from power supply.
1. Select 1 or 2 wing option, connect desired components and complete
settings (see additional functions and connections).
2. Connect control unit to power supply (230V) (“Power” LED is on).
3. Tighten all screws at the fittings so that the drives can easily be moved.
4. Replace cover and snap on.
5. Engage emergency release and secure with lock.
6. Close gate.
Activating Standard Operation
“WL” LED flashes, until the values for force, runtime and closing delay have
been registered and stored.
2 wing gate!
Wing 1 (M1 wing with stop) is closed first, followed by wing 2 (M2 pedes-
trian wing). This prevents that gates with different runtimes are closed in
the wrong sequence.
• Check end switch settings. Open and close the door. If the drive switches
off when an end position is reached, complete a teaching-in process.
Complete at least 2 programming runs:
Set DIL switch 8 to ON and leave it in this position.
1. Press key (Imp). Gate moves to end position gate “OPEN”.
- “Power” LED is on, “WL” LED flashes.
2. Press key (Imp). Gate moves to end position gate “CLOSE”.
- “Power” LED is on, “WL” LED flashes.
When the “WL” LED stops flashing, all values have been registered and
stored.
Upon the next command, the gates are started and stopped in soft run. The
control system thereby checks the force, runtime and closing delay during
every opening and closing procedure and gradually adjusts the settings
each time the end position is reached.
If a programming run could not be properly completed (drives
not in soft run mode, LED "WL" flashes), the control system is
reset (all stored values are deleted, see control reset). Start a
new programming run.
Adjusting Force Tolerance
After the drive system has been installed, the person responsi-
ble for the installation must complete an EU Declaration of Con-
formity according to Machine Directive 98/37/EU and attach a CE
mark at the type plate of the drive.
This also applies in cases where the owner of the system is a
private person, as well as to manually operated gates that have
been upgraded with a drive. The above documents and the
instructions for installation and operation must be handed over
to the operator.
The force settings are relevant for the system’s safety and must
therefore be adjusted with due care and attention. If the force
tolerance is outside the permitted range, there is a serious risk
of injury and damage.
Select the lowest possible force tolerance in order to ensure
that obstacles are immediately and reliably detected.
• Maximum force = programmed force + force tolerance
(adjustable at potentiometer)
• If the set force is not sufficient to fully open or close the gate, increase
the force tolerance by turning the potentiometer clockwise.
• Adjust value while the gate is in operation; the new values are subse-
quently stored upon the next opening operation of the gate.
• After the adjustment of the force tolerance is completed, check the end
positions and readjust, if necessary.
Inspection of force tolerance settings
For detailed instructions, see chapter Maintenance / Regular Inspections.
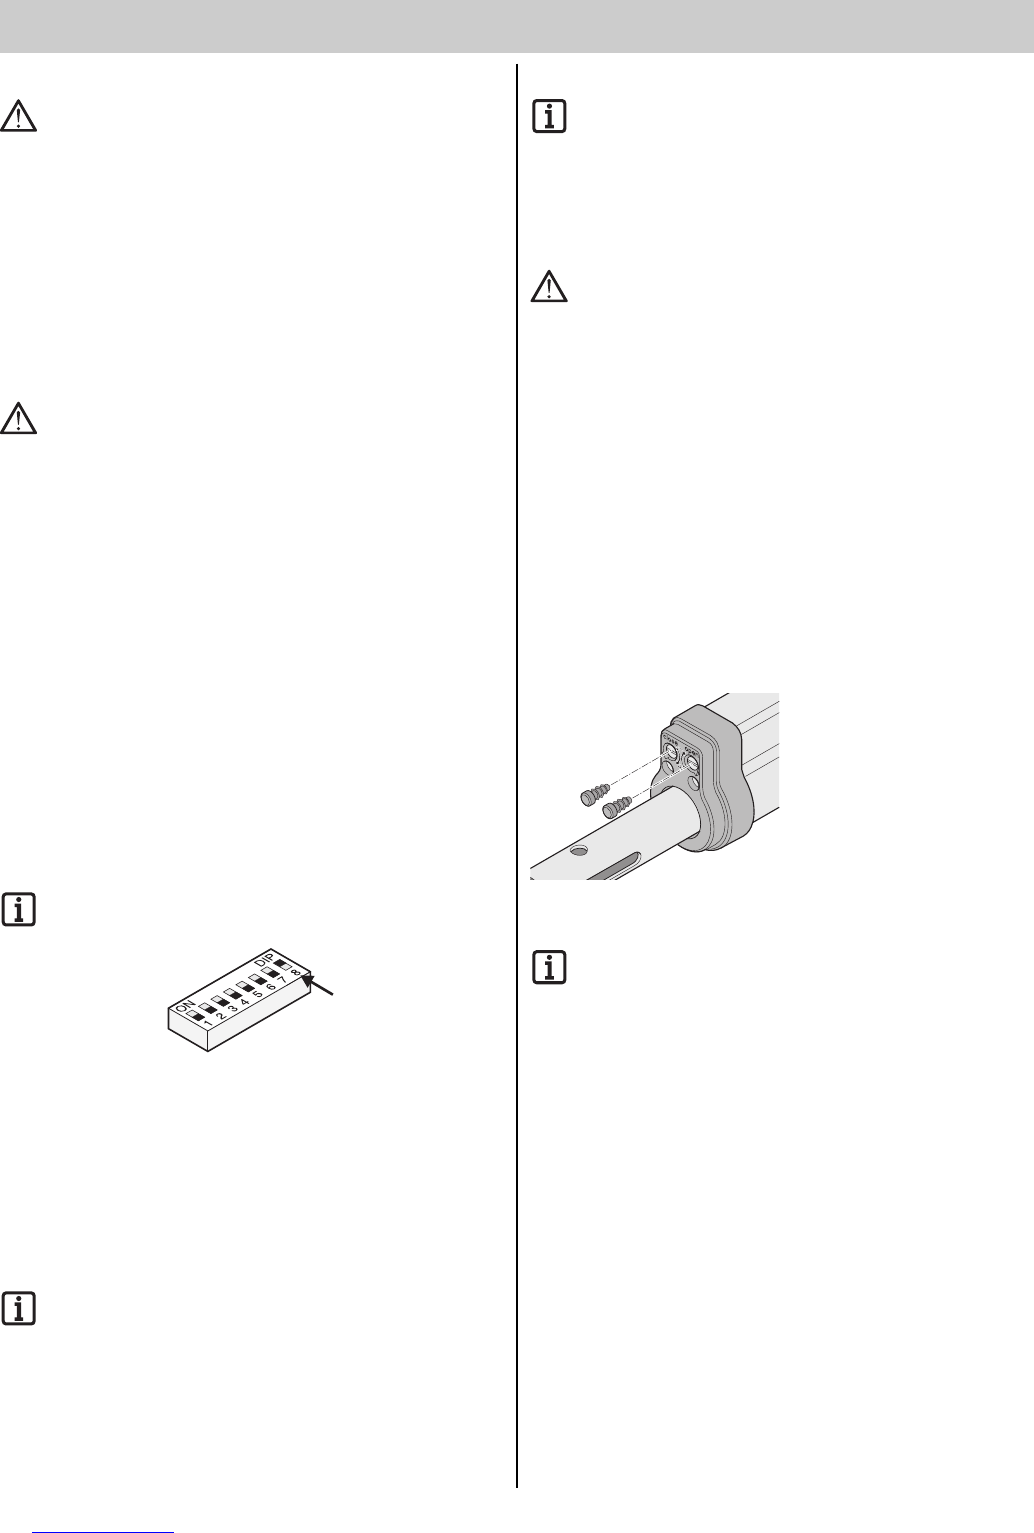
1. Potentiometer set to left stop (0): smallest tolerance value;
potentiometer set to right stop (9): largest tolerance value
2. When both end positions are adjusted correctly, insert the plug.
It prevents dirt penetrating the openings.
Programming Remote Control
Prior to teaching in the hand transmitter, clear the radio receiver
memory.
Gate system with 1 wing:
- Key 1 to radio channel 1
Gate system with 2 wing:
- Key 1 to radio channel 1
- Key 2 to radio channel 2
Check
Press key 2. The pedestrian gate wing opens.
Press key 1. Both wings open.